You are using an out of date browser. It may not display this or other websites correctly.
You should upgrade or use an alternative browser.
You should upgrade or use an alternative browser.
DIY Composite Camper T100 Expedition Vehicle Build
- Thread starter Traveling 2gether Journal
- Start date
Traveling 2gether Journal
Adventurer
ThanksImpressive build. It looks like you've got a power and water system capable for life on the road. I might of missed it, but are you adding heat to your rig?
Not planning on any heater. We have some decent sleeping bags to make it through cold nights and I'm not looking to spend a lot of time in places that are super cold.
Traveling 2gether Journal
Adventurer
UPDATE
I got some work done on the interior of the camper.
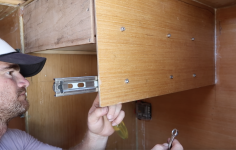
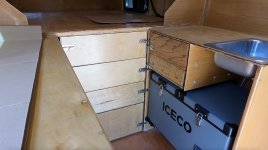
The area at the front of the camper, underneath the foot of the bed is the primary interior storage area. I built drawers to utilize this space. The drawer sides are made of 3/8 inch plywood leftover from the countertops/cabover. The drawer bottoms are leftover 5mm plywood from the camper walls/roof. The pieces are joined with glue and finish nails. I made the drawers different sizes to use the space around the battery/electrical system.
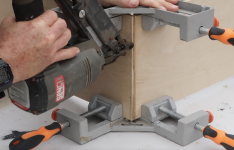
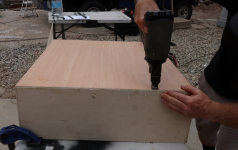
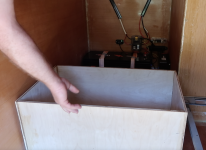
I also made a couple of drawers under the passenger side counter. I ran out of 3/8 inch plywood, so I scrapped a dresser that I found illegal dumped in a parking lot to make the drawer sides and glued in the 5mm drawer bottoms into the groove that was already cut into the drawers.
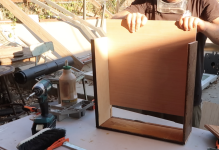
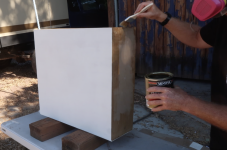
All of the drawers are mounted on drawer slides through bolted to the camper. I coated the drawers in leftover paint and polyurethane and used slide bolt latches to keep them closed while we're driving.
I got some work done on the interior of the camper.
The area at the front of the camper, underneath the foot of the bed is the primary interior storage area. I built drawers to utilize this space. The drawer sides are made of 3/8 inch plywood leftover from the countertops/cabover. The drawer bottoms are leftover 5mm plywood from the camper walls/roof. The pieces are joined with glue and finish nails. I made the drawers different sizes to use the space around the battery/electrical system.


I also made a couple of drawers under the passenger side counter. I ran out of 3/8 inch plywood, so I scrapped a dresser that I found illegal dumped in a parking lot to make the drawer sides and glued in the 5mm drawer bottoms into the groove that was already cut into the drawers.

All of the drawers are mounted on drawer slides through bolted to the camper. I coated the drawers in leftover paint and polyurethane and used slide bolt latches to keep them closed while we're driving.


Last edited:
Traveling 2gether Journal
Adventurer
UPDATE CONTINUED
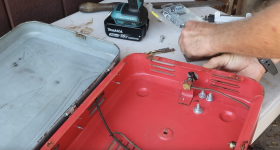
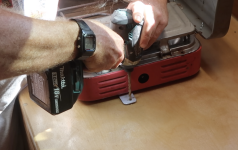
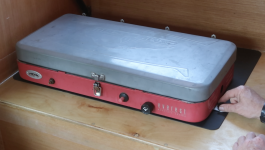
I decided to continue using our 2 burner camp stove. It's a bit tattered but the burners still work fine, so I replaced the rusted apart hinges with some random ones I had around the shop and cleaned it up real good.
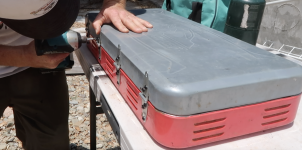
I didn't want to use space in my drawers to stow the stove, so I rigged up a tab on each side of the stove and glassed threaded inserts into the countertop. Now I can hold the stove in place with a couple of thumb screws while driving. I also got a silicone mat to go under the stove, so it wouldn't scuff up the counter. This should make camp setup/break down a little faster too.
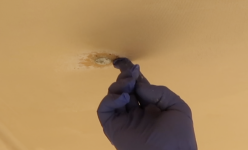
I finally got around to coating the interior with exterior grade polyurethane. This provides some UV protection for the epoxy resin and gives a final sealing coat for any fiberglass that had been sanded to exposure.
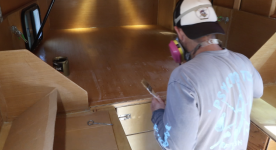
I decided to continue using our 2 burner camp stove. It's a bit tattered but the burners still work fine, so I replaced the rusted apart hinges with some random ones I had around the shop and cleaned it up real good.

I didn't want to use space in my drawers to stow the stove, so I rigged up a tab on each side of the stove and glassed threaded inserts into the countertop. Now I can hold the stove in place with a couple of thumb screws while driving. I also got a silicone mat to go under the stove, so it wouldn't scuff up the counter. This should make camp setup/break down a little faster too.


I finally got around to coating the interior with exterior grade polyurethane. This provides some UV protection for the epoxy resin and gives a final sealing coat for any fiberglass that had been sanded to exposure.

Traveling 2gether Journal
Adventurer
Here's the YouTube video if you'd like more details on the update:
RJ Howell
Active member
I'm using my camp stove inside as well. I just couldn't wrap my head around dedicating part of the counter to a stovetop.. Single burner mainly inside as it's more of a coffee maker and early morning heat.. LOL.
I had just checked in on you, a day or so ago. Good to see your progress!
I had just checked in on you, a day or so ago. Good to see your progress!
Traveling 2gether Journal
Adventurer
I'm sure we'll use the stove inside for the most part too. I just liked the idea of being able to cook outside when its hot out and we really don't want any extra heat in the camper.I'm using my camp stove inside as well. I just couldn't wrap my head around dedicating part of the counter to a stovetop.. Single burner mainly inside as it's more of a coffee maker and early morning heat.. LOL.
I had just checked in on you, a day or so ago. Good to see your progress!
Traveling 2gether Journal
Adventurer
New isn't always better. If you got something that works, work itI love that you are sticking with the old stove. I still use my 1999, around there, coleman two burner. I don't plan to change until it breaks.
Traveling 2gether Journal
Adventurer
UPDATE
I installed a Nature's Head composting toilet.
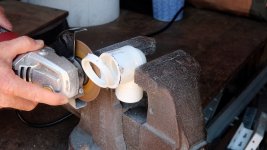
I opted for one of the narrower agitator handle options, so the toilet is 19 inches wide. I left myself a 20 inch wide space to install it... that is not wide enough. I didn't want to start hacking into my new, expensive toilet, but I had to make it fit somehow. I used an angle grinder to shorten the vent intake and exhaust ports. I used leverage to bend the "trap door" handle closer to the toilet bowl. And I made a short elbow out of a PVC pipe fitting to connect the exhaust hose to the exhaust port at 90 degrees. That gave me enough room to fit the toilet and have everything function properly.
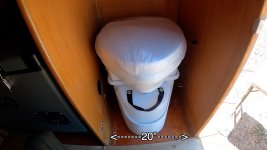
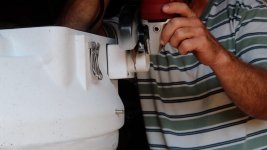
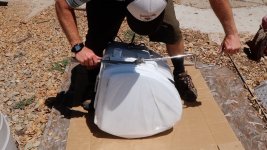
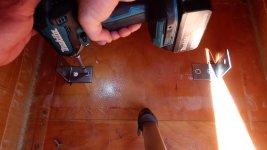
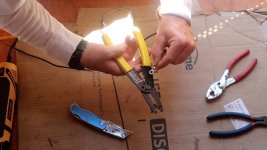
I installed the mounting brackets to the camper floor with the included hardware and Sikaflex 221 caulking. Then I attached ring terminals to the exhaust fan power cord and ran that to the fuse block in the adjacent cabinet. I cut a hole in the floor and installed a through hull fitting for the exhaust hose to vent out through and mounted the exhaust fan power cord on the wall with some cable track so it won't get pinched or tangled when I take the toilet in and out to empty it.
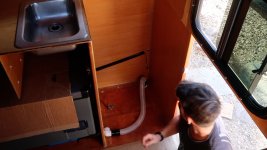
The toilet is attached to the mounting brackets with a couple of thumb screws and we now have a toilet that we can pullover and use anytime we want.
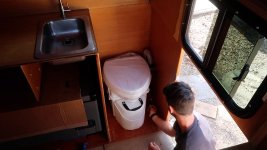
Here is the video if you want all the details.
I installed a Nature's Head composting toilet.
I opted for one of the narrower agitator handle options, so the toilet is 19 inches wide. I left myself a 20 inch wide space to install it... that is not wide enough. I didn't want to start hacking into my new, expensive toilet, but I had to make it fit somehow. I used an angle grinder to shorten the vent intake and exhaust ports. I used leverage to bend the "trap door" handle closer to the toilet bowl. And I made a short elbow out of a PVC pipe fitting to connect the exhaust hose to the exhaust port at 90 degrees. That gave me enough room to fit the toilet and have everything function properly.


I installed the mounting brackets to the camper floor with the included hardware and Sikaflex 221 caulking. Then I attached ring terminals to the exhaust fan power cord and ran that to the fuse block in the adjacent cabinet. I cut a hole in the floor and installed a through hull fitting for the exhaust hose to vent out through and mounted the exhaust fan power cord on the wall with some cable track so it won't get pinched or tangled when I take the toilet in and out to empty it.


The toilet is attached to the mounting brackets with a couple of thumb screws and we now have a toilet that we can pullover and use anytime we want.

Here is the video if you want all the details.
Traveling 2gether Journal
Adventurer
UPDATE
With the camper getting close to ready for a trial run, I figured it was time to resurrect my old truck.
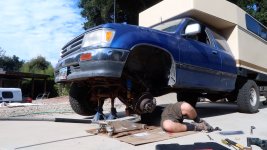
We got home from a Baja trip 2 years ago, I hosed the truck off, parked it in the backyard, and started the new camper build. I knew it already needed some attention back then, so it's no surprise I had some work to do before it was drivable.
I made a video going over a few of the maintenance items I did and addressing the popular question, "why did you build a camper on that old, junky truck?"
The full list of completed maintenance/repair projects so far:
-new tires
-new starter battery
-new clutch master cylinder
-new clutch slave cylinder
-welded clutch peddle bracket back together
-new clutch peddle bushings
-new fuel filter
-new spark plugs
-new driveshaft carrier bearing
-new rear axle bearings/seals
-new front shocks
-new swaybar end links and bushings
-new zurk fittings on rear drive shaft
-grease drive shafts and joints
-bleed the brakes
-new CV axle assembly
It seems to drive around on the street pretty well at this point. I got her up to 70mph on the highway and drove some windy back roads with no problems. I'm looking forward to a camping trip!
With the camper getting close to ready for a trial run, I figured it was time to resurrect my old truck.

We got home from a Baja trip 2 years ago, I hosed the truck off, parked it in the backyard, and started the new camper build. I knew it already needed some attention back then, so it's no surprise I had some work to do before it was drivable.
I made a video going over a few of the maintenance items I did and addressing the popular question, "why did you build a camper on that old, junky truck?"
The full list of completed maintenance/repair projects so far:
-new tires
-new starter battery
-new clutch master cylinder
-new clutch slave cylinder
-welded clutch peddle bracket back together
-new clutch peddle bushings
-new fuel filter
-new spark plugs
-new driveshaft carrier bearing
-new rear axle bearings/seals
-new front shocks
-new swaybar end links and bushings
-new zurk fittings on rear drive shaft
-grease drive shafts and joints
-bleed the brakes
-new CV axle assembly
It seems to drive around on the street pretty well at this point. I got her up to 70mph on the highway and drove some windy back roads with no problems. I'm looking forward to a camping trip!
ITTOG
Well-known member
UPDATE
With the camper getting close to ready for a trial run, I figured it was time to resurrect my old truck.
View attachment 808105
We got home from a Baja trip 2 years ago, I hosed the truck off, parked it in the backyard, and started the new camper build. I knew it already needed some attention back then, so it's no surprise I had some work to do before it was drivable.
I made a video going over a few of the maintenance items I did and addressing the popular question, "why did you build a camper on that old, junky truck?"
The full list of completed maintenance/repair projects so far:
-new tires
-new starter battery
-new clutch master cylinder
-new clutch slave cylinder
-welded clutch peddle bracket back together
-new clutch peddle bushings
-new fuel filter
-new spark plugs
-new driveshaft carrier bearing
-new rear axle bearings/seals
-new front shocks
-new swaybar end links and bushings
-new zurk fittings on rear drive shaft
-grease drive shafts and joints
-bleed the brakes
-new CV axle assembly
It seems to drive around on the street pretty well at this point. I got her up to 70mph on the highway and drove some windy back roads with no problems. I'm looking forward to a camping trip!
You definitely deserve a camping trip after all that work. Congrats. I know how you feel as I recently went on my maiden voyage with the slide in camper I built.
Traveling 2gether Journal
Adventurer
I want to do an add-a-leaf for the extra weight on the rear, but I'm not trying to lift the truck and I'de prefer a longer leaf that works well with the stock springs.
The products I'm seeing online are advertising how much lift they provide, not additional spring rate or anything that would help me guess how much stiffer they would make the suspension. And they are all short leafs that don't seem like they would distribute the resistance well over the long 2nd leaf in the T100 pack.
I've never done an add-a-leaf, so feel free to school me if I'm missing something.
Any suggestions?
rruff
Explorer
I can buy both short and long add-a-leafs for my truck (and both would probably be good), but... they usually take a pretty thin leaf and curve it too much to get the lift... and the result is usually that it will break before too long, since with a load it will be stressed more than the others. At least that is my theory. Currently I just have airbags.
If you have a spring shop locally, ask them what adding a leaf or two will cost. It may be more expensive, but it would last longer I bet. I don't have any shops near unfortunately.
I think the steel used is all the same, so width, thickness, length, and curvature are the main variables. I'm kinda surprised that you can't kind find a long one. There is probably something that would fit.
Similar threads
- Replies
- 33
- Views
- 4K
- Replies
- 31
- Views
- 3K
- Replies
- 0
- Views
- 1K
- Replies
- 16
- Views
- 4K
