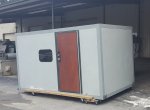
DIY Composite Flatbed Camper Build

rruff

Explorer
Yes, I guess the problem is that structural angle is a minimum of .25" while architectural comes in .125". .25" is clearly overkill.

I had an idea that you could make your own FG edge pieces. Glue your panels together to get the shape, then cover the joints with saranwrap, lay the FG by hand, remove then glue in place. Messy but might make sense if you have lots of edges, and particularly non 90 deg ones.

The FRP angle should be good. You really have several hundred pounds in the angle weight now?

I am going pretty bare bones BTW. I like keeping it simple. My truck doesn't have a lot of payload anyway...
 

DzlToy

Explorer
Any competent machine shop or fab shop can make a 90 degree angle iron from whatever sheet stock you desire. If you need it to measure 4" on one side to cover a 2" panel and only 2" or 3" on the other side, they can do that too. If 11 gauge is too thick, have it bent from 14 gauge or 16 gauge. A thinner sheet could act to seal the joint without adding much weight, but would not add structure, which may not be an issue if your composite panels are quite strong.
 

The Artisan

Adventurer
I used broke 4" 14 ga but could have gone thinner guage. It added about 350bs but my 12.4 x 7.4 x 7 2" sip pod is still only 800lbs
Kevin
 

Terra Ops

Adventurer
I've been wondering how much weight could have been saved if I went with a lighter guage aluminum angle.
So, I began by weighing some left over 4" angle, each 20" in length. One was the structural and the other broke at 14 or 16 guage, not sure.
I used the structural mainly on the exterior right angles and a few places on the interior where the jacks attach. Total feet came to approximately 109.
My sample pieces at 20" weighed 3.6lbs for the structural and 1.8lbs for the other. Interestingly the structural is twice the weight. After calculating, had I used the lighter
broke guage aluminum, I could have save approximately 115 lbs. Not as much as I thought. Below is a pic of the two types;
 

Attachments

  • IMG_20191109_100638664.jpg
    IMG_20191109_100638664.jpg
    932.1 KB · Views: 63

The Artisan

Adventurer
I used broke 14ga metal on mine 4" legs 12.4 x 7 x 7.4 I think it added 355lbs and my pod before adding was 455lbs. I wish I used 18. A little over 800lbs not bad for the size though.
Kevin
20191031_074048.jpg
 

ATCws

New member
I went the easy route with battery powered puck lights. They work well but just don't last that long before needing new batteries.
So, I installed a flexible LED my wife found at Lidl for $15. Its a little over 14 ft. and comes with a 12 volt adapter which I cut off and wired
directly in. The light can be cut to accommodate just about any length needed. What's also nice is the ability to light the entire camper with
one wire attachment point.
Also while traveling, I think I came up with an idea to make stronger, lighter, and less expensive panels. If anybody's interested, I'm happy to share
in a later post.
I'm reading and re-reading your thread and am very interested in your panel construction techniques and what you have discovered after putting them to use. I have a RAM 3500 single cab that I plan to build a removable camper for as you have. Please share you ideas about the Terra Ops Panel 2.0. :) Terrific build. Thx for sharing the build.
 

Terra Ops

Adventurer
I'm reading and re-reading your thread and am very interested in your panel construction techniques and what you have discovered after putting them to use. I have a RAM 3500 single cab that I plan to build a removable camper for as you have. Please share you ideas about the Terra Ops Panel 2.0. :) Terrific build. Thx for sharing the build.

Thanks for your interest, hope this info helps you build your own creation. As for what I have discovered; I'd say the panels have exceeded my expectations. By this I mean insulation factor. I wanted a camper that would provide comfort and protection in any climate. My first camper was a Tiger Bengal. While the family enjoyed it, I was not happy with the R value. So when I had my next camper custom made by Phoenix, I requested 2" foam walls and 4 ply fabric in the pop up. This too did not provide the R value I was after, not to mention the condensation battle in cold temps. Panel built rigs are essentially refrigeration boxes. It doesn't take much to maintain a desired temperature thus reducing energy usage. Second to the R value is no set up. We can pull up, crawl through the pass through and be protected in any weather. No pop up to pop or slide out to slide. Simple and self contained is what I discovered I like best.

If you have seen the latest models by FWC and AT overland "camper shells", you could easily do the same with panels. Just bolt down to existing truck bed, then build out the interior and insulate. Just a thought:)

Here is the response from post #265
My idea for a new panel has different variations. * Cost and weight. If you go with 2" foam board, you will need 4" aluminum angle which increases cost and weight. For 1" foam board, 3" aluminum angle which will decrease cost and weight. This will be a personal preference regarding wall thickness and R value.

Another weight factor is the FRP skin. The double woven is heavier than the single, maybe not by much, but it all adds up.

Cost of the high density foam board is, well, high. Is it really necessary to have high density or can it be achieved another way? Density comes more into play horizontally, while rigidity is more a vertical factor.

The following has not been tested yet. If I were to build another panel I would use all carbon nanotube epoxy. This stuff is strong and rigid. Next would be single weave FRP to save weight.
To save in cost I would use the pink foam board that is easily found at Home Depot or other hardware stores. Then I would lay out a grid on the foam board; for example 1' X 1', and drill a hole at each intersection with either a 3/8 " or 1/2" bit. Panel lamination would be 2 steps. 1'st laminate/epoxy foam to FRP and allow to cure. 2'nd fill the holes with epoxy/laminate other FRP skin.
The epoxy will not only provide rigidity but density too. If you look back at my first post, my first test was on regular 3/4 inch foam board using single weave FRP and non carbon nanotube epoxy. It was strong enough to support my weight of over 200lbs. I would think with the connecting bore holes filled with epoxy, added strength, rigidity, and density could be achieved at a lower price.

I would also look at vacuum bagging the panels or making some sort of jig that would allow placement of jacks to put pressure on the skin while curing.

So in conclusion, cost can be reduced by using regular foam board and weight can be reduced by using smaller aluminum angle and single weave FRP.
 

DzlToy

Explorer
^^ Have you done any heat loss calculations or do you have an approximate R-Value, U-Value or Lambda for your new camper?

What temps have you used it in and how much energy does it take to heat and/or cool?

Charlie Aarons posted a very interesting calculation a few years ago for his Unicat box, which I believe is simply EPS and fiberglass:

Charlie Aarons said:
Unicat does publish a number for its' wall and ceiling sheets, which is in metric – 0.44W/m2*K. This converts to approximately R-13. One must also take into account the window area and a pass through, if applicable. It should be sealed with a piece of gasketed wall material.

Five windows measure 0.4 m2 each and lose 3W/m2*K, so I lose ~32W/K*. At -30C outside and 20C inside, that is 1600W of lost heat. The Webasto I have puts out about 5000W or 17,000 BTU.
 

Terra Ops

Adventurer
^^ Have you done any heat loss calculations or do you have an approximate R-Value, U-Value or Lambda for your new camper?

What temps have you used it in and how much energy does it take to heat and/or cool?

Charlie Aarons posted a very interesting calculation a few years ago for his Unicat box, which I believe is simply EPS and fiberglass:

Have not done any calculations. Panels are made with 2" Dow high density XPS foam board. FRP skins are 2mm thick. Windows are dual pane acrylic.
When temps exceed comfort, we have a insulated cover for the pass through.
 

rruff

Explorer
To save in cost I would use the pink foam board that is easily found at Home Depot or other hardware stores. Then I would lay out a grid on the foam board; for example 1' X 1', and drill a hole at each intersection with either a 3/8 " or 1/2" bit. Panel lamination would be 2 steps. 1'st laminate/epoxy foam to FRP and allow to cure. 2'nd fill the holes with epoxy/laminate other FRP skin.

I like that idea! But 1" spacing is way too tight I think (a substantial % of your panel would be solid epoxy, and lot of work for so many holes), and I'd make bigger holes (like 1" dia). These would make great hard points for mounting cabinets and stuff too.

The density of epoxy is .8 oz/cu-in. A 1in diameter hole 2" deep would have 1.57cu-in of epoxy or 1.25oz. On 6" centers you'd be adding 5oz/sq-ft, or .31 lb/sq-ft. That would add about 25% more weight to the heavy duty panels I've been building (or was building), but I think the piece of mind and extra structural integrity might be worth it. I'm using cheap epoxy, ~$45/gal shipped which comes to ~$5/lb or $1.55/sq-ft for the added reinforcement. Not much. Somebody check my math please... ;)
 

ATCws

New member
Thanks for your interest, hope this info helps you build your own creation. As for what I have discovered; I'd say the panels have exceeded my expectations. By this I mean insulation factor. I wanted a camper that would provide comfort and protection in any climate. My first camper was a Tiger Bengal. While the family enjoyed it, I was not happy with the R value. So when I had my next camper custom made by Phoenix, I requested 2" foam walls and 4 ply fabric in the pop up. This too did not provide the R value I was after, not to mention the condensation battle in cold temps. Panel built rigs are essentially refrigeration boxes. It doesn't take much to maintain a desired temperature thus reducing energy usage. Second to the R value is no set up. We can pull up, crawl through the pass through and be protected in any weather. No pop up to pop or slide out to slide. Simple and self contained is what I discovered I like best.

If you have seen the latest models by FWC and AT overland "camper shells", you could easily do the same with panels. Just bolt down to existing truck bed, then build out the interior and insulate. Just a thought:)

Here is the response from post #265
My idea for a new panel has different variations. * Cost and weight. If you go with 2" foam board, you will need 4" aluminum angle which increases cost and weight. For 1" foam board, 3" aluminum angle which will decrease cost and weight. This will be a personal preference regarding wall thickness and R value.

Another weight factor is the FRP skin. The double woven is heavier than the single, maybe not by much, but it all adds up.

Cost of the high density foam board is, well, high. Is it really necessary to have high density or can it be achieved another way? Density comes more into play horizontally, while rigidity is more a vertical factor.

The following has not been tested yet. If I were to build another panel I would use all carbon nanotube epoxy. This stuff is strong and rigid. Next would be single weave FRP to save weight.
To save in cost I would use the pink foam board that is easily found at Home Depot or other hardware stores. Then I would lay out a grid on the foam board; for example 1' X 1', and drill a hole at each intersection with either a 3/8 " or 1/2" bit. Panel lamination would be 2 steps. 1'st laminate/epoxy foam to FRP and allow to cure. 2'nd fill the holes with epoxy/laminate other FRP skin.
The epoxy will not only provide rigidity but density too. If you look back at my first post, my first test was on regular 3/4 inch foam board using single weave FRP and non carbon nanotube epoxy. It was strong enough to support my weight of over 200lbs. I would think with the connecting bore holes filled with epoxy, added strength, rigidity, and density could be achieved at a lower price.

I would also look at vacuum bagging the panels or making some sort of jig that would allow placement of jacks to put pressure on the skin while curing.

So in conclusion, cost can be reduced by using regular foam board and weight can be reduced by using smaller aluminum angle and single weave FRP.
Thanks very much for the details. Maybe you could stay with the 2" thick foam and use the fiberglass angles that Bedford Reinforced sells. https://bedfordreinforced.com/products/proforms-structural-shapes/ I'm guessing you couldn't screw and tap a bolt hole into them like aluminum but maybe the weight savings would be enough to make their use attractive. Am planning on making panels next summer when the garage will be 80+ degrees naturally.

I could kick myself for not seeing you at Expo East 2018. I was there in the mud Friday and part of Saturday. I couldn't make it to East 2019. Will you be in Flagstaff for Expo West 2020?
 

DzlToy

Explorer
Uhhmm, I think one of you guys read something wrong. :D

A total of 21 holes are drilled into a 4' x 8' sheet of foam with grid lines on 12" centers. Holes (0.375") drilled at each line intersection are filled with epoxy, presumably to a 2" depth.

Are you trying to make a contact point like a rosette weld or a plug weld in metal fab? You may be spending time for nothing, as a layered adhesive over the entire foam structure would be much simpler. Maybe I am missing something.

It is common in the boating repair industry to core a hole in a foam or balsa core that is larger than necessary, fill this hole with epoxy then drill and tap or simply screw into the cured epoxy for a very high strength fastening application. This strategy can be used to hang cabinets, for example.

The area taken up by epoxy in the example above would only be 2.3 square inches and the volume would be twice that (in cubic inches) on a 2" thick panel. At 0.8 ounces per cubic inch, you are literally only adding a few ounces in epoxy to a 4x8' panel.
 
Last edited:

rruff

Explorer
Uhhmm, I think one of you guys read something wrong. :D
A total of 21 holes are drilled into a 4' x 8' sheet of foam with grid lines on 12" centers. Holes drilled at each line intersection are filled with epoxy, presumably to a 2" depth.

Doh! Why did I read that as 1" not 1'? I still like 1" holes on 6" centers better... but I'm not sure either is really sensible.

I guess you are just trying to ensure that the face sheets don't completely delaminate? I get that, but I wonder if the mechanism for foam failure is really something else. When I failure-tested samples I'd get a diagonal crack through the thickness and also under the face sheet, but not right at the bond; rather the foam would fail next to it. If the foam cracks but the face sheets stay attached to each other the panel will still look ok, but stiffness and strength will still go way down.
 

rruff

Explorer
^^ Have you done any heat loss calculations or do you have an approximate R-Value, U-Value or Lambda for your new camper?
What temps have you used it in and how much energy does it take to heat and/or cool?

Any heat loss calculation needs to include ventilation. On a box like these, the heat loss due to that will exceed what is coming through the walls and windows.
 

DzlToy

Explorer
I figured that is what you did, lol.

If the OP is concerned about the skins delaminating from the foam, then I would encourage some research and/or testing to ensure proper bonding between materials, compatible adhesives or tapes, etc.

If the concern is pieces of foam tearing away from "other foam" with the skin still attached to the outside foam pieces, then a honeycomb core or a structural foam is the answer, as they do not tear away like EPS and XPS do.

Blocks, tubes or plates can be inserted into the foam core during construction, thereby giving you an attachment point for "xyz part". This is a common practice in the composites world and is preferable to bonding on a plate after the fact. For a camper, you could use darn near anything that serves your purposes. Just remember to make a drawing showing exactly where the blocks are, measured from a fixed point that is accessible after the camper is completely finished. Ask me how I know. :D
 

Forum statistics

Threads
188,007
Messages
2,901,050
Members
229,355
Latest member
BDM66
Top