Hey Vortec Guys! / Sierra pickup / Suburban / Yukon etc - Finally has Index!

rayra

Expedition Leader
I'm pretty confident you'll find the plunger / actuator in the front diff solenoid is all corroded up. Only thing that makes sense to me for it to keep drawing juice until the fuse blows. If the solenoid was dead it wouldnt / shouldn't blow the fuse. And the dash switch is just that. Nothing in there should be causing a draw high enough to melt the fuse.
You might want to check the front diff for water in the diff fluid, too. The vent breather for the front diff ought to be right inboard of the front left shock top (where that ABS harness connector is) right about the top surface of the frame rail, at some point if probably got forded deeper than the vent. Drive it a bit in 4wd to get it frothed up and just pull the fill plug and stick your finger in there and see what the fluid looks like. Before you pull the solenoid.

(silicone) grease up the new sway bar bushings before you clamp the bar back in.
 

rayra

Expedition Leader
couple of pics taken after my OEM replacement uppers and CV install, when I did my fuller exam for making new bushings for the torsion adjuster crossmember
There are with the vehicle on the ground, you can see the clearances I have from the stops and the 'beehive' bumper on the lower stop. You can see the mounting cup for it on your green arrow pics, the foam-rubber bumper is just twisted / pried into place. If you could maybe alter the ends of the suspension drop-crossmember so the factory bumper mount would have clearance, you cut put a factory bumper there and take some of the harshness out of bottoming out. Would really help in conjunction with new shocks, too, or ease the hit on the existing ones.

GMT800 IFS geometry 01.jpg
GMT800 IFS geometry 02.jpg
GMT800 IFS geometry 03.jpg


And the sway bar end links, you're only supposed to tighten that stack down until the donut bushings squeeze out flush with the edge of the cup washers, not until it can't compress anymore.
 

rayra

Expedition Leader
looking closer at your second pic of the bumpstop, here's the thing I'm suggesting to re-work it -

bumpstopmurphdangerwagonmod.jpg


Can't really tell for sure, but the pic and my recollection is there's nothing else dependent on the end of that crossmember, other than the lower control arm being bolted thru it. It looks like when they designed it they were just trying to maintain the same gap-spacing between the stop bumper and the 'landing pad' area on the lower. But with no regard for how hard or cushioned that stop would be. And they've plainly used the thinnest stop Rancho offers. They make one just like it that's twice as thick that would have been better.
eta - worse, they've given the illusion of a big gap, but the bumper is less than 1/4" of urethane over the cast-in bolt head. So whee free travel until it's practically steel on steel. Must feel like crap when that thing bottoms out. Clack your damned teeth together. -eta

But what I'm suggesting is cuttting back the whole oper portion of the end of the drop-crossmember and relocating either their bumper/endplate or better yet cutting and relocating the factory bumper-holder/plate so you can put a nice taller / deeper bumpstop in there. That would make bottoming the thing out a lot nicer / progressive, rather than just slamming on that thin urethane pad.

here's what they used

iu


here's a thicker one

iu


And just googling 'universal bump stop' gets you all kind of egg-shaped, cone-shaped etc that can be re-shaped or trimmed and do a better job that what's there, without even altering the crossmember. Something taller and softer would work better. Combined with a stouter shock.


something like these, ground down to about 50-60% of that height but a similar profile.

iu


either of those last two would give you a stopgap 'fix' and maybe keep your sway bar from getting hammered off again. While you figure out how serious of an engineering change you're going to make to the whole IFS
 

rayra

Expedition Leader
Hell you could get an inexpensive 2-part polyurethane casting sample kit and some plastic easter egg shells and some #8 bolts and make your own to your own size spec, pretty easy.
 

rho

Lost again
haha, too much of a project to cast my own at this point.
I actually have two of the rubber part of the beehives that I mis-ordered for my partners truck so I'm going to see if i can use those with the exiting cups. The crappy bump stops are actually showing the tops of the bolts through them. They're toast. If that doesn't work i'll be trying some of the front bumpers from the 2wd truck flavor of these trucks as it looks like there is room for that, and its a progressive bump stop. I also need to get some LCA bushings for both arms as they're totally shot on the pass side.

I'll check that actuator on the diff first. Its been in water crossings so that sounds like a really reasonable place to start. Gonna be a busy weekend project fosho!
 

rayra

Expedition Leader
well have fun, rho. Sounds like they were really jumping the hell out of it and/or the shocks and torsion bars are really whupped. New/ improved torsion bars are pretty expensive.
 

Martinjmpr

Wiffleball Batter
With big thanks to Rayra for his help, I put in the Tru-Cool transmission cooler today. Installation was fairly straight forward, with a few exceptions.

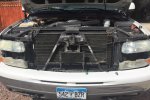
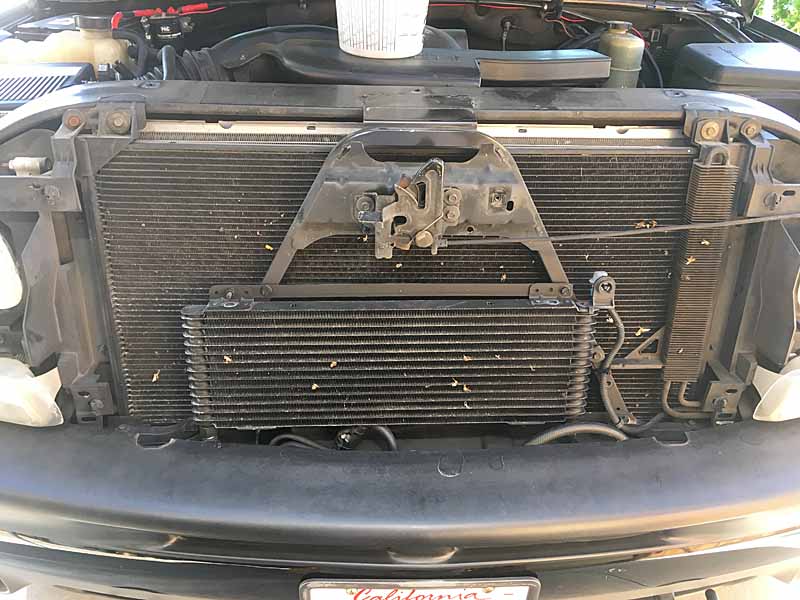
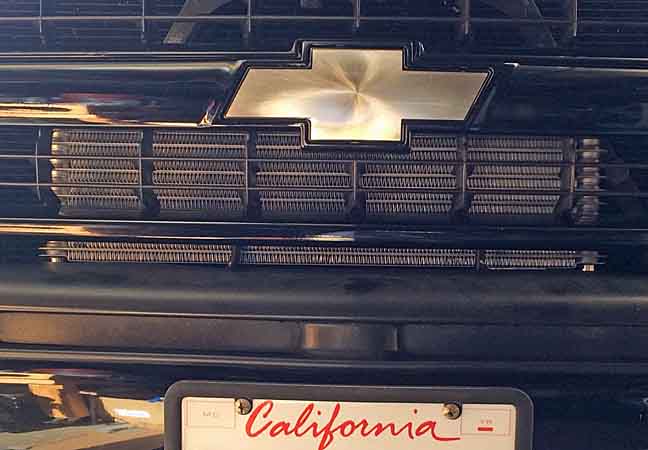
Here is the start picture. You can see how small the factory cooler is (and as Rayra pointed out, it's almost entirely blocked from wind flow by the "bowtie" logo on the grille.)

507896

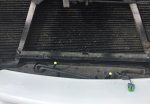
There are some little circlips that hold the factory cooling lines on to the factory cooler. I took mine off but still couldn't get the factory lines out. After a few tries I realized I was wasting my time and just cut them with a tubing cutter.

After removing the factory cooler from the horizontal brace on the bottom of the cooler bracket, I flipped the bracket upside down so it formed a shelf and bolted it back in place. This is a trick I got from one of the YouTube vidoes I watched. Another tip from that video was using foam earplugs to protect the coolant lines from contamination.

507897

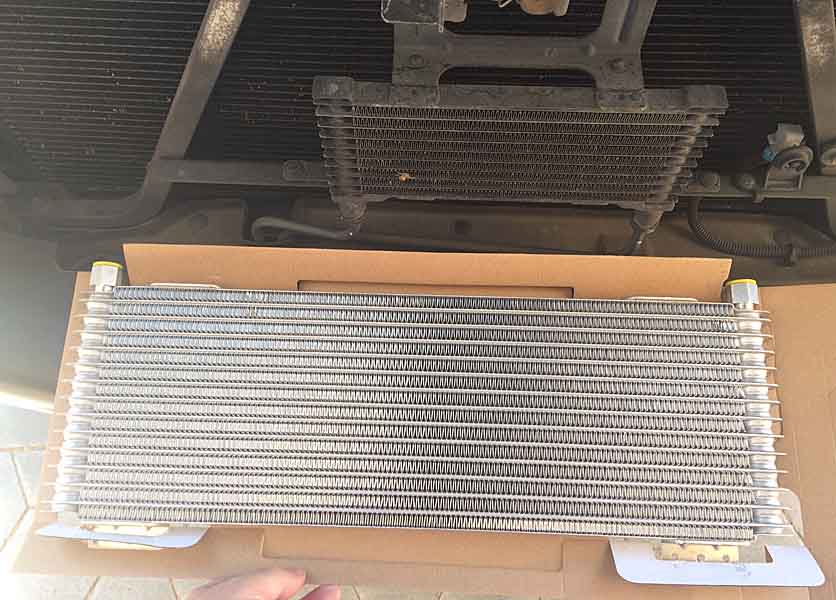
I drilled two holes in the back of the brace to attach the Tru Cool unit. The Tru Cool unit comes with lots of hardware and extra brackets and I put bolts through from the back to the front

507898

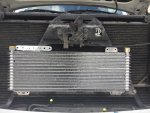
I bolted the unit in. For the upper attachment points I used a couple of the self-tapping screws that came with the Tru Cool, as well as one of their oval-shaped metal brackets on the passenger side (left side as you're looking.) This gives me four solid points of attachment.

You may notice mine looks "upside down" from others who have installed the same one. After watching the YouTube video and looking at the packaging for the Tru Cool I believe this is the correct way to mount it. The cooler has wider passages at the top to allow the cold (thicker) coolant to flow through just the top three rows, then as the coolant gets warmer and less viscous, it will flow into the lower passages, cooling it more only when it needs it.

507899

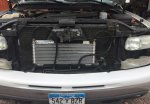
After that it was a simple matter of attaching the lines.


507900

My last mod (not done yet) will be to put some plastic conduit over the lines to keep them from kinking and then zip-tying everything in place.

This project took me the whole afternoon but now that I know what to do I think I could do it in a few hours easily. The cooler is working fine and I took a 20 mile test drive, no leaks and no problems whatsoever!

EDITED TO ADD: Here is the YouTube video that I used as a guide. It was very helpful to me. It's in 3 parts but if you go to part 1 you can continue to follow to the other 2.

 
Last edited:

rho

Lost again
Well... I put one of the torsion bars on the yukon back in 30deg off. Whoops.
All of the LCA bushings were shot so those got replaced. The UCA bushings were ok, so they stayed in for now. Upper ball joints are toast, so we might just both UCAs at some point in the future. Greased everything I could, did the brake pads, new shocks, trimmed some plastic contact points

I'm going to take a grinder to the area where the swaybar is contacting the droop bracket tonight as well as see if I can get the old bumpstop cups out and re-locate them to replace the awful poly bumps that are on there. And fix the torsion bar. And get the new front 4x4 actuator thing in. I'm so glad that I'm almost done with this project.
 

rayra

Expedition Leader
huh. I might have done that to mine last time. I did lose track of it last time after I put my home-made bushings in the crossmember mounts. But the torsion bar hex heads are irregular while the keys are regular, my understanding was it was so they bind / come loose easily. (shrug) I know they are L and R sides. But I'm not even sure if they are indexed / rotated properly. I mean the bar itself could be 180deg out and it shouldn't matter. Have to look that up. It's an 'irregular hole' in my knowledge. ;)

Just dug up my Haynes manual, section 10-4 describes torsion removal and re-install and it mentions marking the orientation of bar / lower and bar / key, but that seems to be just to make sure you index the lower arm and key in relation to each other, not that the bar itself only goes in one way. You'll know that you got it wrong if you set both adjuster bolts to the same depth but you get a radically divergent ride height side to side. If it will even go back together if the parts alignment is 60deg off in either direction (one notch in a hex). I don't think it's even possible to get it back together 60deg off and still get the adjuster bolt properly re-assembled in place.
 

rayra

Expedition Leader
Martin like I said in our PMs, sure looks odd 'upside down'. But whatever works, the fluid don't care.
How much of it can you see with the grill back on? It's plenty big enough to show all four corners directly in the wind. Again like I described earlier, I chose to set my new cooler as low and left as I could, to get as much of it as I could in the direct breeze, out from behind the bowtie

This was my second go-around, when I was preparing to undo my temporary hose setup on the uncut factory lines and cut them and used compression fittings on the metal line stubs -

transcooler57.jpg


And earlier, before I chose to paint it, you can really see how much of it is right in the direct wind. I think that makes as much difference as the adding the whole thing. Another owner could maybe experiment just with relocating their factory out from its hiding place and into the direct breeze. It was REALLY a piss-poor factory mounting location. There's 12-13 layers in the new cooler and only the top 2-3 are behind the middle bar of the grill. Even in Martin's central positioning there's maybe 4-5 layers behind that bar / logo, still leaves over 60% of the cooler 'in the breeze' and that's still a lot bigger cooling surface than the small factory cooler ever had.

transcooler14.jpg


Here's another picture I had earlier in this topic, comparing the factory cooler with the aftermarket, you can see the new cooler is 4x the area of the factory one.

transcooler11.jpg


If someone wants to try cobbling together a dual factory cooler mount with the coolers repositioned low or high in the wind, you can have my factory cooler for a few bucks and shipping. Just let me know. I don't think I kept the factory ends of the trans lines that I cut off, though. I'd have to look thru my parts boxes, I might have.
 
Last edited:

rayra

Expedition Leader
Martin's got his cooler position above the factory bottom brace of that A-frame structure, a piece of angle-aluminum, which also have the external temp sensor mounted on it.
As part of shifting my cooler to the left I chose to use some 3/4" wide aluminum strapping both top and bottom, the cooler attached to the strapping, the strapping attached to the square-tubing of the A-frame, with self-tapping sheet metal screws. I warned Martin not to drill thru tha tA-frame, both the AC condensor and engine radiator are right close behind it.
Anyway in these two pics you can see how I removed that bar as part of positioning my cooler lower and how I initially used the supplied mounting kit. I got it driveable like that but very quickley elected to go wtih the full straps. I drive a lot of washboarded desert roads and didn't really trust several short straps to keep the cooler where I put it. I wanted the vertical rigidity of using the long flat straps as a mounting method. And you can see how I relocated the temp sensor.

transcooler15.jpg

transcooler18.jpg
 

rho

Lost again
huh. I might have done that to mine last time. I did lose track of it last time after I put my home-made bushings in the crossmember mounts. But the torsion bar hex heads are irregular while the keys are regular, my understanding was it was so they bind / come loose easily. (shrug) I know they are L and R sides. But I'm not even sure if they are indexed / rotated properly. I mean the bar itself could be 180deg out and it shouldn't matter. Have to look that up. It's an 'irregular hole' in my knowledge. ;)

Just dug up my Haynes manual, section 10-4 describes torsion removal and re-install and it mentions marking the orientation of bar / lower and bar / key, but that seems to be just to make sure you index the lower arm and key in relation to each other, not that the bar itself only goes in one way. You'll know that you got it wrong if you set both adjuster bolts to the same depth but you get a radically divergent ride height side to side. If it will even go back together if the parts alignment is 60deg off in either direction (one notch in a hex). I don't think it's even possible to get it back together 60deg off and still get the adjuster bolt properly re-assembled in place.

Yep, the whole thing is a spring so the orientation of the bar doesn't matter, just the relationship from key/control arm. Anyways, I tore into the torsion bar last night, I got lucky and I had some photos that depicted how everything was lined up from the stamping on the LCA end of the bar in relation to the shock mount, and I marked the torsion key/bar the previous night before I hit it with some penetrating oil. Reclocking everything proved to be pretty painless as I didn't pre-load the bar after I noted the incorrect clocking.

I'm picking up the front shocks today,a new pitman arm, some replacement bolts and a 1/4-20 tap set and some other bits and then I'm going to see if 4WP has any bumpstops I can re-purpose for this beastie. Then the grinding is going to start for fixing the contact points between the UCA and the swaybar.... I'm so glad to almost be done with the front end of this stupid thing.

On another note... I'll be taking some cues from the transmission cooler installs that yall did for our '03 Sierra.
 

Martinjmpr

Wiffleball Batter
Martin like I said in our PMs, sure looks odd 'upside down'. But whatever works, the fluid don't care.
How much of it can you see with the grill back on? It's plenty big enough to show all four corners directly in the wind. Again like I described earlier, I chose to set my new cooler as low and left as I could, to get as much of it as I could in the direct breeze, out from behind the bowtie

I'll shoot a picture later today but you can see a LOT of the cooler outside of the "bowtie" so I think it will get plenty of air.

Although the ease of removing the grill made me wonder about aftermarket replacements. If the 'bowtie' and the horizontal cross brace are a concern, you could always go with something like this:


508433

As for the outside temp sensor, you may notice that I mounted mine on the arm of the bracket for the PS cooler, just to the left (right as you're looking at it) of the new cooler. ;)
 

rayra

Expedition Leader
Yep, the whole thing is a spring so the orientation of the bar doesn't matter, just the relationship from key/control arm. Anyways, I tore into the torsion bar last night, I got lucky and I had some photos that depicted how everything was lined up from the stamping on the LCA end of the bar in relation to the shock mount, and I marked the torsion key/bar the previous night before I hit it with some penetrating oil. Reclocking everything proved to be pretty painless as I didn't pre-load the bar after I noted the incorrect clocking.

I'm picking up the front shocks today,a new pitman arm, some replacement bolts and a 1/4-20 tap set and some other bits and then I'm going to see if 4WP has any bumpstops I can re-purpose for this beastie. Then the grinding is going to start for fixing the contact points between the UCA and the swaybar.... I'm so glad to almost be done with the front end of this stupid thing.

On another note... I'll be taking some cues from the transmission cooler installs that yall did for our '03 Sierra.

I really think you might do better the change the geometry of the sway bar rather than grind off that protrusion. With the shocks and torsion bars off it should be real easy to determine how much to trim down the end link so teh suspension can move its full range without smashing the sway bar into the frame.
 

Forum statistics

Threads
187,629
Messages
2,896,024
Members
228,596
Latest member
donaldsonmp3
Top