Hey Vortec Guys! / Sierra pickup / Suburban / Yukon etc - Finally has Index!

Overlandtowater

Well-known member
I agree with not cutting the lump off. if it had a shorter sway bar end link it would make a huge difference too. I think maybe the factory link broke after installing the lift and they put on a super long one thinking that would fix the breakage issue but in retrospect it causes bigger problem. and you usually see a 1" block between the frame and the sway bar mount, Ive done a few bracket lifts and they all came with a 1" block it didn't matter if it was a 4" lift or a 6" lift.
 

rho

Lost again
I really think you might do better the change the geometry of the sway bar rather than grind off that protrusion. With the shocks and torsion bars off it should be real easy to determine how much to trim down the end link so teh suspension can move its full range without smashing the sway bar into the frame.
I agree with not cutting the lump off. if it had a shorter sway bar end link it would make a huge difference too. I think maybe the factory link broke after installing the lift and they put on a super long one thinking that would fix the breakage issue but in retrospect it causes bigger problem. and you usually see a 1" block between the frame and the sway bar mount, Ive done a few bracket lifts and they all came with a 1" block it didn't matter if it was a 4" lift or a 6" lift.

I dug up the kit instructions and these are infact the links its supposed to have. In addition I cycled everything through its travel, as well as looked into the intentional omission of blocks for the sway bar mounts.
If the sway bar gets drop brackets it'll create interference with the tie rods, same with going any lower with shorter sway bar links, plus the part numbers on the links added up to the orginal kit instructions. Sigh.

So to help our bottoming out problem (which caused the swaybar contact issue), I picked up some control arm bumpers from a 2000 F150 that I'm going to replace the poly bumps with and that should help a ton, plus some light grinding of that droop stop. There is enough meat there to still support the 400-600lbs of force that control arm/wheel/tire/torsion bar might impart on it so I'm not super worried about it long term, but I will be checking the clearances as I go.
As it is getting the bumpstops that actually work installed should help this from being as much of a problem at all in the future.

At least I got the shocks in yesterday, holes drilled and tapped for the shock reservoirs, and all that stuff installed, swapped the front axle actuator and started working on cleaning up the general mess of wires in the truck.
 

rayra

Expedition Leader
I have no doubt they are the provided links. I'm just asserting that they are too tall for the installation. That their design process was probably 'we added 4" in height with the drop-crossmember, so just add 4" to the height/length of the end links. ' But the frame mounts of the sway weren't moved*, so the geometry is now all f'ed up. And winds up ramming the sway bar into the base of the upper arm mount when the suspension is fully compressed.
And consider that - they built it and stuff slams together that shouldn't. So don't be too fixed on the idea of keeping their end link length. They seem to have got it wrong in their design, akin to that lower bumpstop.


just got to make sure it's tall enough that it doesn't interfere with the inner tie rods at max droop (and turn!) and short enough that the sway doesn't strike anywhere at full compression. once those heights are determined it's a real simple matter to cut the bolt and sleeve of the end link. But check the too-long bolt they put in there with the lift, make sure its threads extend down the shaft enough that you can still bolt things together if you shorten the sleeve.
If the threads don't go far enough down the kit end-link bolt to allow shortening it enough, you might have to source some new bolts at a proper better length. But don't try using all-thread, that excrement will just bend.

I just went and took another look at mine and I don't think there's enough room to put a spacer block between the sway bar frame mounts without interfering with the upward movement of the lower control arm. I mean at rest there's enough room for a 1" shim block (or square tubing, maybe) to be installed, but at max compression I think the front of the lower control arm would then impact that portion of the sway bar.

pics in a minute...


swaybarmountclearance.jpg
swaybarmountclearance02.jpg
swaybarmountclearance03.jpg


I dunno, looks like there should be some room for a shim. How does the roughcountry drop the front connection of the lower arm? Another crossmember-like bracket?
Too, with that lower arm attachment dropped, there's easily room to shim the frame mount of the sway bar.
 
Last edited:

rayra

Expedition Leader
in other undercarriage news, two things -
First, WTH is this apparently loose hose above my transfer case supposed to be plugged into? The pic is looking up the driver side of the transfer case

transfercaseloosehose.jpg


The torsion key mount bushings are still looking good. I've since found reference on removing the the failed mount insert, but it doesn't seem any easier than what I did. You're supposed to remove the staking of the insert on the rear face and then drive them forward out of the ring mounts / bosses. Lots of penetrating oil and an air chisel, I presume. And I cannot find a source for a replacement insert. Seems you have to buy the entire mount and as speculated about earlier, cut the steel mount open and pry it apart to free the insert. That way you don't damage the staking and can just tap the insert into the vehicle frame mount from teh front. That way the staking keeps the mount from being thrust rearward by the forces imparted by any looseness in the front suspension.
I noticed today while taking this picture that my passenger sway bar is still where I put it, inside the key, flush with the back of the key and NOT touching the back wall of the crossmember. While the driver side, the torsion bar is pushed all the way back against the crossmember. I'm pretty sure that's all due to bushing wear in my driver side lower control arm. I strongly expect that to be the source of my shifting / clunking. I still can find no sign of anything else moving around. Still haven't ordered my replacement lower arms yet. Had to divert all my 'hobby' money elsewhere last weekend.

torsionmountrebuild14.jpg
 
Last edited:

Buddha.

Finally in expo white.
That hose above the transfer case might just be a breather, I usually see a little black cap of sorts on breathers.
 

rayra

Expedition Leader
I dunno, it's a little fat for a breather, looks big enough to stuff my pinkie into. These vehicles have two breather hoses that come up from the tunnel to the about where the distributor would be on an SBC motor. I always took them to be the trans and transfer case. And they have the proper little caps on them. The above pictured hose looks more like something that slipped off a PCV/EGR valve sort of barbette. There's no clamp marks on it that I could discern.
Next time I've got it realyl jacked up for swapping out the lower arms I'm going to have to really explore up in their, take cellphone pics or use a mirror and get an eye on the top of the transfer case to see what is going on up there and where that hose goes to or comes from. There's some blackish brackish spatter on the transfer case that first had me concerned it was the notorious case wear-thru problems. But now I'm thinking it's crap coming out of this hose. I have no leaks on the ground from that area, but the hose seems greasy / saturated. Just going to have to get dirty.

Too, try and find a bunch of transfer case repair / replace videos and see if I can spot a hose like that near the top / spine of the transfer case.
 
I have not read this entire thread.

I would really like to soften the ride on my 04 Z71 Silverado. I bought it with Ford keys and 305/70R17s, and its a rough, covered wagon style ride. I have heard of droop stops, but honestly havent spent much time on looking at it. Front end is tight, so I was thinking some longer shocks (I think they are still OE, possibly and probably the original showroom shocks). I know some longer shocks would help, getting the valving back centered. What else could I do, other than dropping the bars?
 

rho

Lost again
508677


Old Vs new bump stops. I cut a half inch off these F150 bump stops so I'll see how it behaves once i get it back together, worst case I can cut some more off. They're a LOT softer than the removed ones. I also swapped the pitman arm out and Oh. My. God. Those things are really on there. I wouldn't be able to do most of this work if I didn't have a giant cordless impact driver, haha.

Still need to get the motor mounts and transmission mounts replaced tomorrow or Saturday. I want this thing out of my carport, omfg.
 

XJLI

Adventurer
I have not read this entire thread.

I would really like to soften the ride on my 04 Z71 Silverado. I bought it with Ford keys and 305/70R17s, and its a rough, covered wagon style ride. I have heard of droop stops, but honestly havent spent much time on looking at it. Front end is tight, so I was thinking some longer shocks (I think they are still OE, possibly and probably the original showroom shocks). I know some longer shocks would help, getting the valving back centered. What else could I do, other than dropping the bars?

That thing looks like the bars are cranked to hell. Jack it up, how much more travel is there until the tires stop going down? Unbolt the shocks and do it again. You probably just need shock extenders, maybe upper control arms.
 

Martinjmpr

Wiffleball Batter
Martin like I said in our PMs, sure looks odd 'upside down'. But whatever works, the fluid don't care.
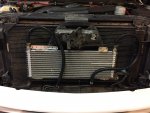
How much of it can you see with the grill back on? It's plenty big enough to show all four corners directly in the wind. Again like I described earlier, I chose to set my new cooler as low and left as I could, to get as much of it as I could in the direct breeze, out from behind the bowtie

Here's what it looks like with the grille back on. Since I didn't paint my cooler you can see pretty well how much of it is out from behind the bowtie (sorry for the dark picture, it was about 9:45 at night when I took this in my garage):

508711

I think that's going to be plenty of "exposure" especially compared to the old factory cooler.

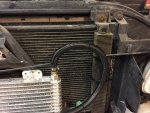
I did want to stiffen up the coolant lines but couldn't figure out a good way to do it. You made a good point about the hoses flapping around and banging against the cooler on the front, so while I search for a better "long term" solution, this works for now:

508714

That is standard plastic split wire loom. Since I was doing this literally at 9:00 at night I had to "make do" with 1/2" loom which is too small. Since it's too small to fully go around the hoses, I put the open portion on the front and the closed portion on the back to protect the hoses.

508716

That should be enough to protect the hoses until I can get a bigger (and preferably stiffer) wire loom to go all the way around the hoses. I was going to use some thick plastic conduit but the problem with that is that it was TOO stiff and I worried that in trying to run the hoses through it, I might precipitate the very problem I was trying to prevent, i.e. kinking hoses that would interrupt the coolant flow. The thin plastic wire loom is not a perfect solution, by any means, but it works for now.
 
  • Like
Reactions: rho
That thing looks like the bars are cranked to hell. Jack it up, how much more travel is there until the tires stop going down? Unbolt the shocks and do it again. You probably just need shock extenders, maybe upper control arms.

Between the Ford Keys and crank, yeah they are maxed, or pretty close. I can deal with a harsher ride, but this is a bit much. I am debating on shocks, control arms, or a decrank some.

What PSI are you running in those big tires?

They are at about 28.

Rayra, I did read the thread now and you have some good work!
 

rayra

Expedition Leader
Thx Cameron.
For yours it will probably need a decrank. Take a good look at the clearance or lack of same on your upper control arm stops on the leadign part of the arm.
With the max crank not only are the torsion bars wound tight and stiffer, your lower control arms are at a steeper angle and more of the vertical motion is translated into a harsher ride. Add to that having little or no clearance on the upper stops means you have very little rebound room. So you get a stiff jounce when you hit a bump and then a second hit as your suspension unloads and you rack against the upper stop.
Decrank until you can get a little more similar space between both the upper and lower stops. Give the front suspension more room to move properly, if you can. If you can can still get tire clearance. If that's why the crank is so high.
And the low tire pressure is to try and smooth the ride?


Martin that looks great, at least half of that cooler is in the direct breeze, and that's nearly twice as much area as the original cooler, not even counting how much of it was obscured.


Rho, we never talked about the rear sway bar end links, about whether the rear sway is wracking on the rear diff cover, and what the condition of the panard bar mounts are. If they beat the front up that bad, the back might be damaged too.
And does the thing have the stock stamped steel rear lower trailing / control arms? If so they are likely beat to crap too.
That front lower bumpstop looks nice, but that's at full droop, is it not? How's the clearance of it sitting on the ground?
Don't mean to harp on the front sway, but what did you decide to do about it hitting, did you grind the upper mount?
 
  • Like
Reactions: rho

rho

Lost again
Rho, we never talked about the rear sway bar end links, about whether the rear sway is wracking on the rear diff cover, and what the condition of the panard bar mounts are. If they beat the front up that bad, the back might be damaged too.
And does the thing have the stock stamped steel rear lower trailing / control arms? If so they are likely beat to crap too.
That front lower bumpstop looks nice, but that's at full droop, is it not? How's the clearance of it sitting on the ground?
Don't mean to harp on the front sway, but what did you decide to do about it hitting, did you grind the upper mount?

From what I saw on the rear so far it looked to be in OK shape. There are control arm drop brackets and a bracket for the panhard bar and all that stuff looked OK, but I haven't gotten in there to give it a super through inspection yet. Thats going to be tomorrows project!

I haven't done anything with the front sway bar n stuff yet. I might be able to take a quarter inch or something off the toob that sets the spacing between the LCA to swaybar, dunno yet. Need to collect more data when its on the ground. I suspect the droop stops will get some light grinding where the witness marks are, I also need to do some light grinding where the shocks come a bit close to the old travel stops. I'm really hoping I can finish this up tomorrow.
 

Forum statistics

Threads
188,176
Messages
2,903,370
Members
229,665
Latest member
SANelson
Top