Hey Vortec Guys! / Sierra pickup / Suburban / Yukon etc - Finally has Index!

rho

Lost again
508977

Welp, this might be why the front diff actuator wasn't working.

Also bit of an update on the bumpstops situation on this truck, haha. Ground the upper stops down a bit, I also cut an inch off of the swaybar end links and left the new bumpstops the way they are. There is 2" of clearance from the bumps to the LCA when its on the ground, BUT, I got it on the road today for a short test drive and holy cow. Its a ton better so far... I'll get that harness fixed tomorrow and hopefully thats going to be it for this old truck.
 

rayra

Expedition Leader
well the exposed wires also probably explain the blown fuses, too. Just a dead short until the fuse goes. What ground those wires open? Looks like something was rubbing against them? There's nothing moving around there, except maybe the power steering pulley / s-belt? or vibration / wear against something muddy / gritty?
 

rho

Lost again
At some point in this trucks past life the front actuator harness and front diff breather got routed together, and somehow both ended up rubbing on the flange of the CV joint. There is a nice polished bit all the way around so it'd been doing that for a while.
 

rayra

Expedition Leader
Hah. Good find / fix. I can maybe take some pix of how it's supposed to be rigged, if you want / if it matters. I assume you've already got it re-arranged and locked down.
 

TroySmith80

Adventurer
TL;DR: Is it supposed to be the case that the PCV valve just sits loosely in the valve cover with nothing holding it firmly in place?

I just picked up a 2001 Yukon with the 5.3, G80 and 3.73 gears. Looking to do some minimal upgrades and use it as a daily driver and camping rig. It's got 190,000 miles on it! I used to be scared of cars with 100k on them but i've been impressed with how long modern cars last and getting braver about buying high mile vehicles (i'm also low on cash after some life changes so i don't have much of a choice!). I hope i don't regret buying a rig with so many miles, but it seems pretty well taken care of. Runs and drives nice.

Anyway, I was poking around checking things out and noticed that the PCV line from the back of the drivers side valve cover up to the intake was making a rattling noise. Then i noticed that it just kind of "sits" in the hole on the valve cover. It takes basically zero effort to pull it out of the valve cover and there is nothing holding it in place. There is a lot of dirty oil buildup around the area where it enters the valve cover, looks like oil has been seeping out. I'm nervous that dust and crud can enter the engine and that the pcv valve and hose might bounce out of the valve cover, leaving the hole wide open to the elements.

Also, thanks for this thread, it's awesome! Super long though and could use an index or table of contents. Maybe some day i'll read it all, lol. Anybody have a line on pdf service manual for the GMT800 rigs, particularly the early run 5.3s like mine?
 
Last edited:

rayra

Expedition Leader
yah, the topic could use an index. Maybe sometime when I have the time I'll pull one together. If someone else wants to write one, I'll edit the opening post to include it.


The PCV grommet where it sits in the valve cover is probably cooked hard. Quick search online I dont find a replacement thru rockauto or a couple major chains. 2003-2006 they deleted the PCV and went with an internal baffle inside the valve cover and just a pipe sticking up. But that creates a whole new trouble after a lot of miles. The baffle has a series of small drain holes that let accumulated oil in the baffle drain out. The holes get blocked with cooked crud and the engine starts really inhaling oil. Puddles in the intake chamber, cruds up the intake runners in the heads, vehicle starts laying its own smokescreen. That's pretty much what I started this topic with.

A decent short-term fix would be to degrease the area, pull the PVC out and degrease it and put a few windings of good electrical tape around the barrel of the PVC body so that it seats more snugly into the valve cover opening. You'll get a lot less blow-by that way.
And PCVs are usually ~$5, you might shop for a replacement IIRC they have a rubber boot on the PCV. A real easy and cheap fix.

---

I got my new driver front lower control arm last week, haven't got around to the install yet, maybe after this weekend. Came in a large odd-shaped cardboard box with the ball joint stud with nut on it poking right thru the box. Lucky it didn't get damaged, probably damaged other things while in route to me. Heavier than I expected, given how spindly they look.
Maybe after I do the install I'll use the old arm as a test-fit piece. For a long time I've been considering other skid plate, fuel tank protection plate and other ideas. I massacre the occasional desert shrub and have idly thought about some sort of protective plate affixed to the lower arm like the nose of a ski tip, to shield the rubber bellows of the CV axles. But unsprung weight is bad, m'kay. Anyway, I'll be doing some 'cardboard aided design' and looking for ways of clamping a small skidplate to the leading edge of the control arm(s). One that won't interfere with steering etc.
 
Last edited:

Lykos

Super Trucker
Hey NBS Mafia.

Is there a switched/accessory circuit in the cargo area of a 2003 suburban I don't know about? I'm worrying a camera and can't run it to an always hot circuit.

Yes I can run it to the reverse lights but I lose on demand functionality. I only want it on when I want it on.
 
Thx Cameron.
For yours it will probably need a decrank. Take a good look at the clearance or lack of same on your upper control arm stops on the leadign part of the arm.
With the max crank not only are the torsion bars wound tight and stiffer, your lower control arms are at a steeper angle and more of the vertical motion is translated into a harsher ride. Add to that having little or no clearance on the upper stops means you have very little rebound room. So you get a stiff jounce when you hit a bump and then a second hit as your suspension unloads and you rack against the upper stop.
Decrank until you can get a little more similar space between both the upper and lower stops. Give the front suspension more room to move properly, if you can. If you can can still get tire clearance. If that's why the crank is so high.
And the low tire pressure is to try and smooth the ride?

I have been playing with tire pressure (very lazily I will say) to try to get a decent combo of ride and wear. 28 gave a better ride but brought some tire wear, so it needs a little more.

I bought the truck as it sits.

I have been looking at and thinking about going with a coilover conversion. Atomic Fab and Performance (Atomic is the SN of a guy on Performance Trucks and GMFullSize) or JD Fabrication (more high speed dessert stuff). I dont mind a stiffer ride, but this gets rough. I don't want to give up the stance and the height, especially when it starts getting used more. Other option is to decrank, possibly some CAs for better travel and ride, and a trim, and possibly lose 1/2-1 inch. I would assume a lift kit (other than a body, not doing a body lift) would result in a ride similar, maybe slightly softer if at all noticeable. Im just really starting to look at options, and I know the C/O kit would be as much as a lift kit (depending on the coilovers $1K to $1.8K for the blingy stuffs)

I have some experience with lifting Ford IBeam/TTB suspensions, and of course solid axles, but the IFS is new to me for lifting stuff (stock replacement isnt the same).
 
  • Like
Reactions: rho

Lykos

Super Trucker
I ended up running two 10g wires for power to the back of our '03 Sierra thats switched and from the ignition for aux lights/reverse lights/camera and maybe other small stuff in the future.

Yeah I think that's going to be the way to go. I'll pipe it into the reverse lights for now. ?
 
  • Like
Reactions: rho

rho

Lost again
I have been looking at and thinking about going with a coilover conversion. Atomic Fab and Performance (Atomic is the SN of a guy on Performance Trucks and GMFullSize) or JD Fabrication (more high speed dessert stuff). I dont mind a stiffer ride, but this gets rough. I don't want to give up the stance and the height, especially when it starts getting used more. Other option is to decrank, possibly some CAs for better travel and ride, and a trim, and possibly lose 1/2-1 inch. I would assume a lift kit (other than a body, not doing a body lift) would result in a ride similar, maybe slightly softer if at all noticeable. Im just really starting to look at options, and I know the C/O kit would be as much as a lift kit (depending on the coilovers $1K to $1.8K for the blingy stuffs)

I have some experience with lifting Ford IBeam/TTB suspensions, and of course solid axles, but the IFS is new to me for lifting stuff (stock replacement isnt the same).

I've been looking into coilovers for our 2wd as well, I think the adjustment in spring rate might be worth it after putting UCA's and drop spindles on ours, but idk. Who knows, maybe UCA, better shocks and limit straps will make all the difference in our 2wd. The JD fab stuff looks appealing tbh.
I think the 4wd have more options at least for diff drop kits and stuff, I don't have many nice things to say about them given my recent experience with one, so I'll refrain from commenting much.

Yeah I think that's going to be the way to go. I'll pipe it into the reverse lights for now. ?

Yep. I ran a whole fuse box/relay/etc for them back there, with recessed lights in the bumper. the same bundle also has the backup cam wire and all that good stuff.


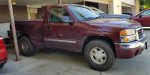
Onto other general truck stuff.... We got the 285/75R16 from my Jeep onto our 2wd sierra, it made a massive difference in that truck, holy cow. Stance is better, ground clearance is WAY better and it drives better to boot. Ours had lower gears from the factory so the shift points in the transmission feel a bit better now and it doesn't SLAM into second gear anymore, which is nice.
Only downside is some minor rubbing on the front sway bar and the inner fender liner, as we have the stock wheels on it right now. So we'll play with things a little to see if we can maybe improve it a bit. The only other minor thing is the 285 is about hanging down a lot more in the stock spare tire location, so that might be something we rethink down the road, esp some of the roads it sees. We already drag the hitch sometimes so it might need to be addressed at some point.
I still need to do a tuneup on our Sierra as it has a little bit of a stumble at idle and a weird whistle... motors are these mysterious boxes of fire to me so idfk whats going. Guess it'll be time to learn.
-_-
 

Attachments

  • truckya!.jpg
    truckya!.jpg
    267.7 KB · Views: 35
Last edited:

Lykos

Super Trucker
RHO I need to run 1 gauge hot and ground and a 6 gauge from my aux battery under the hood to the back.
Where did ya'll run your wires through the firewall?
 

rho

Lost again
RHO I need to run 1 gauge hot and ground and a 6 gauge from my aux battery under the hood to the back.
Where did ya'll run your wires through the firewall?

I'm not sure about the 'burbs and if you have free places to run wires and stuff to the back... with the truck I ran some wires into the cab following the big wireI harness thats on the drivers side by the steering column. If we ever did a battery in the bed of our truck, I'd follow the frame and drill a hole in the bed wherever I needed.

The Yukon I'm working on has some 0 gauge wire run to the rear for jumper cables/winch power inside the framerail to the end of the trucks frame. Seemes to work out, I'd be shocked if there weren't grommets or other wires going into the frame near there.
 

Burb One

Adventurer
RHO I need to run 1 gauge hot and ground and a 6 gauge from my aux battery under the hood to the back.
Where did ya'll run your wires through the firewall?

There is a grommet on the driver side, up and to the left of the brake pedal that gets you access from the engine compartment (I removed mine and drilled it out a bit. You can then run into the plastic paneling under the driver's door, passenger door and get it into the rear.)

Another option (if you want the power exterior in the rear) is along the frame on the driver side. There's already a wire harness there and I welded a few zip tie attachments to better secure it all to the frame (also have rock sliders so it's really protected- I have a 0 gauge running to the rear for a rear winch attachment, and really don't want those shorting...)
 

Forum statistics

Threads
187,629
Messages
2,896,008
Members
228,596
Latest member
donaldsonmp3
Top