My Woody expo trailer.

Heifer Boy

Adventurer
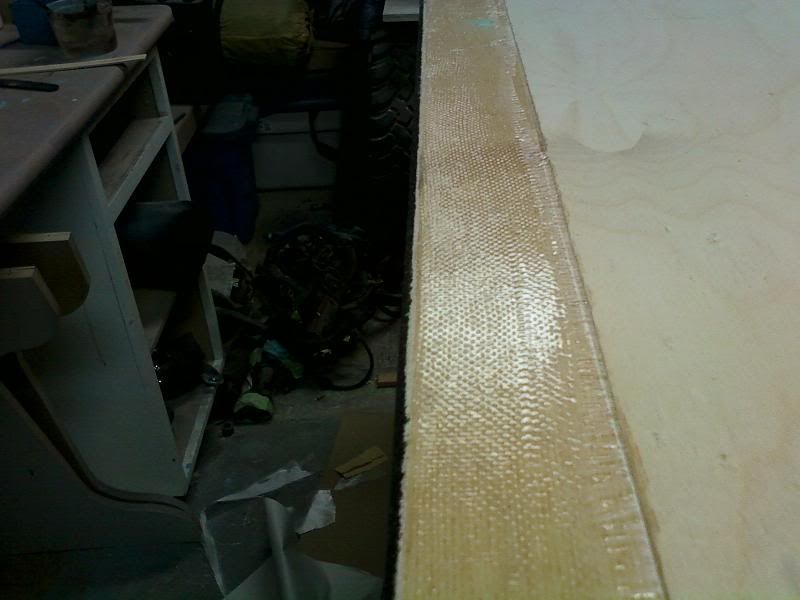
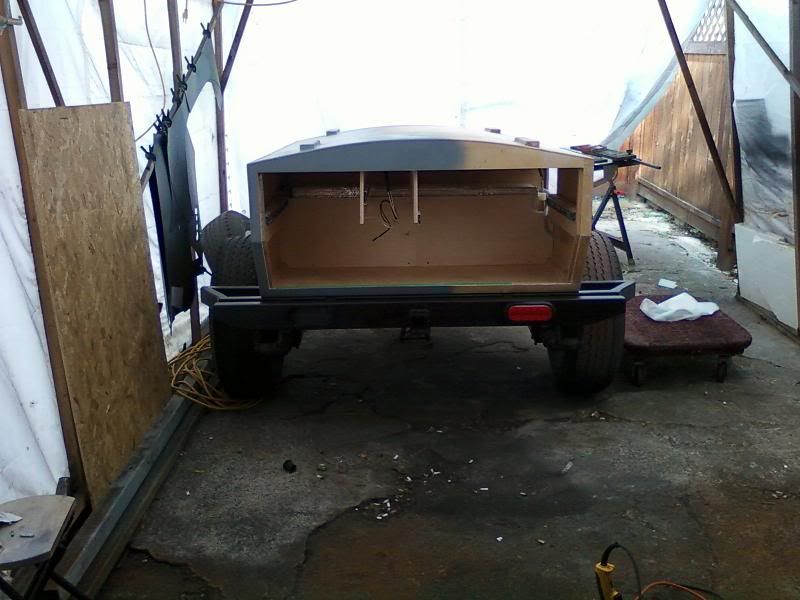
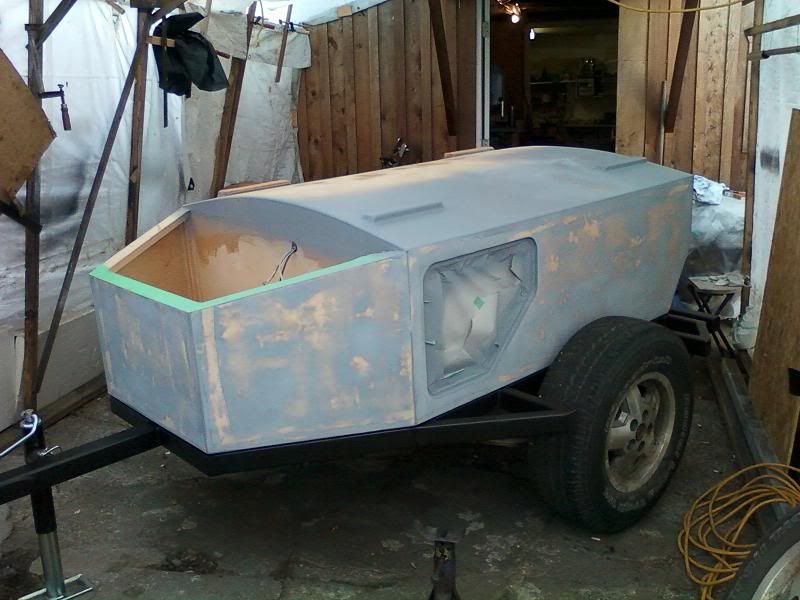
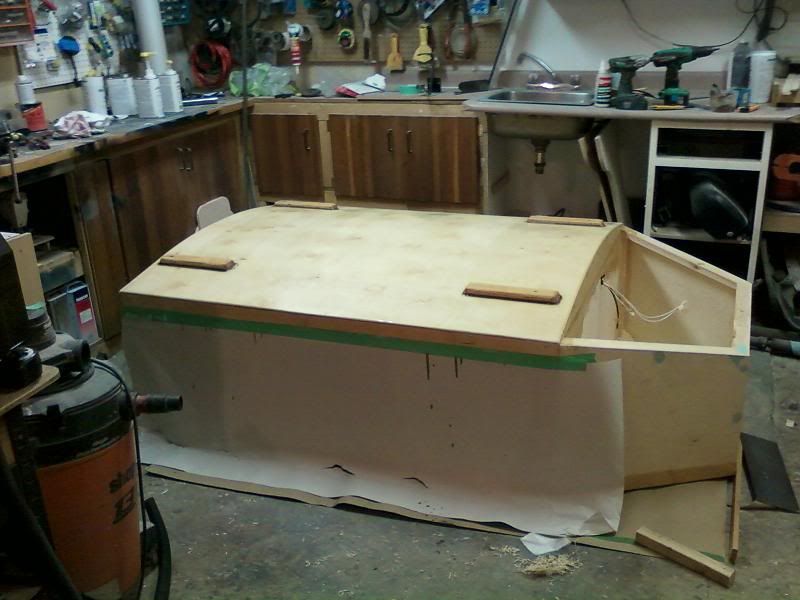
Are you glassing the whole box or just the bottom?

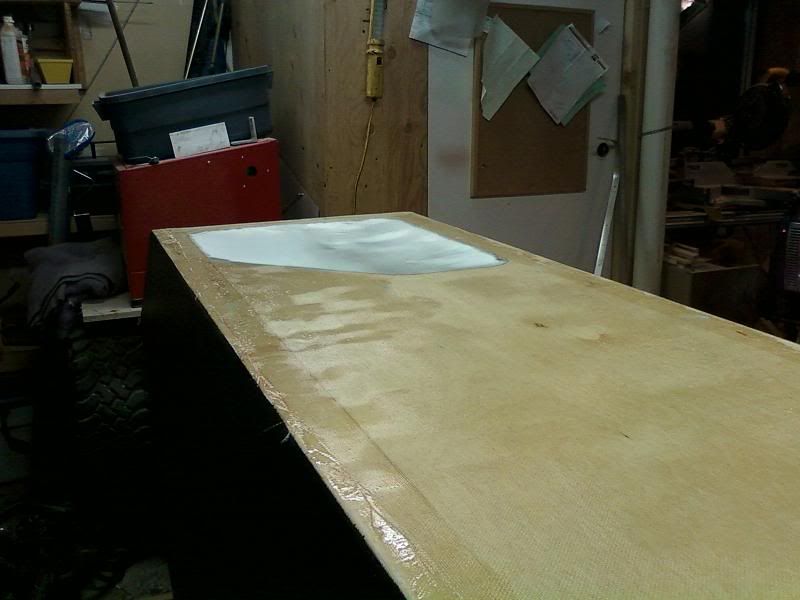
It looks like in your pictures that you have done the top too because it was all masked up around the sides but you only showed epoxying the top in place.

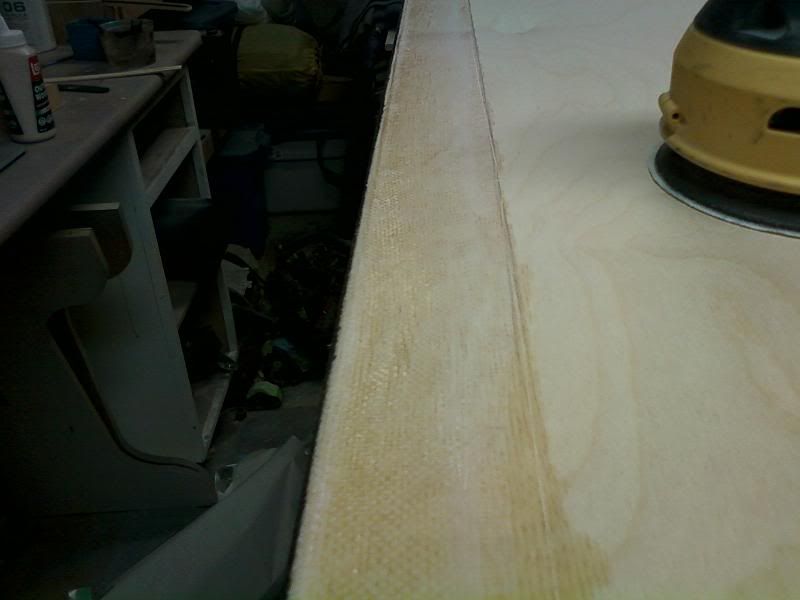
I did what you have done with wrapping about 50mm over the corners but had wait for everything to dry and then feather the edges before the overlaping layer. I had to roll the camper around so I could work on the horizontal surface too so the whole thing took me ages to do. How are you doing your glass joints? Overlapping or butt joining? Do you sand between or just keep going wet on wet and just fair it out later?

Even with it all finished I can still see the overlap joints through my paint. I didn't fair it admittedly...
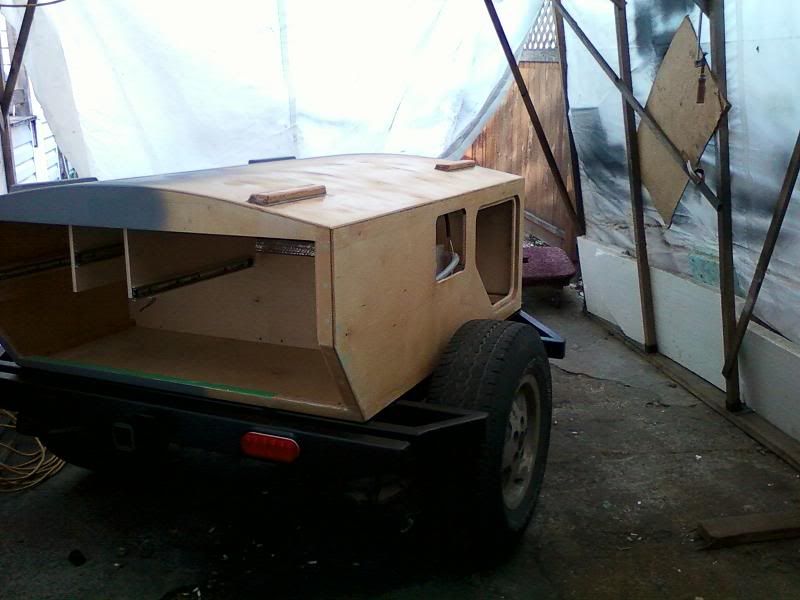
 

Wavebreaker

Adventurer
Heifer Boy: I am glassing the whole box just started on the bottom first.The tape you see is a plastic i put on the top to stop it from getting dirty.
i overlap my joints i have about a 2 inch lap .. When working with epoxy if you let it set for about 6 hours still not quiet hard you can feather the edge with a good cabinet scraper. Ill give the over lap a bit of a sand prior to glassing over. I do bottom then top then the sides.


Update for today, other than a bit of welding. I installed doubler blocks inside of the top for RTT (no pic my bad). Set RTT on the top for the first time really gave a good size perspective finally. Made the 4 tapered blocks that the RTT will bolt thru. Thats about it today. Tomorrow prep for glass and more welding on the frame. Im a wood guy so this welding takes me a bit :)

Photo0157.jpg

Photo0158.jpg
 

Wavebreaker

Adventurer
top glassed and main frame mostly welded. adding springs and axle over the weekend hopefully rolling frame by the end of weekend.

Photo0159.jpg

Photo0160.jpg
 

Wavebreaker

Adventurer
Well managed to get a rolling frame done over the weekend. My plans for the rear area did not work out,was planning on carrying a spare there. Have to think on it some more.. As it sits i have 15 inches of clearance at the axle. Sitting on 30 inch tires level the tongue lines up with my bumper height on the Jeep. Need to add about 6 inches to the trailer jack on the front.

Photo0162.jpg
 

Colby Jack

Traveler
Awesome Progress!

Wavebreaker-- Looking great! Quick related question-- no hijack intended-- can you suggest any good required reading material, boat forums, etc. for epoxy and fiberglass work? I know there are hundreds of books and forums out there, just looking for any suggestions.

One other thing-- Why did you do bottom, then top, then sides? HB did bottom, sides, then top IIRC, his logic being that moisture would cascade over the layers like shingles. Just curious, as you are the working professional in this field.

Colby Jack
 

Wavebreaker

Adventurer
Colby Jack : one of the better sites for info on Epoxy systems is West System. http://www.westsystem.com/ss/use-guides/ good solid info on application.

Once your epoxy/glass covering is done there will be no layers per-say. I usually do the larger layups first and over lap into the next. My overlaps are 2 inches so almost a double thickness of cloth at the weak point (Corners),also in an easy place to fair out after i was done. Also i did the bottom first for ease of painting when i'm done sanding and fairing the unit. Bottom is rubber guarded and the rest will be painted with auto paint to color match my Jeep.

If you end up with water migration in your lapped area something is wrong :) Good surface prep of the lapped area will insure a good mechanical bond.

Hope that answers your question,
 

Heifer Boy

Adventurer
The overlapping 'shingle' idea didn't make a lot of sense to me either because it should all end up as one inpervious layer. A few other recommended that method so I went with it. It may have been a bit easier to do it all in a different order but I don't think it made much difference in my case. It's nice to know it doesn't actually matter and Wavebreakers reason for doing the bottom first makes sense.

Guess that's what you get being 'working proffessional' :)

It's looking great BTW. I like the lines of the box and need to learn to weld so I can build something similar someday.
 

Colby Jack

Traveler
Thanks!!!

:bowdown: Just the two guys I wanted to respond! I appreciate your info and timely responses! I want to build a wood drift boat as a winter project next year, and this type of build is simply inspiring!!!

:coffee: Proceed my good sir...:coffee:

Colby Jack
 

Wavebreaker

Adventurer
Well i have finally finished the glass work on the pod ,time to sand and paint :)

Colby on the topic of overlaps the first two pictures show my last two laps on the side of the pod before sanding and after. When i do a lap i use masking tape to give me a cut line then i feather that edge into the plywood prior to re-glassing. you can see my cut line under the new glass but there is no bump at that point.


Photo0164.jpg

Photo0165.jpg

Photo0166.jpg
 

Wavebreaker

Adventurer
Seems like not alot being done by me on this thing the metal work just seems to keep on going. Frame is almost done now just need to remove the axle and tires and flip it ..some grinding and paint the damn thing. pod is sitting waiting to go onto the frame so i can paint it.

Anyway still plugging along.

Photo0173.jpg

Photo0171.jpg
Photo0172.jpg
 

BC_Explorer

New member
Wavebreaker:

Great craftsmanship on your trailer. Almost makes me want to take a trip over to the island (I live in the lower mainland) to see it firsthand!
 

Wavebreaker

Adventurer
BC Explorer come spring you will get a chance i will be over there more than here next year, well that's the plan so far anyway :)
 

Wavebreaker

Adventurer
Well things are moving along ..never as fast as you like but that the way it goes :)

Trailer frame for the most part is done. Still needs fenders and some dodads ..

Photo0177.jpg


Tires and wheels went on my bad no picture.. New spring bushings and new u-bolts. + old YJ rear springs.

So today we moved the Pod out of the shop and put it on the frame, Finally it looks like its coming together.
I guess my math is still working because it fit like a glove. Now i can get on with the painting and fabricating the Dodads.
I was getting a little concerned about my tongue weight when it was in 2 pieces about it getting to heavy after putting it on the frame i have about 30 or 40 lbs should be good once things are loaded into it.

Photo0179.jpg

Photo0180.jpg

Photo0182.jpg


Till later

[cheers]
 

Forum statistics

Threads
189,811
Messages
2,921,176
Members
232,931
Latest member
Northandfree
Top