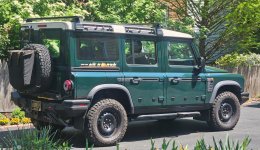
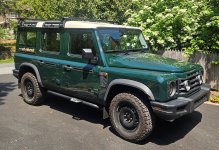
Outfitting my Grenadier Trialmaster

84-4runner

Active member
I've been at the Overland Outfitters factory this week, helping them finish up some preproduction samples. I've now got a preproduction Cargo Side Bag and a preproduction First Aid Bag for the rear door panel. Photos of both are attached. I've also attached a photo of the prototype Cargo Side Bag I've been testing in my Grenadier for reference, the preproduction sample is essentially identical to my prototype so as soon as I get home and test it I expect I'll be able to let them know it's ready for production (ignore the wrinkles in the fabric, they relax out in a few days).

View attachment 877027

For reference:

View attachment 877028

The First Aid Bag for the large rear door panel is almost identical to the cargo bag that zips into the same panel but it's got some special features for first aid supplies. It zips open to lie flat and inside are small and medium pockets for the supplies, behind those are larger pockets, and a center panel with elastic loops to hold even smaller medical supplies. Unlike most first aid bags, the organization inside this one is designed so one can find the needed supplies quickly in an emergency when time is of the essence.


View attachment 877031

View attachment 877029

For reference:

View attachment 877030

When I get home I'll install both of these in the Grenadier and I'll also load the first aid bag with supplies to show how the inside organization works. BTW it also zips onto the attachments on the seat backs and the cargo sides so if all one needs is a great first aid bag it can be hung in either of those places instead of on the rear door.

Monday they should have the sample panels for the small rear door ready for me.


what is the floor mat that you have. I have been trying to find a Bedrug to cut down, but yours looks usable.
thanks
 

jscherb

Expedition Leader
I'm still not comfortable with the factory dual battery system; in my Jeeps the dual battery system I've implemented runs the campsite accessories (kitchen/fridge, etc) off the auxiliary battery and those things never drain the main battery. The aux battery gets charged by the alternator when the Jeep is running but when it's not running there's no connection between the batteries so the starting battery never gets drained by the campsite accessories. Also the aux battery gets charged by the solar panel, and there's a switch that connects the two batteries together in case the starting battery needs a little help. In the Grenadier, as its been explained to me the aux battery does nothing unless needed to boost the main battery during starting, and all accessories run off the main battery. I don't have confidence in the Grenadier system yet, maybe I will after an expedition or two.

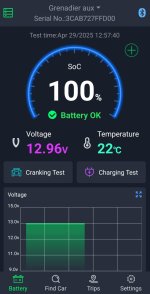
Also I am told that the battery monitor on the dash screen only monitors the main battery, not the aux battery. So how are we to know the status of the aux battery without going under the back seat and testing it manually?

I installed a Bluetooth battery monitor on the aux battery. It took only a few minutes because the aux battery terminals aren't covered by the ridiculous plastic shield that covers the main battery and many of the under-seat fuse panels. I've attached to photos of the installed monitor and a screen shot.

I got the battery monitor on Amazon: https://tinyurl.com/ctk42r88 but it's available other places as well.

BatteryMonitor1.jpgBatteryMonitor2.jpgBatteryMonitorApp.jpg
 

jscherb

Expedition Leader
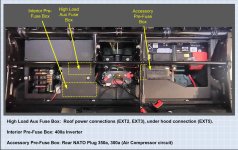
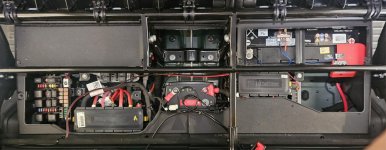
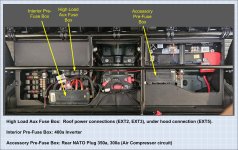
I can't believe that nobody on the Grenadier design team figured out that the plastic cover over the electrical compartment under the back seat prevents access to many fuses that could be blown while in the wild. I'll call these "consumer fuses", meaning fuses that supply power either to devices that the user might have added, or devices that the user might stress. For example, if one plugs a power tool into the inverter that draws more power than the inverter will supply and the inverter fuse gets blown, how do you access the Interior Pre-Fuse box in the wild to replace the fuse if you don't have the right tools to remove the plastic (or don't have the time - even with the right tools it takes a while).

ConsumerFuses.jpg

Not only didn't the Grenadier engineers have the common sense to provide easy access to these fuses, they made the plastic cover very difficult to remove. For example, several of the T50 screws that have to be removed are under part of the rear seat support and an ordinary T50 bit in a socket wrench can't reach them. And why do the screws holding a plastic cover need blue threadlocker? And even with the screws removed, I don't think the covers can be completely removed without removing the seat brackets. Really? Just to change a fuse?

I modified my cover to provide better access to the fuse boxes.

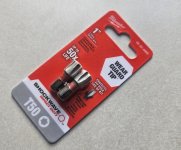
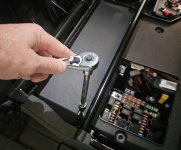
Removing the T50's without removing the seat brackets requires a stubby Torx bit and a wrench to turn it:

T50Bit.jpg

The stubby bit is available at Home Depot, 2 for $3.00: https://www.homedepot.com/p/Milwauk...-Screw-Driver-Bit-2-Pack-48-32-4989/301361909

A 1/4" open end wrench is used to turn the bit. The screw will be very tight at first because of the threadlocker; if you can't turn it with the 1/4" wrench, grab the bit with a pair of Vise Grips for more leverage. A 1/4" drive 1/4" socket with extension turning the stubby bit may also have enough clearance from the seat bracket bar to do the job.

RemovingT50.jpg

There are also several T25 screws that hold the front and rear sections of the panel together.

RemovingT25.jpg

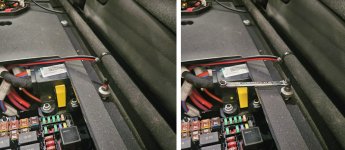
Even with all of these screws removed, the panel still won't come out, but now it's loose enough to allow for cutting.
I marked the locations on the cuts of the fuse boxes I wanted to expose with a silver sharpie, and used a saw blade in my Dremel to make the cuts. The blades are from Harbor Freight: https://www.harborfreight.com/6-piece-hss-saw-blade-with-mandrel-set-67224.html. They're very sharp, be careful not to cut yourself, and the reason the panel was loosened was so that it can be lifted away from the components below it for cutting.

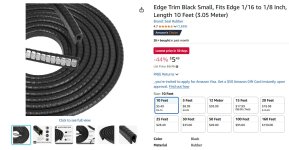
After cutting and cleaning up the edges a bit, I gave the cut edges a finished look with push-on edge trim, which I found on Amazon.

EdgeTrim.jpg

Job done:

FuseAccessDone.jpg

FuseAccessDone2.jpg

I haven't replaced the T50's yet, I'll probably replace them with Agile Offroad's nylon replacements: https://agileoffroad.com/product/replacement-under-seat-hardware-set-for-ineos-grenadier/

Now I have reasonable access to almost all of the fuses in the vehicle. I still don't like that the main battery isn't accessible, but with any luck that only needs to be accessed with the battery reaches end of life.
 
Last edited:

jscherb

Expedition Leader
What about some type of thumb screw or small knob? Something that requires no tools!
Definitely a good idea, but now that I've made all of the fuse boxes accessible there will no longer be a need to remove or move the plastic. The need for fasteners of some type now if only to keep the plastic from rattling. If I could find 10mm thumbscrews I could use them, or, the Agile Offroad nylon screws are very reasonably priced and only need a Phillips screwdriver.
 

jscherb

Expedition Leader
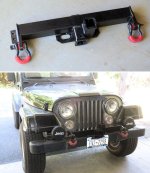
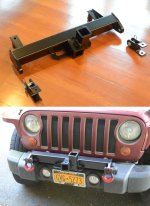
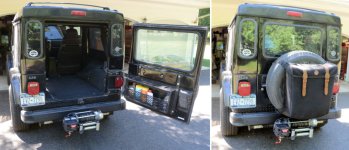
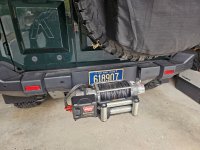
I have one Warn winch that I've used with all three of my Jeeps for years. It's in a receiver mount and I've designed and built "quick install" receivers for the front of the Jeeps which bolt in place/remove in minutes - since I only need a winch (and therefore the front receiver) when I'm on an expedition, I can install the receiver and winch just for that expedition and remove it for daily driving when I return home. The winch can also be used in the rear receiver of all three Jeeps and the Jeeps are wired for that. Some photos of the front receivers on the Jeeps are attached.

TJQuickInstallRCVR.jpg

JKQuickInstallRCVR.jpg

TJWinchRear.jpg

I've designed and plan to build a similar receiver for the front of the Grenadier but haven't had time (or need) to do that yet. The Grenadier quick install front receiver will look similar to the ones pictured on the Jeeps.

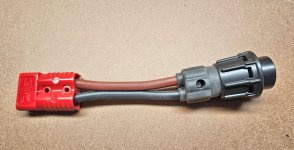
I do want to use the winch on the rear of the Grenadier and having a Trialmaster, I've got the NATO plug in the rear. The wiring setups on my Jeeps use Anderson plugs, so I made up an Anderson-NATO adapter for using the winch on the rear. The NATO plug came from Agile (https://agileoffroad.com/product/ineos-grenadier-nato-plug-with-screw-ring-by-agile-offroad/); the Anderson plug and 2-gauge copper wire are from Amazon and eBay.

NATO-AndersonAdapter1.jpg

NATO-AndersonAdapter2.jpg

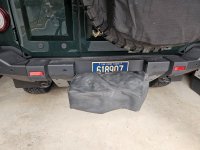
The winch in place in the rear receiver:

RearWinch1.jpg

RearWinch2.jpg

Since the winch wiring has an Anderson plug, I'll probably just put an Anderson in the front of the Grenadier somewhere connected to the 500-amp High Load switched circuit.

I post photos of the Grenadier quick install front receiver when I build it.
 

jscherb

Expedition Leader
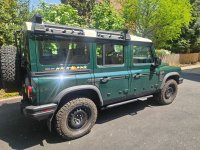
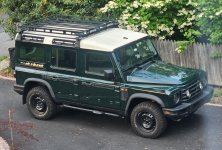
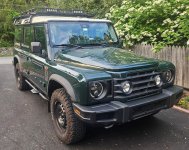
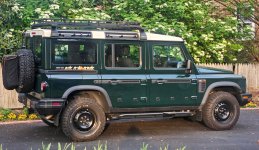
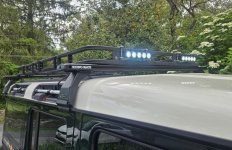
Installed the factory Rhino rack bars and mounted my Garvin rack basket to them. I've been using the Garvin for years on two of my Jeeps and since I've got all of the attachments I need for the gear, cargo and roof top tent that I carry in/on it using the Garvin on the Grenadier makes sense. Installation was a very simple bolt-on using Rhino's Roof Top Tent brackets, no drilling or adaptation required. It's very quiet on the highway, over the years there's never been any real noise from the Garvin basket and the factory Rhino rack bars are very quiet too.

The rack has lights mounted to it; I've got rooftop outlets on my custom Jeep hardtops that these plug into. It's an SAE plug, so I made an SAE-Deutsch adapter to plug those lights into the Grenadier's EXT2 rooftop circuit.

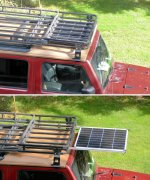
Next I'll install the front extension to the rack, it's got a slide-out solar panel underneath it. I've attached a few photos of it on the Jeep. I plan to modify the Grenadier's front left roof power outlet to be an input for the solar panel. The solar panel also has an SAE plug which goes into an SAE outlet on the roofs of my Jeeps, so I'll do another SAE-Deutsch adapter. And of course a solar controller that's compatible with the Grenadier's CTEK dual battery controller, probably a CTEK D250SE unless anyone has a better suggestion.

RackBarsInstalled1.jpgRackBarsInstalled2.jpgRackBarsInstalled3.jpg
GarvinInstalled1.jpgGarvinInstalled2.jpgGarvinInstalled3.jpgGarvinInstalled4.jpg
RackLights1.jpg


SolarInAndOut1.jpg
 

jscherb

Expedition Leader
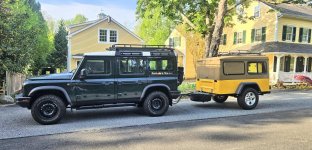
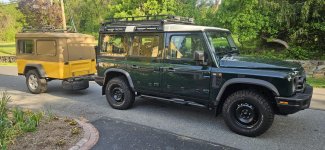
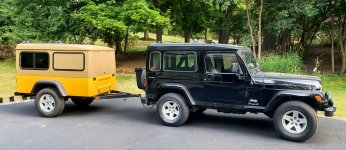
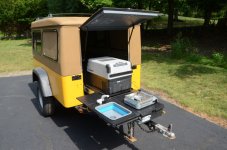
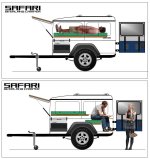
For years I've towed this Jeep-style trailer around behind my Jeeps when I need to carry more cargo than will fit in a Jeep. I'm heading to Flagstaff in a week for Overland Expo West and I've got to carry a bunch of things so I got the trailer out of storage today. The trailer is made from two Jeep body tubs and a fiberglass hardtop I made in the same molds that I used to make the hardtop for my 2006 Wrangler (the black Jeep in one of the photos attached), so it's a perfect match for that Jeep but I think it looks pretty good behind the Grenadier as well - I suppose if I were only to tow it behind the Grenadier I could paint it green with a white roof and it would look even better. I originally built it to be a camper (a few photos and concept images are attached), but I use it so often for cargo I never completed the camper interior other than installing the Trail Kitchen.

Anyone else going to Overland West?

GrenadierAndTrailer1.jpgGrenadierAndTrailer2.jpgGrenadierAndTrailer3.jpgGrenadierAndTrailer4.jpg
FirstRun4.jpg
SafariCamperTrailKitchen.jpg
CamperInteriorDesign.jpg
 

Forum statistics

Threads
189,154
Messages
2,913,899
Members
231,861
Latest member
Herb colvert
Top