OVRLND CAMPERS ONLY : Post your OVRLND Camper build here or a link to your build thread to inspire others!

Dan250

New member
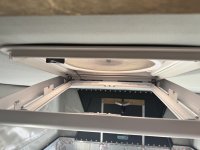
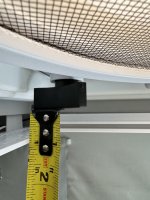
Ahh another reason to finishing insulating haha. We're you able to insulate the bars at all or just panels? I'm going with rigid foam as well but the bars get pretty hot/cold themselves. I've seen people using hvac tape or what ever that foil tape is but I assume it wouldnt do much.
 

dstefan

Well-known member
So I'm sitting in my camper right now and there's a fair bit of wind. I keep hearing the sound of what I assume is the aluminum skin of the camper flexing in an out in the wind. Not concerning but it is annoying. Anyone else have this issue?
Likewise, no flexing of the skin. I don’t have rigid insulation, though. What I do have wouldn’t stop it. I wonder if that’s truly what you’re hearing?

I know at the time my older version was built in early ’21 Jay was using VHB to adhere the skins to the frame and then riveting. The skins are 16 guage, which really wouldn’t flex that much, I don’t think. Granted you have a longer camper than most of us from what I could see in one of the pics of your build, so that could allow for skin flex.

We used to get an annoying ticking sound in wind and on some investigation found it was a couple small metal clips behind the front and rear hinge mechanisms that connected some small bungee cords that pulled in the front and rear tent panels when closing. We just put a sock between the clip and the aluminum it’s clicking against when it’s really windy (maybe over 20-25 seems to be where they make noise). The bungee tension holds them in place fine. HOWEVER, we also have the old style hinges, not the black ABS panels. I’d check anyway, since you may still have something similar going on there.
 

montechie

Active member
So I'm sitting in my camper right now and there's a fair bit of wind. I keep hearing the sound of what I assume is the aluminum skin of the camper flexing in an out in the wind. Not concerning but it is annoying. Anyone else have this issue?
I haven't experienced that, I've been in 25-30mph wind with 40ish gusts, enough to rock my truck suspension. That's before and after adding my soft insulation. I only have a 5' truck bed model though so it's pretty rigid. We occasionally get rattle from the lid buckles in the wind.

I wonder if it's between the skin and a support?

For insulating the metal bars I've used coroplast sheets, ABS type plastic sheets (above next to the slide), and this 1/4" plastic foam stuff. Not sure I have a favorite, the coroplast insulates really well on top of my wool insulation, but is clunky to cut curves into so I'm not super happy with my trim job. I may switch to a thin ABS/HDPE plastic sheets since you can work it like wood with jigsaws, etc and you can mount things directly to it. Some on here used the HVAC tape + carpet squares to eliminate the baked potato look and it looks nice.
 

Dan250

New member
I haven't experienced that, I've been in 25-30mph wind with 40ish gusts, enough to rock my truck suspension. That's before and after adding my soft insulation. I only have a 5' truck bed model though so it's pretty rigid. We occasionally get rattle from the lid buckles in the wind.

I wonder if it's between the skin and a support?

For insulating the metal bars I've used coroplast sheets, ABS type plastic sheets (above next to the slide), and this 1/4" plastic foam stuff. Not sure I have a favorite, the coroplast insulates really well on top of my wool insulation, but is clunky to cut curves into so I'm not super happy with my trim job. I may switch to a thin ABS/HDPE plastic sheets since you can work it like wood with jigsaws, etc and you can mount things directly to it. Some on here used the HVAC tape + carpet squares to eliminate the baked potato look and it looks nice.
Yeah just figured it out. Looks like the VHB between the skin and support on the roof didn't bond to one of the beams up there. Not sure if I can really do much about it. Seems like it wouldn't be a structural issue but it is annoying. Thanks for the tips for insulation techniques! Looking forward to be a baked potato soon so I got a while to decide what to do. Coroplast seems like a good way to go since it has an air gap in the material.

Side note. I got woken up this morning by a woodpecker knocking on my roof haha took him a few times to figure out the camper isn't some new kind of tree.
 

Pra4sno

Member
Yeah just figured it out. Looks like the VHB between the skin and support on the roof didn't bond to one of the beams up there. Not sure if I can really do much about it. Seems like it wouldn't be a structural issue but it is annoying. Thanks for the tips for insulation techniques! Looking forward to be a baked potato soon so I got a while to decide what to do. Coroplast seems like a good way to go since it has an air gap in the material.

Side note. I got woken up this morning by a woodpecker knocking on my roof haha took him a few times to figure out the camper isn't some new kind of tree.
In OVRLND's ownership packet they cite a polyurethane sealant they recommend: 3M 540 Gray. You could put this sealant up between the roof skin and roof support bar.

Or alternatively, you could use a seam sealer for automotive applications (they sell it in gray, this link is for black): 3M 08367 Seam Sealer in Black

I have used that on many trailer projects to bond/connect metal sheet to support bars and it is extremely durable; while also being more forgiving than a mechanical fastener.
 

dirtnsmores

Member
1000005457.jpg
1000006692.jpg

Haven't been on here in awhile but I had the camper installed back in February on my 06 Tundra and I'm absolutely loving this setup! Been working a lot the past few months but we've squeezed in a few trips. I've uploaded a lot of quick videos to my YouTube channel about the camper.

Here's how I did the insulation...


And here's how I have the "downstairs" setup for using it daily on breaks at work and camping with the family...


Lots more content coming soon. Thanks again to everyone who helped answer my questions during the build process.
 

ShrimpBoots

New member
For those of you looking for an easy overhead lighting setup and have a maxxair fan install. I just put in the maxxshade plus. It was easy enough to wire up to the fans wiring and throws a ton of light. Next step will be figuring out a switch so I can turn it on from outside the truck too. For now a stick works just fine. maxxair_light.png
 

dirtnsmores

Member
For those of you looking for an easy overhead lighting setup and have a maxxair fan install. I just put in the maxxshade plus. It was easy enough to wire up to the fans wiring and throws a ton of light. Next step will be figuring out a switch so I can turn it on from outside the truck too. For now a stick works just fine. View attachment 839622

That's pretty awesome. Didn't realize they make this product. I like that it's tied into the fans wiring. So did you have to remove the fan or mess with the headliner?
 

dstefan

Well-known member
That’s a pretty great product enhancement by Maxxaire!

Do you think there’s enough of a rim and clearance on the inside of the shade when opened to insert a filter? Due to my asthma I’d love to find some way to filter smokey air from wildfires and/or campfires when it’s bad out. I have some MERV13 material and some stiffer 3/4” aquarium filter and could easily fashion a filter, if there was enough room and the inside of the rim could hold it.

Already got surprised by distant heavy smoke one morning in May up in NE Utah. Strikes me too that with a filter could be a powered positive pressure vent . . .
 

ShrimpBoots

New member
I just got mine on Amazon, but ETrailer has some good images to understand how it installs. Make sure you get the "Plus" since that has the lights, otherwise it's just a retractable shade.

I left the headliner up and it was easy enough to work around. Basically there is already a collar installed up there and you add this collar to it. It comes with splice taps to wire into the fans power. I ended up taking the wire fan cage and the fascia of the fan down to tap off the control board instead of the lines Jay wired. My reasoning is they were already basically jumper wires with quick disconnects so if something went wrong I could fix that easier. It was only 4 more screws.

The collar that you add on has a rail that the actual light piece snaps on to. It's stayed very secure down rugboard roads. I actually didn't wire it up at first and just installed it to see if it would stay up offroad for a few weeks! It doesn't interfere with my front pushbar either.

I think you could absolutely fit a filter in there. The least amount of clearance is at the manual knob and there is still plenty. You could work around it easily.

Attached a few more pics to hopefully explain it better
 

Attachments

  • IMG_0846.jpg
    IMG_0846.jpg
    261.4 KB · Views: 37
  • IMG_0845.jpg
    IMG_0845.jpg
    265.7 KB · Views: 35
  • IMG_0844.jpg
    IMG_0844.jpg
    279.4 KB · Views: 34

Inyo_man

Don't piss down my back and tell me it's raining.
Is anyone else having issues with the bed sliding out while driving up steep, rough grades off-pavement?
I'm considering installing some sort of removable stop/peg to keep the bed in place.

Cheers
 

jagarcia89

Active member
Is anyone else having issues with the bed sliding out while driving up steep, rough grades off-pavement?
I'm considering installing some sort of removable stop/peg to keep the bed in place.

Cheers

I initially had some trouble on hard acceleration but my thicker mattress locks it in pretty good now. But I was going to make a simple latch to bolt to the unistrut (or 8020) bed slider.

Basically take a piece of bar with a slot and have it on a bolt at the channel. Have the slot off set so that it sticks up blocking the bed. Then you can just pick it up and flip it around.

Hard to describe so maybe I’ll draw a pic


Sent from my iPhone using Tapatalk
 

jagarcia89

Active member
Is anyone else having issues with the bed sliding out while driving up steep, rough grades off-pavement?
I'm considering installing some sort of removable stop/peg to keep the bed in place.

Cheers
Bad drawing. But the long horizontal box is the bed rail. Short vertical block is the bar in both open and closed position. Green is the slot and red is the cut out bolt. Pretty low tech and could be made with scrap.
 

Attachments

  • IMG_0529.jpeg
    IMG_0529.jpeg
    71.1 KB · Views: 34
  • IMG_0530.jpeg
    IMG_0530.jpeg
    112 KB · Views: 31

Inyo_man

Don't piss down my back and tell me it's raining.
Thanks for the reply.
I was thinking about something that was similar...
Perhaps a peg or bolt that drops into place to keep the bed from sliding out, but can be easily removed to pull the bed out.
I'll keep playing with some designs...

Cheers
 

Forum statistics

Threads
187,133
Messages
2,891,250
Members
227,790
Latest member
coast runner
Top