Pop-Up Camper - Custom Build (scratch built) Oasis-Si

So you skinned this with plywood, then skinned that with aluminum sheet? Any reason why you didn't just go straight to aluminum skin on metal frame? Seems like you could drop a hundred pounds right there. What thickness plywood?

Build looks great though! Really looking forward to see what you do with the pop up fabric.

Kevin
 

VanIsle_Greg

I think I need a bigger truck!
So you skinned this with plywood, then skinned that with aluminum sheet? Any reason why you didn't just go straight to aluminum skin on metal frame? Seems like you could drop a hundred pounds right there. What thickness plywood?

Build looks great though! Really looking forward to see what you do with the pop up fabric.

Kevin

Great question. The aluminum is only 0.040 thick, so not thick enough to stand on its own. The upper plywood skins are thin Luan, so not really 'plywood' but not really not plywood. Luan is strong, waterproof and dense, but most importantly light. A 4 x 8 sheet weighs only about 18 pounds per sheet. I believe that all of the upper skins totalled only 4 an d 1/2 ish...so around 100#. The aluminum on the wood is strong, and reasonably light. The Luan is 5.2mm or 1/4" only.


Great stuff to work with. When adhered with the Sika construction adhesive to bare prepped and cleaned steel, it is nearly impossible to remove. Amazing bond.

I am VERY stoked on getting the fabric done ASAP. That is the only big job left. Everything else is minor tasks and tweaks. I need to finish up the electrical, and to do so I need to re-do the roof lift system. Working on that design now. I found this online and think I might work on something like this with gas assist or go big and do Linear Actuators. One click roof lift seems appealing. ;)
 

VanIsle_Greg

I think I need a bigger truck!
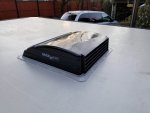
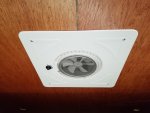
Now that I have the camper home, I can work on it as time permits. I managed to get some work done yesterday, and one of these tasks was important. Closing up the BIG 14 x 14 inch hole in the center of the roof. lol I installed my MaxxAir Mini Deluxe fan and wired it all up. Its a nice unit, with a set of LED lights, 2 screens (inner and outer) and a one speed fan. It seals up well, and is really low profile (why I picked this one). Its cheap too, $80 at Camping World now...

I poked around a little with some other tasks. I mounted the shore plug and the portable solar panel pigtail, as well as the camper to pickup 4 wire connector. I am not 100% sure I like this as I am not 100% sure I have enough wires with only 4? I need:

  1. Power for charging from vehicle
  2. Camera to tie into vehicle backup camera
  3. Running lights for roof side marker lights
  4. Wait... maybe 4 is enough?

What do you folks building your own use for camper to vehicle connections? I have seen a number of campers with 7 pin trailer wiring setups that tie into the trailer 7 pin. I like that but not sure I could make that work?

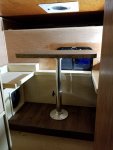
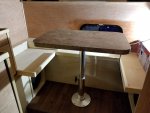
A better pic of the table in the 'up' position.

504142

Turned out great.

504143

MaxxAir installed on the white FG roof. Looks good up there... and the lower profile is nice. One solar panel goes behind this and one in front. Need to get those installed soon too.

504144

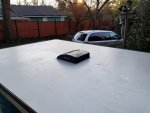
BIG roof.

504145

Inside. Nice and flush. You can run the fan, the lights or both and the vent opens and closes with a slide not a crank, so its simple and effective. In the deep of winter it would be easy to but a 'plug' of Reflectix in there to seal it up and keep the heat in.

504146

Today's project(s), more wiring and yet another trip to the store!
 

ITTOG

Well-known member
A standard 4 pin doesn't provide power. Yes you can make it have power but one wrong connection and you might pop a relay or fuse.

Sent from my Pixel XL using Tapatalk
 
You need a ground wire too.

Also, any concern with the roof being flat and water pooling up on it?

I'll have to check out our local Lowes, the home depot doesn't seem to have as much selection when it comes to lumber.

Kevin
 

VanIsle_Greg

I think I need a bigger truck!
A standard 4 pin doesn't provide power. Yes you can make it have power but one wrong connection and you might pop a relay or fuse.

Sent from my Pixel XL using Tapatalk

I probably should have / could have been more specific. I am not using the 4 pin built in trailer plug at all, but am leveraging a 4 pin connector to build a harness. I am wiring the camper connections up separately, power (via a battery seperator / charge isolator), running lights, camera and ground all coming in via a 4 pin only because I only need the 4 connections. I thought about using the 7 pin trailer connection.

You need a ground wire too.

Also, any concern with the roof being flat and water pooling up on it?

I'll have to check out our local Lowes, the home depot doesn't seem to have as much selection when it comes to lumber.

Kevin

The camper sits a little nose down in the truck as the ram is ass high, so gravity should let it drain naturally. We left the 2 front corners un-trimmed so they will act as drains. It shouldn't pool, plus when not in the truck it will have a tarp / cover on it, and the center vent is high enough to make it drain (at least so far it does).
 

VanIsle_Greg

I think I need a bigger truck!
After a week away in Tofino hiking, eating and chilling... I am back home and managed to get a few minutes to work on the camper. I have planned out the balance of my wiring for the truck -> camper and inside the camper as well. I managed to get some stuff wrapped up this afternoon and into the evening, including the rear inner overhead roof lights, the water inlet and hoses attached and the porch light. I tested all connections as well...and sadly found out that my drivers side upper roof marker lights do NOT work. ?

The interior lights are awesome, easy to install and work great. I used m/f plugs for them and wrapped the connections with shrink wrap in case I ever need to replace one (or two). They are inexpensive units from Amazon (China), but look and function great! Pretty stoked about the way they look and the light quality. Will buy again if ever I need some (link here).

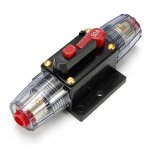
I ordered a few circuit breakers this time instead of fuses. I like the fact that they can be reset and there is no need for a bag of fuses, or as many fuses. I picked up these from Amazon as well in a few sizes for different purposes. (link here).

I did run into one issue... the fridge slider hits the door handle! :cautious: Not sure how we didn't catch this sort of critical design issue, but I will have to think on this one a bit. Changing or remediating this is no small task and would require esentially a full rebuild of the door and remediation of the frame too. ****...dge.

Water line and vent trimmed and secured in place. I didn't get a pic of the exterior, was too dark. It is a simple Valterra RV inlet, nothing fancy. Feels good to have this done.

506592

Ugh... this sucks.

506593

On a brighter note (figuratively and literally) here are my 4 of 6 lights! These get a separate dimmer and switch than the ones over the bed. This way I can have some lights or all lights and can dim the rear 4 over the kitchen / eating area differently than the reading lights. SMRT.

506594

Over kitchen lights.

506595

Porch light. This is about mid to upper chest height when loaded... so not in your eyes and its under the HW heater box

506596

I picked up these in different amp ratings for solar in from panels to controller, solar from controller to battery, from truck battery to camper and from power inside. Pretty nice quality for the price.

506599

Lights... they come in Chrome, white and black all frosted. These are warm white light and look great! Really nice light quality.

506600

Tomorrow I am going to dig into the wiring some more and hopefully get the main 4 gang switch panel lit up with all the interior wiring roughed in and ready for final connections. Its a bit of a mess right now... but its a work in progress.
 

CoyoteThistle

Adventurer
That's a bummer on the fridge slide/entry door. I did the same dang thing on my build with a kitchen drawer that interfered with a handle and a latch on my entry door. I think maybe it's an easy thing to miss since we're always working with the door open - either way, I never gave it a seconds thought until the build was essentially done and my drawer only opened a couple inches. Hope you can engineer an easy solution.

Build is looking great, congratulations on the progress and thanks for sharing!
 

VanIsle_Greg

I think I need a bigger truck!
Thanks Coyote Thistle... and yeah, it is easy to miss details like that when you are in the middle of so many things. Not sure how to fix this, but for now it is going to sit until I am finished some of the more important items and bigger jobs (like the fabric and lift system for instance. heh More wiring today, so that will be good, but need to lift the top, and its decided to rain now... so that may have to wait.

It feels good to see it coming together finally, as it has been a long process. Fun project though.
 

VanIsle_Greg

I think I need a bigger truck!
The kids and my wife are away skiing for 4 days so I jumped at the chance to get more work done. No pics this time... got too dark by the time I was done. I managed to finish the LPG / external storage cubby by adding aluminum "L" trim around the inside edge, Sika-sealed and then foam taped the edge. All adjusted and now the door seals out the elements, and makes a satisfying 'woosh' sound when it is closed. heh It is vented, but still seals very nicely for water.

I then worked on the rear entry door. I need to finish the trim around the inside edges and needed to adjust it to close better. That sucked, as it required me to completely remove it. It is now closing properly, has a nice even gap all the way around, and the trim I put on the front edge looks awesome even if I say so myself. I picked up all of the aluminum edging, aluminum trim and finish bits from good ole Home Depot. Handy having one just up the road. :)

I ran out of light...and aluminum, so more pics and work to come. I was going to finish trimming out the door tonight, but it rained... and I have no shop, so that was a no-go. Man...I need a shop.

Oh and I re-worked the design for my lift system. I am going to start that in the next few days as well. Back to HD for some 3/4" conduit and some hardware. Need to fab up some brackets, and then I just need to put in some nice radius bends and then install it all. Should work like a charm!

If you have seen Tim Morrissey's video and his FWC build, it is similar to his setup only I will likely put it on the sides not front to rear.
 

VanIsle_Greg

I think I need a bigger truck!
So...today was not as productive as I had hoped and needed, but it was productive all the same. I pulled off all of the remaining protective film off of the skins, and cleaned up the masking tape. The film was going a little weird in the sun, and the tape was starting to come apart as well. The sun, morning dew were turning the tape dry and the film was leaving some goo... which I will have to figure out how to remove.

Anyways, it looks pretty rad all silver now, and it is getting close to get finished. The exterior is about 90% done now, with only a few little bits to do (and the fabric of course). I had to remove and re-adjust the rear entry door and then I could add all of the remaining corner trim. That is now 100% done, and that feels pretty good.

Need to work on that lift system now. Good times!

Rear door and rear hatch complete. LPG heater box almost done now too.

507732

Skins turned out great. No lumps and or bumps, nice and smooth.

507733

Need to make up those corner trim pieces soon. I wish I had a bandsaw.

507735

Marker lights... on this side do NOT work. Ugh. Need to try to sort that out. The wiring is in the roof buried and inaccessible, so that might be interesting.

507736

Tomorrow, lift tubes getting purchased and bent and then on to some custom brackets.
 

Attachments

  • 20190330_130947.jpg
    20190330_130947.jpg
    1.5 MB · Views: 246
So...today was not as productive as I had hoped and needed, but it was productive all the same. I pulled off all of the remaining protective film off of the skins, and cleaned up the masking tape. The film was going a little weird in the sun, and the tape was starting to come apart as well. The sun, morning dew were turning the tape dry and the film was leaving some goo... which I will have to figure out how to remove.

Anyways, it looks pretty rad all silver now, and it is getting close to get finished. The exterior is about 90% done now, with only a few little bits to do (and the fabric of course). I had to remove and re-adjust the rear entry door and then I could add all of the remaining corner trim. That is now 100% done, and that feels pretty good.

Need to work on that lift system now. Good times!

Rear door and rear hatch complete. LPG heater box almost done now too.

View attachment 507732

Skins turned out great. No lumps and or bumps, nice and smooth.

View attachment 507733

Need to make up those corner trim pieces soon. I wish I had a bandsaw.

View attachment 507735

Marker lights... on this side do NOT work. Ugh. Need to try to sort that out. The wiring is in the roof buried and inaccessible, so that might be interesting.

View attachment 507736

Tomorrow, lift tubes getting purchased and bent and then on to some custom brackets.
wow...looks like the airstream of pop ups. keep up the solid work.

Sent from my SM-N960U using Tapatalk
 

VanIsle_Greg

I think I need a bigger truck!
As a friend said recently...the devil is in the details. And there are a lot of details.

Added some trim pieces to cover all the joints and finished the rear with some L angle at the bottom edge. All held on with Sika of course. Lots of Sika.

Conduit for my lift system. 3/4" and borrowed a bender from a friend. Looking forward to getting these bent up tonight.

508084

Bottom trim. Looks so much better now.

508085

Joint trim.

508086

More joint trim...

508087

Rear corner detail with wider trim to completely cover the frame edge.

508088

Still more joint trim. Looks so much more finished now that its all in place.

508089

More to come soon.
 

VanIsle_Greg

I think I need a bigger truck!
It's been a busy weekend. I worked on Saturday on the mounting brackets for the lift tubes I bent up last weekend. These will be an internal double hoop style manual lift with gas lifting struts outside to help out. Again, they uploaded out of sequence... heh

Finished lift bracket (no weld style). I picked up some 1/8" x 2" aluminum from Home Depot as well as some beefy L angle brackets. I trimmed and rounded the L brackets, and then went about measuring, drilling and countersinking all the fasteners and the mounting holes for the finished brackets to the camper. These are 7" x 2" and because the aluminum was non-finished I sanded them for a brushed look. Not bad for something I whipped up. The tunes for the lift hoops are 3/4" EMT conduit that I bent up.

510345

Finished unit (there are 4 mounting bases).

510347

Shiny!

510348

This is what each end will look like. 1/4" mounting hardware with lots of washers between everything to keep it all moving nicely with no binding. Washers were not included in the prototypes below.

510349

Testing.

510350

Works!

510351
 

Attachments

  • 20190413_201237.jpg
    20190413_201237.jpg
    1.4 MB · Views: 98

Forum statistics

Threads
188,284
Messages
2,904,848
Members
229,961
Latest member
bdpkauai
Top