Pop-Up Camper - Custom Build (scratch built) Oasis-Si

VanIsle_Greg

I think I need a bigger truck!
Looks great in there!
Doesn't look to sag the truck too much either. You'll have to let us know what it weighs.

Im assuming you'll be removing the tailgate.

I once road out with a friend who had a side by side loaded in a 8' bed and the tailgate didn't quite close. We left it down for the trip out, somewhere along the bumpy road the tailgate bounced up high enough and removed itself from the bottom pivot. Some harness and paint damage were the only damages. Who knows how long it was dangling around from the cables back there...

Yes, the tailgate was supposed to come off. I lowered it and thought to myself "I really need to remove that...." then proceeded to forget, back up under it, lower it down and start strapping it in. Then turned around and was like...."Um, yeah".

Honestly it looks ridiculous with the gate still on and the camper tucked in, but not closeable. lol

The sag is very minimal, I do have AirLift air bags in the coils to help with the sway when we tow our trailer, and I installed Timbren bump stops for the same reason...both also help out a lot with the camper. I think it dropped maybe 1.5 inches? I am pricing out a small leveling lift right now, so it is going up about 2 inches in the next few weeks. Only thing I will have to worry about with the lift is also adding a bump stop pad spacer to make up the gap.

Rides very good too. Solid and stable.
 

Timbren

Active member
Yes, the tailgate was supposed to come off. I lowered it and thought to myself "I really need to remove that...." then proceeded to forget, back up under it, lower it down and start strapping it in. Then turned around and was like...."Um, yeah".

Honestly it looks ridiculous with the gate still on and the camper tucked in, but not closeable. lol

The sag is very minimal, I do have AirLift air bags in the coils to help with the sway when we tow our trailer, and I installed Timbren bump stops for the same reason...both also help out a lot with the camper. I think it dropped maybe 1.5 inches? I am pricing out a small leveling lift right now, so it is going up about 2 inches in the next few weeks. Only thing I will have to worry about with the lift is also adding a bump stop pad spacer to make up the gap.

Rides very good too. Solid and stable.

Happy to see you are enjoying our Bump Stops! Keep the adventures coming!
 

VanIsle_Greg

I think I need a bigger truck!
Happy to see you are enjoying our Bump Stops! Keep the adventures coming!

Thanks for the reply Timbren, yes they work great... very happy with them loaded up with the camper or towing the trailer or hauling stuff. Greatly improved ride when loaded.
 

VanIsle_Greg

I think I need a bigger truck!
Deposit going in for fabric and cushions this weekend. He is coming over to do final measurements and working out the details. Pretty excited about this development, but I sort of missed the season...heh. I am thinking about a Planar diesel heater from my friends over at Expedition Upfitter. So 'maybe' a winter camp might sneak in.
 

VanIsle_Greg

I think I need a bigger truck!
Deposit in, final designs and plans confirmed and templates made. Also having him make me a rear awning to go over the entrance/door and rear of the camper. Should be nice.... 5' out from the back and the full width of the camper (81").

I managed to get some work done today as well. Installed a backup camera in the rear of the camper and wired it up, well wired it up to the point where I need to tie it into the factory Ram wiring. Will need to make a pigtail for that. I also installed the 2 x side lights and the 4 gang switch set I picked up. Those are for either cooking in the kitchen (outside on the drivers side under the awning) or seeing who is out there in the night! heh

I also made a nice wiring cover, to hide all the wiring going from side to side... then I dropped it when I was installing it and cracked it...FML. Oh well, will fix it some day. Also managed to wire up some wiring for the 'under' lights, or the lighting that will go under the sides of the camper. Again, to light up around the camper if needed. I still need to re-wire all my running lights too... I am a few short so need to order those ASAP.

No pics this weekend, totally forgot! heh
 

VanIsle_Greg

I think I need a bigger truck!
Not much in the way of progress of late... too cold and wet to do much, and pitch black by the time I finish work. I did manage to get a hold of all of the upper running lights (amber and red) and on sale this time too that I will be installing soon. I also managed to score a set of new (he used them once) Happijac Stainless Quick Load turnbuckles for $200. They need to be shortened a couple of inches, but they are as new and will be a LOT easier than the setup I have now.

The tie downs I have now work, but they are not ideal (and a bit clunky to use) and they take a while to get installed and tightened. I could not pass this deal up, it will make loading a lot faster. :cool:

71-zLOcUdKL._AC_SL1500_.jpg
 

VanIsle_Greg

I think I need a bigger truck!
Ugh... got the call a few days ago from my fabric guy. Was awesome to get the call, and an update as it has been a month or so. The fabric he ordered for my camper pop up sides and the rear door awning, which is the same stuff / colour he is using on his boat top replacement as well... was backordered due to COVID. The supplier he usually uses could not give him a timeline for the 60" width fabric, and would not commit to a delivery timeline. So, he had to order it from a different supplier in the 46" width. So... it means a few more more seams, but at least it only took 2 weeks to arrive. All the other parts, zippers and window / screen material etc showed up weeks ago.

So the good news is (for both of us I guess), the fabric arrived a few days ago. The also good news is, he is starting work ASAP and it should be done soon, he is putting a bit of a rush on it. This is all ok, it is cold and wet out there, and I am not quite ready to get the fabric installed anyhow. lol Will be camping by spring no matter what!

Still super stoked on this progressing.
 

ITTOG

Well-known member
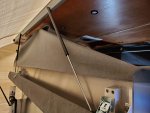
Man, where does the time go. I have spent the past few weekends and days off working on the camper trying to get it done... and I am getting pretty darn close. One of the issues I was still dealing with was the roof wanting to rack from side to side when lifting or lowering. I had always planned on another front lift support... but the two side ones were a PITA to make... so I made one closer to the FWC style.

Here is the finished short drivers side lift support. All glued and screwed in place. It is shorter because of the upper kitchen cabinet.

View attachment 611889

Finished passenger side... same as drivers only about 2' longer.

View attachment 611890

Looking good.

View attachment 611891

Here is the new front panel. Screwed into the top (roof) with a piano hinge and many many screws... folds in the middle and at the bottom. This is made with 1/2 plywood for strength and because I didn't want to mess with rivets and composite materials like FWC... and I had scrap plywood.

View attachment 611892

Oh and I finish painted the bed platform with the same primer and then the one part epoxy I used on the underside of the tub. It is for floors / garage or basements so it should stand up.

View attachment 611893

Detail of the mickup.

View attachment 611894

No more racking, roof works awesome.

View attachment 611895

Still needs a latch, trying to decide if I want to use a plank / stick like FWC does or something else? TBD

View attachment 611896

More to come...

Not sure if you have seen my build but I am building a pop top as well (you can see it at the link in my signature). You are much further along than I am and I was thinking about how I am going to support my top with gas struts. It doesn't take one long to understand that gas struts alone will not be enough. My roof is 12' x 5' 7". While thinking about this I remembered you build so came back to see what you did. I was surprised to see you started with the tubing supports on the side. What led you to that decision versus the front and back?

I hadn't thought too much about the tubing supports at this point but have looked at them. I am leaning towards plate aluminum similar to the wood supports you made or even a thicker plate that isn't as wide, similar to what overland explorer uses (pic below). I am only planning to put them at the front and back. I hadn't thought about needing them on the side. It appears you installed the tubing supports first. Is that correct. If yes, did the wood supports then resolve the movement issues you were having.

Finally, in your 4th pic, which I copied below, it appears the design is a little different than the one you installed on the other end of your camper. Is the smaller piece of wood that appears in front just hiding the pivoting part of two pieces of wood behind it or is this one a completely different design?

I guess I lied because I do have one more question. Have you started on your canvas for the top? I too found Timothy Morrissey's youtube video's and my canvas will be tall like his. Mine will be about 37" unless I prevent full extension of the gas struts using the supports I put at each end. Anyway, curious if you have thought about your material you will use and if you plan to have an insulated liner at the same time? Any idea what these companies are using for the insulated liners?

Sorry for so many questions and thanks for posting so much detail on your build. It has been great to follow along and looks very nice.

1613788999201.png1613789189425.png
 

VanIsle_Greg

I think I need a bigger truck!
Not sure if you have seen my build but I am building a pop top as well (you can see it at the link in my signature). You are much further along than I am and I was thinking about how I am going to support my top with gas struts. It doesn't take one long to understand that gas struts alone will not be enough. My roof is 12' x 5' 7". While thinking about this I remembered you build so came back to see what you did. I was surprised to see you started with the tubing supports on the side. What led you to that decision versus the front and back?

ANSWER: The cabinets in the galley and the hanging locker go all the way up to the top of the tub, so unfortunately that really left no space for the lift supports when closed. I would call that a design error or possibly a design feature heh? Either way the plan from early on was side lift supports, and they work really well. The part I like the best is it is easy to lift the roof from the middle of the floor... one stop shopping.

I hadn't thought too much about the tubing supports at this point but have looked at them. I am leaning towards plate aluminum similar to the wood supports you made or even a thicker plate that isn't as wide, similar to what overland explorer uses (pic below). I am only planning to put them at the front and back. I hadn't thought about needing them on the side. It appears you installed the tubing supports first. Is that correct. If yes, did the wood supports then resolve the movement issues you were having.

ANSWER: Yes, I like that design a lot, the one pictured... the aluminum one. The biggest reason for the front wood support is safety, but also to reduce 'racking' or side to side movement while I am building this thing. Once the fabric is installed much or all of that should go away, but I will likely leave the wood in place for added support. My roof weighs way too much, so I will sleep better knowing that there is some added support right above my head. Wood support completely removed all racking from side to side.

Finally, in your 4th pic, which I copied below, it appears the design is a little different than the one you installed on the other end of your camper. Is the smaller piece of wood that appears in front just hiding the pivoting part of two pieces of wood behind it or is this one a completely different design?

ANSWER: The reason for the design change, or more correctly the reason I designed mine this way was twofold; to keep the overlap simple to build, and to be able to use a simple but mount for the piano hinge. The 4WC design relies on thin material and rivets. I thought about picking up some similar material to the 4WC composite... but had LOTS of Birch plywood available so, Birch ply it was. The face piece is the 'stop' for the panel. Meaning that when the panel is fully extended the face piece which is attached to the bottom stops the 2 pieces from over extending and gives it all its strength. Works like a hot darn too.

I guess I lied because I do have one more question. Have you started on your canvas for the top? I too found Timothy Morrissey's youtube video's and my canvas will be tall like his. Mine will be about 37" unless I prevent full extension of the gas struts using the supports I put at each end. Anyway, curious if you have thought about your material you will use and if you plan to have an insulated liner at the same time? Any idea what these companies are using for the insulated liners?

ANSWER: My canvas / material is made of Sunbrella marine fabric, so designed to be out in the elements and is highly water resistant and mold resistant, wear resistant etc. Basically it is made to work hard. My sides are only 23" high as I recall, so deeper camper tub, smaller fabric sides. This means less un-insulated area and less area to add insulating blanket too. Me, I am going to make something with Reflectix and likely a fabric over top. I have watched Timothy's videos, and have communicated back and forth with him a few times on his build, especially the fabric videos. He is a super nice guy, very helpful. I whimped out and contracted out my fabric to a local Marine Fabric guy. He is also doing all my interior upholstery and a rear awning as well. Should be done soon if not already (covid delays on custom fabric orders killed our timelines).

Sorry for so many questions and thanks for posting so much detail on your build. It has been great to follow along and looks very nice.
Thanks for all the questions man. If you want any additional details or have any questions, I am happy to answer. You can connect with me via my profile and send me an email. I am NOT an expert, but I have some stuff that I know worked and more importantly stuff that didn't...heh, happy to share both.
:cool:
 

lindy74

Member
Great build and great job! Almost makes me want to build another. I went with the lift pipes on my build as well, and I really like how it worked. Yours is very finished looking, while i went with more of a utility. Again great work and thank you for sharing it!
 

VanIsle_Greg

I think I need a bigger truck!
Great build and great job! Almost makes me want to build another. I went with the lift pipes on my build as well, and I really like how it worked. Yours is very finished looking, while i went with more of a utility. Again great work and thank you for sharing it!
Thanks Indy!
Lots more to come. Stay tuned!
 

VanIsle_Greg

I think I need a bigger truck!
Long time no update?

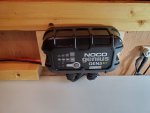
I am working on the camper again now that the weather is not so cold, and I am getting ready to finally finish this thing. Been way too long... mind you I took the better part of a year off so, that hit the productivity pretty hard. Anyhow I am finishing up the electrical, including adding in some lighting that I wanted to add and unfortunately needed to replace the battery charger / maintainer that I had because is seems to have failed? Then it started working again? Well it is 10 years old, so was likely on its way out. Upgraded to a NOCO smart charger. I have solar for when It is off grid, and when I have shore power, I have both options. All 12v in this camper, and minimal at that as I really don't need much more than some lights, a water pump and a way to charge my phone. Oh and will need to run the heater soon too... Diesel I think? Maybe LPG... tbd.

Electrical is cleaned up (again) with a few more lines to run still. I am setting up a sub panel under the sink to run all the other lights and a few other accessories and to give me some ability to expand if needed? Also set up a 110v plug so that on shore power the fridge will run on 110v and if not it will run on 12v. Best of both worlds, and can crank er up before a trip on AC and save the batteries.

Before

20210321_151547.jpg

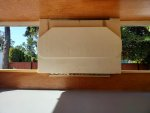
After. Batter box cover is not 100% sealed, but it is 90% and it is vented to the outside too.

20210321_160956.jpg

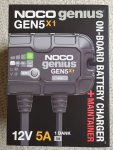
New NOCO. Nice product... has Lithium capabilities, even the ability to reset a completely dead unit. Also has temperature compensation via a temp probe and programming... also can de-sulphate the repair a battery (so they say).

20210321_160943.jpg

Nice unit.

20210321_131845.jpg

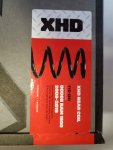
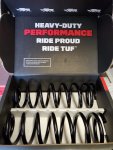
Oh and I stumbled across a set of these XHD rear coils for my RAM. They shipped a set for a RAM 1500 to a guy who ordered some for a Chev... so he sold them NIB and cheap. Read some good stuff, will install soon. Stock RAM rear spring rate is pretty soft at the best of times.

20210320_130147.jpg

20210320_130108.jpg

I 'might' be replacing the wood on the camper with aluminum pretty soon (like next weekend)? The glass is delaminating from the wood, and it looks like crap. Not to mention it will eventually leak and rot... and I have already repaired it all once. Wood must have had too much moisture when it was glassed...plus it was early winter and a bit cold. Meh, onwards and upwards!! Home Depot has a pretty decent selection now!

20210321_172648.jpg
 

VanIsle_Greg

I think I need a bigger truck!
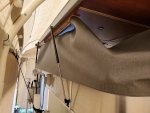
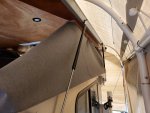
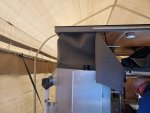
So... some progress, finally. Laine, the marine upholstery guy stopped by on Friday to do some final measurements and planning for the canvas, and he dropped off the finished cushions and some additional fabric to wrap a few interior trim pieces. The fabric was stretched around the camper and we finalized the window sizes and the opening locations as well as discussed the rear awning size and how it will attach. Pretty stoked on all counts!

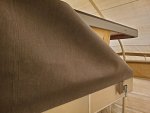
This is marine Sunbrella, and is some pretty nice fabric. Matches the aluminum and the awning well (awning is dirty). The test fit went well overall!

20210409_111248.jpg

20210409_111228.jpg

20210409_111256.jpg

20210409_111220.jpg

There will be a zipper in the rear to close it which will also allow it to be removed if it ever needs repairs. Also will have an opening window on both sides, and one in the rear over the door. All with bug screens and zip up / velcro closures. Also asked him to stitch in some D-Rings or some loops to allow for some bungee cord to be used to assist in closing it (ala 4WC).

20210409_104815.jpg

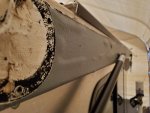
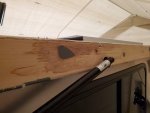
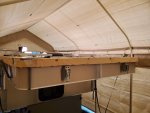
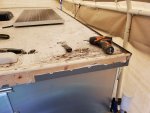
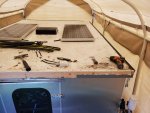
Next up... removing the fiberglass on the roof sides and the the roof sides themselves. As you can see, there is some pretty serious delamination and bubling... and sadly, some water got in. The roof top itself seems fine and is well bonded, but these sides were a mess. This was not something I did, and it appears there was some issues with the gel coat and or the glass bonding? Some areas peeled off with little effort, some were better adhered, but 80% of it was ruined so it will be replaced with aluminum.

20210410_174701.jpg

Water got in here... and the screws were completely corroded. These were counter sunk, plugged with wood plugs and glue and then under glass... so glad I am doing this.

20210410_181425.jpg

20210410_181403.jpg

20210410_171523.jpg

20210410_171518.jpg

I was able to drill out all the plugs and remove all but 3 screws that were all stripped BADLY when installed, so I am ripping apart the entire passenger rear corner to get them out. Why, because I am going to use my cordless 18v circular saw and very carefully cut the wood sides off, and do NOT want to hit any screws (new blade and I am cheap). heh

All ready to cut the sides off tomorrow. Will take some before and after (and during) pics.

#progress.
 

VanIsle_Greg

I think I need a bigger truck!
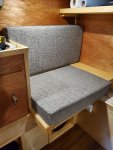
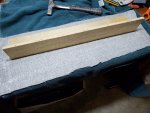
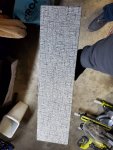
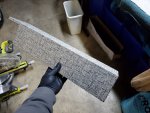
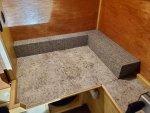
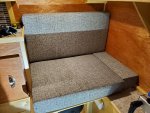
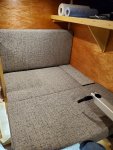
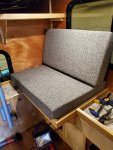
I forgot to add pics of the upholstery. This is 4" HD foam with Marine Grade fabric. I like the colour and how it is sort of neutral enough to blend in... hard to see in this light however, it was dark and these are taken under LED roof lights with the lid closed. heh This is with the cushions in, but the corner electrical / plumbing races still in raw varnished plywood. You can see one beside the seat cushion. The other is underneath the bottom of the backrest. I had some fabric to wrap these so... I did.

20210410_182701.jpg

Wrapping.

20210410_204938.jpg

Meh job, but it will do. Poor quality knock off Olfa Snap Off Blades did not keep an edge well, so there was some tearing. I was able to get a pretty decent job using high tack spray adhesive and back staples after wrapping the corners. Then some heat from a small soldering torch to singe the frayed bits. Job done.

20210410_205008.jpg

20210410_204958.jpg

Installed and a perfect fit.

20210410_210238.jpg

Cushions installed... not bad!

20210410_210315.jpg

In almost bed mode. heh I still need to re-build my table and get it set up to make the mid section of the bed. I have a design in mind, just need to do the actual work now...heh.

20210410_210339.jpg

20210410_182706.jpg

Will be off the tools for a couple of weeks starting next Thursday as I am having minor hand surgery, so will not be able to do much for a bit. Hopefully (fingers crossed... pun intended because this is for trigger finger) I heal fast and can get back to work ASAP on the roof in preparation for the fabric!! Should be able to install that in a few weeks.
 

Forum statistics

Threads
188,368
Messages
2,903,823
Members
230,227
Latest member
banshee01
Top