cruiseroutfit
Well-known member
Death Star Build Part# 4: Go Time, the Build Day!
Why a single weekend? Well I'd like to think I'm a pretty busy guy and free weekends come at a premium. Quite honestly I'd much rather be bouncing around the desert on a Saturday than working on my vehicles. While lightly discussing the 100 Series build idea with my ARB sales rep (TR Burrus) & Jason Goates, one of my part-time helpers here in the shop, the idea came up, "Why not in a single day?". (Pretty sure we all have Jason to blame for the idea") ). The more I thought about it, why not? As I developed my Gaant chart and laid out the tasks in the build planning phase, it quickly became apparent that this wasn't going to be feasible in 24 hours proper, well not in the manner in which I wanted it installed that is. So instead we planned around a weekend, starting after we closed the shop and sent off our shipping on a Friday evening and culminating sometime on Sunday when everything was wrapped up and finalized.
). The more I thought about it, why not? As I developed my Gaant chart and laid out the tasks in the build planning phase, it quickly became apparent that this wasn't going to be feasible in 24 hours proper, well not in the manner in which I wanted it installed that is. So instead we planned around a weekend, starting after we closed the shop and sent off our shipping on a Friday evening and culminating sometime on Sunday when everything was wrapped up and finalized.
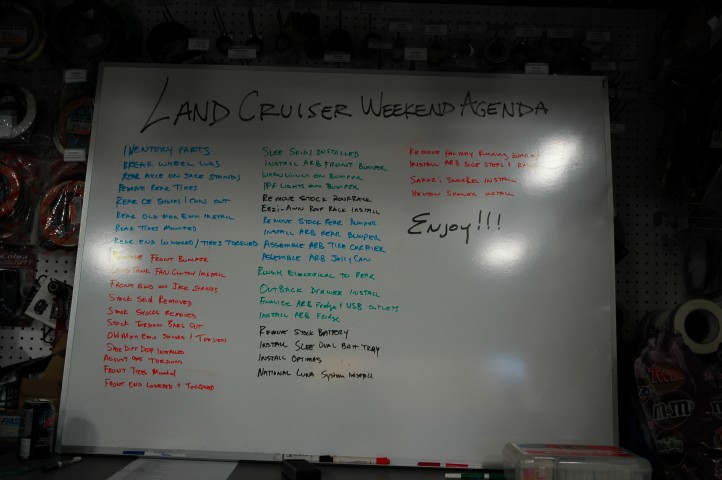
The Weekend Task List
The advantage of the Gantt chart was the ability to scale the project in any way we wanted. I knew we had approximately 150 man-hours of projects to complete, be it 15 guys working 10 hours each or 5 guys each working 30 hours. There is an obvious point of diminishing returns in terms of the number of people you can have practically working on one vehicle at one time, given that constraint we tried to plan not only the project timing but also the number of people on each project as well. Our 'staff' ranged from over a dozen people during the heat of things on Saturday to 3 people on Sunday afternoon. Practical for all? Perhaps not but plan some projects, buy some pizzas and you might be surprised not only how many show to help but how helpful they in fact are. Crucial for me was to not compromise the build quality in the name of getting it done in a weekend. By bringing in some 'ringers' that specialize in these projects I was able to ensure that the build quality was maintained throughout.
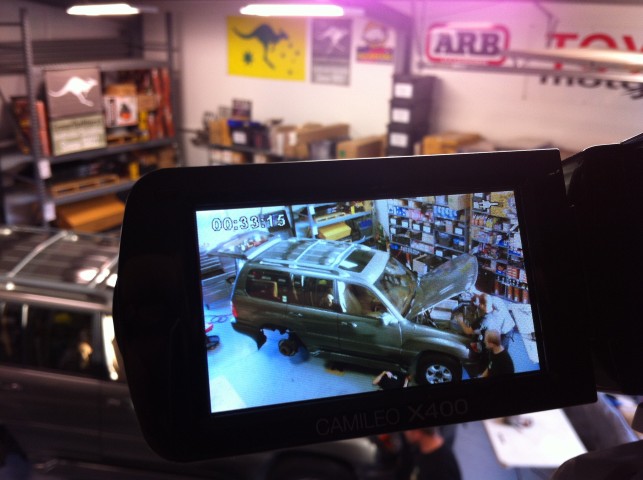
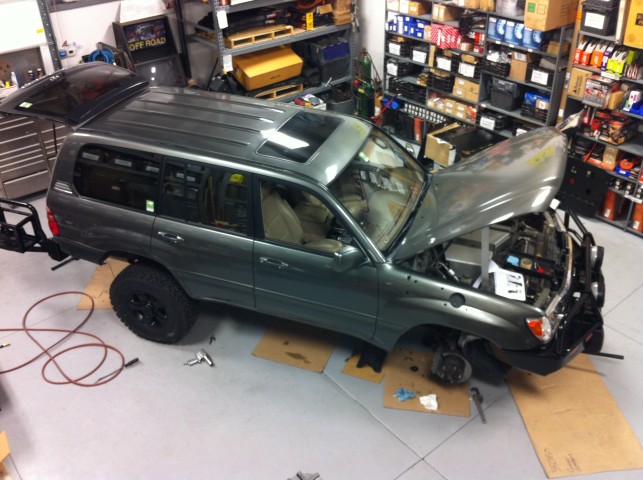
Capturing the first items of the build - stock rear suspension removal & removing the stock front bumper
Step one was to get the 100 in the shop and start tearing things off like mad men. Our first victim would be the front bumper and while one crew (Jake, Jason & Dan) was dismantling the factory front bumper a second crew (Johnny & Stephen) were pulling the suspension off the rear axle. With the stock coils and shocks removed, it was time to install the new Old Man Emu rear suspension components. Meanwhile, assembly on the front ARB bumper was underway and the front bumper crew installed the chassis mount, Warn winch, and buffers in preparation for mounting the bar to the chassis. With the front bumper installed and finalized, we could start the rear bumper/swing installation which needed to happen before the drawers could go on, seeing the trend here? Like pieces of a puzzle, we had to jump around to keep out of the way of the simultaneous projects all the while having projects completed before the next started. All part of the fun.
Build Pictures from Friday Evening:
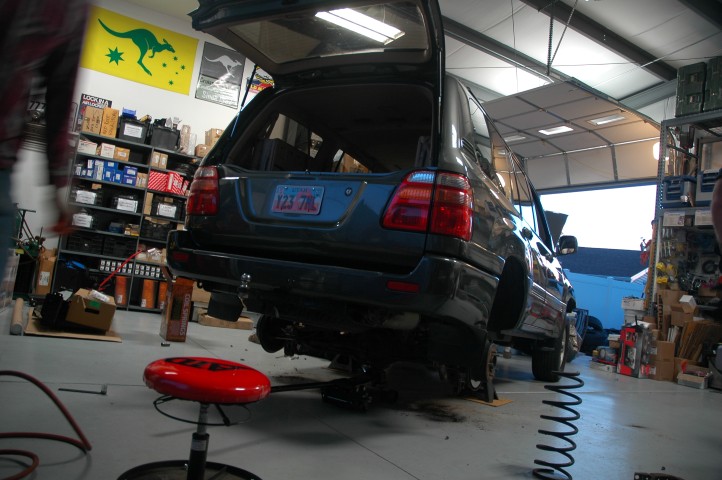
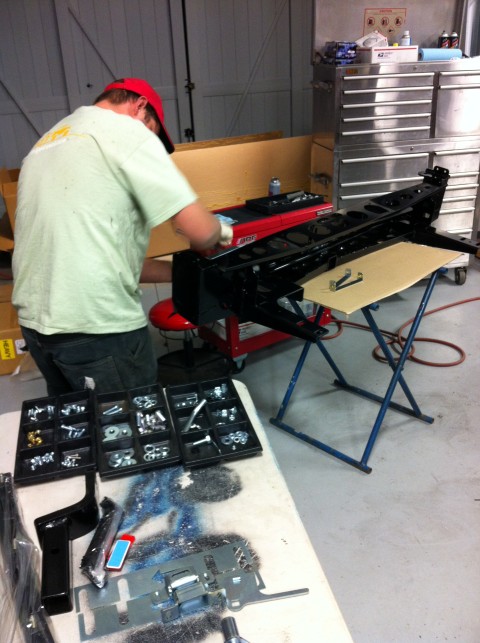
OME rear suspension installation

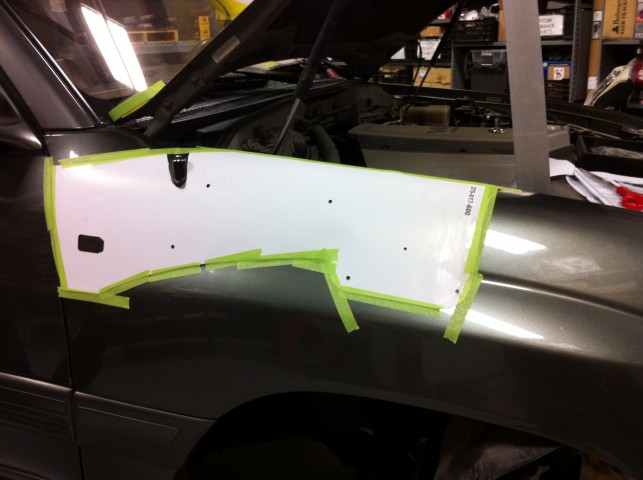
Prepping the front end for the ARB winchbar
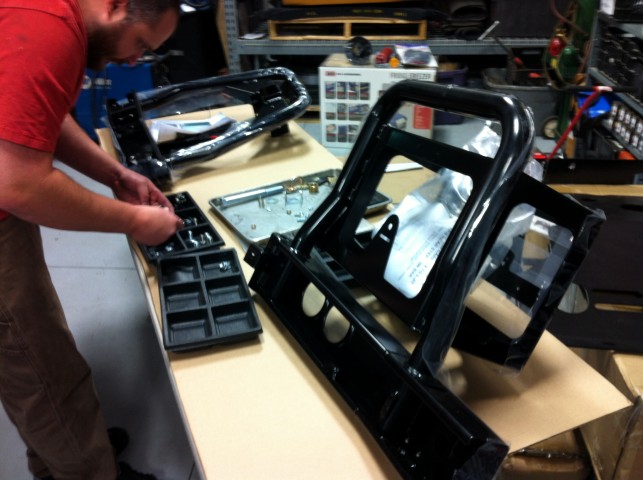
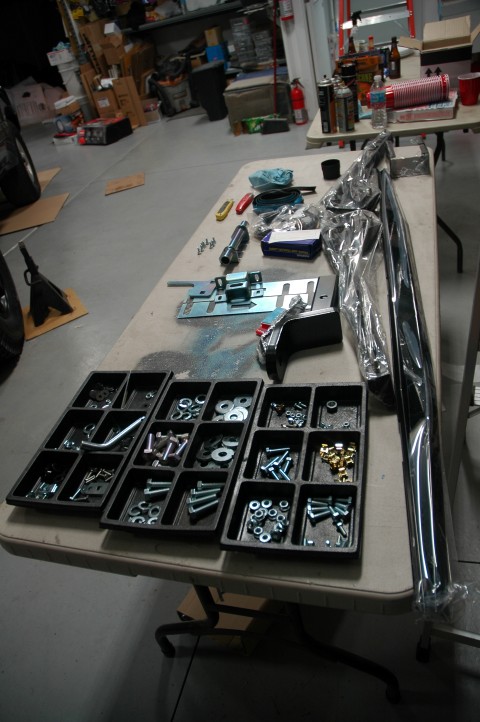
Assembling the ARB rear swings - fuel & tire carrier
Assembling the ARB rear bumper main bar
Installing the carriers on the rear bumper
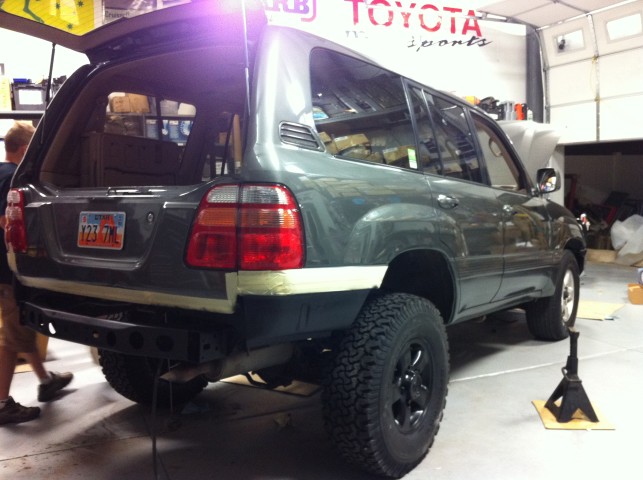
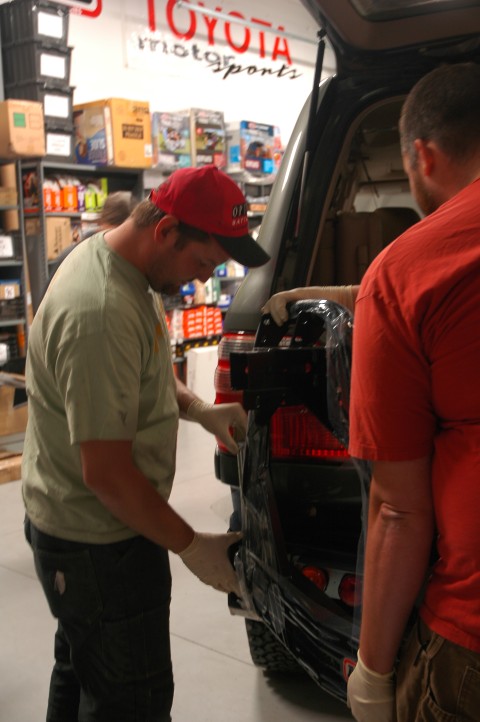
Front bumper complete, the shop getting messy!
Rear end suspension complete, front bumper complete, snorkel holes drilled

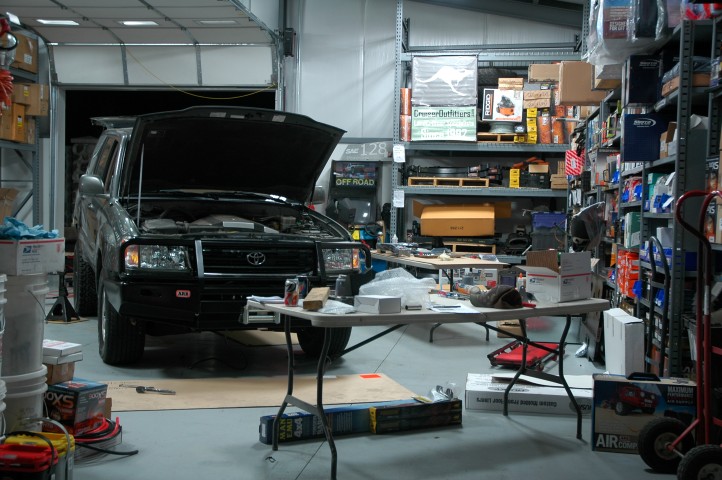
Making progress!
By Friday night the winch was installed in the front bumper and the bumper was finish mounted. Now we could rock out the front suspension and start on the rear bumper as the rear suspension was finalized. Working through the night we finished up the bulk of the rear bumper and swings and the front suspension as well. Bouncing in between front and back tasks I started on the snorkel, we let the paint dry on the fender holes and grabbed some early morning brekky.
To Do List By End of Day 1 (Friday 6PM - Saturday 5AM):
Inventory Parts X
Break wheel lug nuts X
Rear End on Jack Stands X
Remove Rear Tires X
Rear Stock Shocks & Coils Removed X
Rear OME Suspension Installation X
Rear Tires Mounted X
Rear End Lowered & Rear Tires Torqued X
Remove Front Bumper X
LandTank Fan Clutch Installation
Front End on Jack Stands
Stock Skid Plate Removed X
Stock Shocks Removed
Stock Torsion Bars Removed
OME Shocks & Torsion Bars Installed
Slee Diff Drop Kit Installed
OME Torsion Bars Adjusted
Front Tires Mounted
Front End Lowered & Front Tires Torqued
Stock Trans Cross Member Removed
Slee Skid Plates Installed
Install ARB Front Bumper X
Warn Winch Installed in Bumper X
IPF Lights on Bumper X
Remove Stock Roof Rack X
Remove Stock Rear Bumper X
Install ARB Rear Bumper X
Assemble & Install ARB Wheel Carrier X
Assemble & Install ARB Jerry Can Holder X
Rough Electrical to Rear
Rear 3rd Row Seats & Seatbelts Removed
Outback Drawer System Installed
Finalize ARB Fridge Wiring & Aux power outlets
Install ARB Fridge
Remove Stock Battery
Install Slee Dual Battery Tray
Install Optima Battery's
National Luna Dual Battery System Installation
Remove Factory Running Boards
Install ARB Side Steps & Side Rails
Install Eezi-Awn K9 Roof Rack
Safari Snorkel Installation X
Helton Hot Shower System Installation
Why a single weekend? Well I'd like to think I'm a pretty busy guy and free weekends come at a premium. Quite honestly I'd much rather be bouncing around the desert on a Saturday than working on my vehicles. While lightly discussing the 100 Series build idea with my ARB sales rep (TR Burrus) & Jason Goates, one of my part-time helpers here in the shop, the idea came up, "Why not in a single day?". (Pretty sure we all have Jason to blame for the idea
). The more I thought about it, why not? As I developed my Gaant chart and laid out the tasks in the build planning phase, it quickly became apparent that this wasn't going to be feasible in 24 hours proper, well not in the manner in which I wanted it installed that is. So instead we planned around a weekend, starting after we closed the shop and sent off our shipping on a Friday evening and culminating sometime on Sunday when everything was wrapped up and finalized.
The Weekend Task List
The advantage of the Gantt chart was the ability to scale the project in any way we wanted. I knew we had approximately 150 man-hours of projects to complete, be it 15 guys working 10 hours each or 5 guys each working 30 hours. There is an obvious point of diminishing returns in terms of the number of people you can have practically working on one vehicle at one time, given that constraint we tried to plan not only the project timing but also the number of people on each project as well. Our 'staff' ranged from over a dozen people during the heat of things on Saturday to 3 people on Sunday afternoon. Practical for all? Perhaps not but plan some projects, buy some pizzas and you might be surprised not only how many show to help but how helpful they in fact are. Crucial for me was to not compromise the build quality in the name of getting it done in a weekend. By bringing in some 'ringers' that specialize in these projects I was able to ensure that the build quality was maintained throughout.
Capturing the first items of the build - stock rear suspension removal & removing the stock front bumper
Step one was to get the 100 in the shop and start tearing things off like mad men. Our first victim would be the front bumper and while one crew (Jake, Jason & Dan) was dismantling the factory front bumper a second crew (Johnny & Stephen) were pulling the suspension off the rear axle. With the stock coils and shocks removed, it was time to install the new Old Man Emu rear suspension components. Meanwhile, assembly on the front ARB bumper was underway and the front bumper crew installed the chassis mount, Warn winch, and buffers in preparation for mounting the bar to the chassis. With the front bumper installed and finalized, we could start the rear bumper/swing installation which needed to happen before the drawers could go on, seeing the trend here? Like pieces of a puzzle, we had to jump around to keep out of the way of the simultaneous projects all the while having projects completed before the next started. All part of the fun.
Build Pictures from Friday Evening:
OME rear suspension installation
Prepping the front end for the ARB winchbar
Assembling the ARB rear swings - fuel & tire carrier
Assembling the ARB rear bumper main bar
Installing the carriers on the rear bumper
Front bumper complete, the shop getting messy!
Rear end suspension complete, front bumper complete, snorkel holes drilled
Making progress!
By Friday night the winch was installed in the front bumper and the bumper was finish mounted. Now we could rock out the front suspension and start on the rear bumper as the rear suspension was finalized. Working through the night we finished up the bulk of the rear bumper and swings and the front suspension as well. Bouncing in between front and back tasks I started on the snorkel, we let the paint dry on the fender holes and grabbed some early morning brekky.
To Do List By End of Day 1 (Friday 6PM - Saturday 5AM):
Inventory Parts X
Break wheel lug nuts X
Rear End on Jack Stands X
Remove Rear Tires X
Rear Stock Shocks & Coils Removed X
Rear OME Suspension Installation X
Rear Tires Mounted X
Rear End Lowered & Rear Tires Torqued X
Remove Front Bumper X
LandTank Fan Clutch Installation
Front End on Jack Stands
Stock Skid Plate Removed X
Stock Shocks Removed
Stock Torsion Bars Removed
OME Shocks & Torsion Bars Installed
Slee Diff Drop Kit Installed
OME Torsion Bars Adjusted
Front Tires Mounted
Front End Lowered & Front Tires Torqued
Stock Trans Cross Member Removed
Slee Skid Plates Installed
Install ARB Front Bumper X
Warn Winch Installed in Bumper X
IPF Lights on Bumper X
Remove Stock Roof Rack X
Remove Stock Rear Bumper X
Install ARB Rear Bumper X
Assemble & Install ARB Wheel Carrier X
Assemble & Install ARB Jerry Can Holder X
Rough Electrical to Rear
Rear 3rd Row Seats & Seatbelts Removed
Outback Drawer System Installed
Finalize ARB Fridge Wiring & Aux power outlets
Install ARB Fridge
Remove Stock Battery
Install Slee Dual Battery Tray
Install Optima Battery's
National Luna Dual Battery System Installation
Remove Factory Running Boards
Install ARB Side Steps & Side Rails
Install Eezi-Awn K9 Roof Rack
Safari Snorkel Installation X
Helton Hot Shower System Installation
Last edited:
")