Smittybilt Scout Trailer Reviews?

Itsbobbyagain

New member
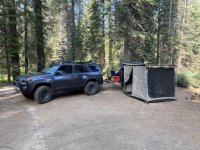
Hey Everybody, I finally made some time to post an update on all the stuff I've done to the trailer since getting it back in the summer. I've used it a bunch and it's working very well for me. It's really made set up and tear down easier and it got all this stuff out of the 4Runner.

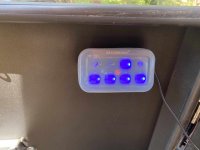
2023-09-21_15-28-28_943.jpg

Added a Auxbeam switch controller
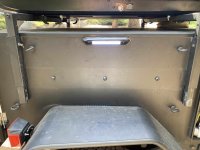
2023-09-20_13-29-47_177.jpg

Added LED strip lights on ceiling the interior of every compartment (added a shelf above the oven, just not in that pic)
2023-09-26_19-20-30_134.jpg

Added exterior LED flood lights on both sides and the front
2023-09-20_13-30-24_668.jpg

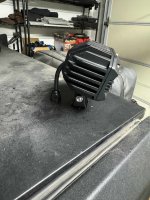
Added really bright flood lights on each corner of the box
2023-11-16_08-08-34_618.jpg

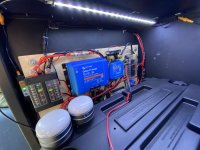
This is the electrical panel. Looks messy in the pic, but I've cleaned up the wiring since then. Added a DC to DC charger, solar controller, shunt, bus bars, fuse block, switch controller, cutoff switch, and a 200ah LifePo4 battery. I have more to do here like a connection panel for DC outlets and solar input plug.
2023-09-20_13-26-32_671.jpg

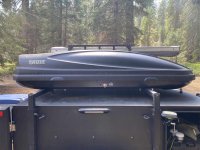
I sleep in the 4runner so I don't need a RTT. I used a Thule box we already had in the garage. It actually does really well on rough trails/roads.
2023-09-20_13-27-14_013.jpg


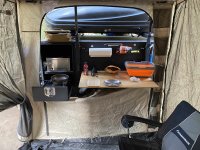
Recreated this table mount from a post in this thread
2023-09-20_15-41-55_483.jpg


End of part 1
 

Attachments

  • 2023-09-21_15-28-59_272.jpg
    2023-09-21_15-28-59_272.jpg
    937.7 KB · Views: 49
  • 2023-11-26_14-09-38_459.jpg
    920.1 KB · Views: 13
Last edited:

Itsbobbyagain

New member
Part 2

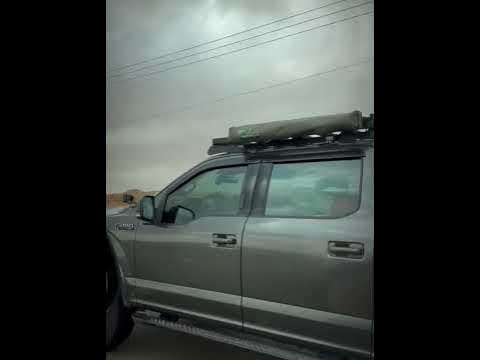
Fabricated an awning lift (17") . 3D printed some ABS bushings and used extruded aluminum and gas struts.
View attachment 2023-11-26_14-09-38_459.jpg

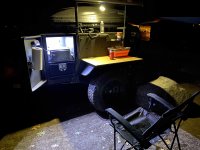
Added a travel oven and a shelf above it. I don't have a pic of the shelf handy. That shelf is really useful for storing all the kitchen gear. This is the kitchen set up when the awning tent is set up. Happy accident that the big access panel lined up perfectly.
2023-09-21_15-28-59_272.jpg

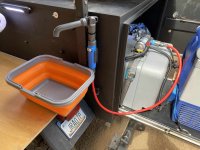
Added water tank and pump to feed the Joolca hot water heater and faucet
2023-09-20_13-31-50_368.jpg

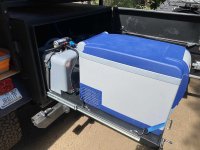
Added fridge which is now on a Arb slide and the tank is mounted to L track. I removed the slide and rails on the left side. Sliding the full water tank and full fridge was too heavy, so now just the fridge slides.
2023-09-20_13-27-30_812.jpg

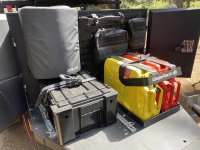
I removed the tongue box and added Joolca hot water heater, molle panel, jerry cans and L track for holding down firewood or frontrunner box (full of Joolca stuff and small propane tanks).
2023-09-20_13-25-52_452.jpg

Added DirtWorx rear tire carrier and trasharoo
2023-09-20_13-27-20_411.jpg

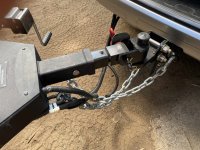
Added Max coupler
2023-09-20_13-26-03_319.jpg

I also added bearing buddy caps. Otherwise I think that's all the mods to date. I'm working on a slide out solar panel mount for a 200 watt panel. I might also replace the tongue jack with the Ark one I see lots of people here using.

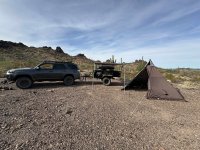
The trailer is great offroad, I go to some fairly remote places, so far zero problems. The only clearance issue is really the 4Runner's departure angle, sometimes it drags the spare tire and the hitch a little when going through a steep wash. Otherwise it goes where it's towed. I think I kept it fairly light so it handles great on road and offroad. I like to winter camp in the desert. I usually take a diesel heater or wood burning stove for my tipi tent. I had 98% of this stuff in my 4Runner at one time. Hard to believe, but I'm glad it's all in the trailer now. No worries about large quantities of water spilling or an electrical fire in the car (still carry a fire extinguisher), and most recovery equipment and tools stay with the car in case I need to detach go explore or whatever.

2023-11-26_13-52-48_620.jpg
 

Attachments

  • 2023-09-20_13-27-20_411.jpg
    2023-09-20_13-27-20_411.jpg
    1.2 MB · Views: 30
  • 2023-11-26_14-09-38_459.jpg
    920.1 KB · Views: 20
Last edited:

trae

Adventurer
Fabricated an awning lift (17") . 3D printed some ABS bushings and used extruded aluminum and gas struts.

I like how your "messy wiring" is by far cleaner than everything I've ever done 👍

Can you share more details on your awning lift? Pics would be great.
 

fd6axc4

Member
I'm wondering if Smitty has a new version of the trailer out. I know v1 has the tongue issue that was resolved in v2 a few years ago. Going through recent threads, it sounds like a few people have a '22 version. Is there an upgraded version after the tongue fix version, and if so, what are the changes?
 

emtmark

Austere Medical Provider
69d92015a50ca05fa94b49cbe371e365.jpg

5d5997a3a6f96ecaf21f3a9056907d02.jpg

8df11ec748897a0f066ccef1048f52ad.jpg

ece168b838dcf3b4630d971dc788c6d1.jpg

Tried out
560fc2e2c89adb9a8bb04949c5559dd4.jpg
a new diesel heater for the tent installed a stove jack in the new awning and BAM 17 degrees of no problem later lol


Sent from my iPhone using Tapatalk Pro
 

trae

Adventurer
@emtmark are you on thenewx? I've towed my scout with the Xterra a couple of times and it was a struggle over BC's mountain passes. F150 is way better.
 

Itsbobbyagain

New member
I like how your "messy wiring" is by far cleaner than everything I've ever done 👍

Can you share more details on your awning lift? Pics would be great.
Thanks for the compliment, I think I’m one of the few that enjoy messing with 12 volt wiring.

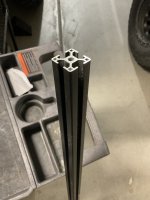
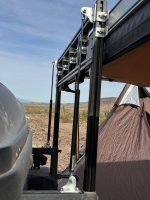
The awning lift I built is made mostly of extruded aluminum profile. It’s similar to unistrut if you are familiar with that. I used that as a building mater because I don’t know how to weld. It can be cut with a miter saw and a metal cutting blade. It has a ton of connecting options and you can easily mount things to it like handles or eye hooks for hanging things.

IMG_0183.jpeg

I used black anodized 30mm size that I got for a reasonable price at a web store called zyltech.com.

The shape of the mount is pretty simple. Just a rectangle with legs that fit down in the square tube of the RTT rails. I used L brackets to mount the awning to the mount. Most awnings have a big flat price of extruded aluminum as the base plate. One of the downsides are all the bolts and nuts it takes to hold everything together. I was concerned they would vibrate loose after a while. I used nylock nuts and loctite and so far not a single nut has loosened.

IMG_0180.jpeg

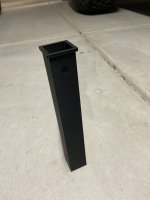
The 30mm profiles fit inside the square tube with about 1mm or so of space around it. This is where I needed a bushing of some sort to help the profile slide up and down smoothly inside the square tube. So I 3D printed a bushing from ABS plastic. It’s very durable, slides along the aluminum nicely even when dusty, and is heat resistant.

IMG_0182.jpeg

It’s a simple square sleeve shape with a thick lip on top and a hole in one side. The hole is to allow a T nut and bolt to pass through. That’s for tightening the mount in the square tube so it doesn’t rattle while bouncing down the road and trails. I printed a set of spares just in case one gets too damaged I can replace it. They can be reprinted pretty cheaply and easily if I need more. After 4 trips out one has cracked a little at the top but still functioning fine. I think it’s because it’s jammed into the square tube which isn’t perfectly square.

I experimented with a couple of different gas struts. I ended up using 20lb lift, 17” stroke gas struts from Amazon. I think it tops out at 80 ish inches from the ground up fully extended. Bringing it down 17” to stow for travel makes a big difference in height clearance and it doesn’t rock around at all when traveling off road.

I secure it in the down position with ratchet straps meant for securing mountain bikes and kayaks. I also tighten the T nuts I mentioned earlier. When it’s stowed it’s very secure. You can yank on it and the whole trailer will rock and there is no play in the square tube.

To lift it I just loosen the T nuts and release the ratchet straps and it starts rising on its own. I give it just a little help to go up straight and not bind, but it otherwise rises on its own. I tighten down the T nuts again and unfurl the awning.

Bringing it down is the reverse. I added eye hooks for the ratchet straps and handles to pull it down.
 

Itsbobbyagain

New member
69d92015a50ca05fa94b49cbe371e365.jpg

5d5997a3a6f96ecaf21f3a9056907d02.jpg

8df11ec748897a0f066ccef1048f52ad.jpg

ece168b838dcf3b4630d971dc788c6d1.jpg

Tried out
560fc2e2c89adb9a8bb04949c5559dd4.jpg
a new diesel heater for the tent installed a stove jack in the new awning and BAM 17 degrees of no problem later lol


Sent from my iPhone using Tapatalk Pro
I dig your awning and stove setup. I would like to do what you’ve done and add a stove jack to my awning room. I just haven’t figured out the best way to do it. My awning room is square (ARB) and it attaches underneath the awning. Those little stoves are great and really put out the heat. What a great winter camping setup!
 

trae

Adventurer
Thanks for the compliment, I think I’m one of the few that enjoy messing with 12 volt wiring.

I don't mind 12v wiring because I'm not afraid of it killing me, like the mains power. I'm also very careful to make sure everything is rated and fused properly so I don't end up with my truck on fire. What I can't seem to figure out how is how to route things nicely the way you did (y)


The awning lift I built is made mostly of extruded aluminum profile. It’s similar to unistrut if you are familiar with that. I used that as a building mater because I don’t know how to weld. It can be cut with a miter saw and a metal cutting blade. It has a ton of connecting options and you can easily mount things to it like handles or eye hooks for hanging things.

Brilliant. So the unistrut fits in Scout's "stock" awning "tubes"?

I picked up a cheap fluxcore welder to learn how to weld. Up to 3/8" mild steel. I wouldn't quite trust myself to make anything structural yet (like this for example) but I feel like it opens up opportunities for customization.
 
Finally managed to fit my fridge into the genny compartment. Required some surgery to the tray. Then I found out that I forgot to account for the bolts and riveted the tray to the slide. We’ll find out how well it works in a week or so. Next step, wire it properly.

5344794958fd09a1cece9776cb2d674e.jpg

f7dba0a607e5395959a562dee3757256.jpg

f150b5693a56344f33ad730605309366.jpg

7bc361c958c44ca244a3fe11a88b8413.jpg


Sent from my iPhone using Tapatalk
Do you happen to know the dimensions for the Engel MU40 you have pictured? I can't find any info about that model online anymore. Seems like that would be a pretty good reference for the max size to fit on the slider (you showed you could go back, and width/height is still limited by door frame).
 

ebrabaek

Adventurer
Do you happen to know the dimensions for the Engel MU40 you have pictured? I can't find any info about that model online anymore. Seems like that would be a pretty good reference for the max size to fit on the slider (you showed you could go back, and width/height is still limited by door frame).
I had the MU40 in mine. Somewhere in the thread the install is.... Hrmmmm... :) If memory serves me correct I had to grind a few bolts in order to make it fit perfect.
 

Todd G.

New member

Forum statistics

Threads
188,047
Messages
2,901,587
Members
229,411
Latest member
IvaBru
Top