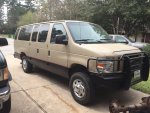
The Rig Runner ...a 2010 E350 5.4 DIY Coil Conversion

Raul

Adventurer
Thank you.

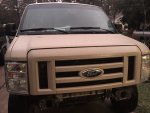
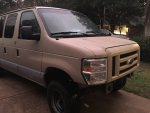
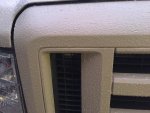
Very impressed with Monstaliner. As it cured, the texture smoothed out. I was not too impressed with the grill as some of the lines were a little bit messy with some excess paint, but today they look great. A few extra shots. Keep in mind that it has been raining and the surface is wet.
IMG_9559.jpg
IMG_9557e.jpg
IMG_9560e.jpg

I can not wait to finish the exterior paint, do the rear axle and then start with the 4x4 conversion. As bad as the van looked initially, it was a priority not to upset the HOA.
 
Last edited:

ClubWagon

Observer
The joys of living with an HOA.... I'm suprised mine didn't complain when I did my van last year. For about a month it was a combination of white, gray primer and black bed liner. The looks on the neighbors faces that drove by while I was working on it was definitely priceless though. LOL!!!
 

Raul

Adventurer
Done! Finally bottom and bumpers are painted and installed.

IMG_9594edit.jpg
IMG_9592.jpg

Next step: Clean the new rear axle and install it with the springs form the ambulance. Hopefully that will raise the back as it sits very low. Also, start shopping for the front axle.
 

Raul

Adventurer
I started with the axle swap. It turns out that is not a direct swap. On the ambulance axle there is no ABS sensors and both calipers share a single line so I guess the ambulance do not include ABS. At least this one and it was a 2011 (!?!?!?). The axle doesn't even have the recess or the tapped hole to install sensors

I am still ahead since I got the 4.11 gears and the LSD plus spare calipers and axles, but I'll have to swap the internals and do the whole shimming...

I have not look at what is the axle of my van, but I assume the rotors will have a signal ring. On my 2000 E150 with 9.75 there was a signal ring on the differential. I do not see any wiring into the pumpkin on my E350. Will see.

I'll get back to it after spring break.
 

Raul

Adventurer
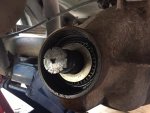
Still working on it. The ambulance axle disassembly was quite straightforward. The axle on my van was a different issue. Taking the pinion nut was an ordeal (now I have a new impact wrench), the flange was hard and the unsticking the pinion bearing was quite a work out.

IMG_9840.JPG
My new Best Friend, BFH

IMG_9835.jpg
Work in progress

IMG_9838.jpg
Rust on the splines and under the bearing made things very hard.

IMG_9619.jpg
At least I am pleased with the looks so far. The pin stripe makes a difference, not sure if will stick for long on the rough finish.IMG_9840.JPGIMG_9838.jpgIMG_9619.jpgIMG_9835.jpg
 
Last edited:

FROADER

Adventurer
I love it! The colors look great!

I might have missed it and sorry if I did, but what kind of prep, if any, did you do to the chrome grill and rear bumper before putting the Monstaliner on?
 

Raul

Adventurer
I love it! The colors look great!

I might have missed it and sorry if I did, but what kind of prep, if any, did you do to the chrome grill and rear bumper before putting the Monstaliner on?

I peeled all the chrome out of the grill. I was expecting something quite thin, but in reality it is quite thick and stiff. With a razor blade I was picking an edge and peeling... as with everything so far, took longer than expected. Once it was just the plastic I used primer for plastic.
For rear bumper I sanded it with 70 grid and applied self edging primer. This bumper is not going to stay for long so this should do.
 

FROADER

Adventurer
I figured there was something done to the grill having experience with that, I just wanted to make sure.

Thanks for the reply.
 

Raul

Adventurer
I got my front axle, and transfer case. Now I am waiting for Chris to ship the brackets, brake lines, gas tank cutting kit and few other things. Bad timing meant that he didn't have any coil kits available...hopefully next weekend I'll be able to install the front axle.

Since the Fox Shock absorbers were shipped I installed the rears and since I was at it I ordered new springs from ATS. Now I do not have the shaggy bottom any more
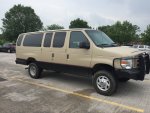
IMG_0039.jpg

One of the first thing I did was to replace the tired front springs with a set of CC860S that I had laying around. I tried them on my E150 and didn't like them as they were quite long but soft. I haven't driven more than 500 miles since the swap and I was counting on having the new axle already installed. This is what happens when you have a long spring and a short (worn out OEM) shock absorber:
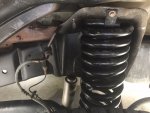
IMG_0078.jpg Wireless shock absorber?

If anyone cares, these are the specs of the specs of some of the MOOG springs for the Ford vans

Ins dia Bar dia Spring Rate Load Install H Free H
CC860 4.03 0.81 512.00 1510.00 15.50 18.31
CC860S 4.03 0.83 549.00 1797.00 16.00 19.27
CC880 3.98 0.78 589.00 1850.00 13.00 16.00
CC880S 4.00 0.81 652.00 3006.00 12.00 16.60

cc860 are long, but may be too soft, even the S

I wanted to have the third row seat installed before I do the interior since the final height will determine the bed height and everything around it. It was tough on the small details but finally I fitted a second row Tahoe seat on the bottom frame of the Econoline bench. The result is a little bit too tall, but with the 2010 benches legs, it seems feasible to shorten them a bit. I'll get a picture of the bench tomorrow this is a close up of the matting area. At the end I replaced teh small U-bolt with a big one since there was the mounting of the three point middle seat belt.

IMG_0079.jpg
 
Last edited:

Raul

Adventurer
IMG_0085.jpg

This is how the seats look like today. Over the weekend I should be able to cut 3" or 4" of the legs.IMG_0085.jpg
 
Last edited:

Forum statistics

Threads
188,368
Messages
2,906,152
Members
230,117
Latest member
greatwhite24
Top