2022 RAM 5500 Composite "Super Camper"

StenchRV

Well-known member
Damn you do good work man! Congrats

THANKS MAN! You know the work it takes.....and being OCD does not make it any easier!


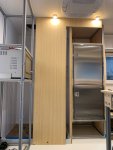
FINGERS CROSSED for the bathroom door installation and HOPING all the planning and measuring 5 times paid off. IT DID! I ordered a few hinges and they were taking awhile to arrive so I started looking again and stumbled across a VERY heavy duty hinge. Ordered one and after it arrived ordered another 2. GREAT hinge! It has to hold a 3/4 piece of bamboo that measures 25" X 77" in place. 72 # 8 X 3/4" SS screws, I did replace the #6's it came with. The hinge also was the PERFECT width to make my grain matching efforts pay off without shimming.


IMG_6497.jpeg
Fixed panel getting ready for glue and screwing in place on the wardrobe side.
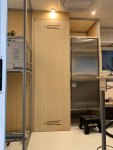
IMG_6498.jpeg
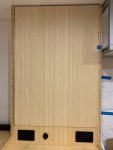
YAHOO does not even cut it! WIN for the week on the build!
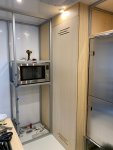
IMG_6499.jpeg
Now my wife can sand and finish it. Did I mention YAHOO!! WIN!
IMG_6500.jpeg
Could not line up any better...planning... but LUCK always plays a part!
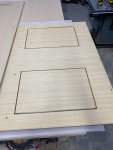
IMG_6509.jpeg
Couch storage doors.
IMG_6511.jpeg
SWEET!!!

IMG_6510.jpeg
One more door for the wife to sand and finish! Grain matching is fun! DARN OCD!!!


I pick up the last 2 storage boxes today! Drivers side. I will need to modify one for a fuel filler and the other for a fuel filler and the shower grey tank, tank drain and vent. Will post pic's:).

Will be a fun week!


MERRY CHRISTMAS! HAPPY HOLIDAYS! HAPPY NEW YEAR!


CHEEERS!!
 
Last edited:

StenchRV

Well-known member
Ideas.

On another subject. We were planning to run the vent tube for our Air Head toilet up the middle of the rear wall of the rig behind the wardrobe drawers and doors and out the roof. Due to the close fit of the drawer slides and the amount of work it would take to modify about 5 drawers to make it work we are thinking of venting the toilet out the back wall. The vent will be about 40" off the ground from the outside of the rig and we have a vent cover that would be waterproof and vent downwards.

The plan is to install a PVC pipe through the wall, seal off the foam, and then mount the fan inside and the larger vent cover outside.

ANYONE with experience in the Air Head toilet depart please feel free it chime in with pro's and con's!

THANKS!!

CHEERS!!
 
Last edited:

RAM5500 CAMPERTHING

OG Portal Member #183
Ideas.

On another subject. We were planning to run the vent tube for our Air Head toilet up the middle of the rear wall of the rig behind the wardrobe drawers and doors and out the roof. Due to the close fit of the drawer slides and the amount of work it would take to modify about 5 drawers to make it work we are thinking of venting the toilet out the back wall. The vent will be about 40" off the ground from the outside of the rig and we have a vent cover that would be waterproof and vent downwards.

The plan is to install a PVC pipe through the wall, seal off the foam, and then mount the fan inside and the larger vent cover outside.

ANYONE with experience in the Air Head toilet depart please feel free it chime in with pro's and con's!

THANKS!!

CHEERS!!

I have mine vented out of the roof (fan inside, cover outside) with the hose they supplied, and the little 12v fan runnning 24/7.

Its worked perfectly for 2 years and absolutely zero smell whether inside or outside of the camper.

This is one of the appliances i was on the fence about, but have been absolutely thrilled with how good it works.
 

WanderingBison

Active member
Ideas.

On another subject. We were planning to run the vent tube for our Air Head toilet up the middle of the rear wall of the rig behind the wardrobe drawers and doors and out the roof. Due to the close fit of the drawer slides and the amount of work it would take to modify about 5 drawers to make it work we are thinking of venting the toilet out the back wall. The vent will be about 40" off the ground from the outside of the rig and we have a vent cover that would be waterproof and vent downwards.

The plan is to install a PVC pipe through the wall, seal off the foam, and then mount the fan inside and the larger vent cover outside.

ANYONE with experience in the Air Head toilet depart please feel free it chime in with pro's and con's!

THANKS!!

CHEERS!!

I don’t know about the Air Head but I’ve had a Nature’s Head for over four years. It wasn’t vented outside at all for the first year or so, and when I finally vented it, it’s vented to behind the body moulding on my Ford Transit.

I don’t know what you will gain by venting it that far from the head itself and suspect you will find that the long distance make venting more difficult to properly vent. If you are concerned about smells, it is extremely rare that anyone actually stink up the head so much that it is noticeable outside close to the vent. I have stuck my nose right up to the moulding on a few occasion trying a smell test and I can smell it right after a visit but probably because it was a “noticeable” visit and because I actually know it’s there.

Separating the urine is the magic and is what make the difference on the smell front.

I find that it’s used largely/mostly for number one and rarely for number two (“emergencies” during the night and when way off-grid with nothing else available.

Hope this helps!


Sent from my iPad using Tapatalk
 

StenchRV

Well-known member
I don’t know about the Air Head but I’ve had a Nature’s Head for over four years. It wasn’t vented outside at all for the first year or so, and when I finally vented it, it’s vented to behind the body moulding on my Ford Transit.

I don’t know what you will gain by venting it that far from the head itself and suspect you will find that the long distance make venting more difficult to properly vent. If you are concerned about smells, it is extremely rare that anyone actually stink up the head so much that it is noticeable outside close to the vent. I have stuck my nose right up to the moulding on a few occasion trying a smell test and I can smell it right after a visit but probably because it was a “noticeable” visit and because I actually know it’s there.

Separating the urine is the magic and is what make the difference on the smell front.

I find that it’s used largely/mostly for number one and rarely for number two (“emergencies” during the night and when way off-grid with nothing else available.

Hope this helps!


Sent from my iPad using Tapatalk


Thank you, it helps :)

The good news is taking the vent out the rear wall of the rig, rather than the roof, means we only have to vent the toilet about 18" total. The toilet is almost against the back wall. I have heard many people say you really do not smell anything from the toilet.

I agree, urine can STINK! We purchased an additional smaller urine bottle from Air Head so we could plumb a urine diverter into the 35 gallon grey tank just below the shower and toilet. Not high on the list of things to get done in the next month or so.....but still on the list.

CHEERS!!
 

StenchRV

Well-known member
I have mine vented out of the roof (fan inside, cover outside) with the hose they supplied, and the little 12v fan runnning 24/7.

Its worked perfectly for 2 years and absolutely zero smell whether inside or outside of the camper.

This is one of the appliances i was on the fence about, but have been absolutely thrilled with how good it works.


Thank you!........yet again :)

CHEERS!!
 

Vance Vanz

Well-known member
It is in the details :)

View attachment 756593
Bathroom door getting cut out. I had some doors cut out of the middle of a few panels. The doors are for the storage area behind the couch back and a systems door on the drivers side, also behind the couch back. It is nice when the mill works shop likes the quality of the bamboo.
View attachment 756594
Storage cabinet complete. Adjustable shelves and totally removable if needed for system access.

View attachment 756595
After the CNC shop cut out the door and I had it home we changed our mind on ventilation layout so I used a plunge router to make some bathroom ventilation openings. That was fun! No room for error as that was the only panel we have for the bathroom wall and door.

View attachment 756596
My wife turned her sewing and craft room into the wood finishing shop. She is doing all of the sanding and finishing for the entire rig! Tedious work but it is coming out great!
You can see the back of the couch panels mentioned above.

View attachment 756610
Screen door and door threshold installation. We had to shim the screen door out a little to match perfectly to the door. Now we have a screen door for winter camping :)
View attachment 756623
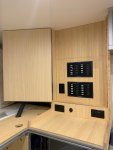
Charging station and water heater switch on the right. This will get a door above the little shelf to hide the 12V/120V panels and will be a nice place for art or a TV in the future.

View attachment 756624
Time to start on the rear wardrobe! We just ran out of our original LARGE shipment of 8020. Ordered more to finish the wardrobe and kitchen cabinet. AMAZINGLY it arrived yesterday, only 4 days! WOW!


CHEERS!!
CNC shop doing your cutting........ Isn't that cheating for us DIYers ? :ROFLMAO:!

Awesome work; I'm loving it.

Did you and your wife decide to go with a lighter/natural color on the bamboo; I thought you two were contemplating/set on a dark stain? Maybe I missed this somewhere.

You are getting my wheels turning with ideas for my bamboo. I'm excited to see the shower door installed.

Would you mind sharing what main factors lead you to the Panasonic Convection Microwave? You can PM me on that one if you prefer. I'm in the process of researching them right now, so I have it on hand for some of my upcoming interior layout. Is this a countertop model, or does it have the option/a kit for being inset/mounted as a "over the range"? I was thinking of an "over the range" model to have a clean install/make sure it is securely mounted to the cabinetry. I guess you could also mount any/most countertop models to the cabinetry using the threads of their feet mounts.

Electrical panels are super clean.

Sorry I'm a bit behind in posting to your thread. For some reason it is not sending me updates when you make a post, even though I selected for it to do so and have reset the watch/un watch function.

Keep up the good work.
 

Vance Vanz

Well-known member
THANKS MAN! You know the work it takes.....and being OCD does not make it any easier!


FINGERS CROSSED for the bathroom door installation and HOPING all the planning and measuring 5 times paid off. IT DID! I ordered a few hinges and they were taking awhile to arrive so I started looking again and stumbled across a VERY heavy duty hinge. Ordered one and after it arrived ordered another 2. GREAT hinge! It has to hold a 3/4 piece of bamboo that measures 25" X 77" in place. 72 # 8 X 3/4" SS screws, I did replace the #6's it came with. The hinge also was the PERFECT width to make my grain matching efforts pay off without shimming.


View attachment 757039
Fixed panel getting ready for glue and screwing in place on the wardrobe side.

View attachment 757040
YAHOO does not even cut it! WIN for the week on the build!
View attachment 757041
Now my wife can sand and finish it. Did I mention YAHOO!! WIN!
View attachment 757042
Could not line up any better...planning... but LUCK always plays a part!
View attachment 757043
Couch storage doors.
View attachment 757044
SWEET!!!

View attachment 757045
One more door for the wife to sand and finish! Grain matching is fun! DARN OCD!!!


I pick up the last 2 storage boxes today! Drivers side. I will need to modify one for a fuel filler and the other for a fuel filler and the shower grey tank, tank drain and vent. Will post pic's:).

Will be a fun week!


MERRY CHRISTMAS! HAPPY HOLIDAYS! HAPPY NEW YEAR!


CHEEERS!!
SWEEEEEET. The bamboo looks great and thanks for sharing what hinge you went with for the shower door.

Don't worry, you're not alone with the OCD blessing and curse. This is why it takes me forever to get anything done, but it's almost always perfect when it is finished.

You had mentioned that your shower door was 3/4" bamboo and in a previous post that you were trying to run as much 1/2" bamboo as possible for weight reduction. In your experience/opinion, if your bamboo was not being used for any structural/load bearing purposes and was only being used for aesthetic purposes (cabinet doors/drawer faces), would you run all 1/2"?
 

StenchRV

Well-known member
CNC shop doing your cutting........ Isn't that cheating for us DIYers ? :ROFLMAO:!

Awesome work; I'm loving it.

Did you and your wife decide to go with a lighter/natural color on the bamboo; I thought you two were contemplating/set on a dark stain? Maybe I missed this somewhere.

You are getting my wheels turning with ideas for my bamboo. I'm excited to see the shower door installed.

Would you mind sharing what main factors lead you to the Panasonic Convection Microwave? You can PM me on that one if you prefer. I'm in the process of researching them right now, so I have it on hand for some of my upcoming interior layout. Is this a countertop model, or does it have the option/a kit for being inset/mounted as a "over the range"? I was thinking of an "over the range" model to have a clean install/make sure it is securely mounted to the cabinetry. I guess you could also mount any/most countertop models to the cabinetry using the threads of their feet mounts.

Electrical panels are super clean.

Sorry I'm a bit behind in posting to your thread. For some reason it is not sending me updates when you make a post, even though I selected for it to do so and have reset the watch/un watch function.

Keep up the good work.


Vance,

I REALLY contemplated doing ALL the cutting myself. I figured paying a CNC shop to make a few cuts was worth it because if I made one mistake it could cost me $$$. Just making the plunge cuts for the bathroom door vents, there will be a few more of those around the camper, was stressful enough. Could have been a quick $500 screw up! That was my DIY better safe than sorry move :p

My wife tried about 10 different finishes. Most were too yellow or honey colored. We had a friend suggest the Odies oil and we tried both dark and the light version. In hindsight the carbonized bamboo from our vendor might have helped out. We chose the natural version. We REALLY like the way it is coming out color wise. Hopefully it holds up well and putting a poly over it will not be required. Time will tell. Already my wife is touching up after me :) We are going with a dark flooring to "ground" the look.

A "bit behind in posting" DUDE you are working your ******** off on your rig. We both know the long hard days involved in the build process. HATS OFF to you brother!

We chose the microwave because of all the functions it has and the smaller size. YES there is a trim kit for over the range set up. It cost as much as the microwave! As you see ours it is FIRMLY locked in place, even used a little VHB on the top two easy to reach and remove hold downs. I used four short pieces of aluminum angle, 2 on the sides and two on the top.

Electrical panels were worth every penny. Choose a manufacturer and go! Easy wiring and access. I could have hinged the panel they mount on, gave it some thought, but I have had them both out a few times and they rest really easy o the lip of the cutout and if you bundle your wires right not hard at all.

More on the bathroom setup as I go. Going to be a busy week.....you know the drill.

CHEERS!!
 

StenchRV

Well-known member
SWEEEEEET. The bamboo looks great and thanks for sharing what hinge you went with for the shower door.

Don't worry, you're not alone with the OCD blessing and curse. This is why it takes me forever to get anything done, but it's almost always perfect when it is finished.

You had mentioned that your shower door was 3/4" bamboo and in a previous post that you were trying to run as much 1/2" bamboo as possible for weight reduction. In your experience/opinion, if your bamboo was not being used for any structural/load bearing purposes and was only being used for aesthetic purposes (cabinet doors/drawer faces), would you run all 1/2"?


OCD....:p??...can get you now and then!

I talked with a friend who has a TON of wood working and cabinet making experience before making our choice. He used to build custom cabinets on HIGH END homes. The 3/4" weighs only 13 LBS more a sheet than the 1/2" The 3/4" should be more stable, in talking with the friend and emailing the vendor. I used a few sheets of 1/2" for just "covers", side of the fridge, side of the kitchen wall, couch storage, a few choice glue spots but everything else will be 3/4". Even if every sheet I used was 3/4", and I used every bit of all the sheets I ordered, it would have been 130 LBS TOTAL more. Was worth it to me to use the 3/4". The Bamboo is not light! But neither is most wood. With the 8020 we tried to keep the total wood in the camper to a minimum.

I wanted grain match, I like the look.....being OCD. It took some extra 4X8 sheets to do it that way and yes I will have a bit of leftovers but worth it to me. Buy once, cry once. You know the drill.

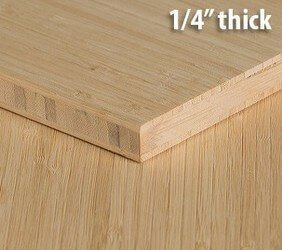
Bamboo vendor. Even the CNC mill works guy asked where we purchased the wood.


That hinge is a BEAST! ALL my hinges are now that hinge!

CHEERS!!
 

RAM5500 CAMPERTHING

OG Portal Member #183
Would you mind sharing what main factors lead you to the Panasonic Convection Microwave? You can PM me on that one if you prefer. I'm in the process of researching them right now, so I have it on hand for some of my upcoming interior layout. Is this a countertop model, or does it have the option/a kit for being inset/mounted as a "over the range"? I was thinking of an "over the range" model to have a clean install/make sure it is securely mounted to the cabinetry. I guess you could also mount any/most countertop models to the cabinetry using the threads of their feet mounts.

The microwave convection choice was one of the harder things to plan as here in SoCal they are basically impossible to find in a store to put your hands on, and check out mounting options for the RV installs, etc....

We went with this unit, due to lots of rave reviews, and mounting that perfectly fit our needs: https://www.recpro.com/rv-convection-microwave-stainless-steel/

It works great, was easy to mount for clean stout install, and fits our needs, but the interior dimensions are a bit smaller than expected.

We use our microwave A LOT in our camper.

Doing it all over again, i would go with a bigger unit, similar to Craigs.

NOTE: I just realized when i googled this for you, the cost has gone up almost $150! Danggg
 

StenchRV

Well-known member
Microwave information. My wife shopped the sales :) It has gone up about $150 since we bought it.


CHEERS!!
 
Last edited:

Vance Vanz

Well-known member
Vance,

I REALLY contemplated doing ALL the cutting myself. I figured paying a CNC shop to make a few cuts was worth it because if I made one mistake it could cost me $$$. Just making the plunge cuts for the bathroom door vents, there will be a few more of those around the camper, was stressful enough. Could have been a quick $500 screw up! That was my DIY better safe than sorry move :p

My wife tried about 10 different finishes. Most were too yellow or honey colored. We had a friend suggest the Odies oil and we tried both dark and the light version. In hindsight the carbonized bamboo from our vendor might have helped out. We chose the natural version. We REALLY like the way it is coming out color wise. Hopefully it holds up well and putting a poly over it will not be required. Time will tell. Already my wife is touching up after me :) We are going with a dark flooring to "ground" the look.

A "bit behind in posting" DUDE you are working your ******** off on your rig. We both know the long hard days involved in the build process. HATS OFF to you brother!

We chose the microwave because of all the functions it has and the smaller size. YES there is a trim kit for over the range set up. It cost as much as the microwave! As you see ours it is FIRMLY locked in place, even used a little VHB on the top two easy to reach and remove hold downs. I used four short pieces of aluminum angle, 2 on the sides and two on the top.

Electrical panels were worth every penny. Choose a manufacturer and go! Easy wiring and access. I could have hinged the panel they mount on, gave it some thought, but I have had them both out a few times and they rest really easy o the lip of the cutout and if you bundle your wires right not hard at all.

More on the bathroom setup as I go. Going to be a busy week.....you know the drill.

CHEERS!!
Thanks for the reply and all of the info. I appreciate it very much!

Just playing with you on the bamboo cutting. We are never really 100% DIY anyway. I know exactly what you mean; sometimes it is worth it when you are dealing with expensive material. I get nervous every time I have to cut into one of my carbon fiber resin infused panels. Maybe my build is making me neurotic ?.

The natural bamboo color looks good and a darker floor will be a great contrast. You and I may be twinsies on our interiors. I may have to change mine up so people don't say I copied you ;).

I had a feeling the trim kits may be outrageously priced. As soon as you go to the "over the range" models the price jumps way up. You can tell me to "just look at the previous pictures I posted dude!" ?. I see how you mounted yours. I will probably do the same, buy a countertop model and secure it.
 

Vance Vanz

Well-known member
OCD....:p??...can get you now and then!

I talked with a friend who has a TON of wood working and cabinet making experience before making our choice. He used to build custom cabinets on HIGH END homes. The 3/4" weighs only 13 LBS more a sheet than the 1/2" The 3/4" should be more stable, in talking with the friend and emailing the vendor. I used a few sheets of 1/2" for just "covers", side of the fridge, side of the kitchen wall, couch storage, a few choice glue spots but everything else will be 3/4". Even if every sheet I used was 3/4", and I used every bit of all the sheets I ordered, it would have been 130 LBS TOTAL more. Was worth it to me to use the 3/4". The Bamboo is not light! But neither is most wood. With the 8020 we tried to keep the total wood in the camper to a minimum.

I wanted grain match, I like the look.....being OCD. It took some extra 4X8 sheets to do it that way and yes I will have a bit of leftovers but worth it to me. Buy once, cry once. You know the drill.

Bamboo vendor. Even the CNC mill works guy asked where we purchased the wood.


That hinge is a BEAST! ALL my hinges are now that hinge!

CHEERS!!
Thanks for sharing details about the choice in bamboo thickness and the vendor you used. Hopefully you also just saved me a couple of hours researching a supplier. Who am I kidding, I'm OCD, maybe you just saved me a couple of days ?!

I figured as much related to the 1/2" vs 3/4" debate. It is always that fine line, go with 1/2" to save on weight but risk a thinner material or go all out with the 3/4".
 

Forum statistics

Threads
188,412
Messages
2,907,016
Members
230,176
Latest member
Arcadia1415
Top