AdventureTaco - turbodb's build and adventures

turbodb

Well-known member
How are those ST Maxx tires holding up? How many miles do you have and how are they wearing? Any balance/handling issues, how loud are they? Performance in difference terrains? Will you replace them with the same when they wear out, why/why not?
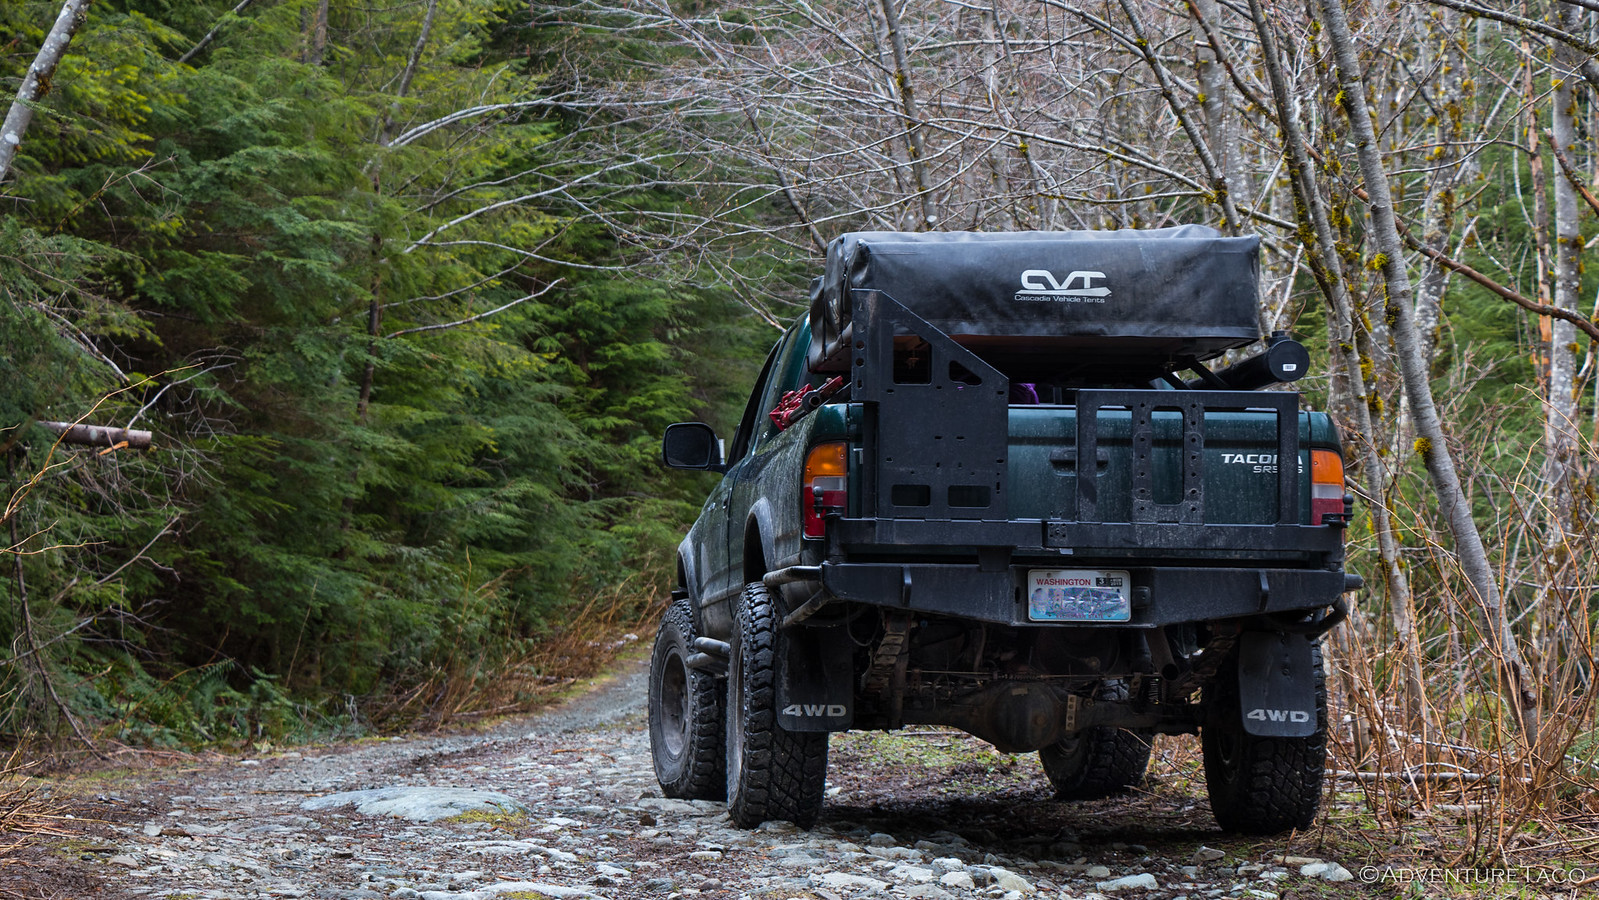
The ST Maxx are doing great. I've run two sets now, and don't (currently) see any reason to move to a different tire in the future. As far as 255/85R16 go, I think they are the best tire available. The tread pattern is a nice AT/MT mix, they are reasonably quiet on the road, and they've been puncture-free for me so far. Oh, and they seem to wear really well to me - I put 30K on my first set (before selling them with the wheels I was changing out), and they had a ton of life left. I've got ~15K on my second set right now.

On the "down" side - I do not like the E-load weight of them, but as far as I can tell, there are no C-load 255/85R16's out there, so it's hard to hold that against them. And, I like the Duratrac tread pattern better, but alas, no 255/85R16's are available.
 

turbodb

Well-known member
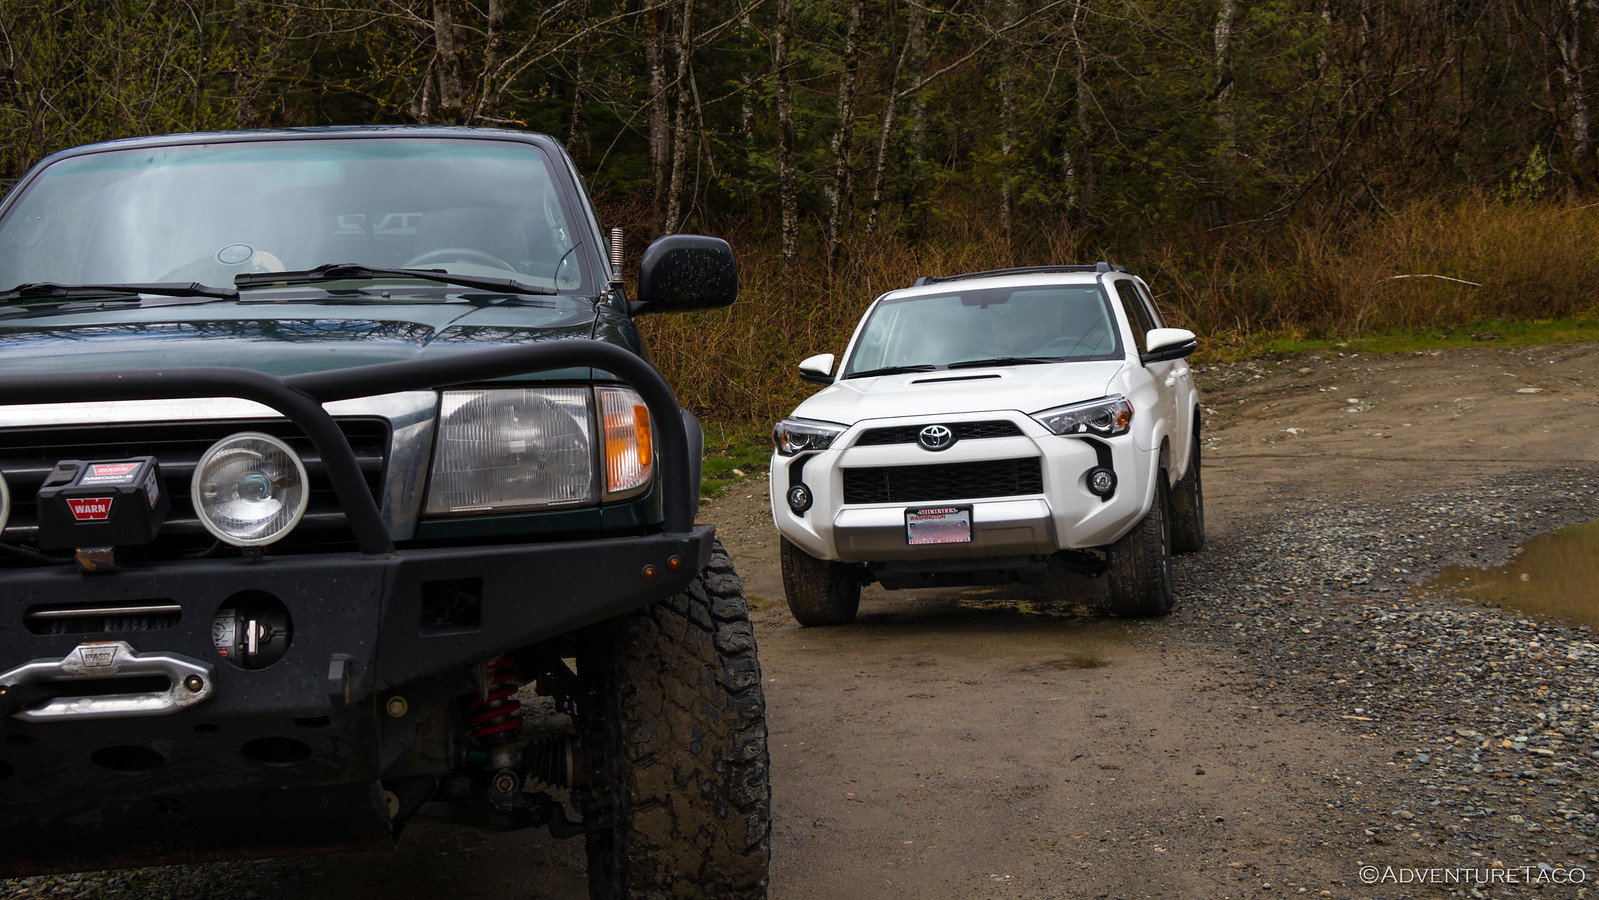
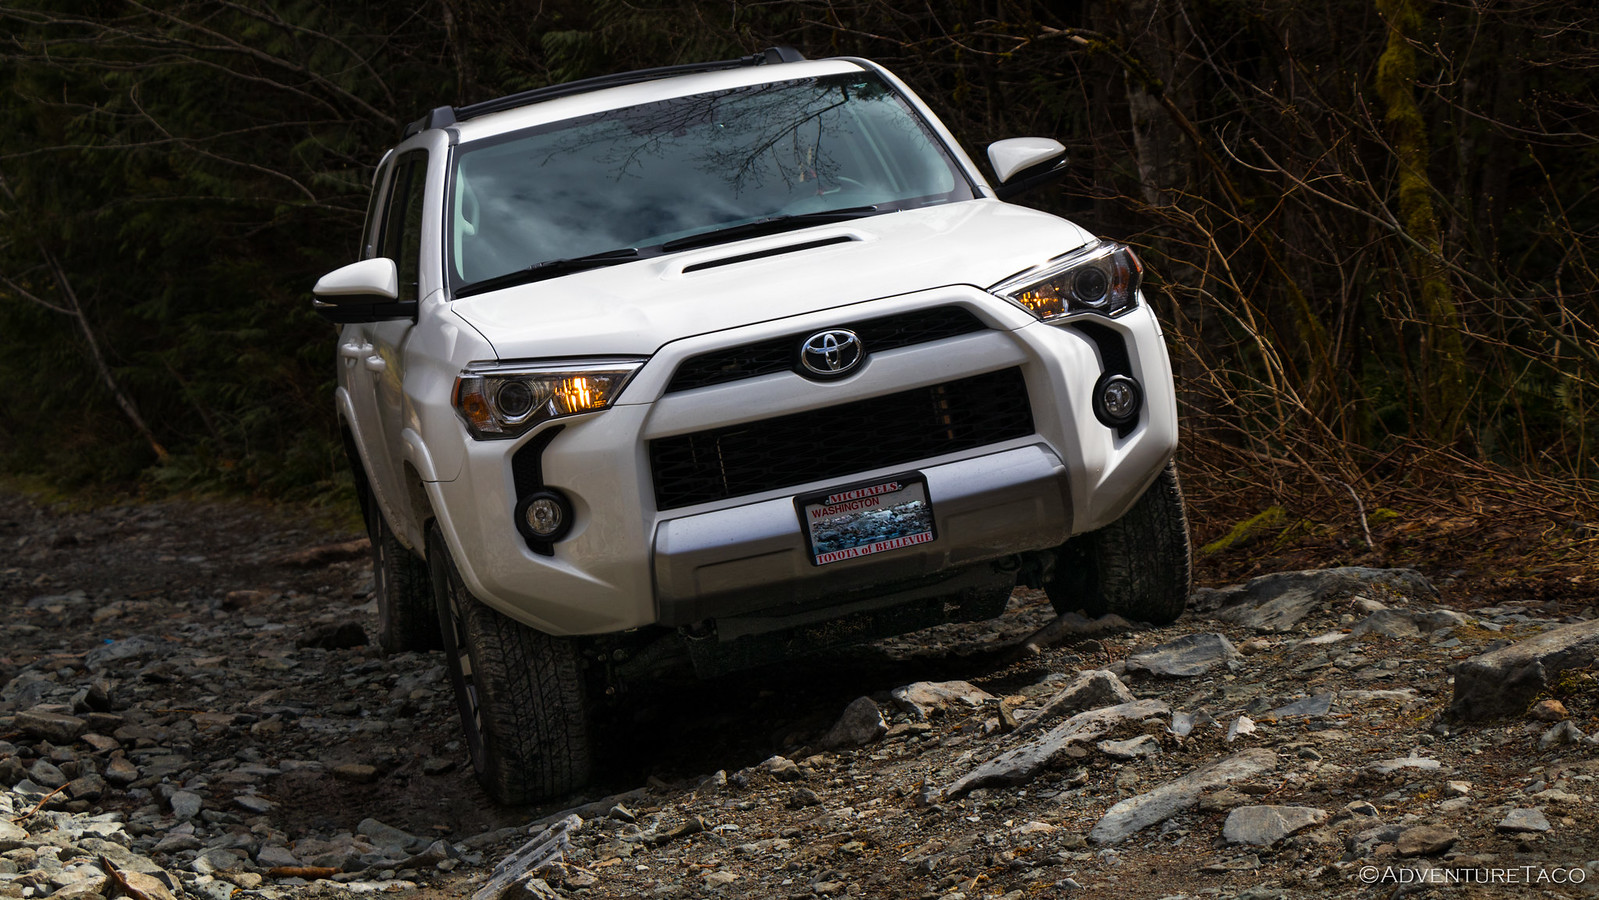
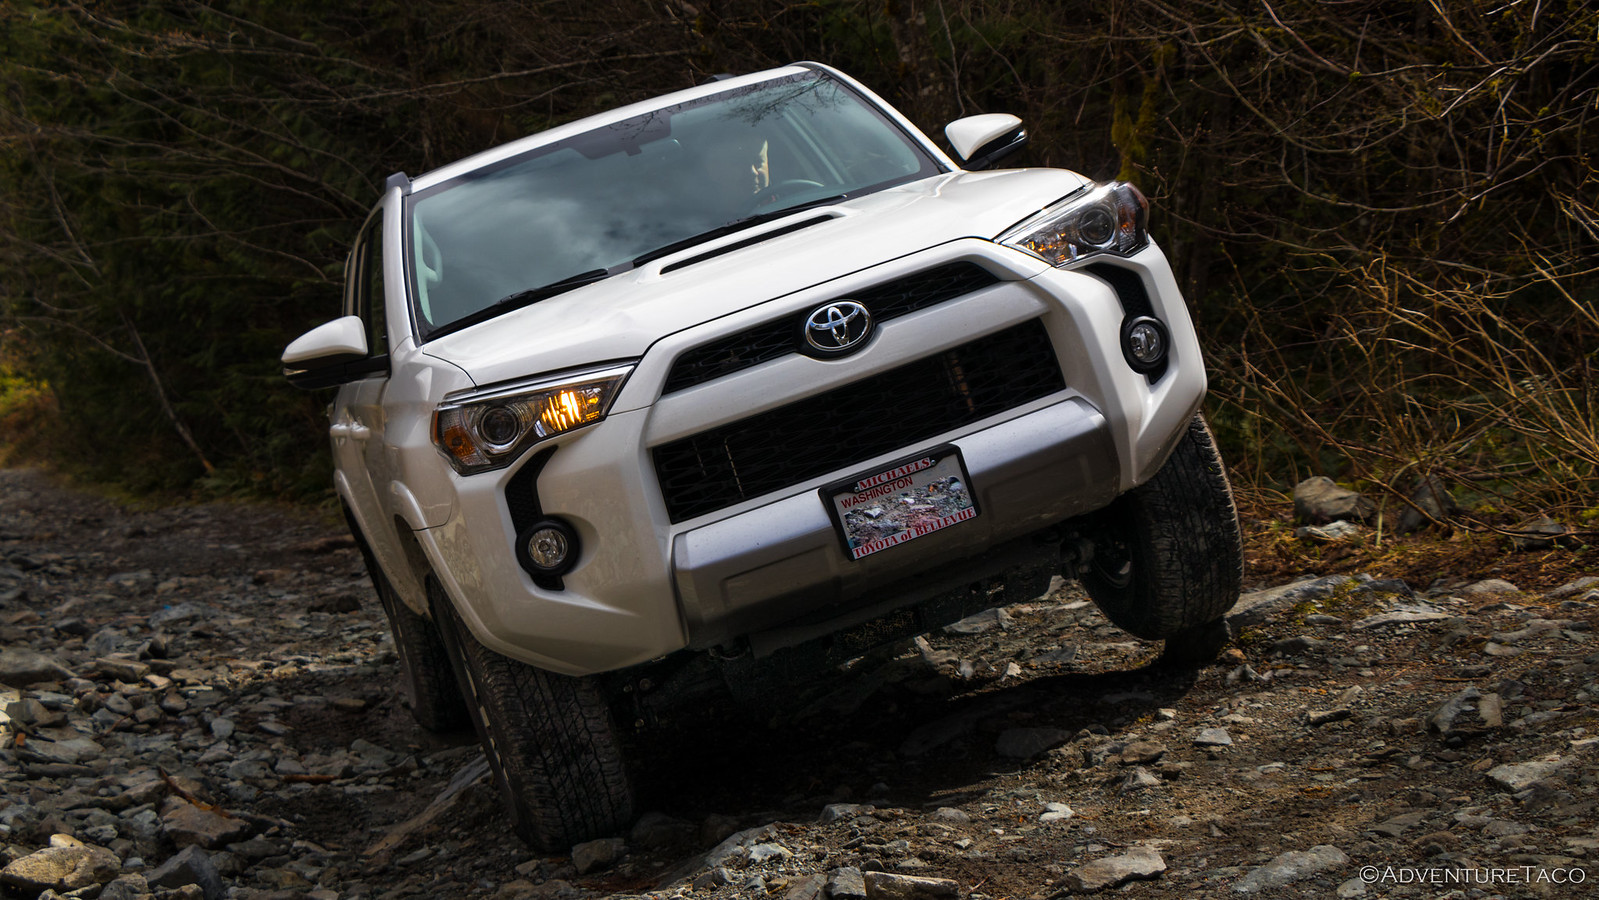
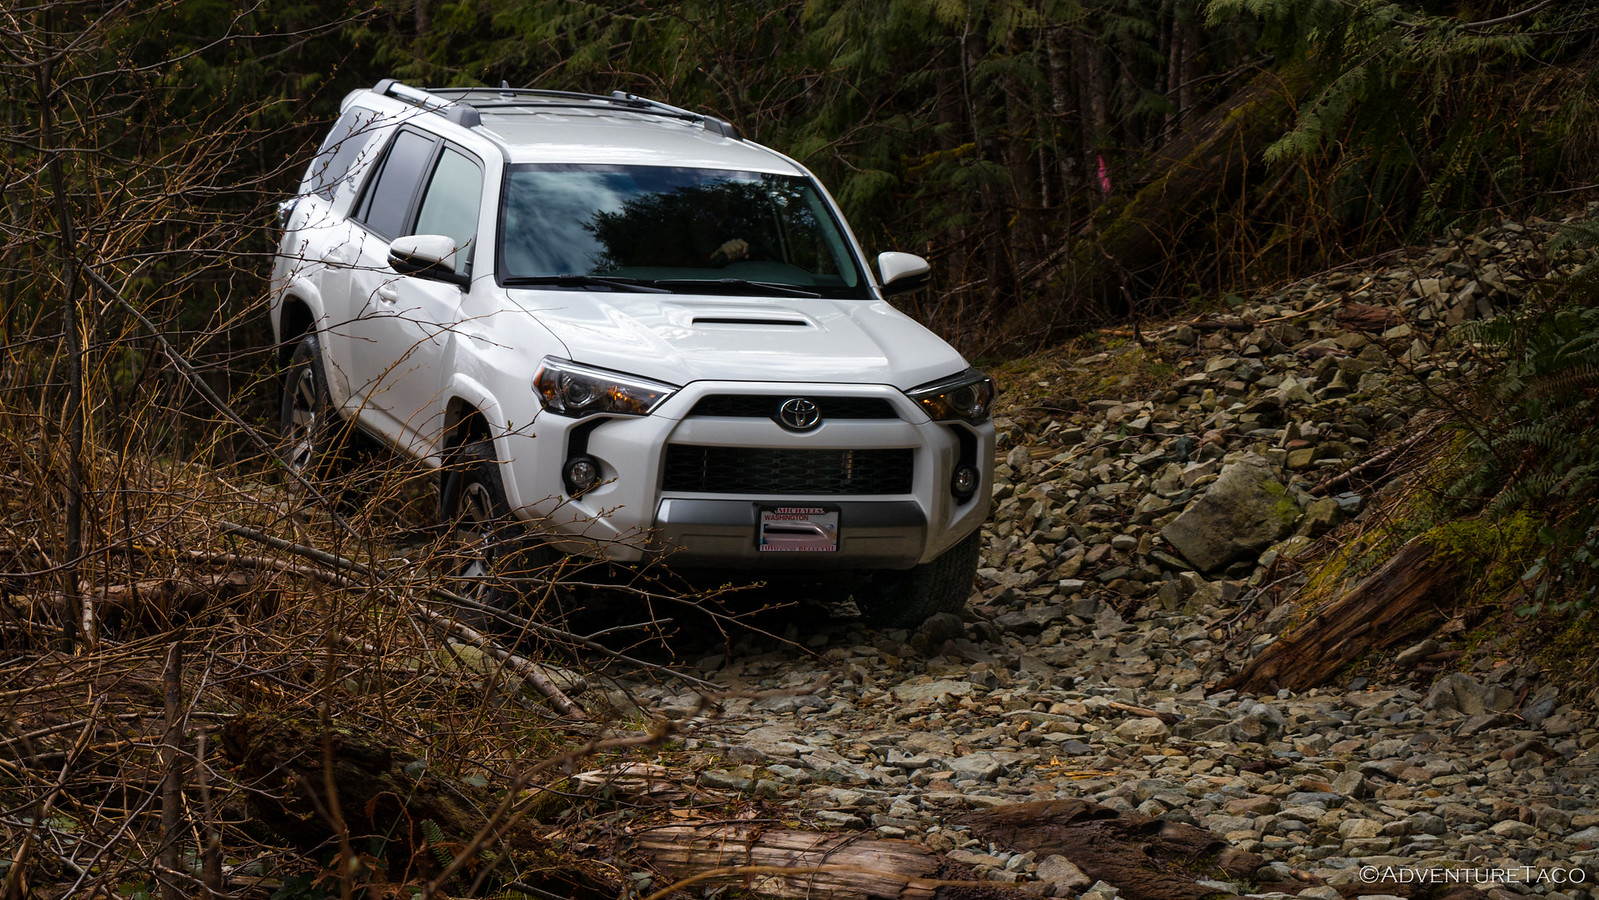
Their First Adventure - Two T4R Stormtroopers & AdventureTaco
April 21, 2018.

"You should get a 4Runner." is what I tell just about anyone with kids who asks what kind of car they should get. Of course, nothing generally comes of that - people opt for something more racy - a Tesla, or an Audi, those kinds of things.

So, you can imagine my surprise when Dave and Joe - a couple guys I worked with - each came home with a 4Runner and reached out to go "offroading"! Now that's cool.

Naturally, I wanted their first dirt in their new trucks to be fun - how else would I get them out again? - but I also wanted to balance that with something that'd be a little uncomfortable for them, not just some flat gravel road that you could drive in a Prius. Oh, and we had weather to contend with as well, since spring really only comes to the PNW around June.

In the end, we decided to take the trucks out to NF-9021 - something they were totally capable of, but that I knew would take Dave and Joe to the edge of their comfort zone, and then leave them wanting more - prefect!

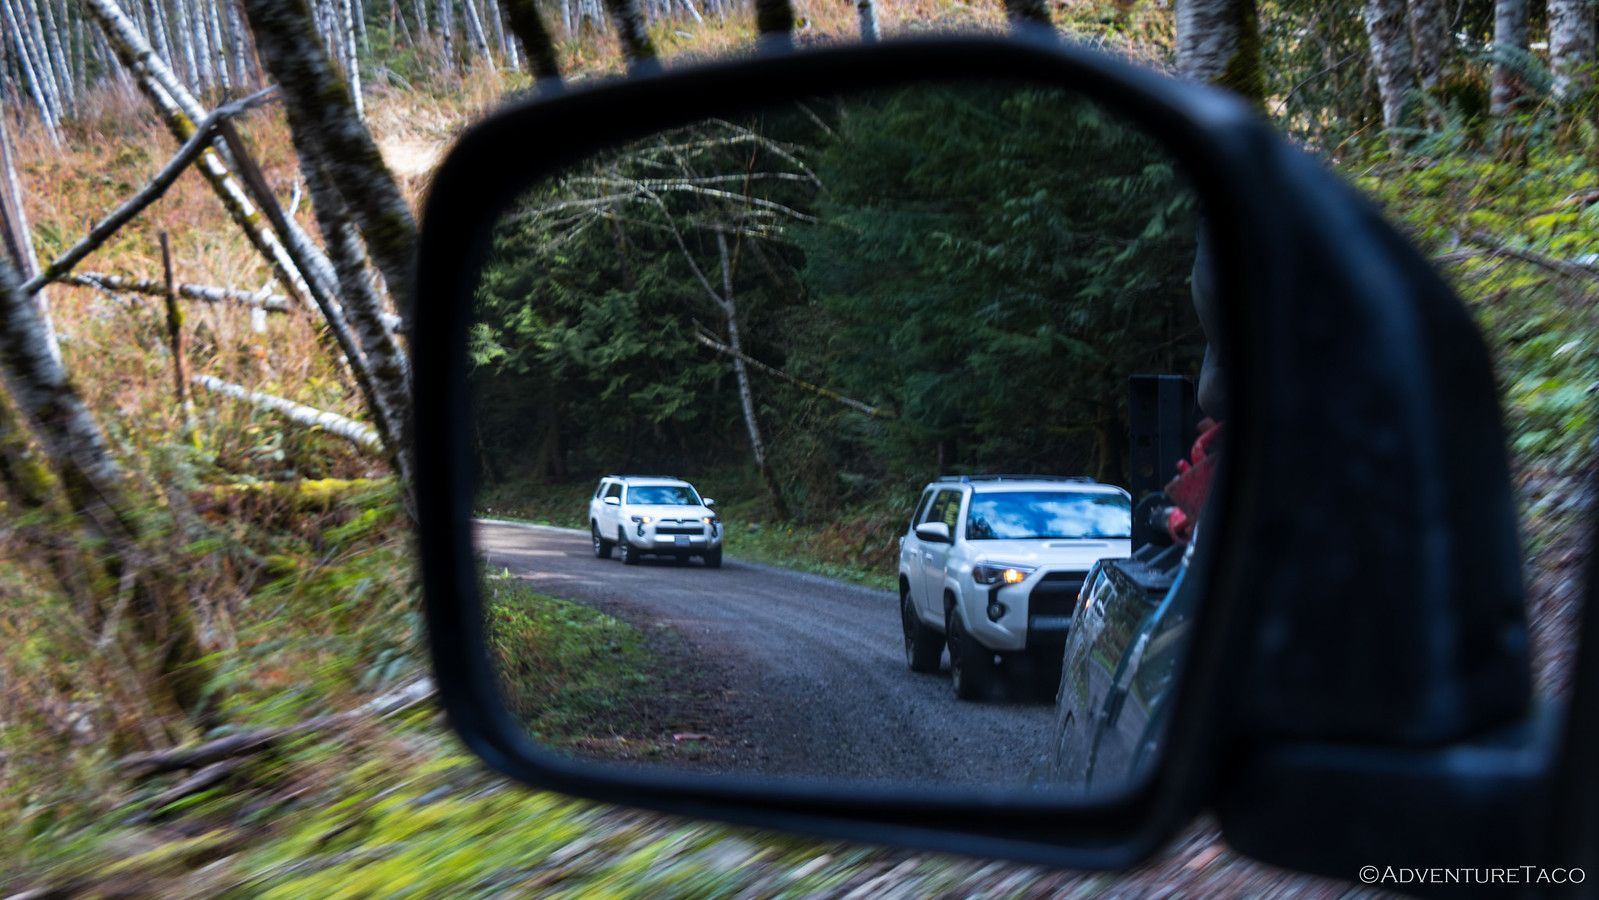
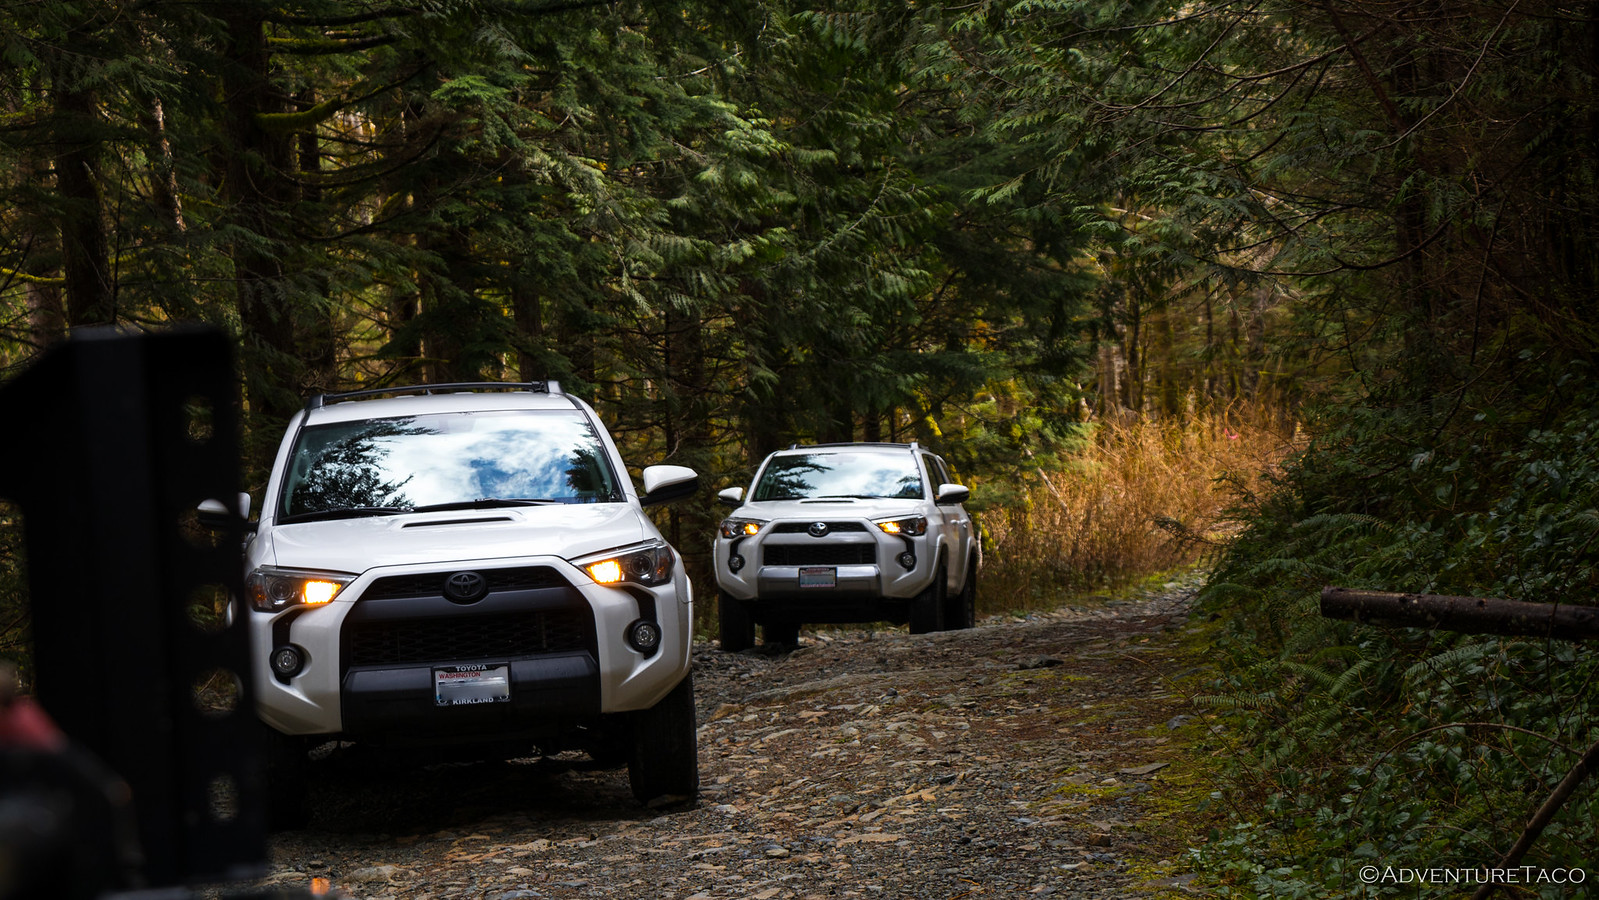
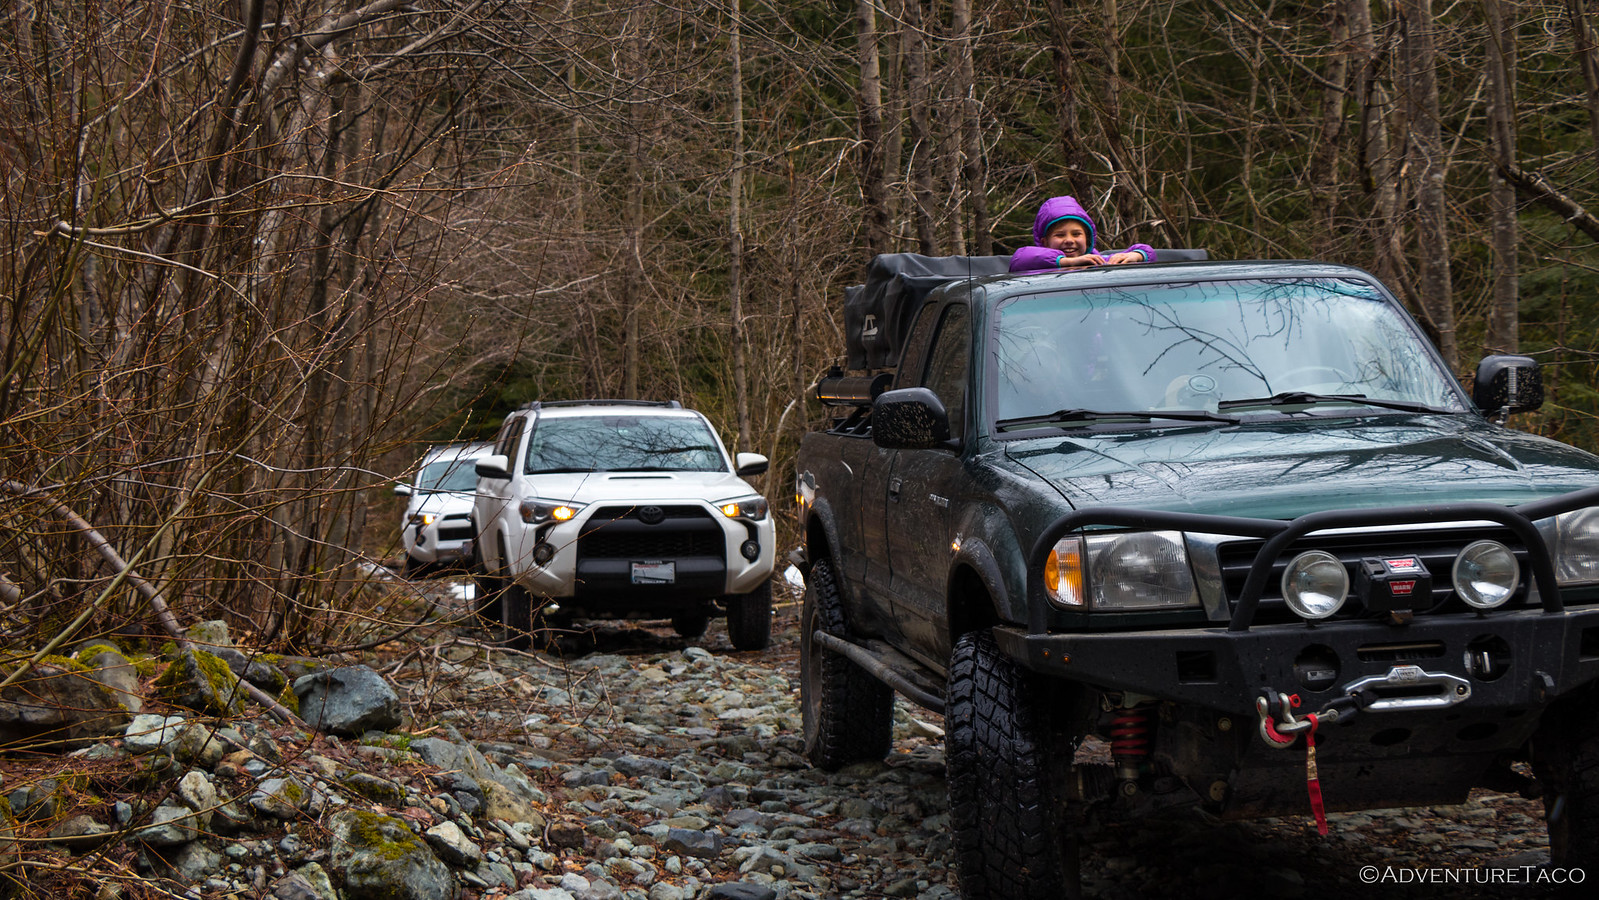
We rendezvoused at the trailhead just after 10:30am, said our hellos, and ran through a bit of a debrief about the trail and offroading in general. The Runner's - matching white stormtrooper models - eyed the AdventureTaco.


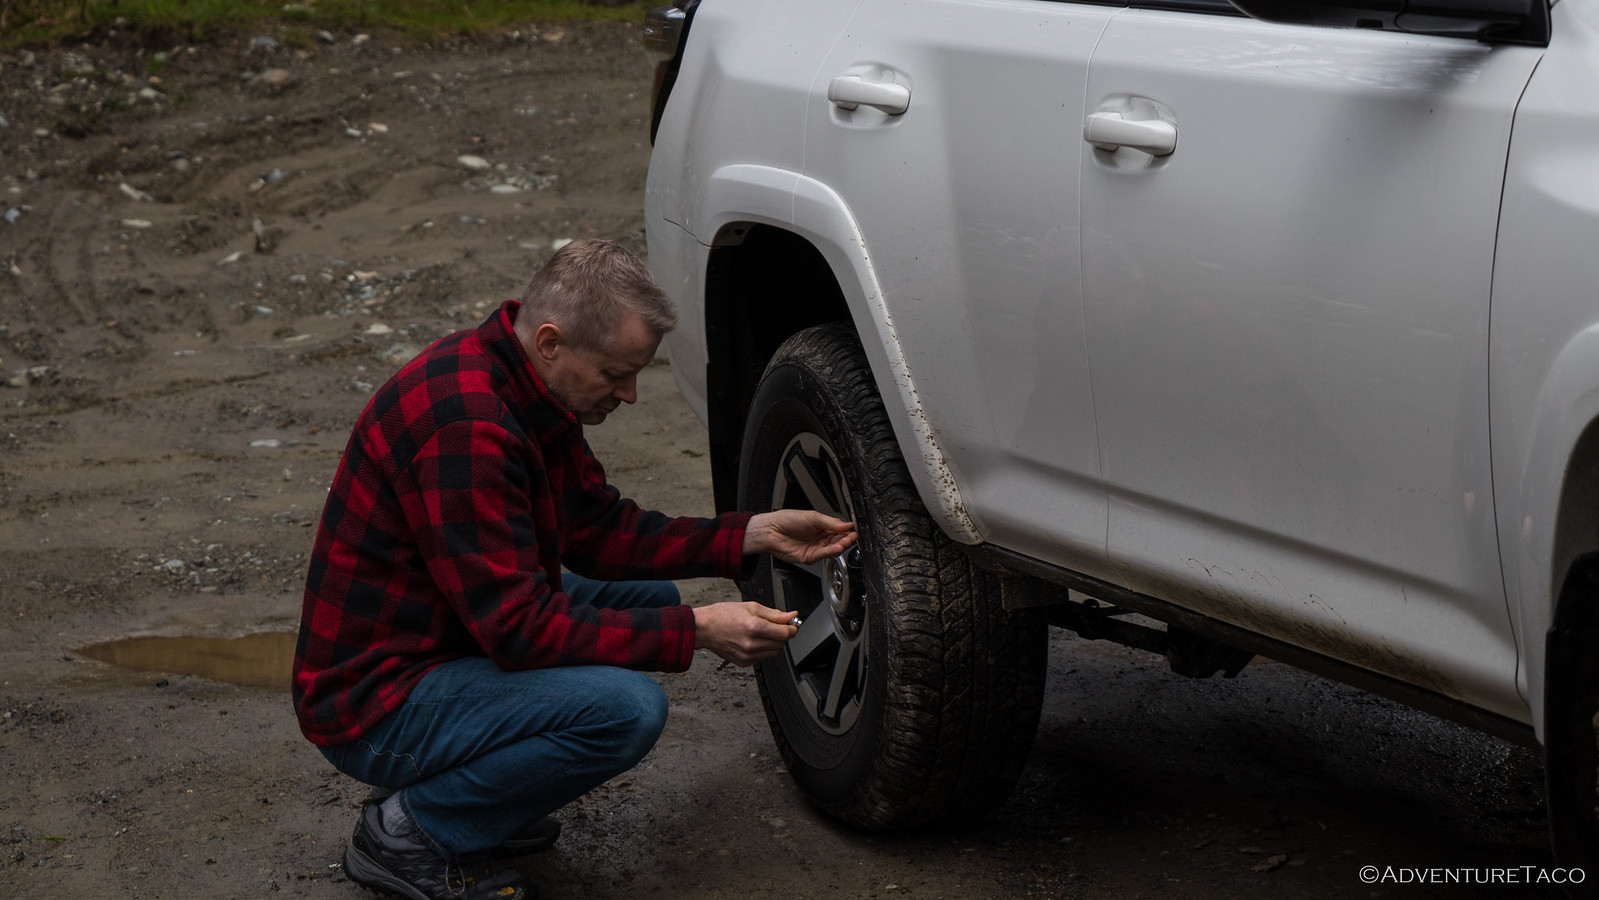
Then, it was time to air down. I handed over a tire pressure gauge and suggested that they air down from 32psi to something around 22-23psi, since they were running P265/70 R17 tires (that "P" standing for passenger-load rated vs. "LT" or light truck). We wanted them to have some give for comfort and flexibility over rocks, but letting out too much air would lower them even closer to the ground and get them riding on their thin sidewalls.

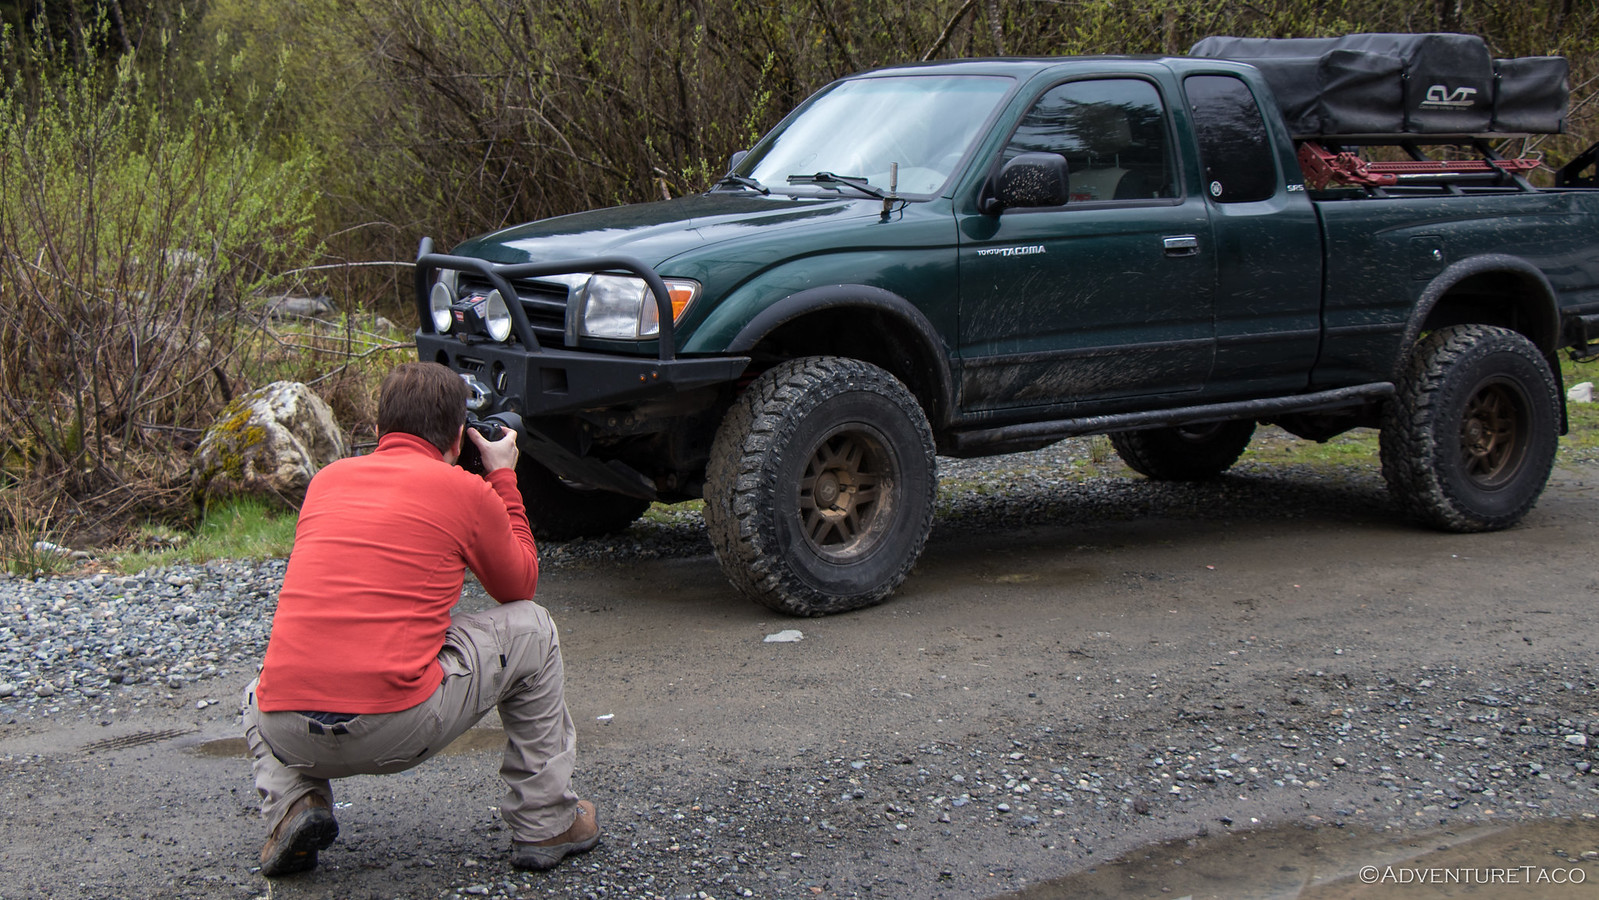
While we aired down, Joe also entered his element. Click, click click.


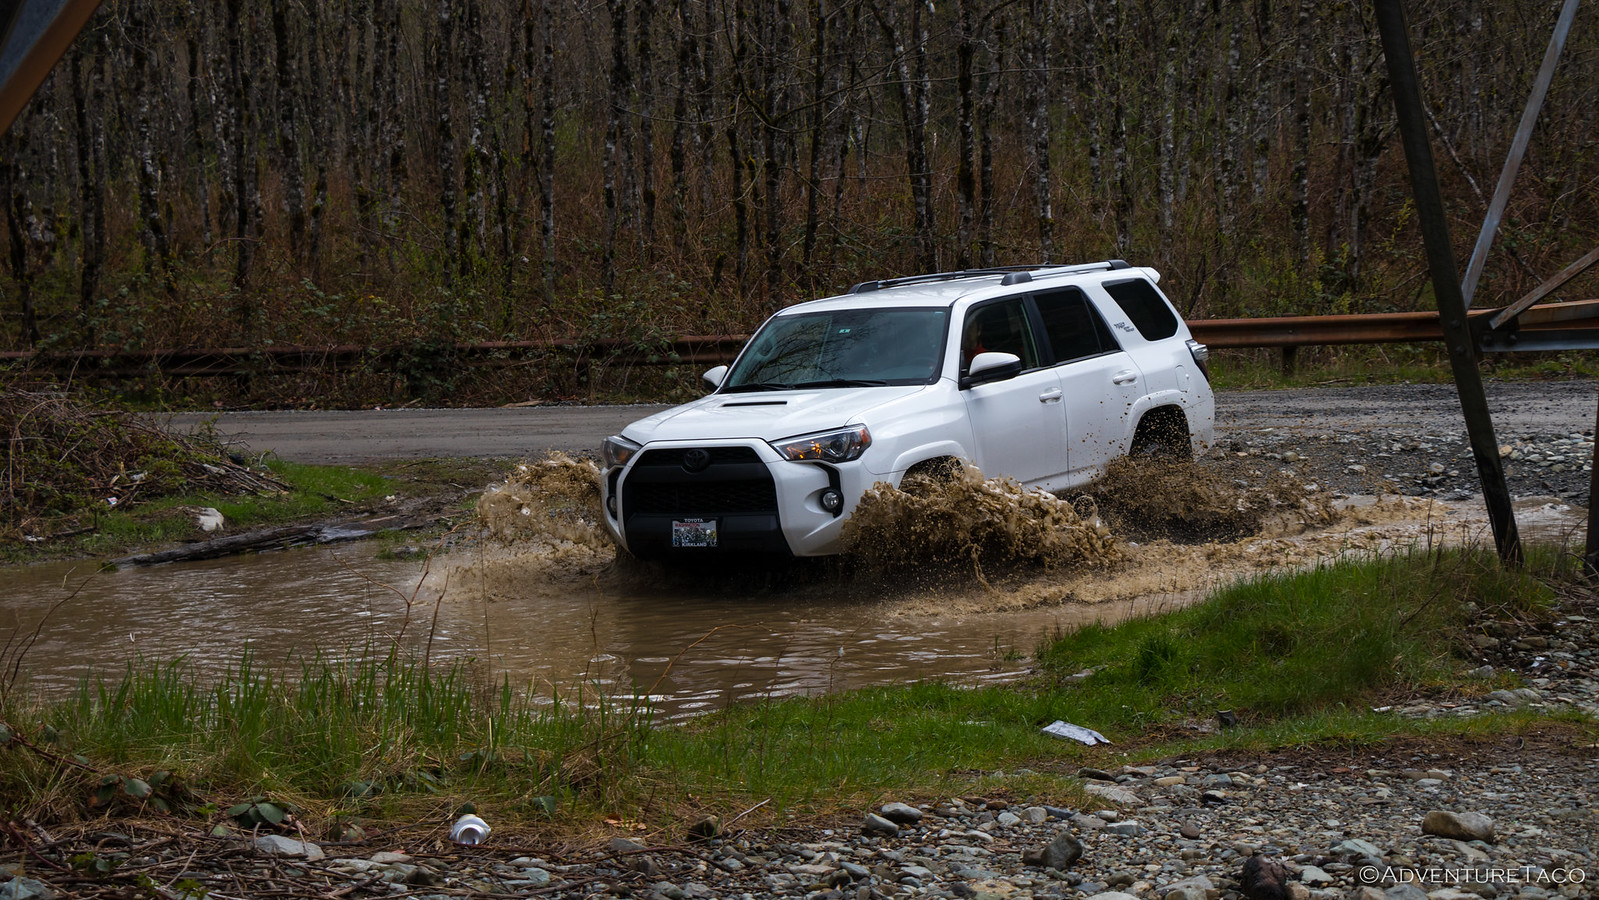
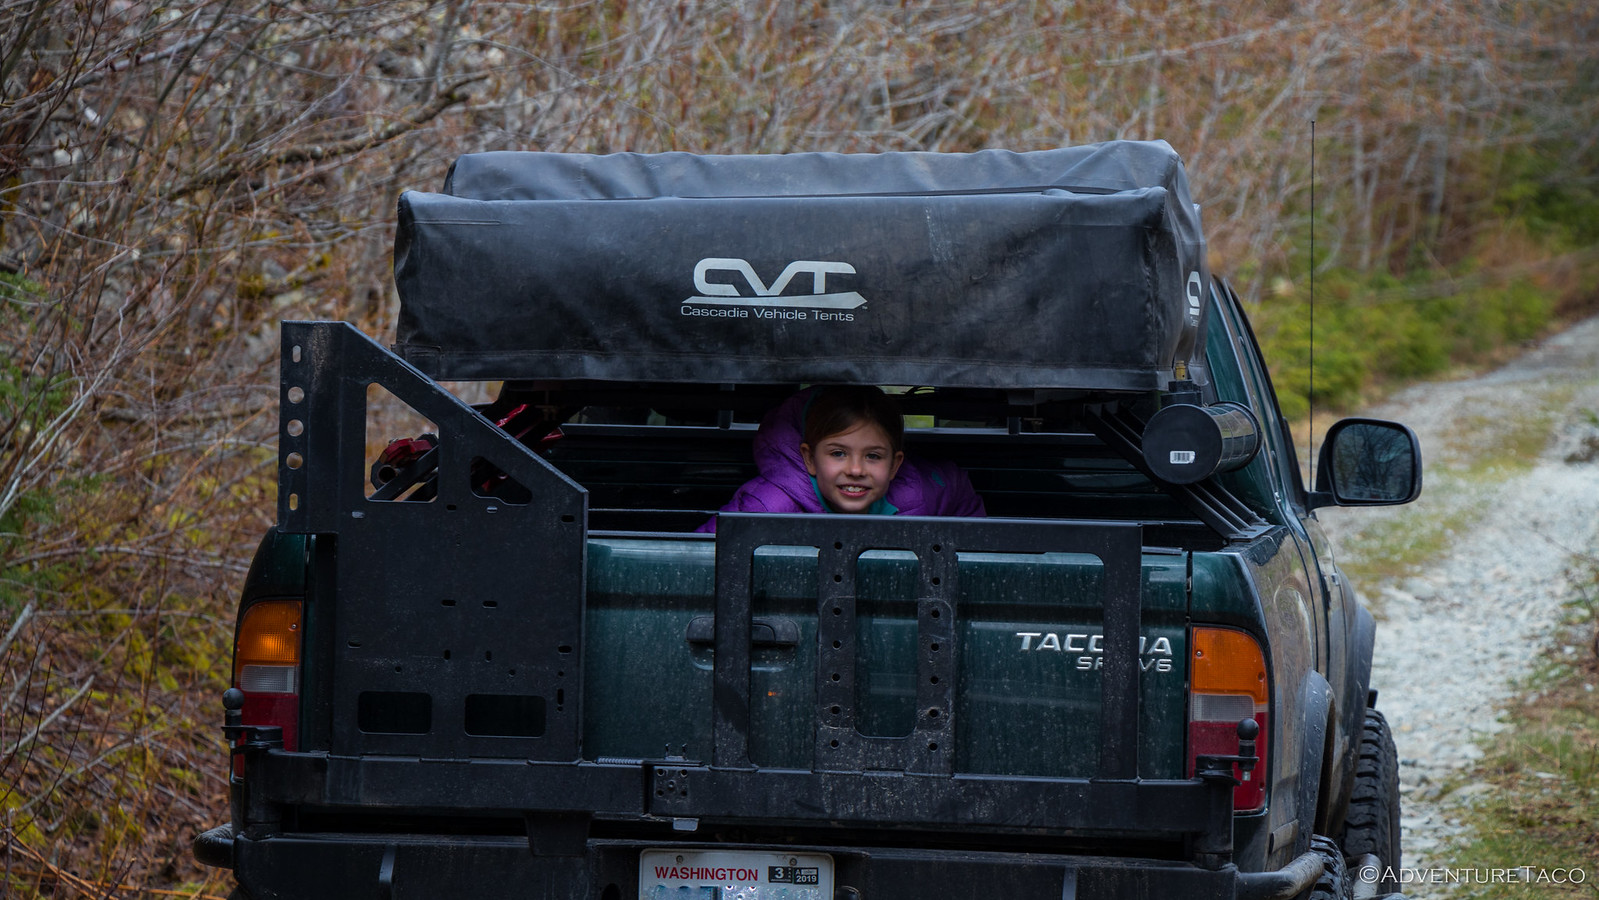
We'd rallied at a turnout with a couple big puddles, and figured this would be as good a spot as any to get the first bits of mud on the 4Runners. So @mini.turbodb climbed in the back of the Tacoma, and we dove right in. If you could see the smile on Joe's face here, you'd know he's hooked forever.


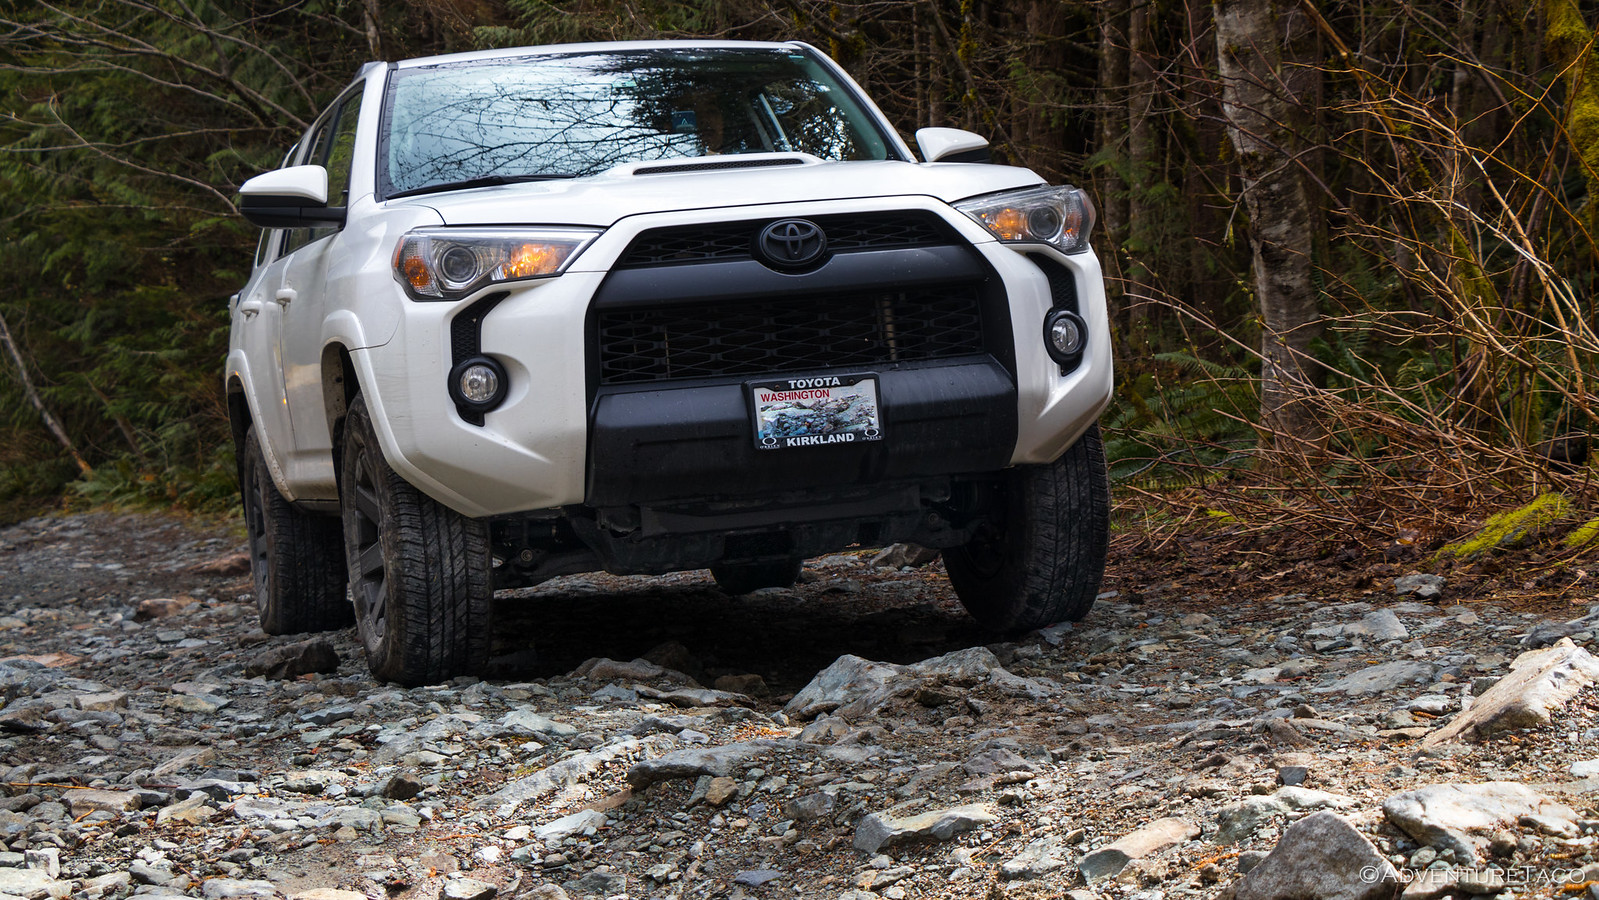
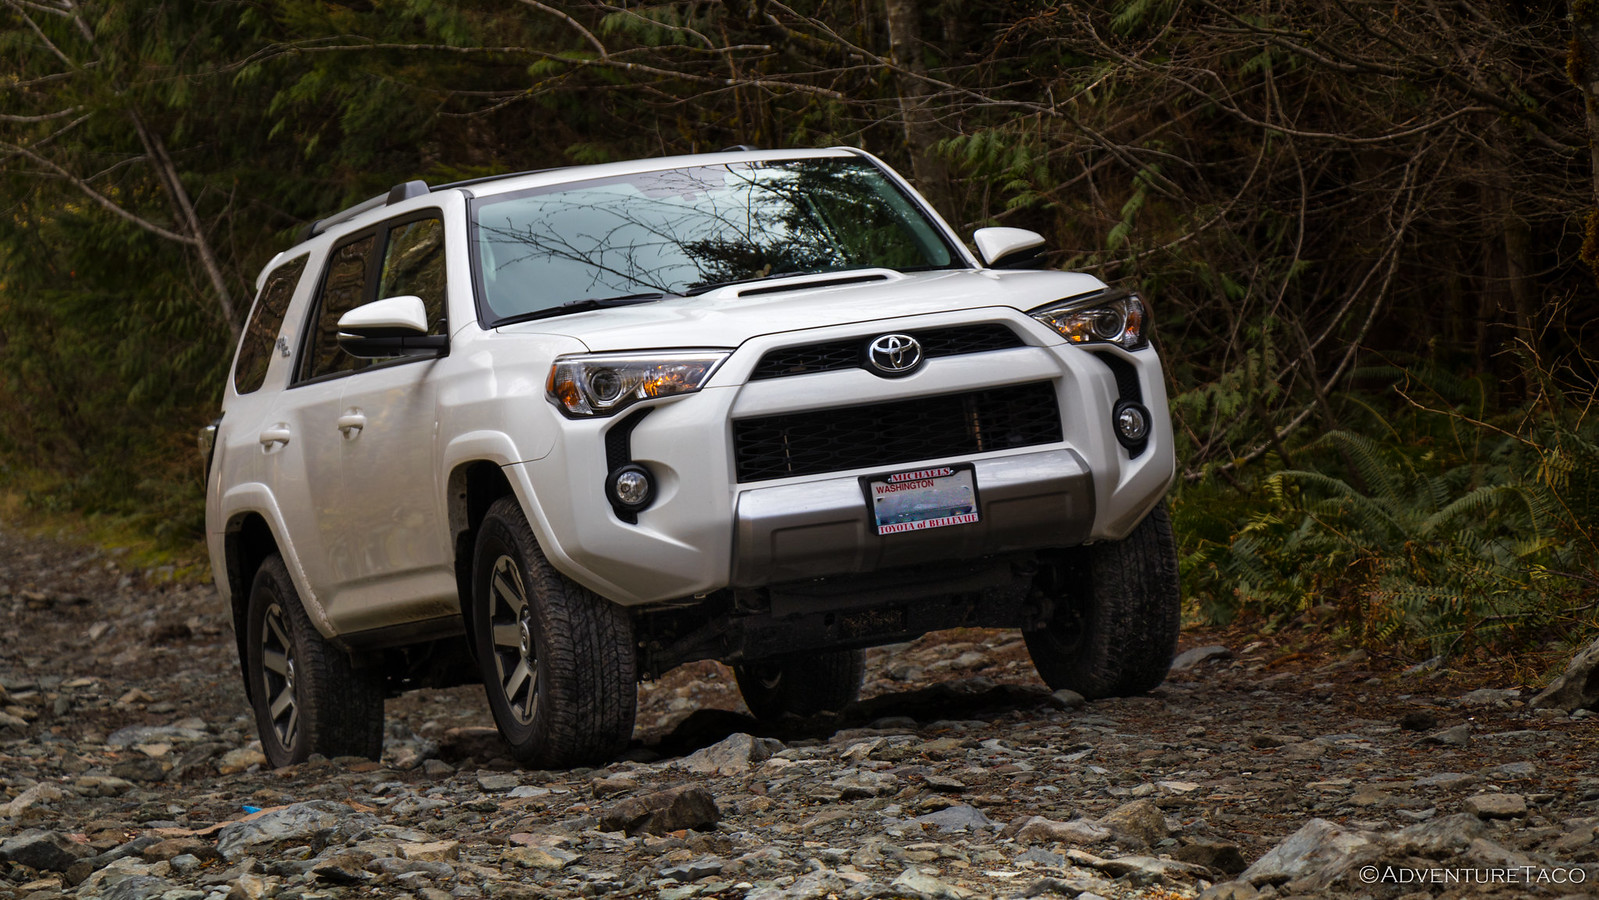
Then, we headed up the trail - potholey at first, then steep, and then steep and rocky. It was fun going - I'd leap up ahead and then jump out to snap some pics of Joe and Dave making their way up - big grins and a bit of fear apparent on their faces.


Of course, they'd both punched it into 4WD early on, and despite the tires these were still super-capable 4Runners, so there was never anything to worry about. I took the opportunity to teach them how to watch and listen to a spotter, as I directed them into the bumpier and more off-camber parts of the trail - still pretty tame, but you know, to give them a little excitement.

I think they loved it.


This whole time, @mini.turbodb was having a blast - perhaps the best time she's had offroading, ever. Riding in the back of the truck (generally standing between the cab and the tent) was exhilarating for her, and the nice weather, slow speeds, and easy trail made it the perfect time for that! And that made @mrs.turbodb happy, since she was of course worried to start.


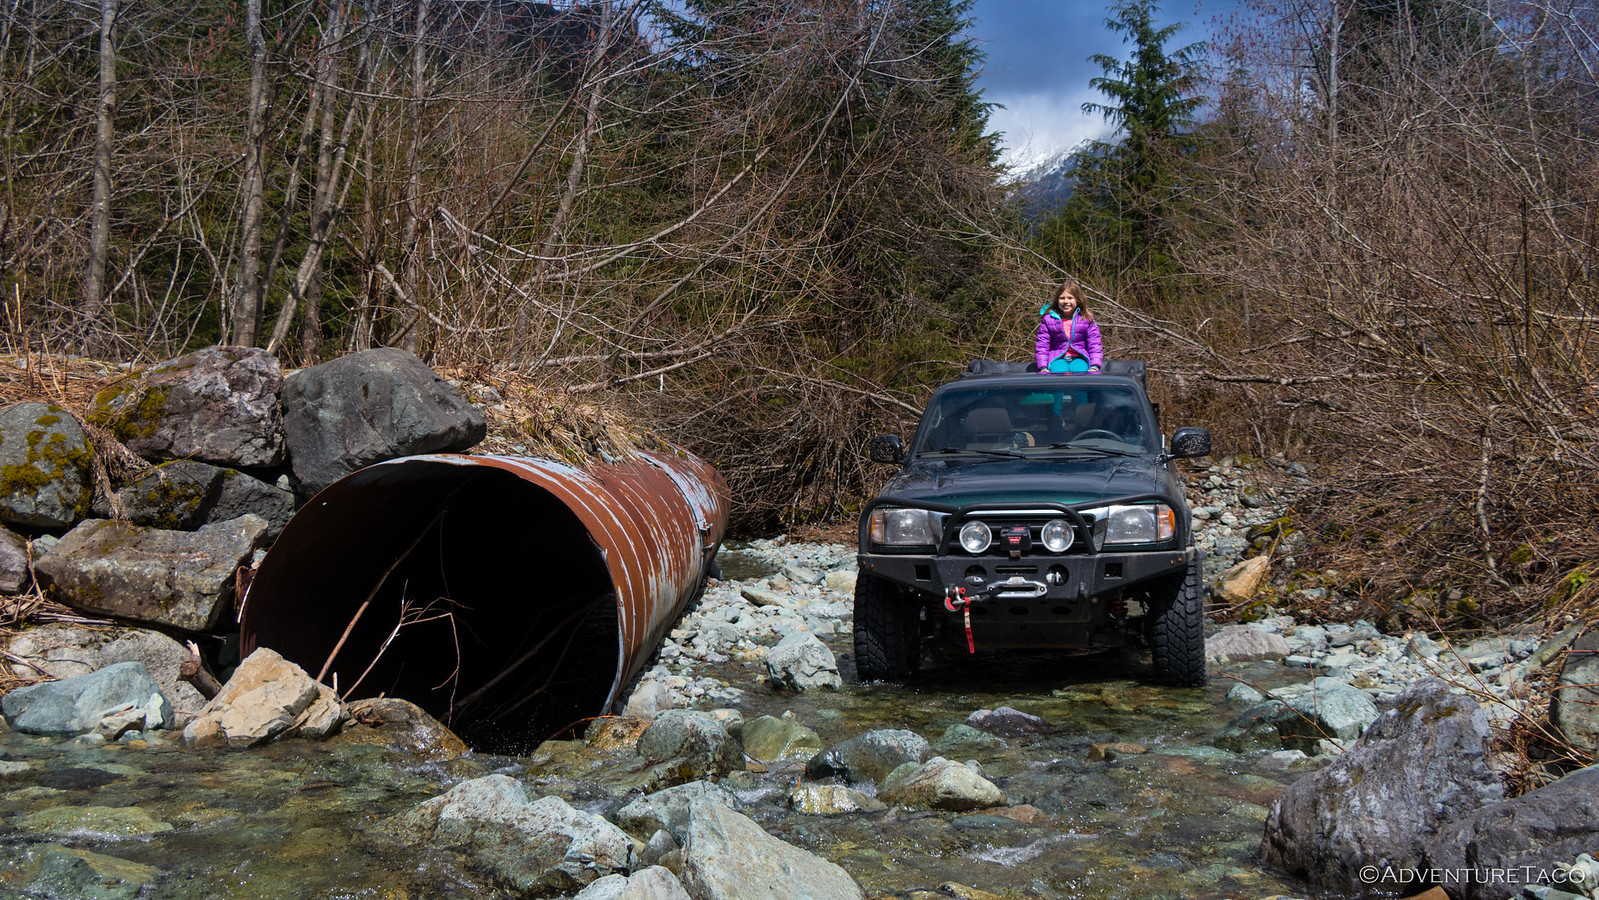
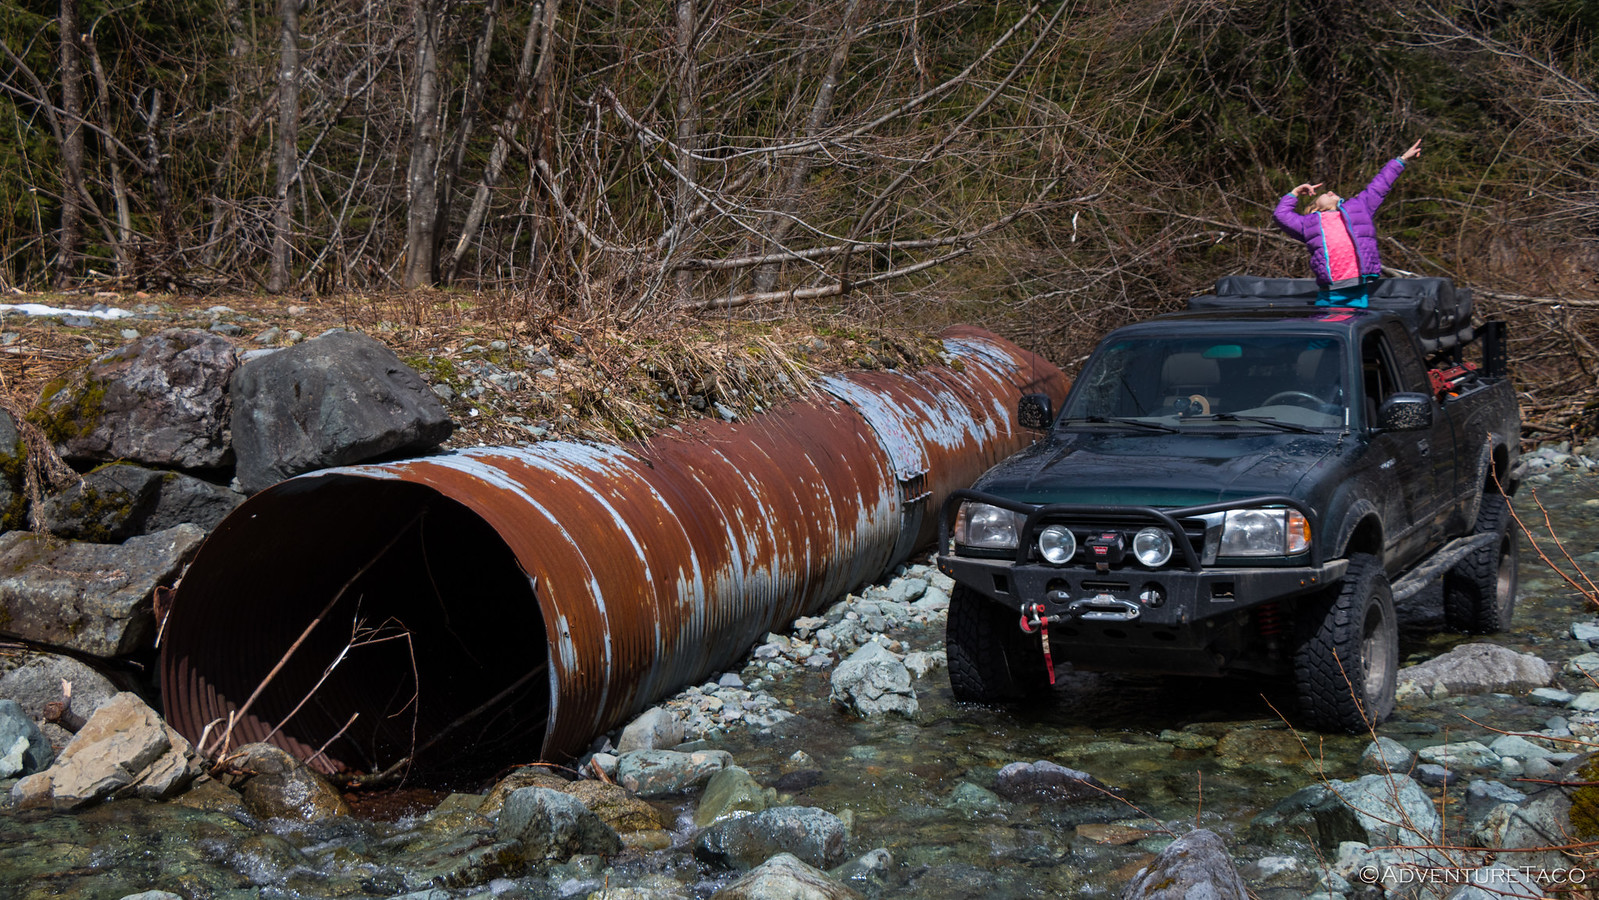
We continued making our way up the trail, passing through forest and over burms until we ultimately came to the Mine Creek crossing. The water was low, but the snow (which had been spotty to this point) picked up on the other side and was a foot deep in places. Not a problem for the Tacoma, and probably not an issue for the 4Runners, but with street tires and 8-inches of clearance, we decided that it was a good spot to call it for the first trip.


And then, from the other direction, we saw a Jeep and Tacoma headed down the road toward us. It was time to get out of the way. I pulled into and up the creek and Joe eased in after me. Dave backed into a shallow pull-out, and the Jeep and Tacoma made their way past. @mini.turbodb enjoyed it all immensely.


- - - - -

Unfortunately, that's all the photos I'm allowed in a post. For the rest of the photos and story, keep reading:
Their First Adventure - Two T4R Stormtroopers & AdventureTaco


.
 

turbodb

Well-known member
Chasing the P0171 Engine Light
April 23, 2018.

I was ready for adventure - running solo, I was returning to Death Valley, having only just wet my appetite on our first trip back in January. With 2500 miles to go, I knew I had a lot of driving ahead - but I was ready - or so I thought - when, less than 50 miles in, the Check Engine Light (CEL) came on.
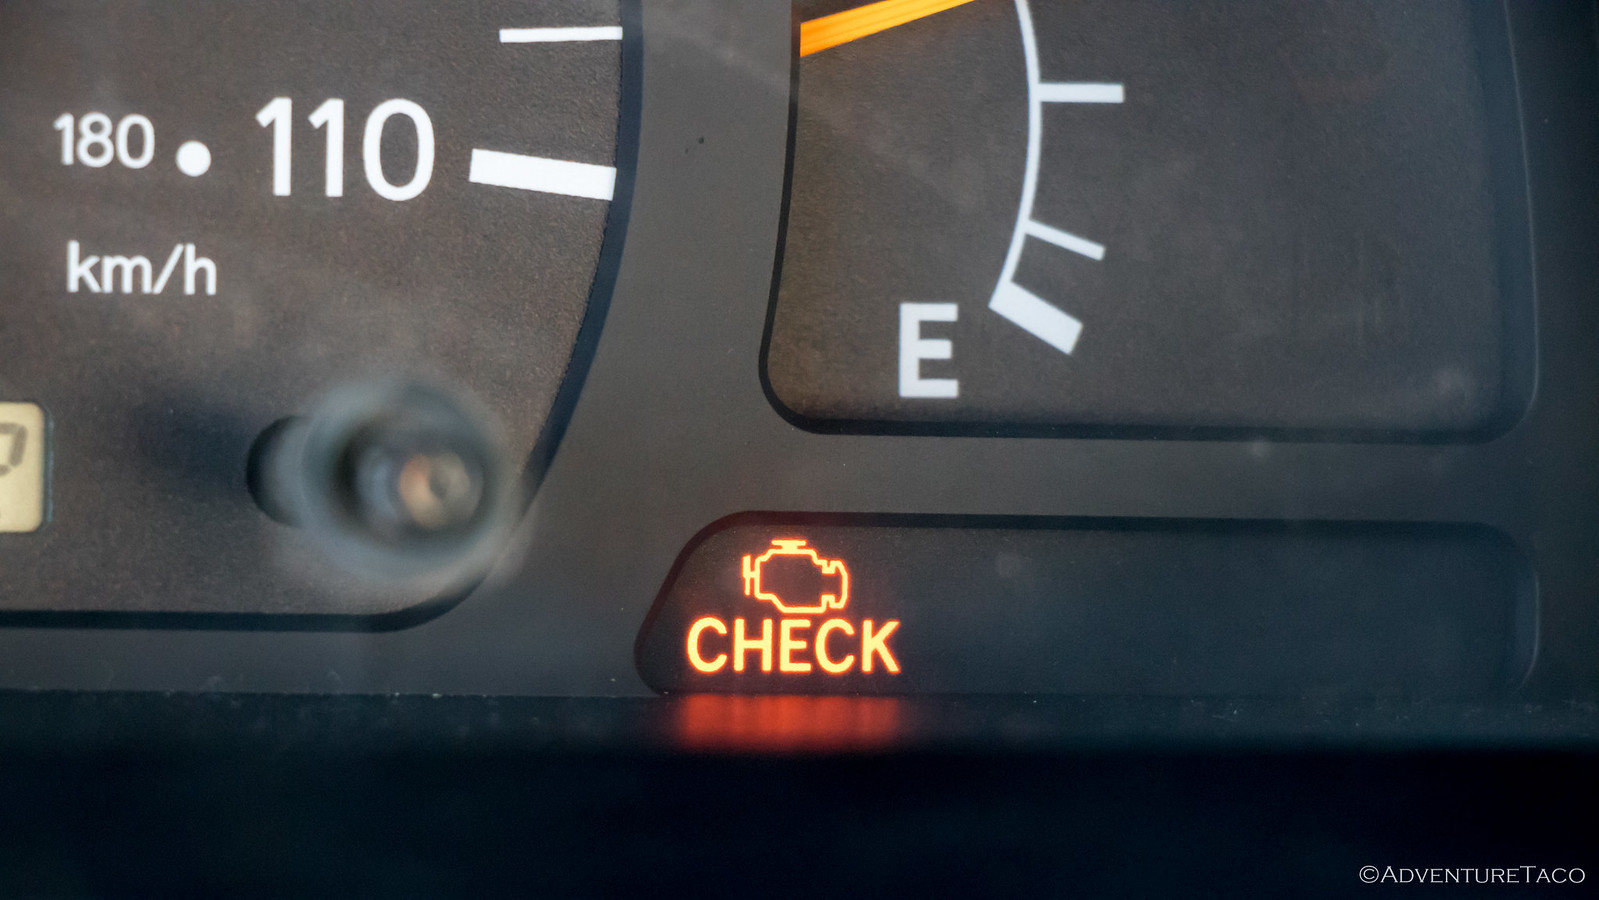

I've covered the details of the first hours of diagnosis in my Back to Death Valley trip report, so if you haven't read that (and are interested), I'd recommend starting there. The plan here is to go into what happened when I returned - the process of chasing the P0171 source, and getting it fixed.

It's long, and wordy, and follows my learning process. If you already know everything here, sorry about that!

- - -​

Upon my return, I started with a bunch of research into what can cause the P0171 code on a 96-04 Tacoma, which is set when Long Term Fuel Trim (LTFT) and Short Term Fuel Trim (STFT) exceed 15% for an extended period of time (over the course of two trips). It's not a small list, and I'm sure that even what I uncovered isn't complete:
  • Dirty or malfunctioning mass airflow sensor (MAF)
  • Vacuum leak
  • Malfunctioning air/fuel ratio sensor (AF)
  • Fuel injector clogged
  • Fuel filter clogged
  • Fuel pump weak
  • Malfunctioning positive crankcase ventilation valve (PCV )
  • Engine coolant temp sensor malfunction
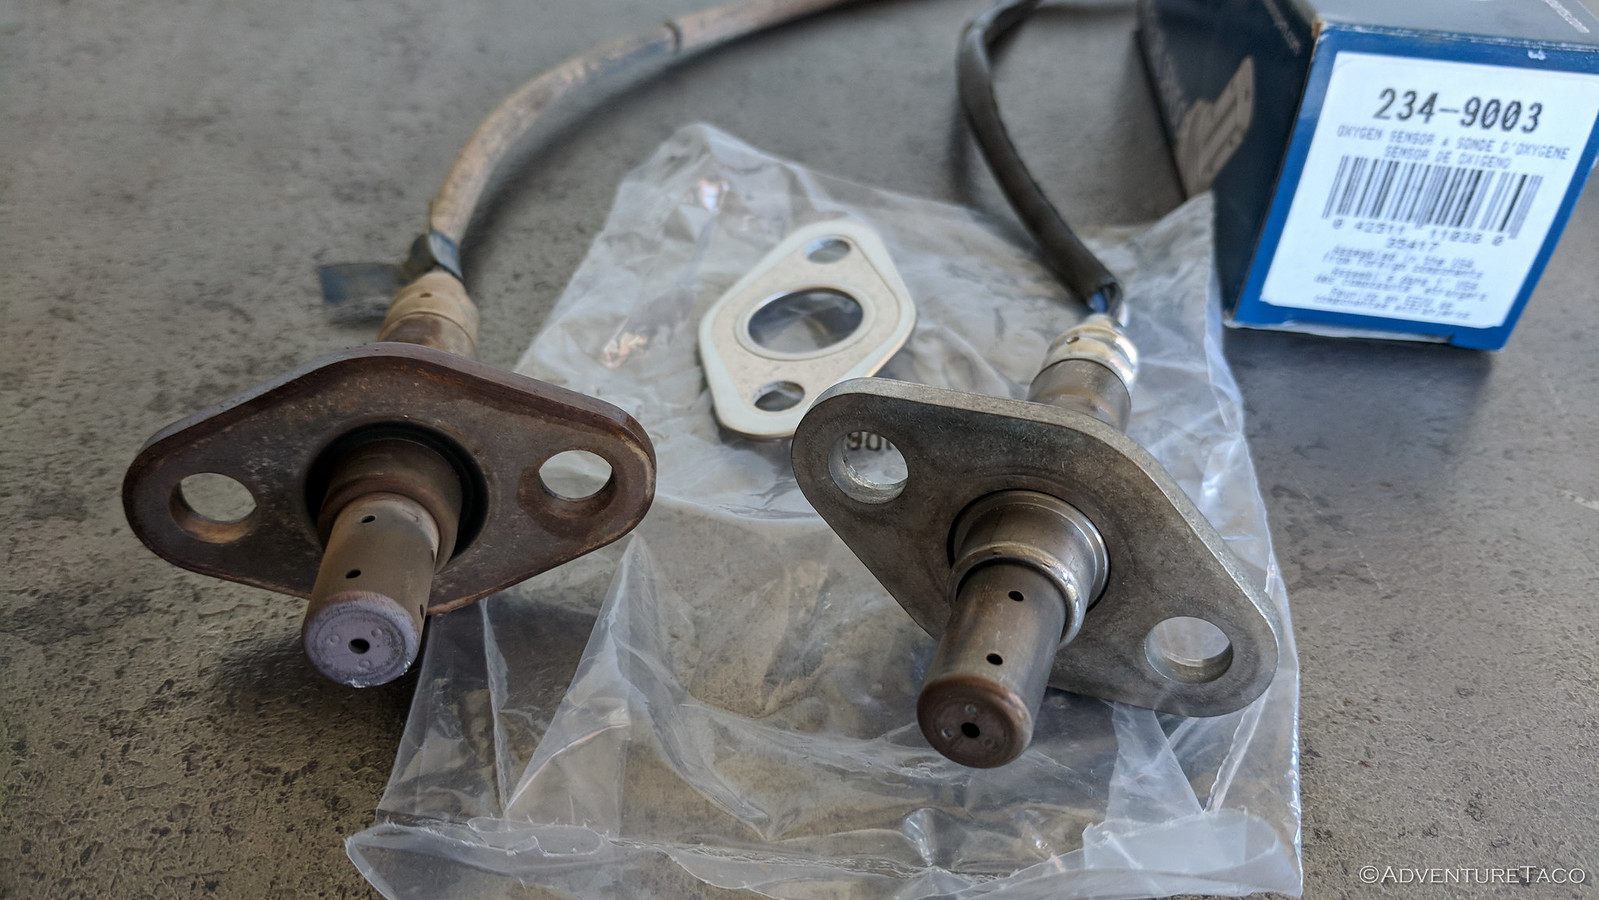
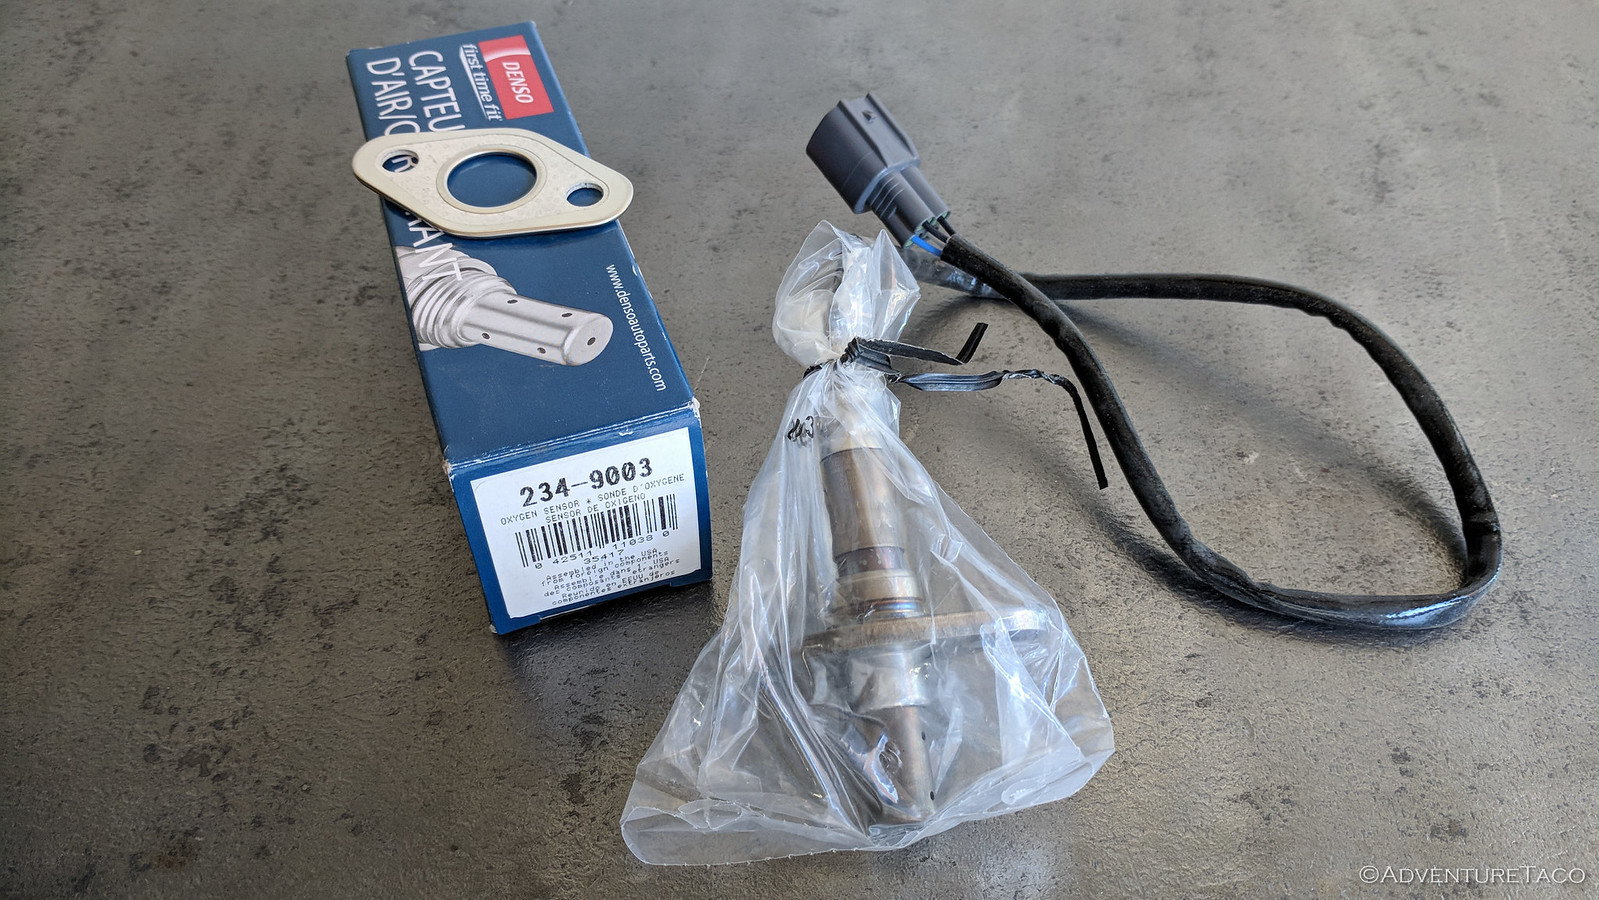
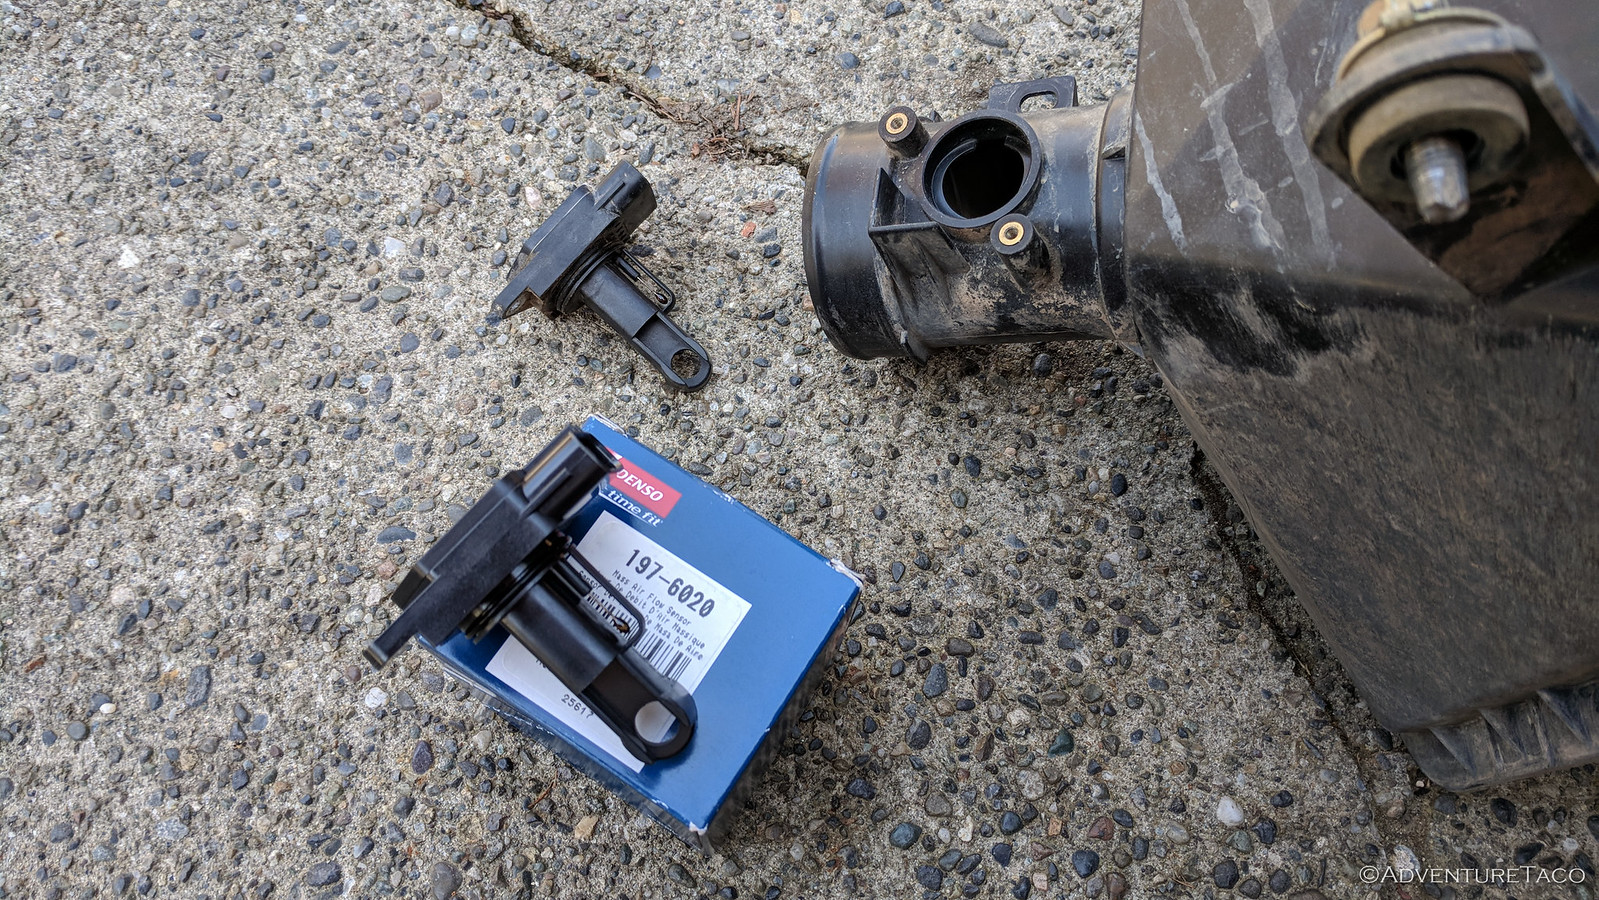
I decided that I'd try a multi-pronged approach, largely centered around what seem to be the most common culprits - a vacuum leak, the MAF, and the AF sensor. I ordered a new Denso (OEM supplier) MAF sensor (197-6020) and AF sensor (234-9003), as well as a new OEM fuel filter (23300-62010), so that they'd arrive as soon as possible.

Having already cleaned the MAF, I started by looking for a vacuum leak. I'd done this by spraying starting fluid in the engine bay in hopes of hearing the engine rev while on my trip, but I figured a smoke test was in order. So I grabbed an old paint can, a length of hose, and an air valve to construct my own personal smoker.
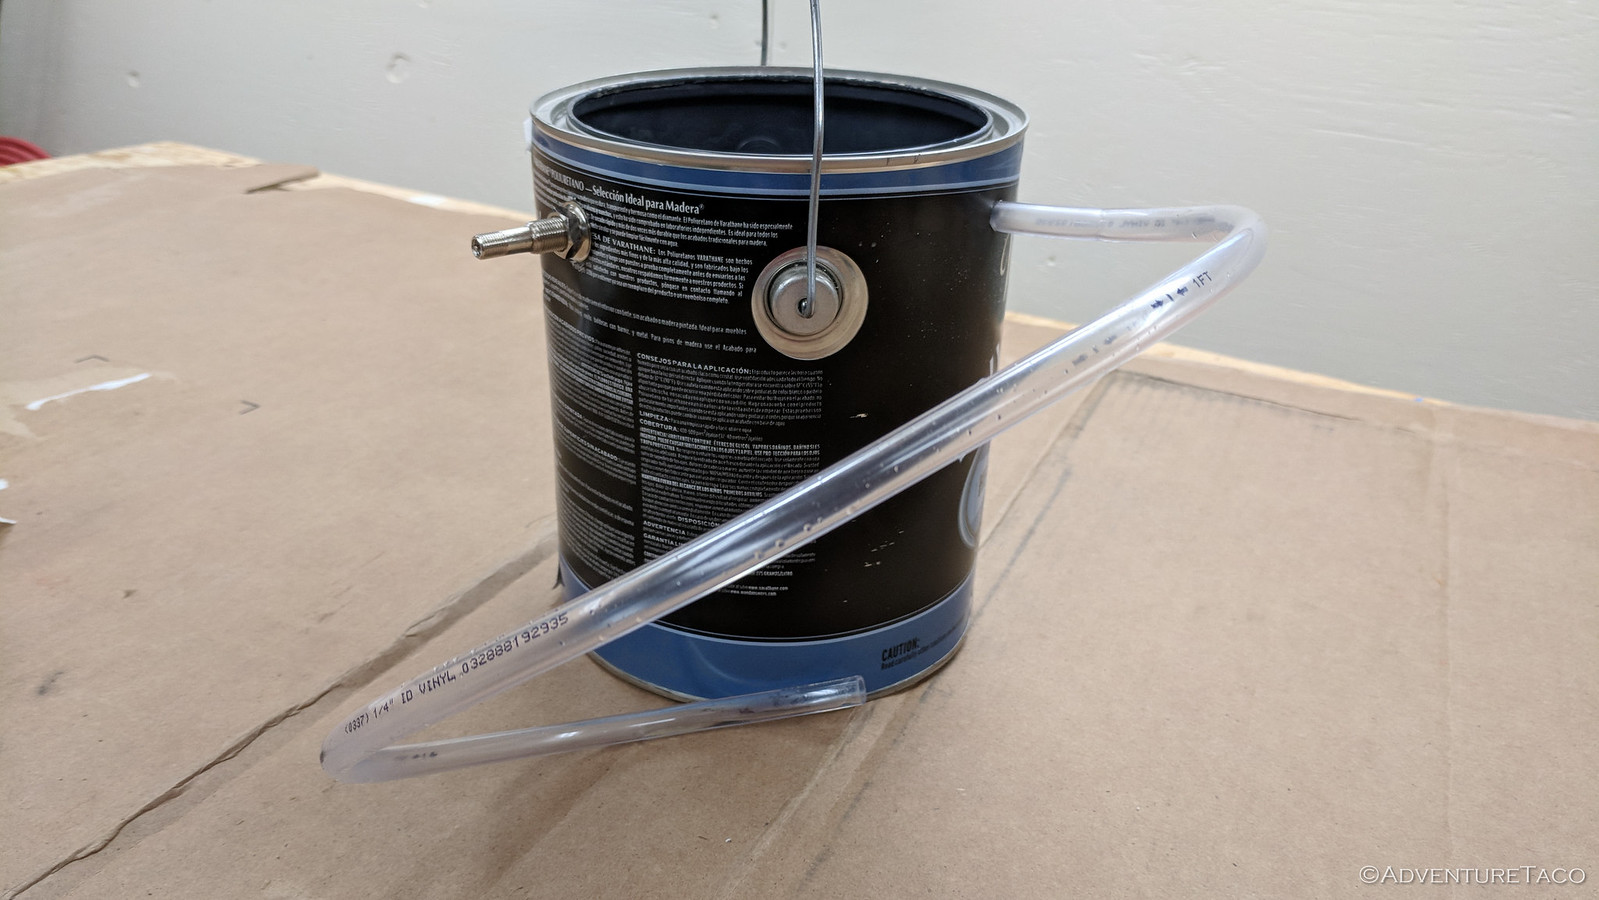

Then, I built a fire. My plan was to sprinkle a bit of olive oil on them inside the paint can to generate smoke, and then to push the smoke into the system with a bit of air pressure (just a couple psi - I didn't want to blow any hoses off in the process).
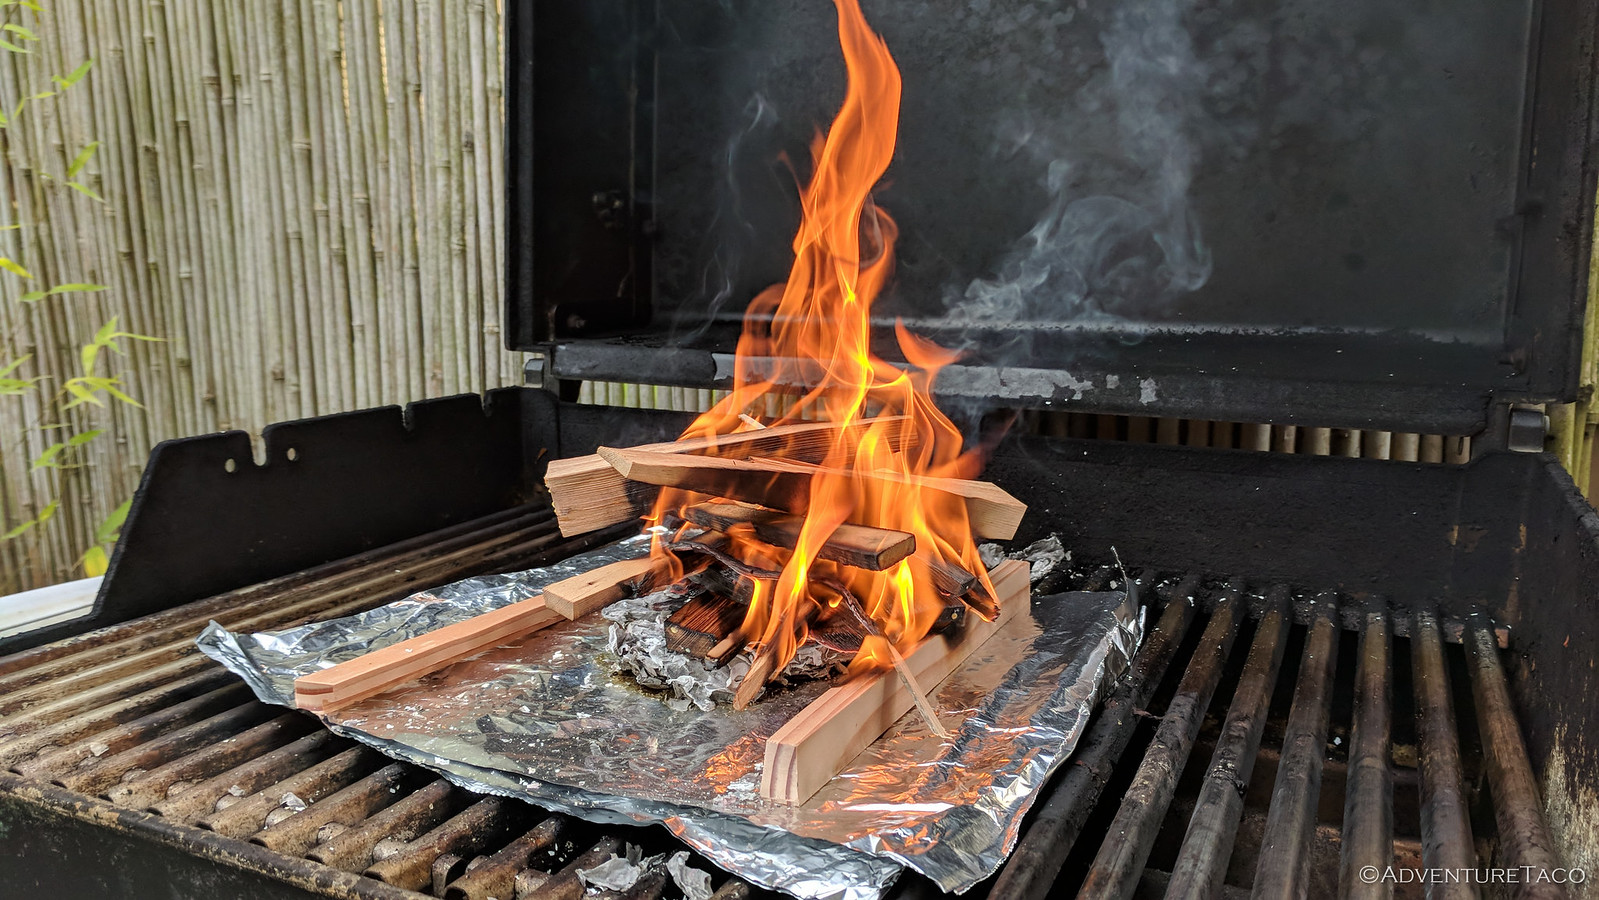
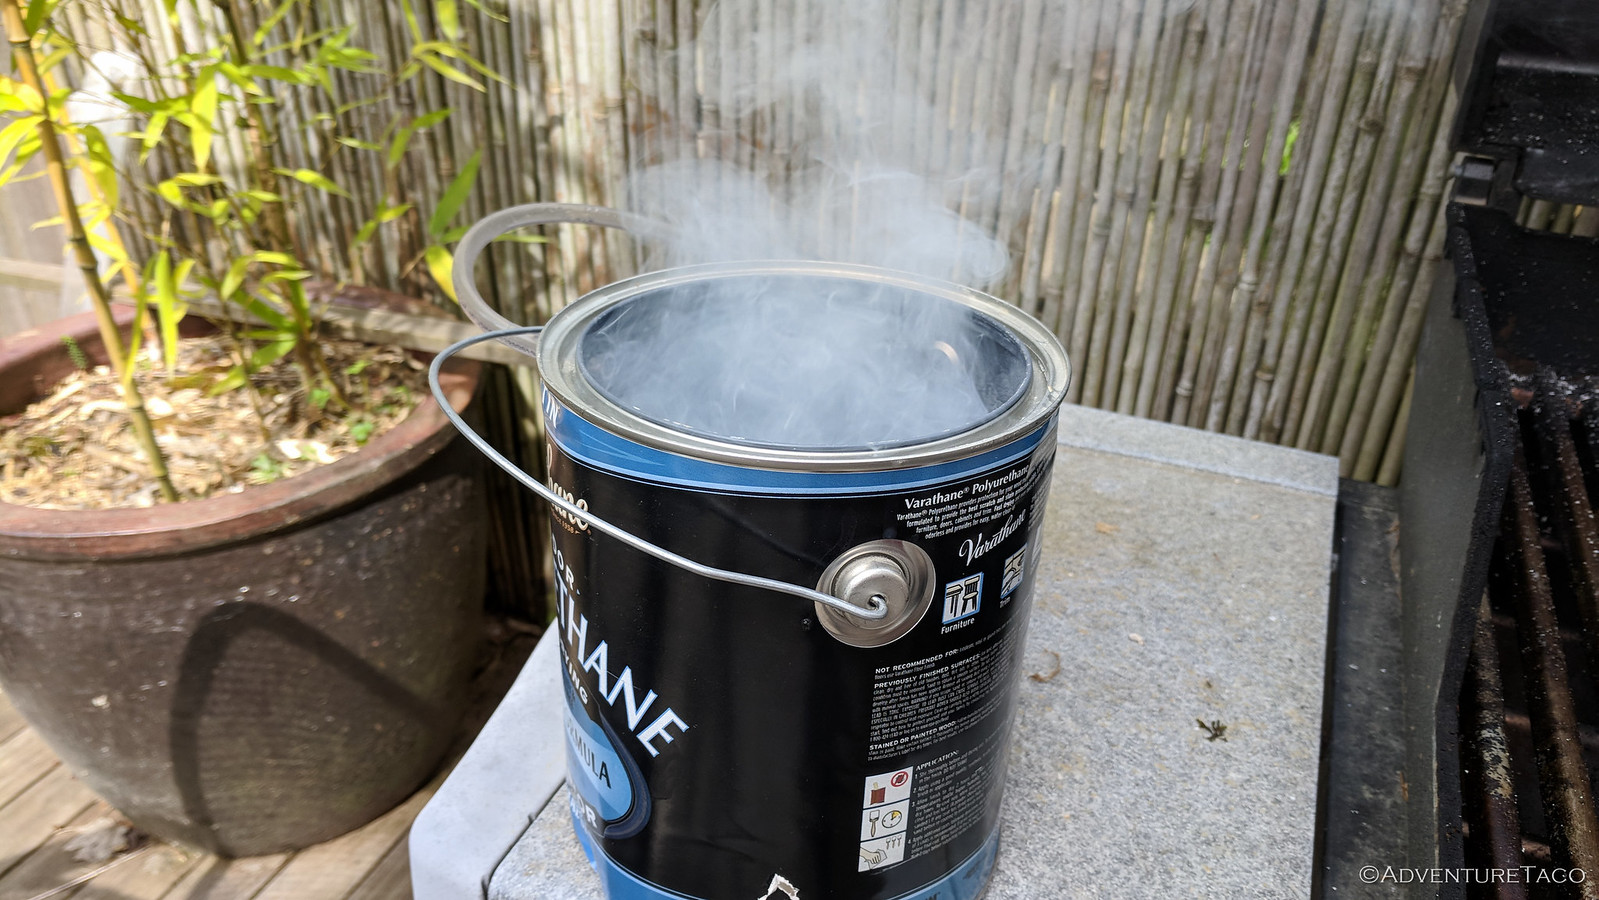


I was generating lots of smoke, so I removed the air box (filter + MAF) and covered the intake with a blue glove. Then I hooked up the clear hose and sent the smoke into the system. There was plenty of smoke getting in (and coming out once I took off the blue glove), but as I'd found with the starting fluid, I had no leaks.
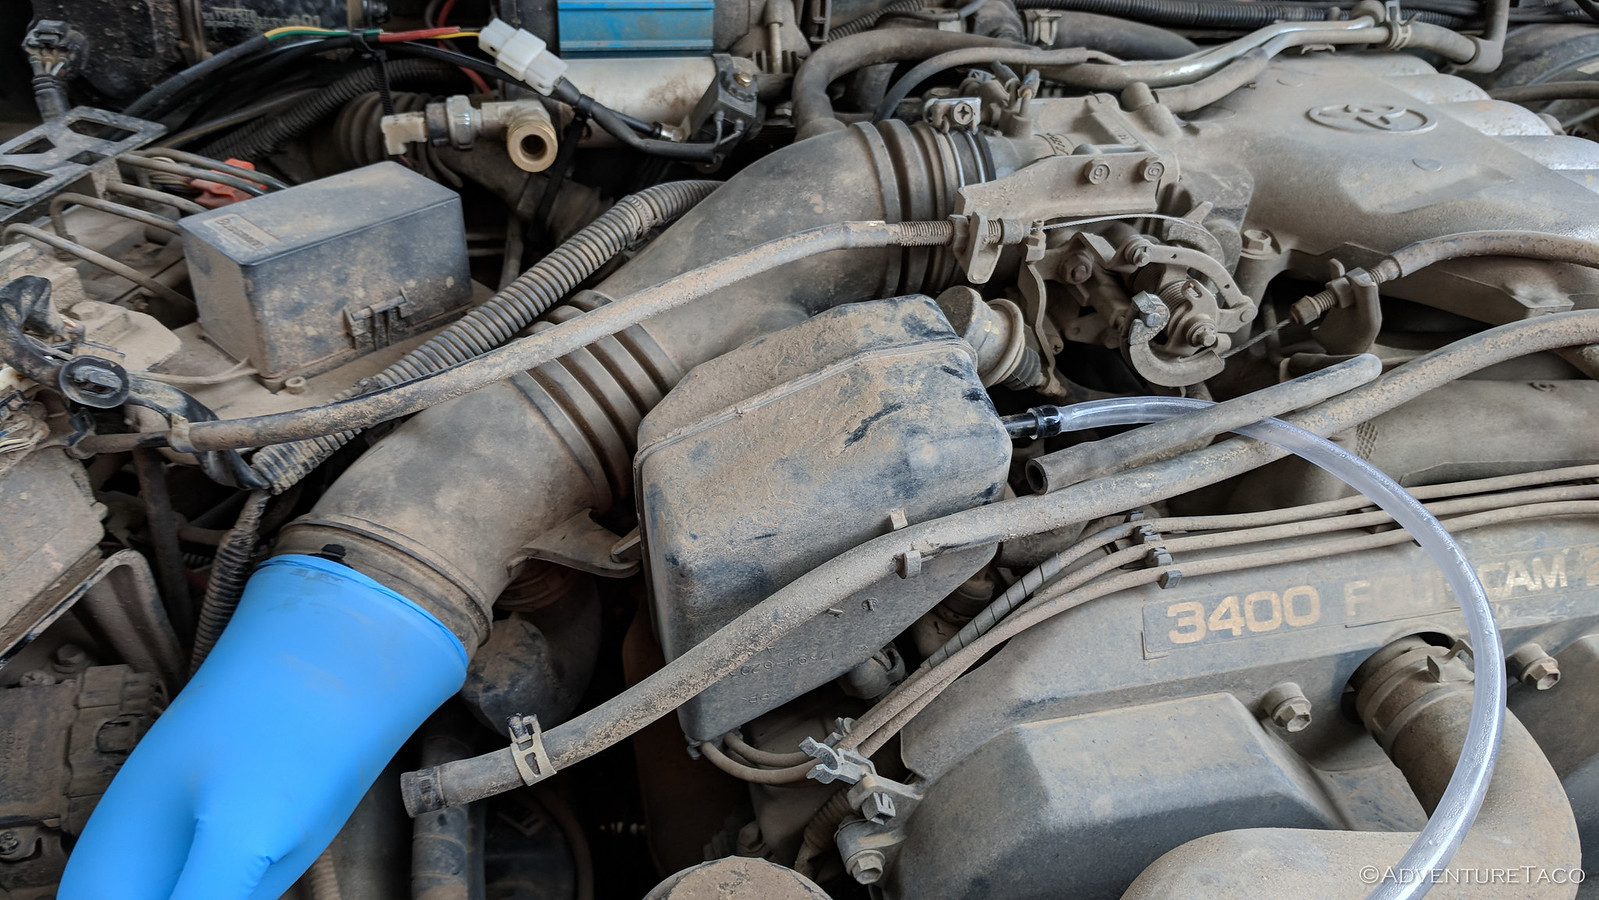
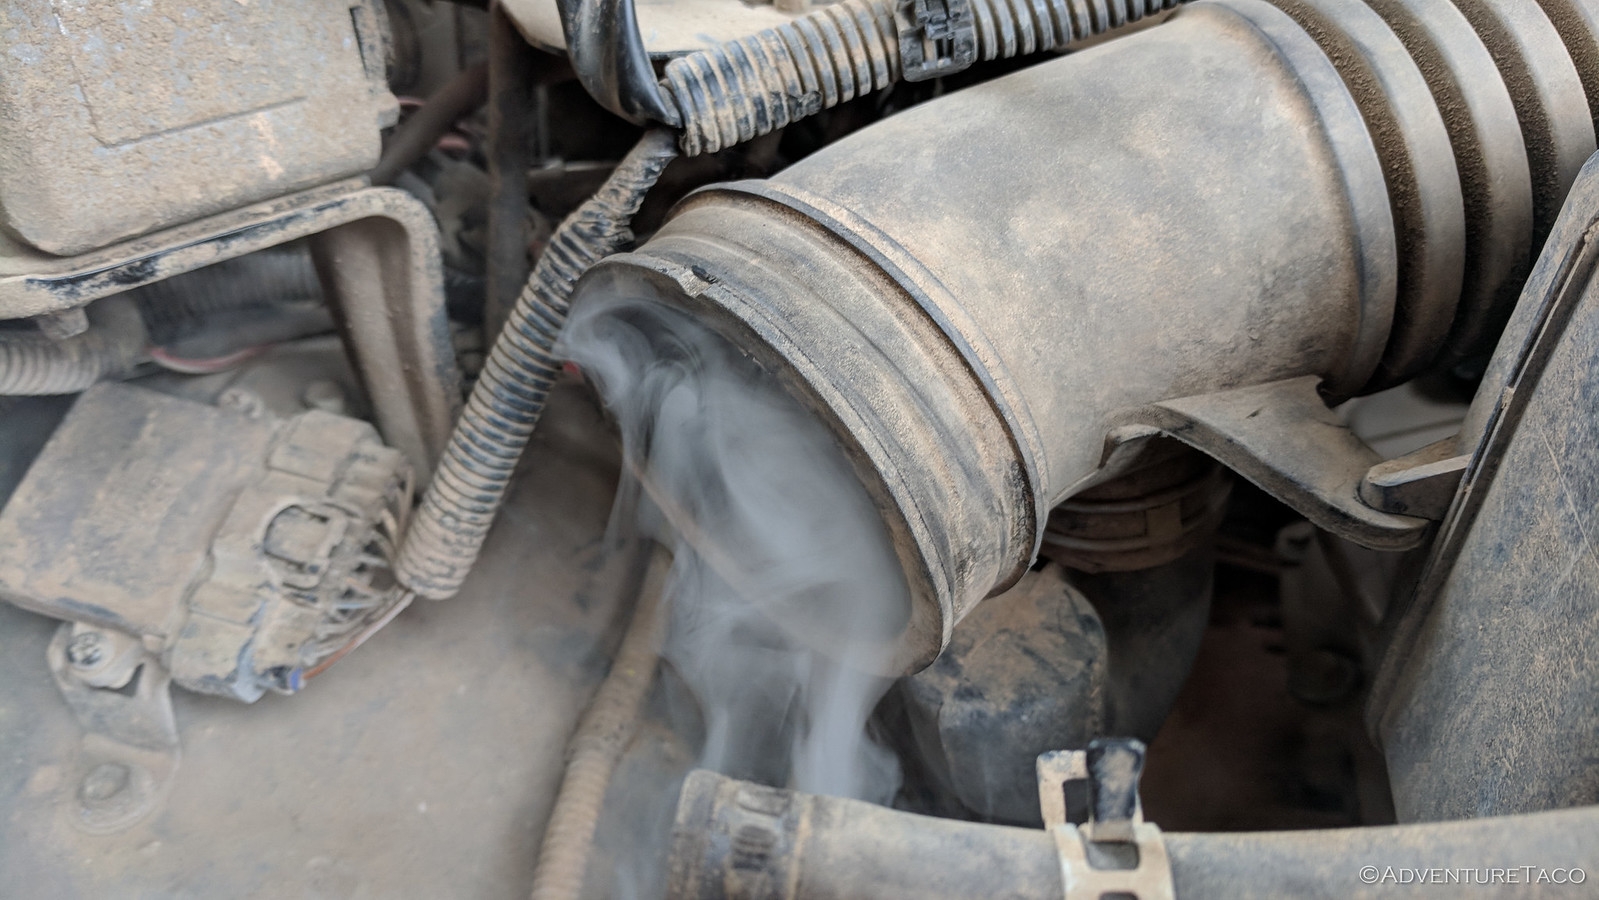


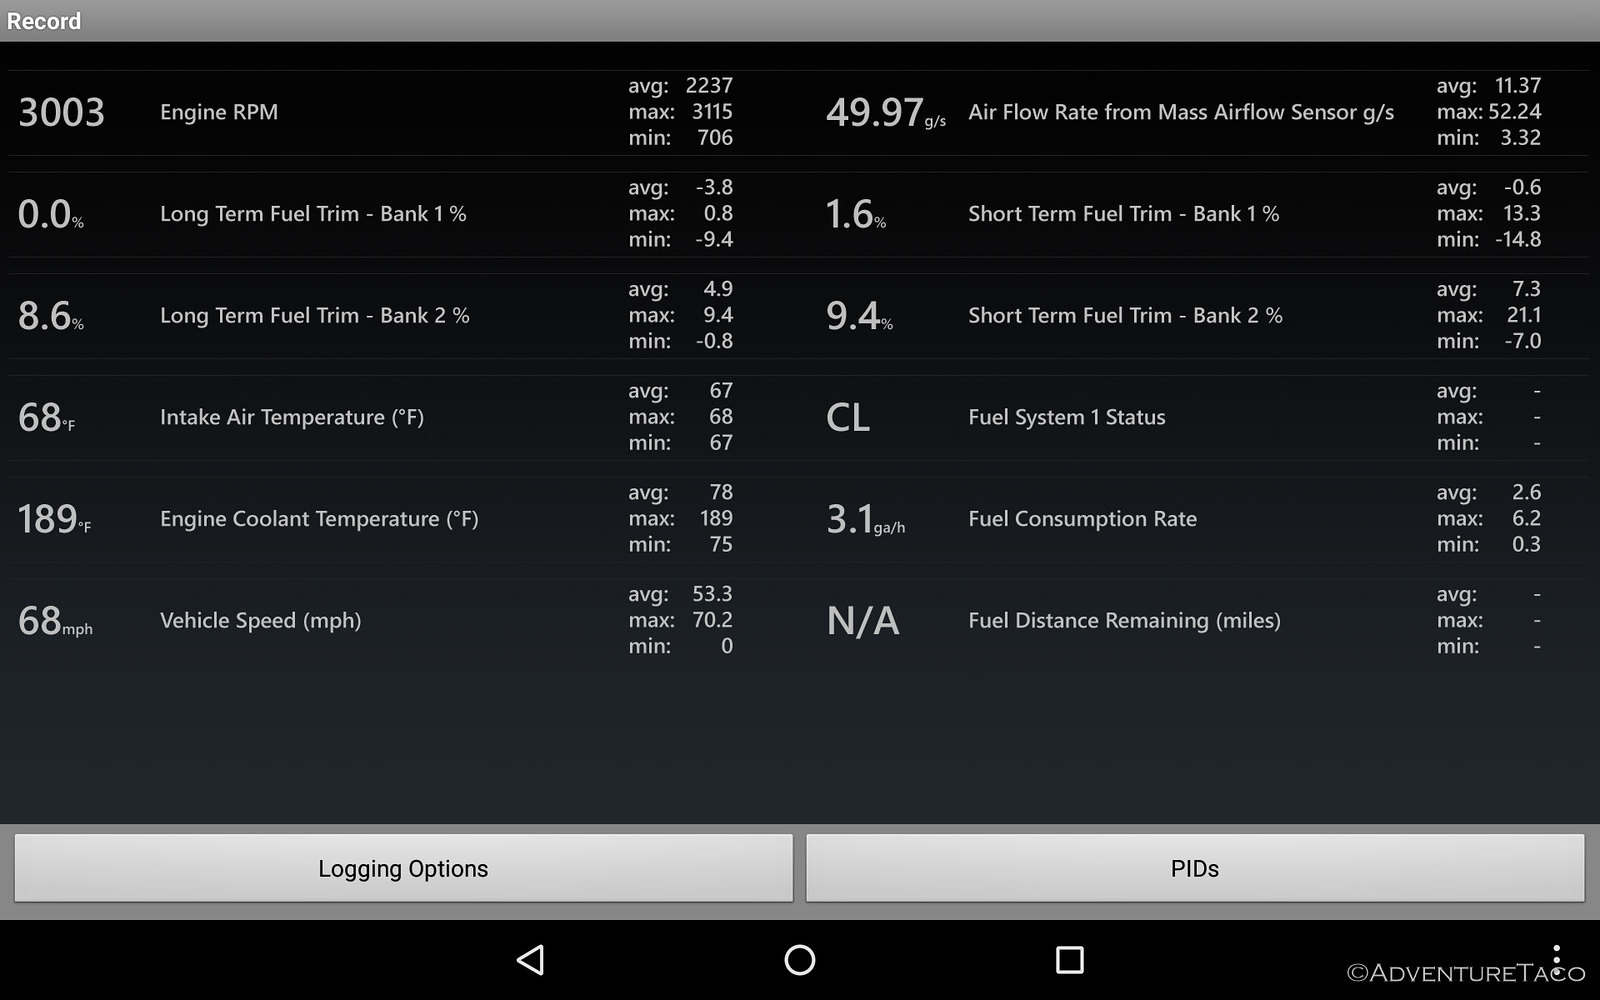
With that (as unlikely as it was, since it seems that P0171 is most commonly caused by a vacuum leak) I was confident that I could start focusing elsewhere. Taking stock of the data I had seemed to make the most sense, and so I pulled up the screenshots I'd taken when I was on the road to Death Valley.

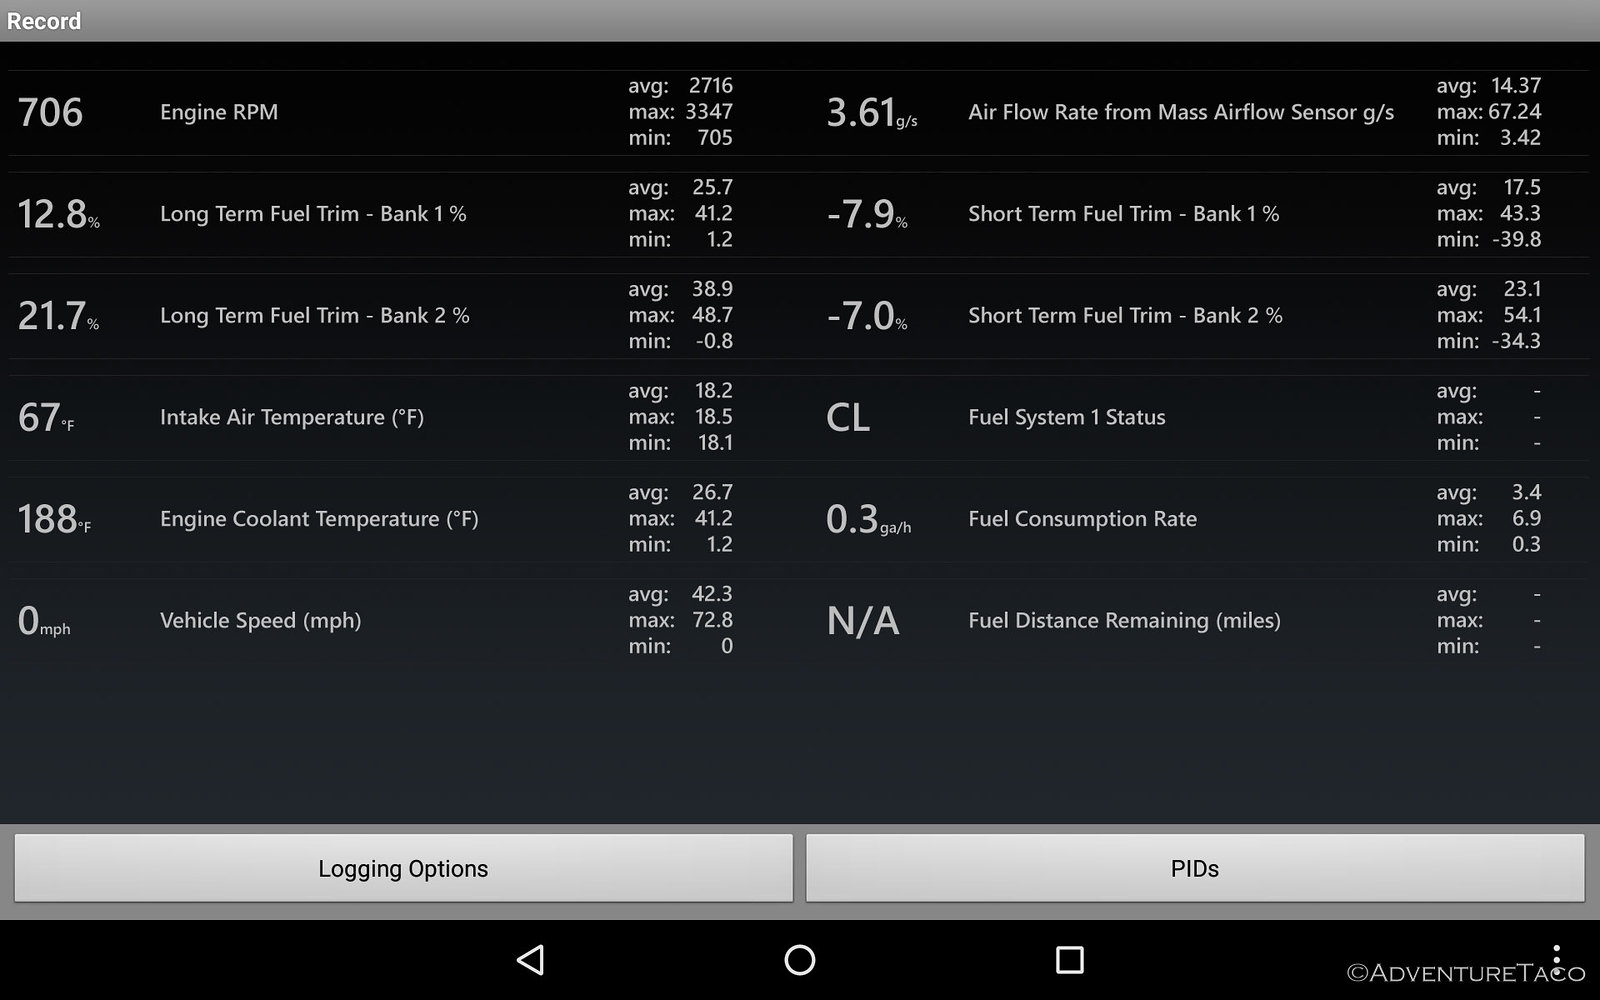
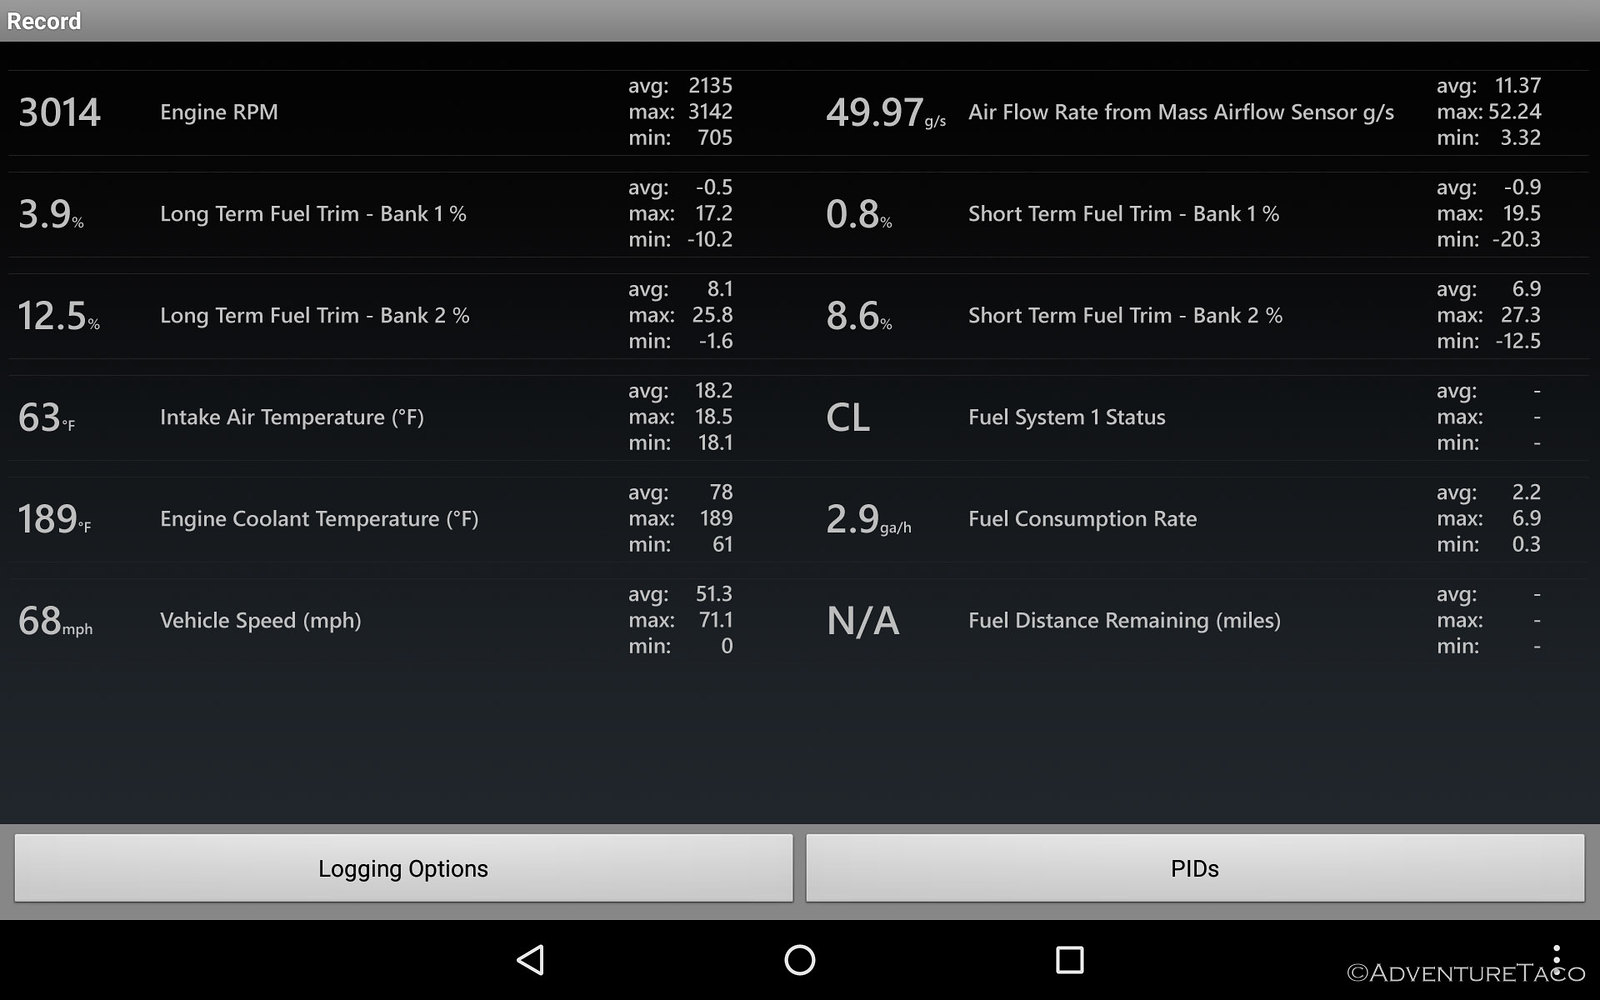
Fuel Trim Data At Idle

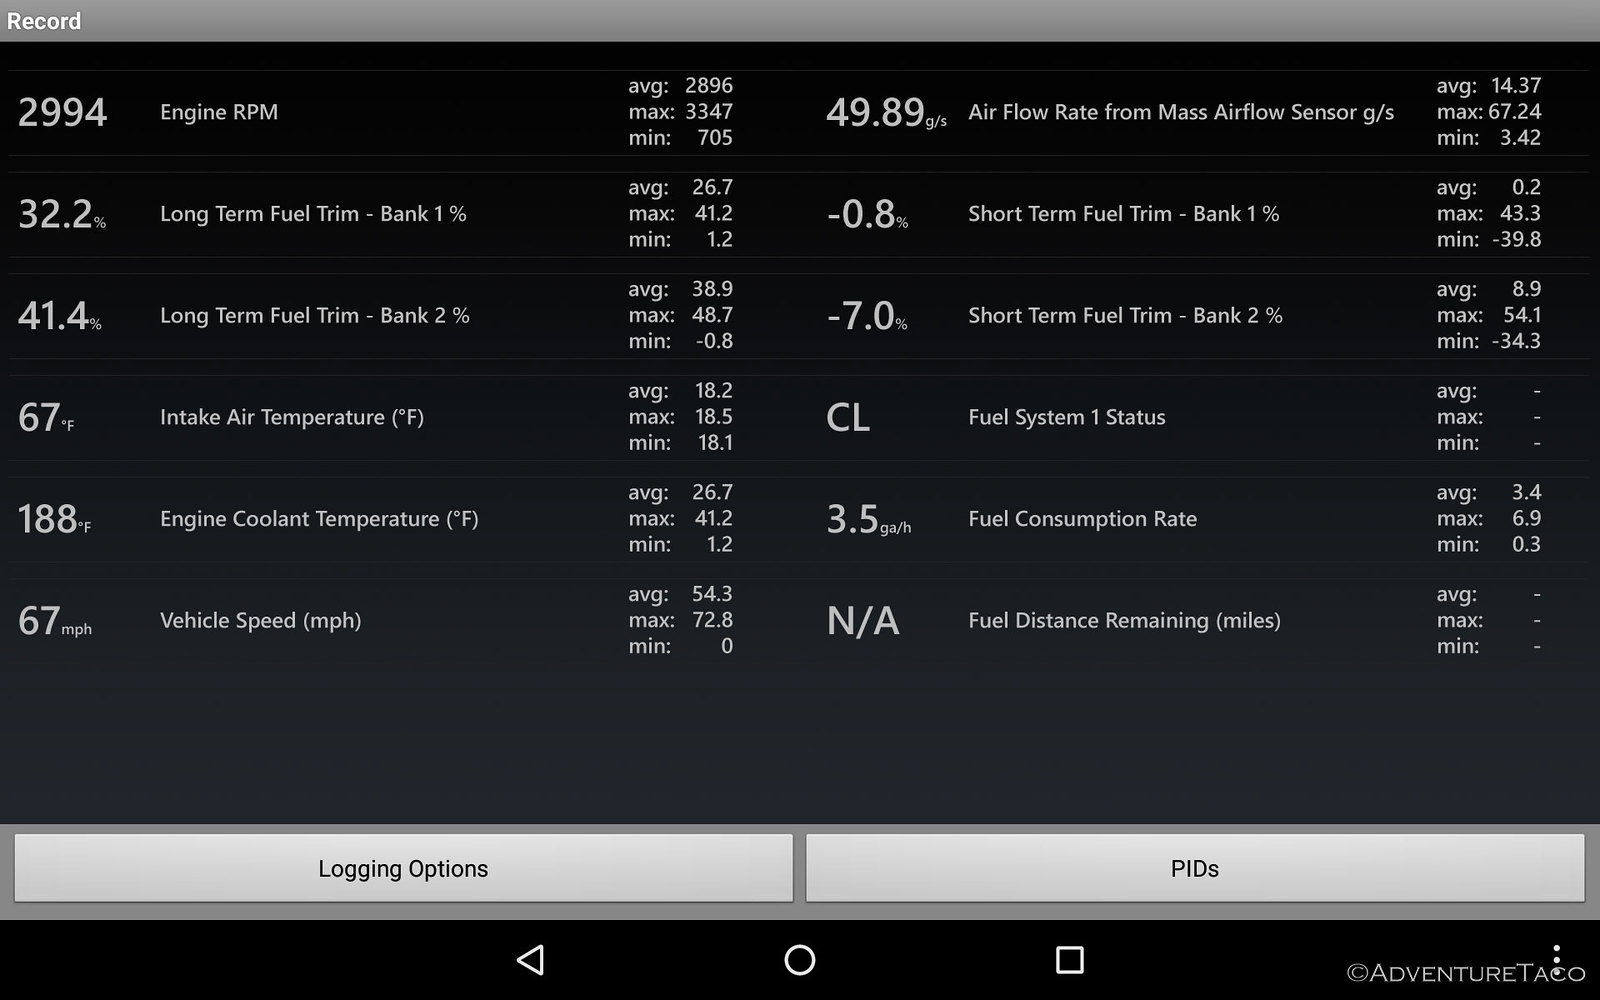
Fuel Trim Data Under Load

A bit more reading and YouTube research suggested that I should tackle the MAF sensor next for a couple of reasons:
  1. Generally, if you have (more) reasonable fuel trims at idle, and they get worse under load, then it's unlikely to be a vacuum leak; it's more likely the MAF. This seemed to describe my situation - my idle fuel trims were in the 0-10% range, and then get really bad at higher RPMs and loads.
  2. MAF rate should be around 1 g/s per liter of displacement per 500 RPMs. That would mean that at ~705 rpm idle and 3.4L, it'd be around 4.75 - so a reading of 3.6g/s was a bit low.
The new parts arrived shortly, and looked to be identical to those in the truck.


I had the air box out in a few minutes - something I can do in my sleep now - having taken it out several times in the last couple days, and it was a simple matter of pulling the old MAF sensor, replacing it with the new, and plugging everything back in - easy peasy.
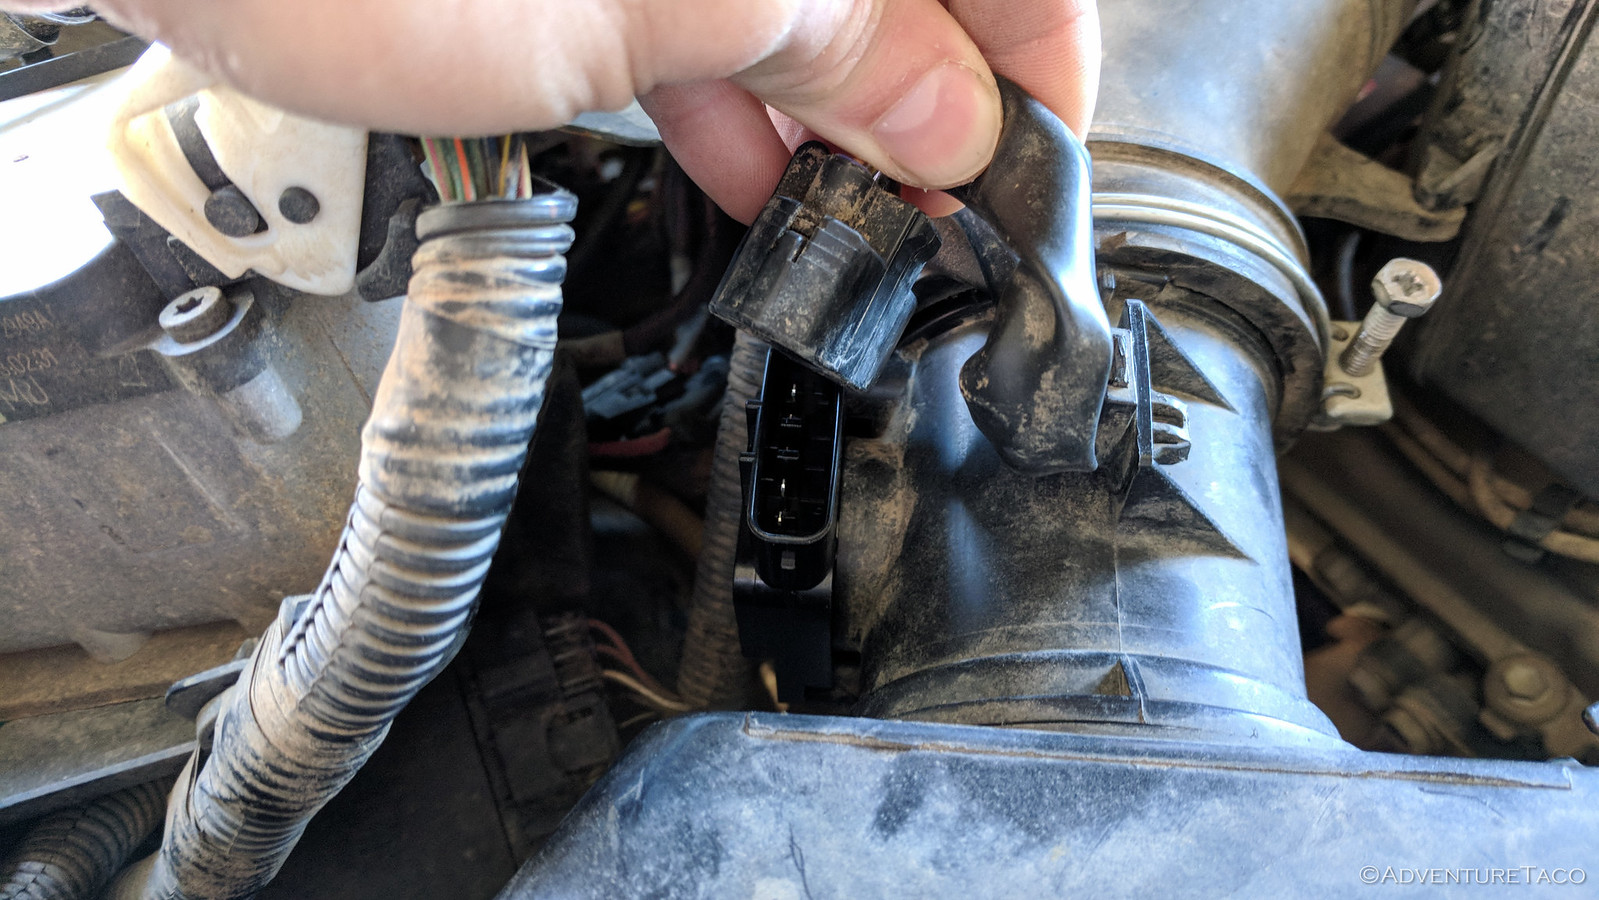


And then I went for a test drive. And the numbers under load were quite a bit better (idle was already "OK" so I was no longer focusing there). Bank 1 was actually looking quite good and Bank 2 was much better than it'd been. It was still on the border of what I'd call "in spec," but compared to what I was seeing previously, it was a big improvement.

At this point it was time for a bit more learning on my part. I wanted to know more about how the fuel trims were determined - because the only two sensors I was looking at (MAF and AF) were significantly before, and significantly after the two cylinder banks where fuel trim was being oscillated.

On a first gen Tacoma, it works something like this (as I understand it) - the truck's computer reads the airflow over the MAF sensor to know the amount of input air. It also knows when and how much fuel an injector should be releasing into the cylinder. And, it knows how far the combusted air needs to travel in order to get to the AF sensor and what the air-fuel ratio should be at that sensor. So, as it sends the air-fuel ratio back to the computer, if those numbers aren't as expected, the computer adjusts the fuel into the injectors to achieve the expected result.
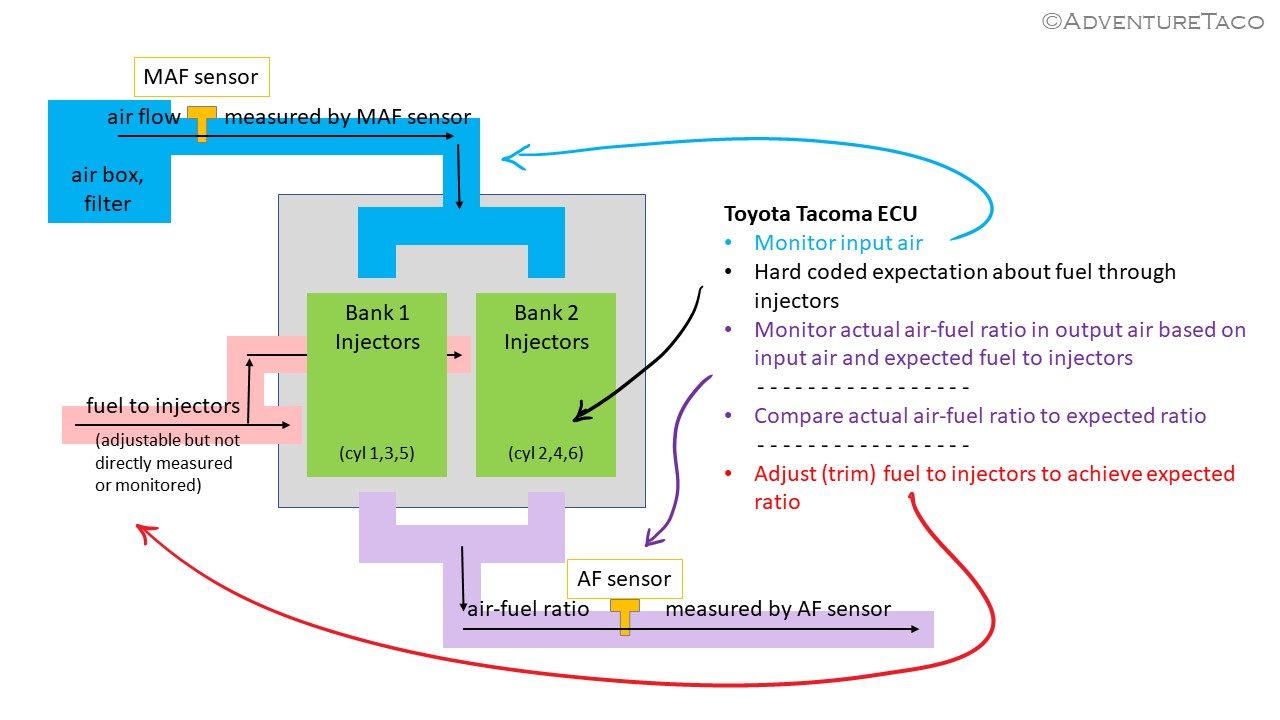

It seemed to me that I was now in a situation where my sensors were probably working correctly - and here's why: Bank 1 looked good - the MAF sensor was reporting some amount of air intake, that air was flowing through the engine, and the AF sensor was reporting an air/fuel mix that the truck computer interpreted as needing (essentially) no tweaking - thus, LTFT on Bank 1 was around zero. The "problem" was that there was still some fuel trimming on Bank 2 - possibly because something could still be a bit off there. That could be a result of:
  • a problem with the AF sensor
  • a small error in estimation at the ECU of when air should be passing the AF sensor from each bank
  • injectors that needed cleaning
 

turbodb

Well-known member
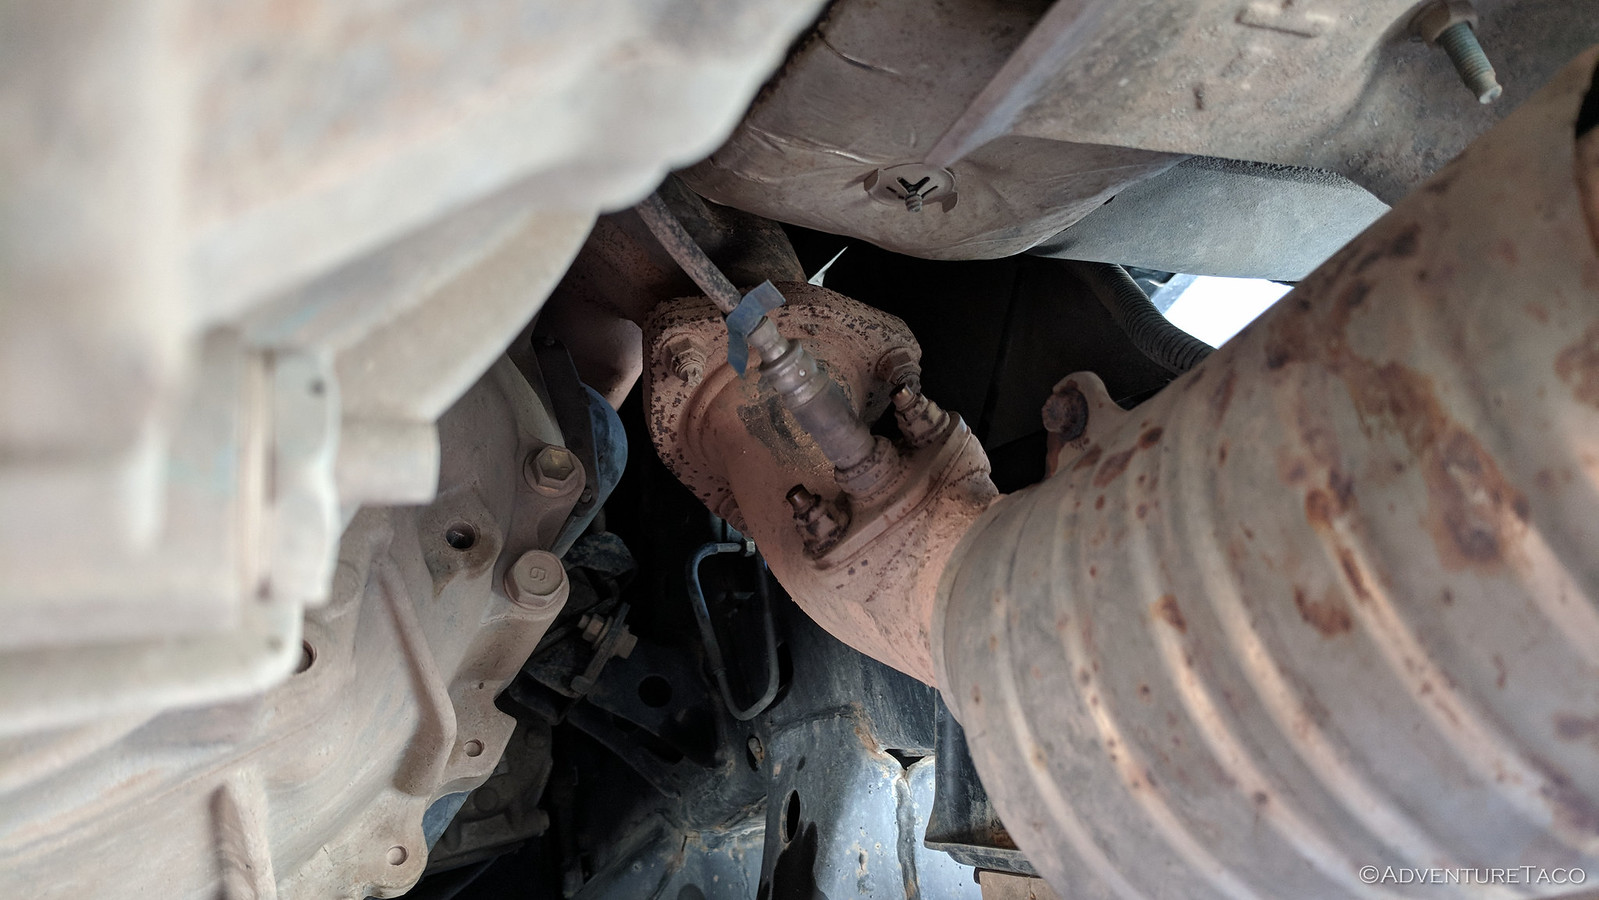
I figured that since I had a new AF sensor, I'd replace that next. At the very least, it'd be reasonable to do that at 90K miles and I'd be able to use the original as a trail spare - so I set about the process, which is straight forward but very tight. I started by disconnecting the battery (not sure if this is necessary, but seemed like good practice). I then found the AF sensor - it's on the passenger side, just forward of the first catalytic converter - and sprayed the nuts with some penetrating fluid, since they were quite rusty.


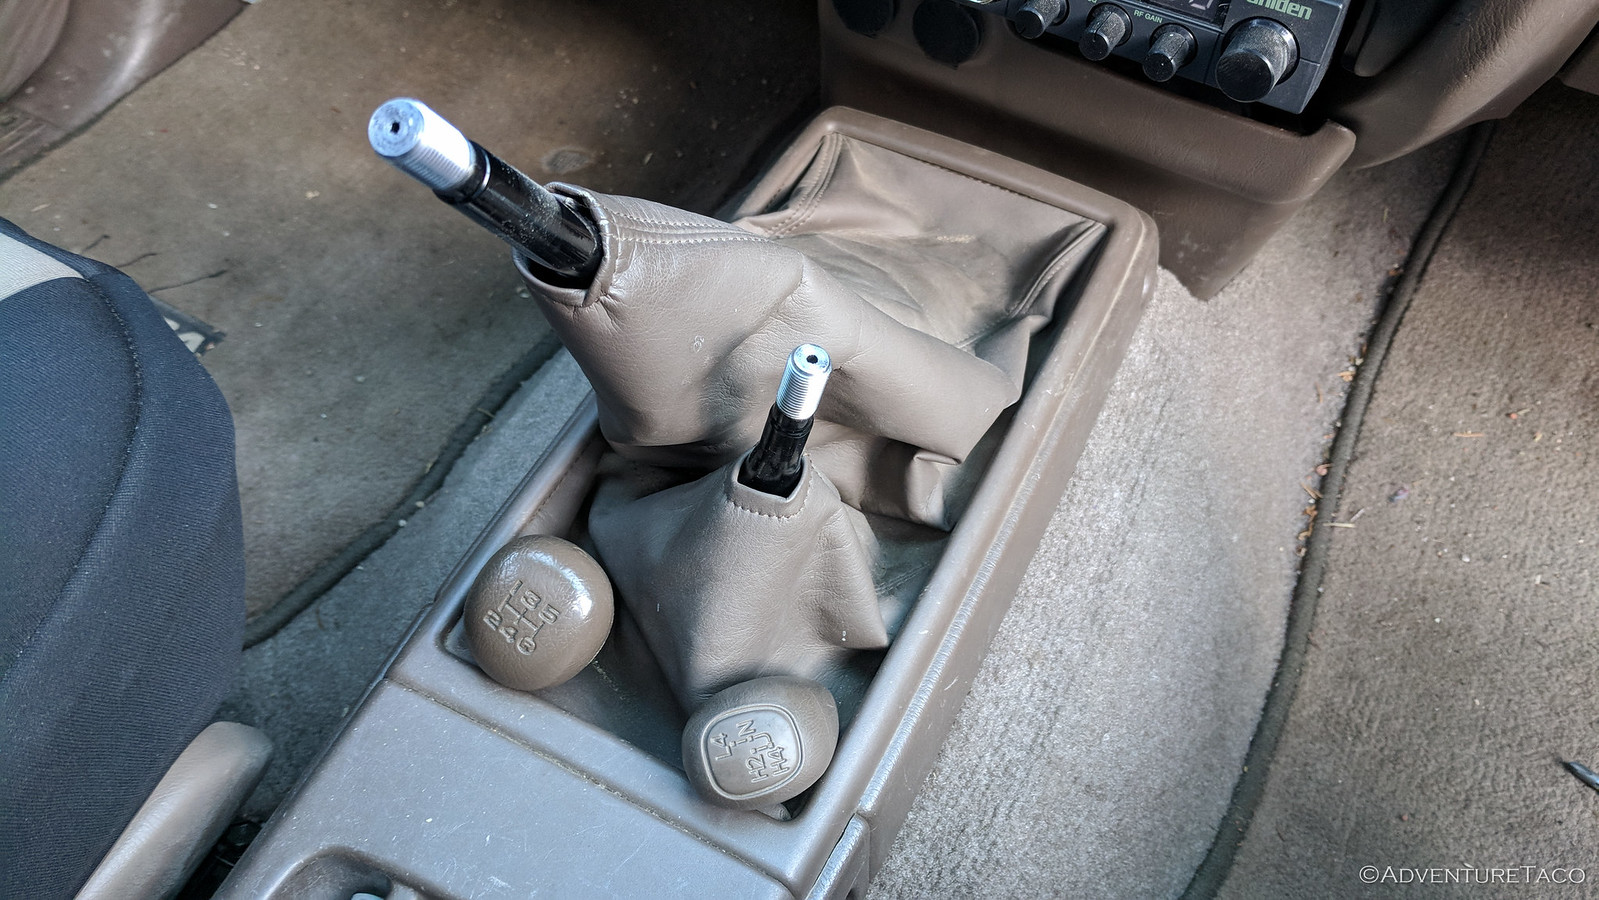
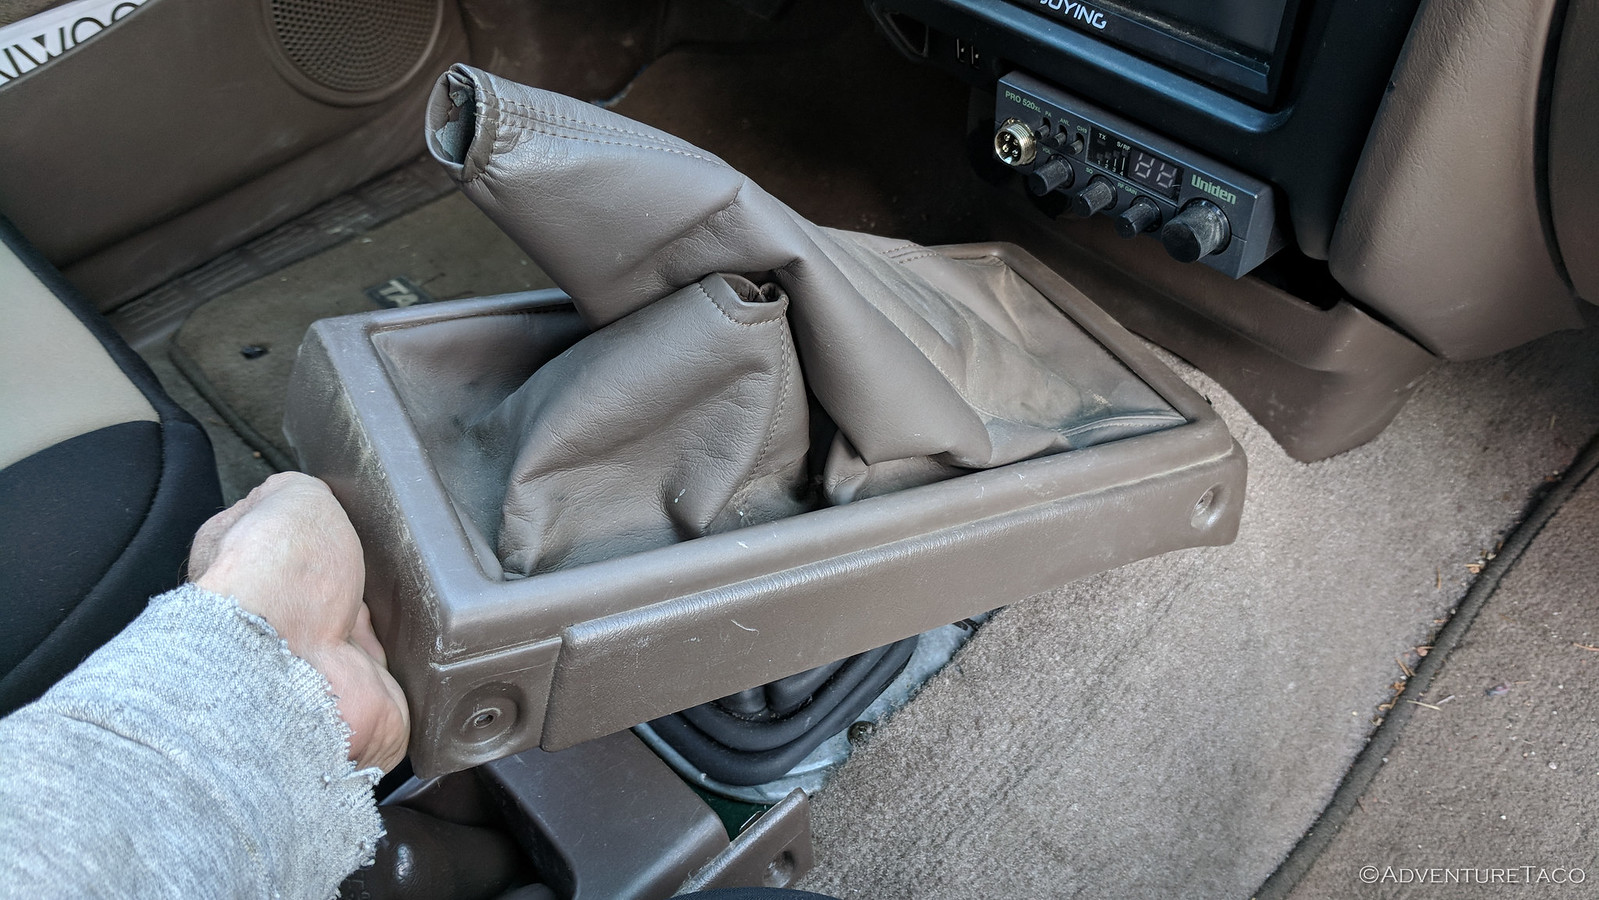
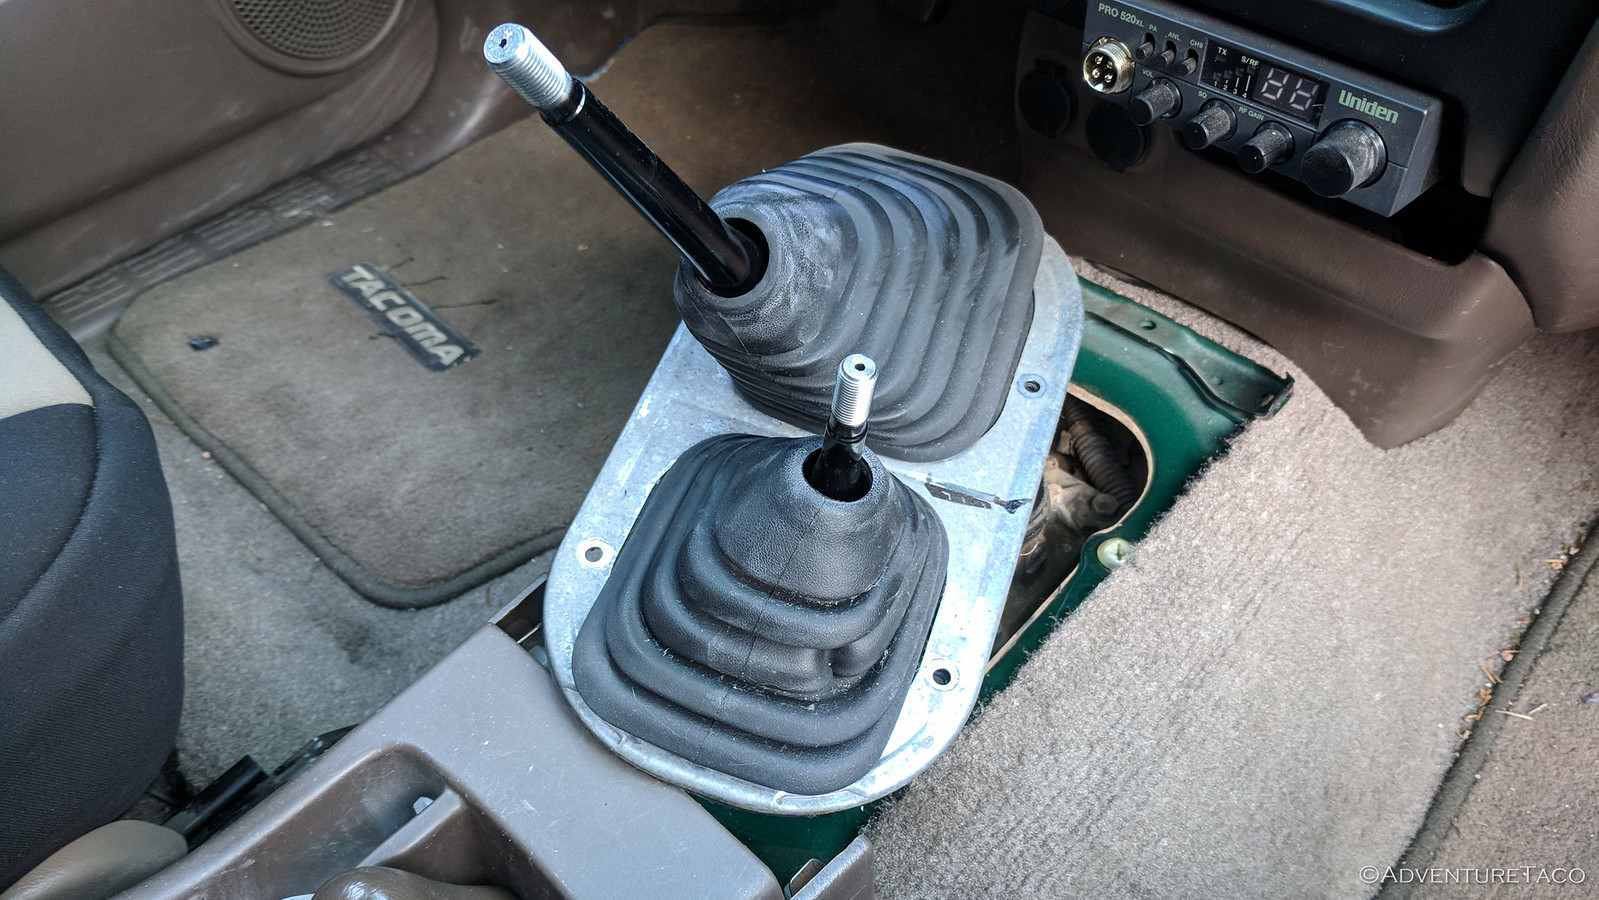
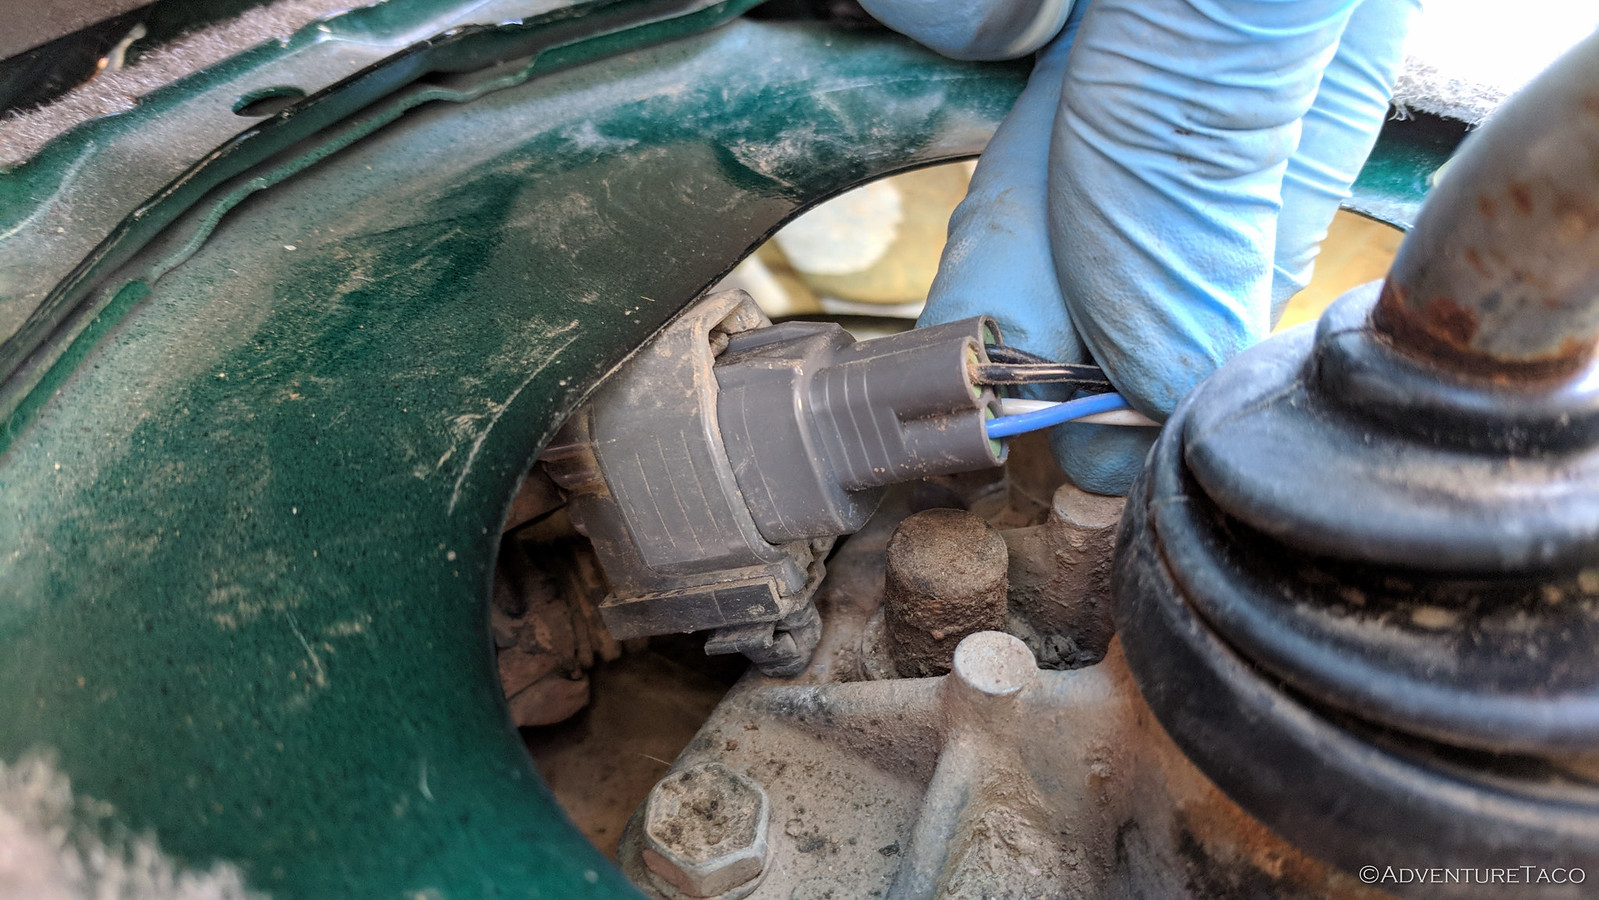
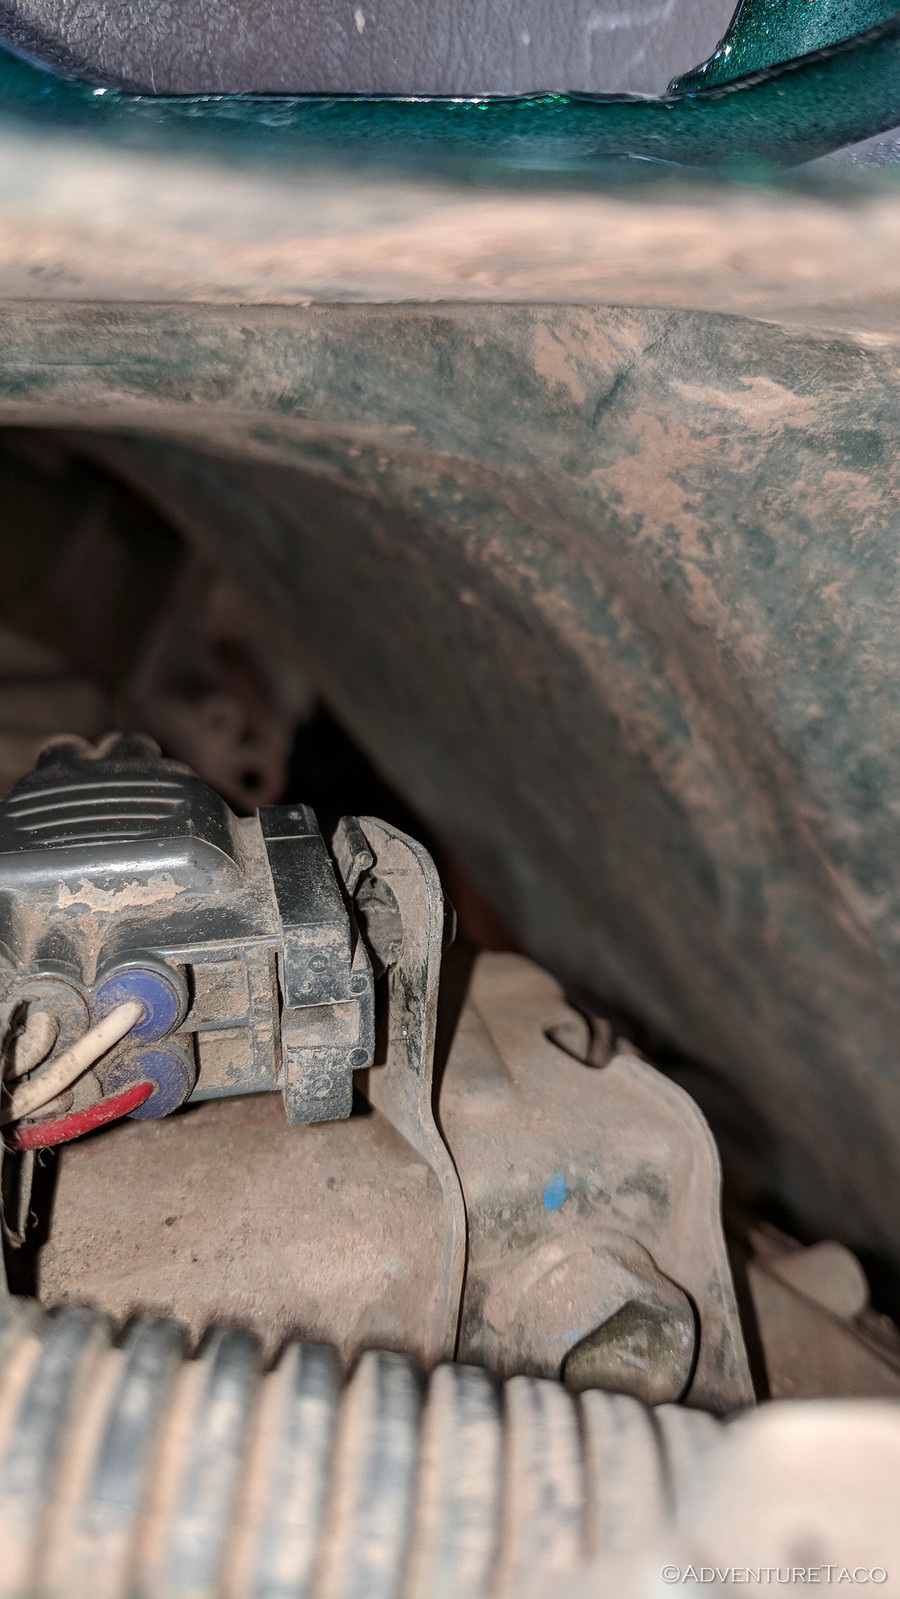
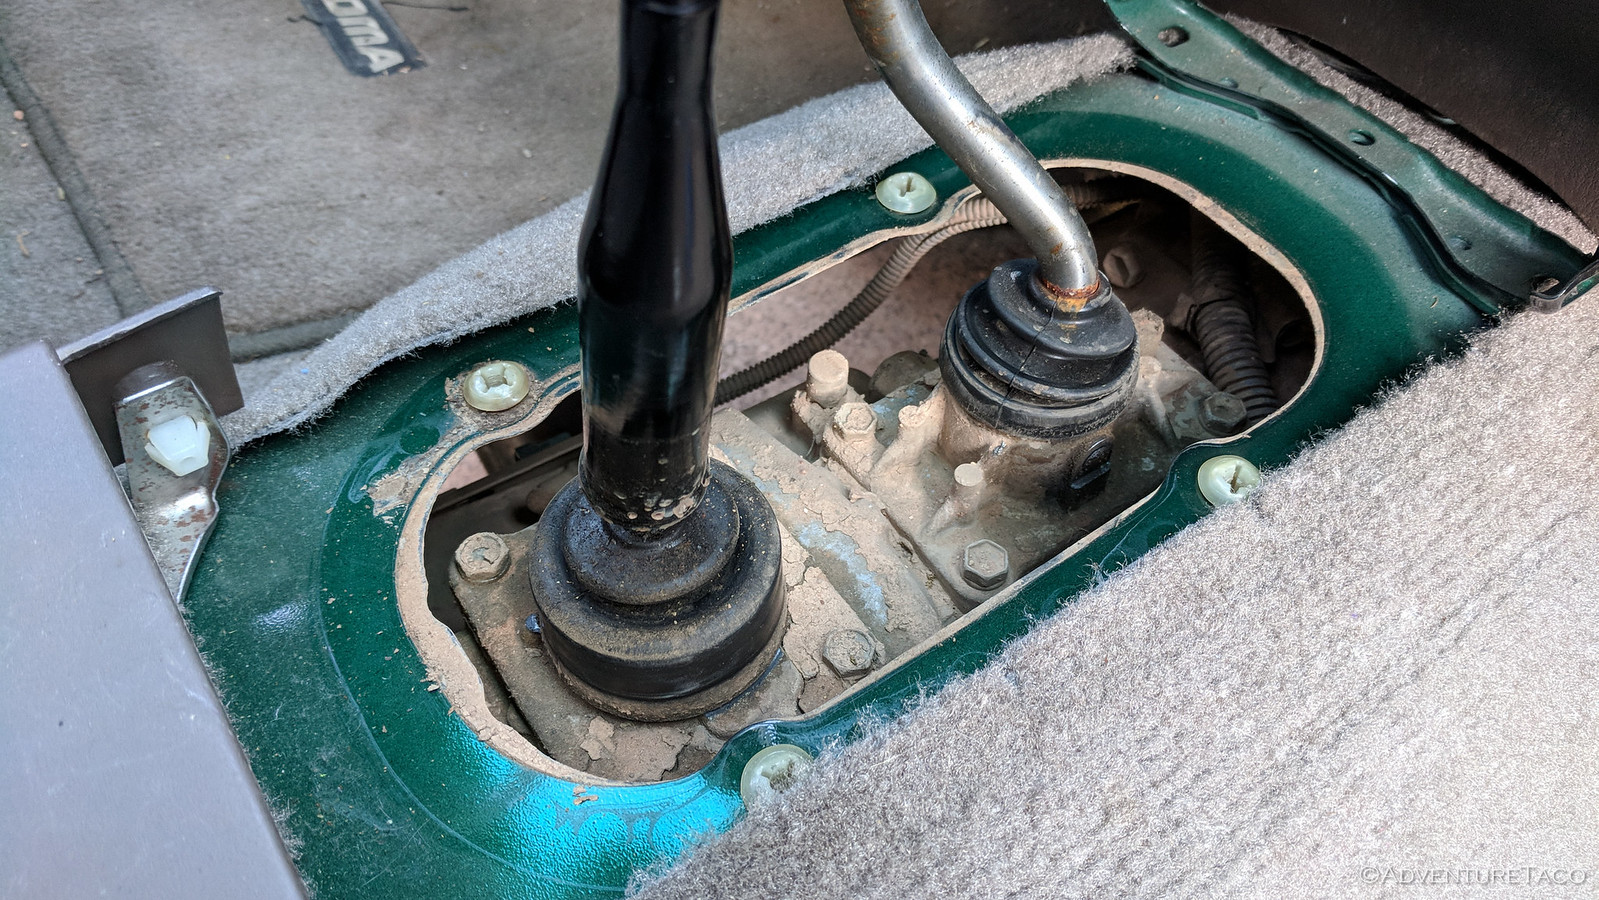
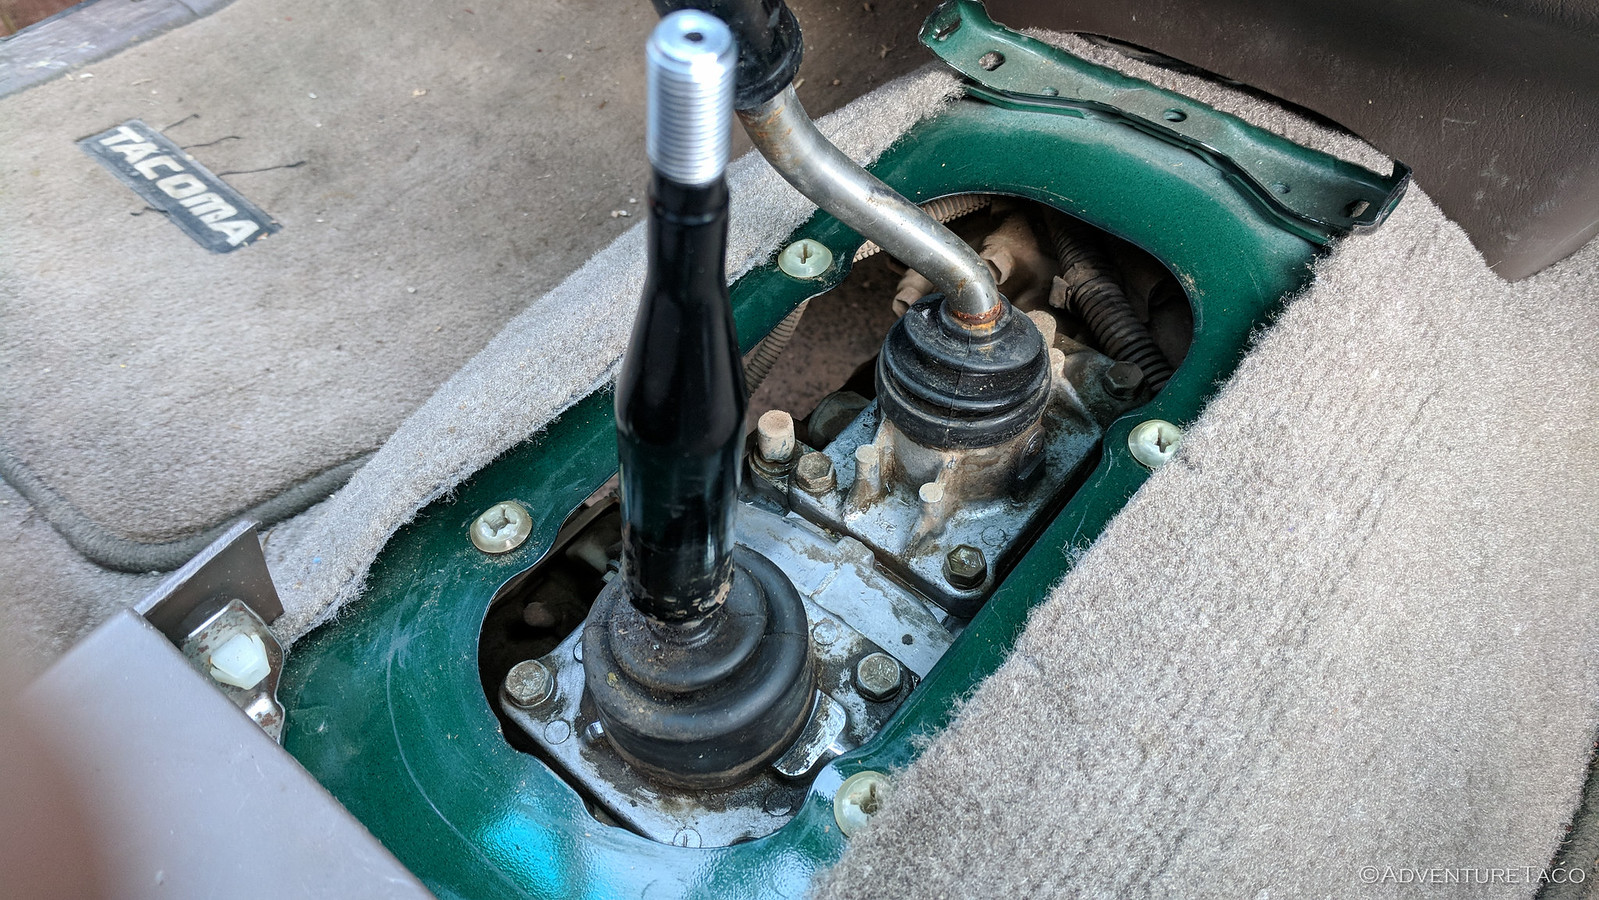
Next, I needed to find the connector. On manual transmission v6 Tacoma's, the connector is located on top of the transmission, and is only (barely) accessible from inside the cab. Start by removing the shifter knobs (they just unscrew), boot covers (four screws), and boots (four screws). The only tricky bit here is removing the boot covers - be careful when prying out the boot covers so you don't break the plastic tabs on the rearward part of the center console.


At this point, you'll be able to see the top of the transmission and transfer case. Mine was covered with mud from Montana and Wyoming as well, so I took a few minutes to clean it off, just 'cause.


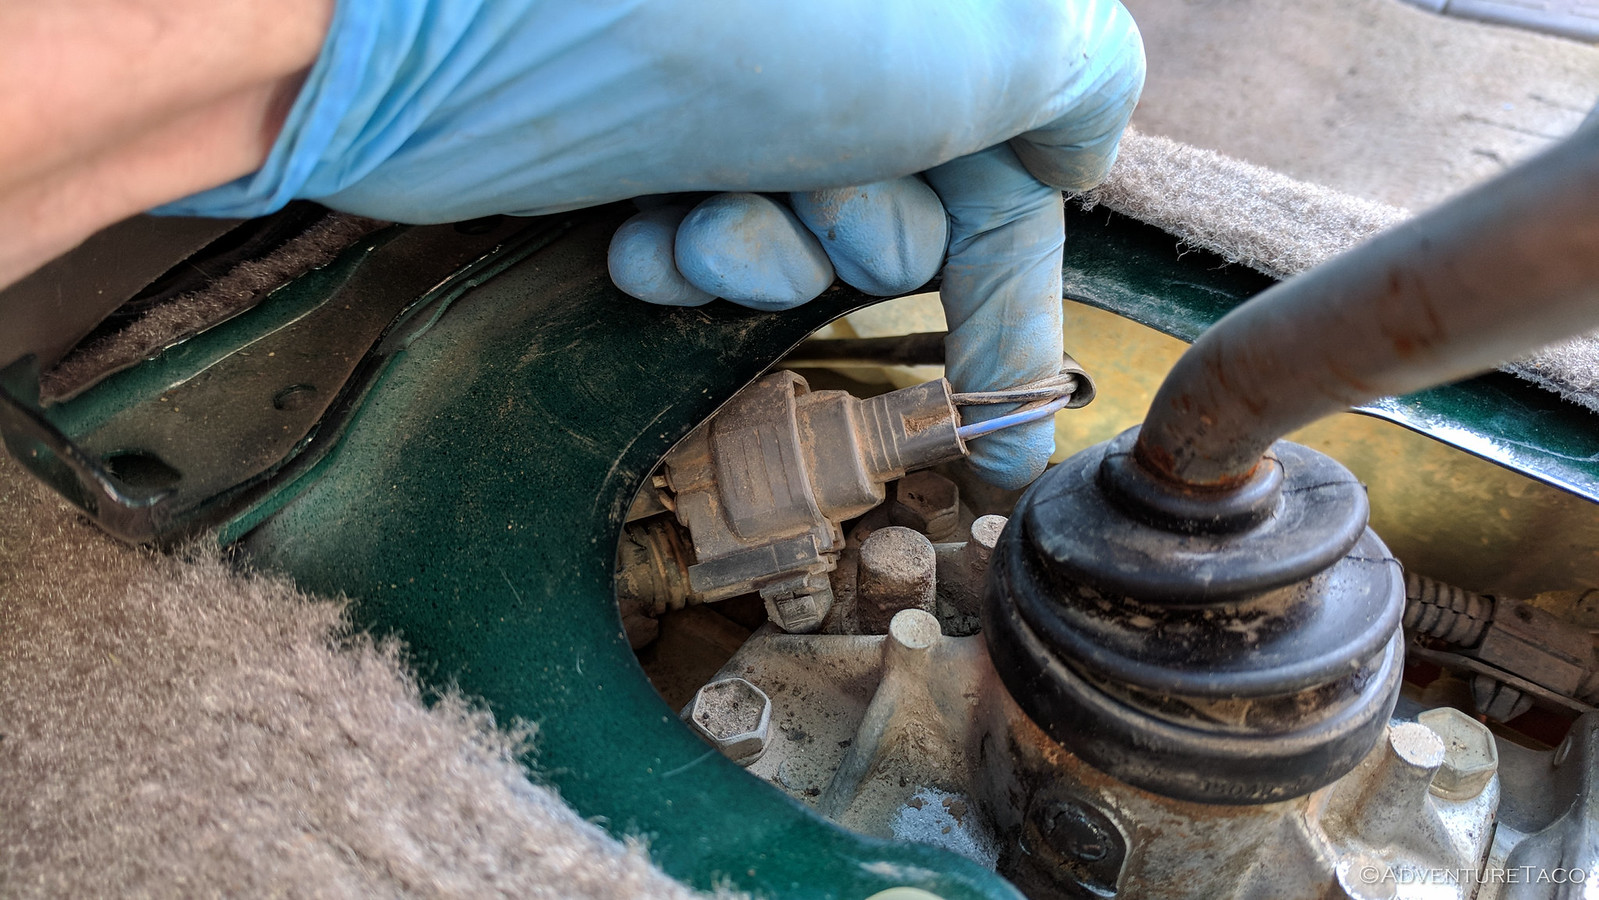
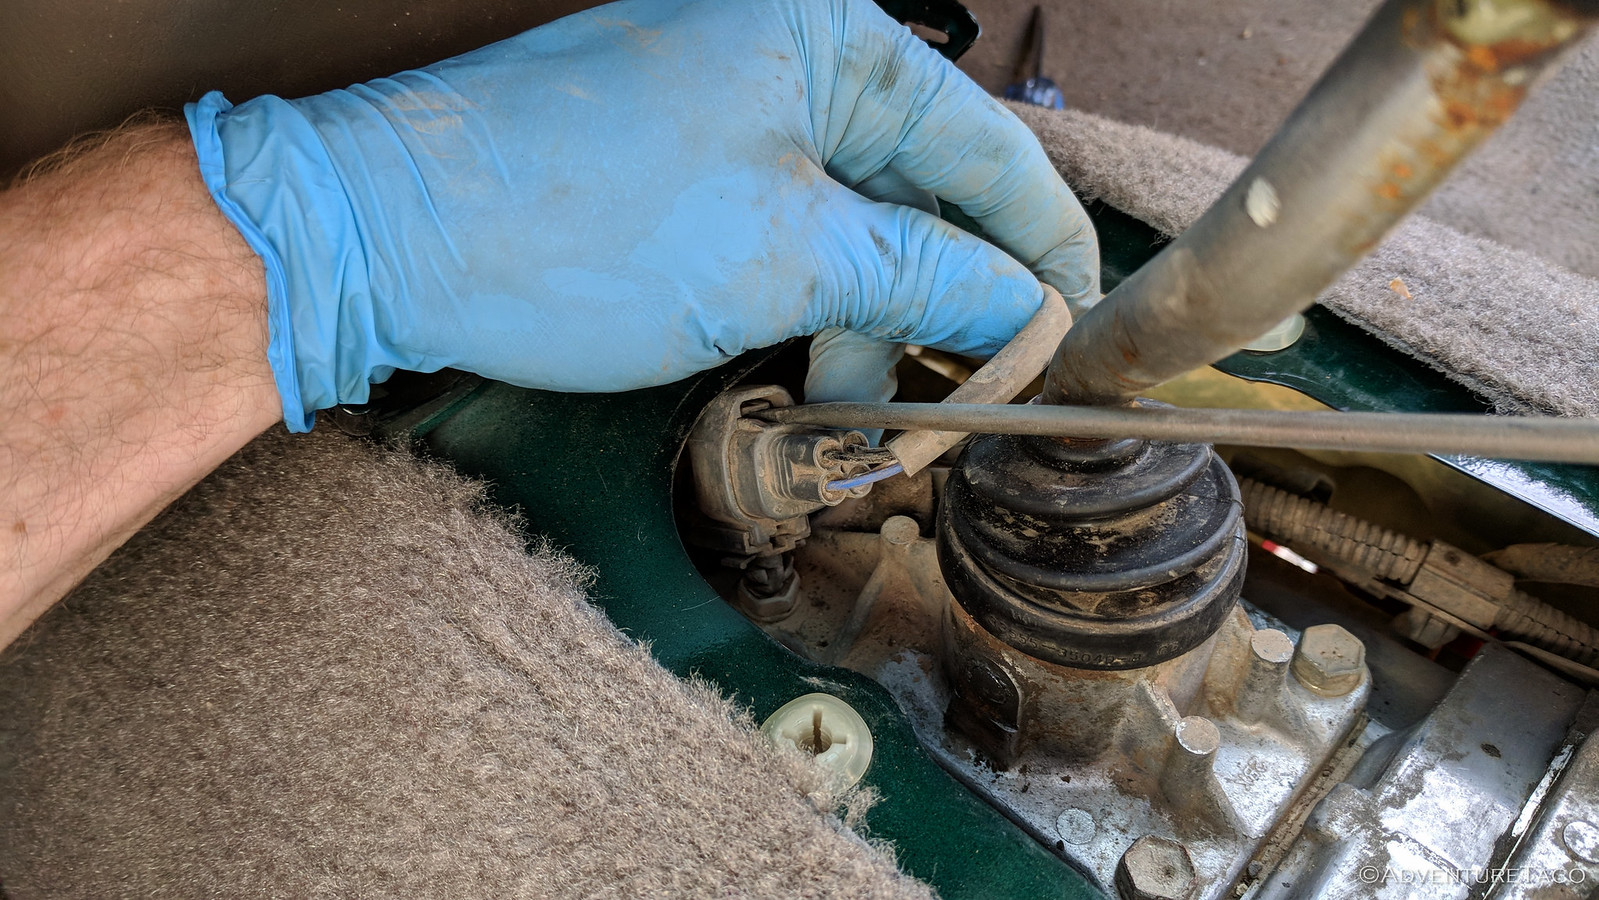
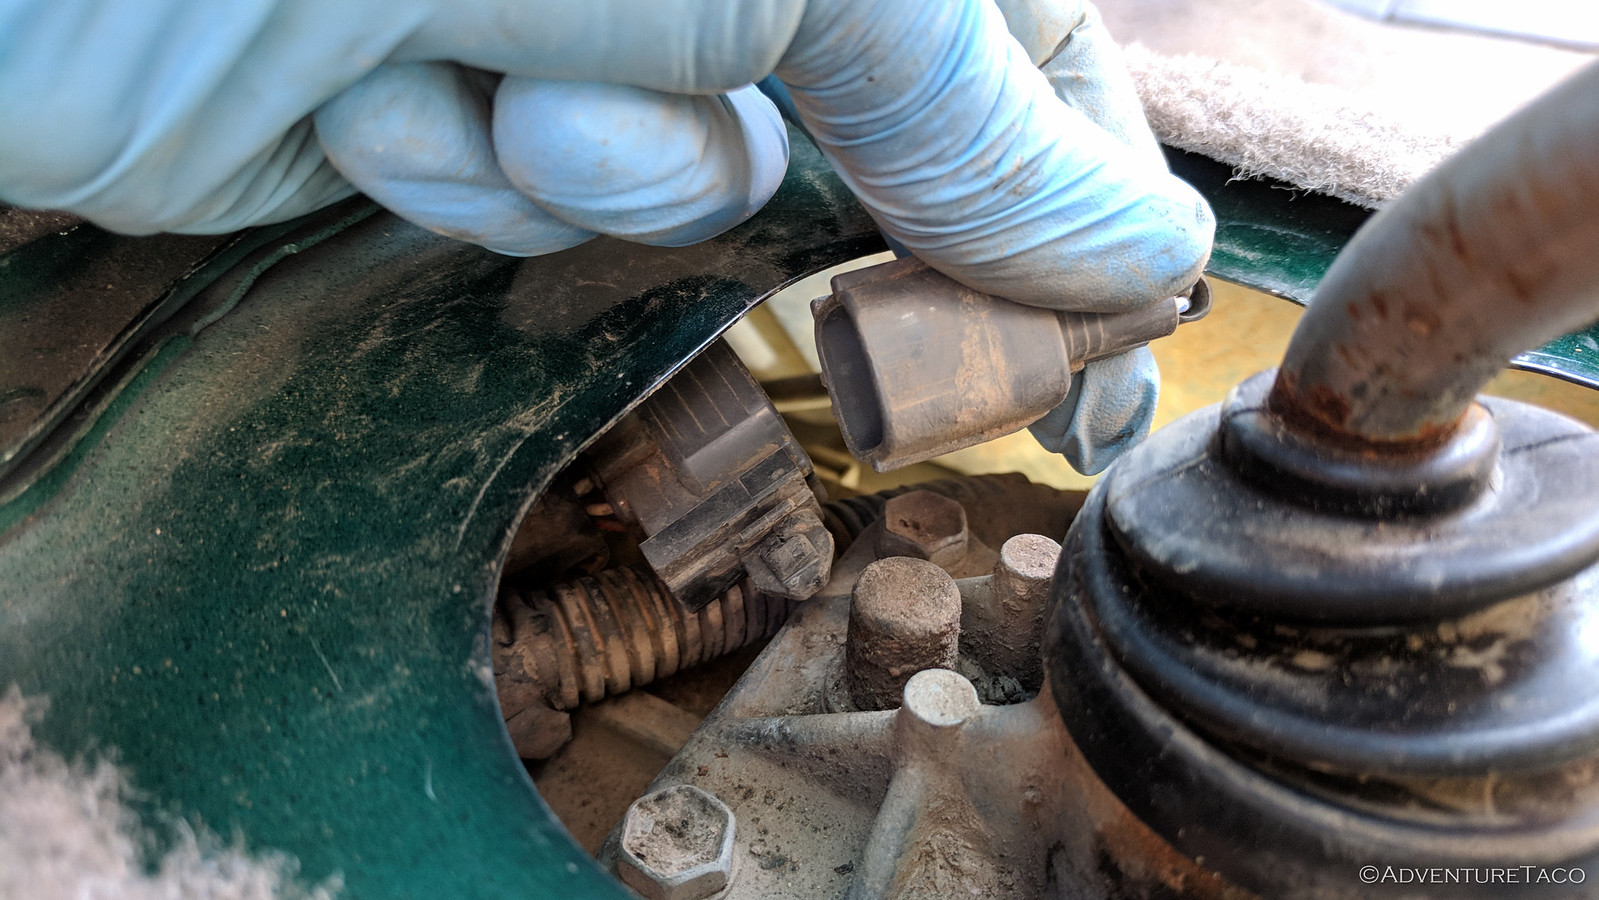
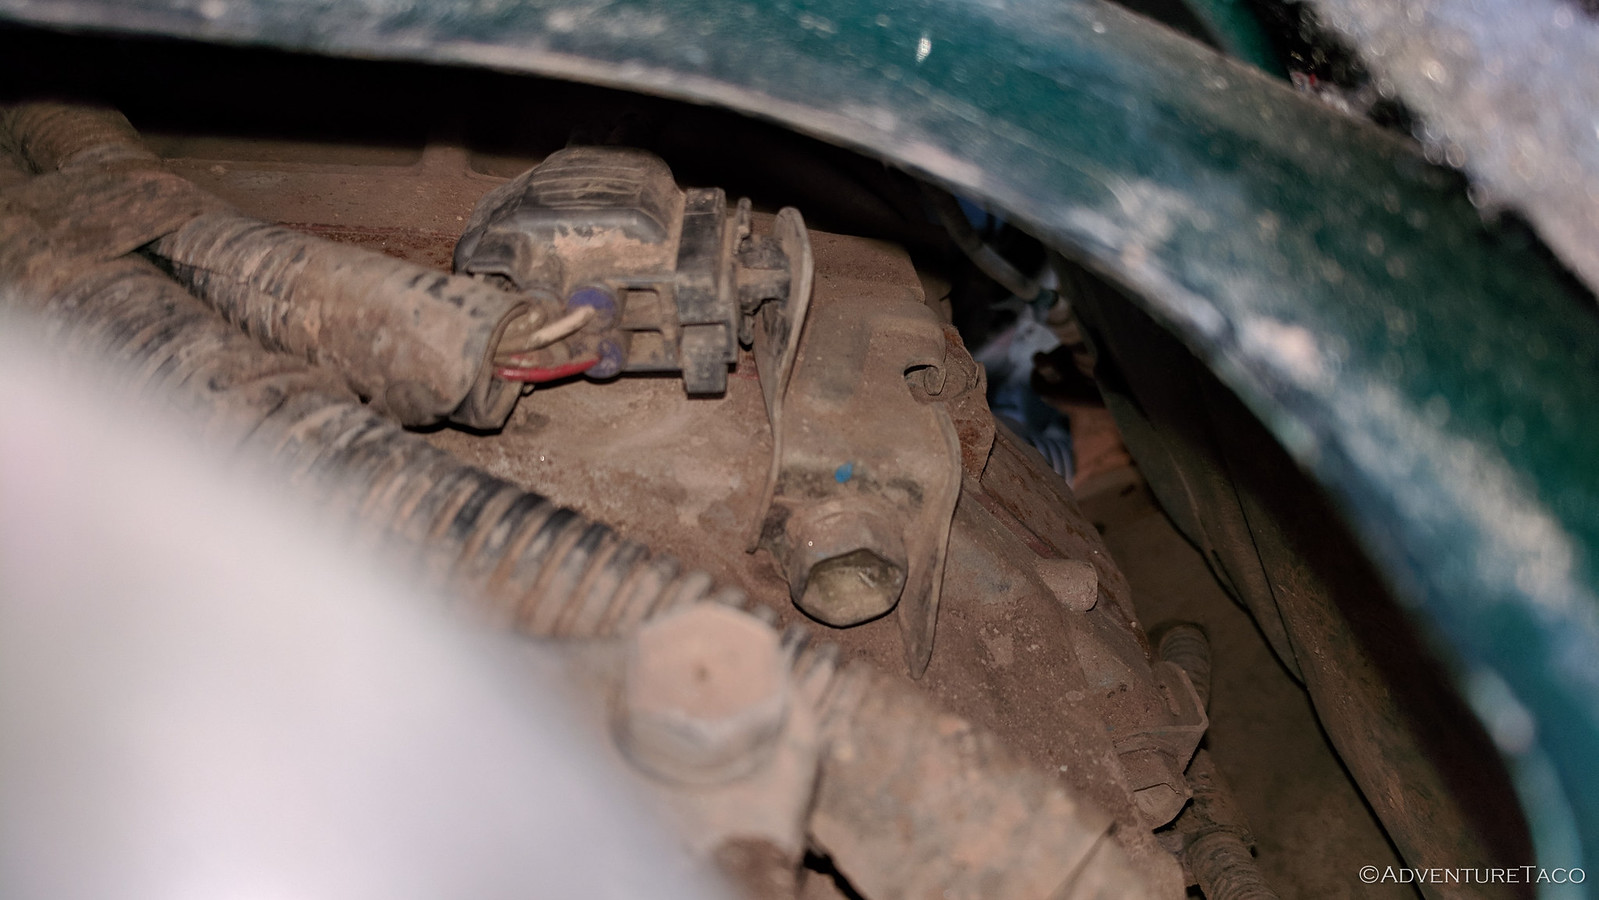
Now, if you look forward on the transmission, you'll see the connector your after. It's clipped about 4-inches forward, just out of finger reach. Use a screwdriver to pry out the clip so you can access the connector. Go slowly and use a flashlight - the clip is installed vertically, so you pry "down from the top" and "up from the bottom" in order to release it.


Once you've released the clip, you can pull out the connector and disconnect it. I found a screwdriver to be useful in this process as well, as I could pry "up" the catch more easily than trying to compress the plastic on the other side of the connector.


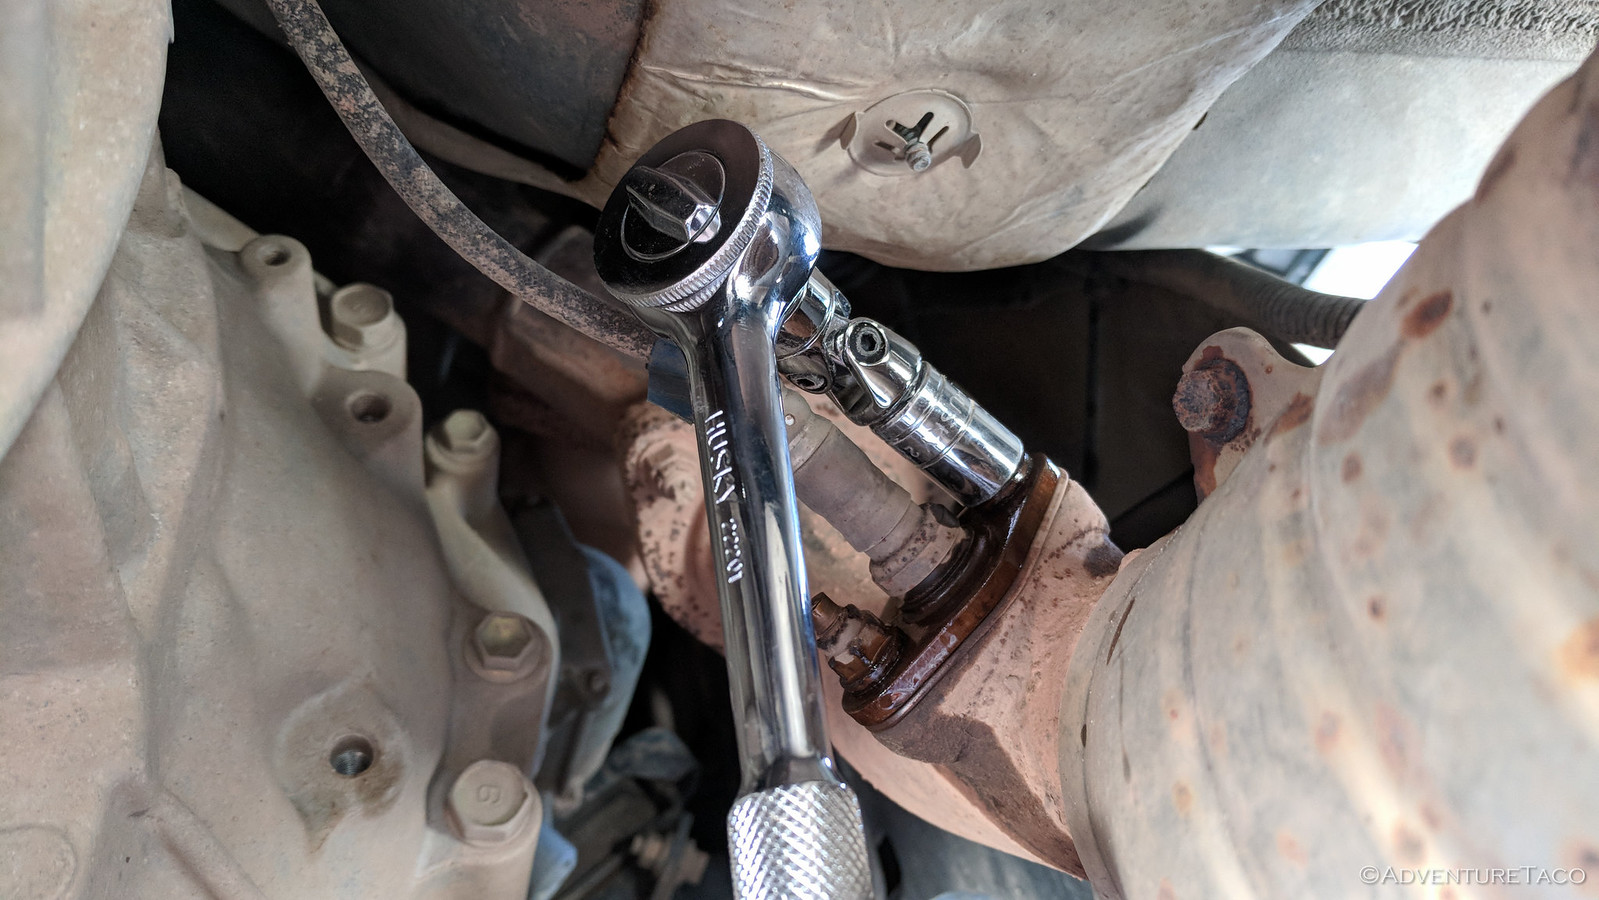
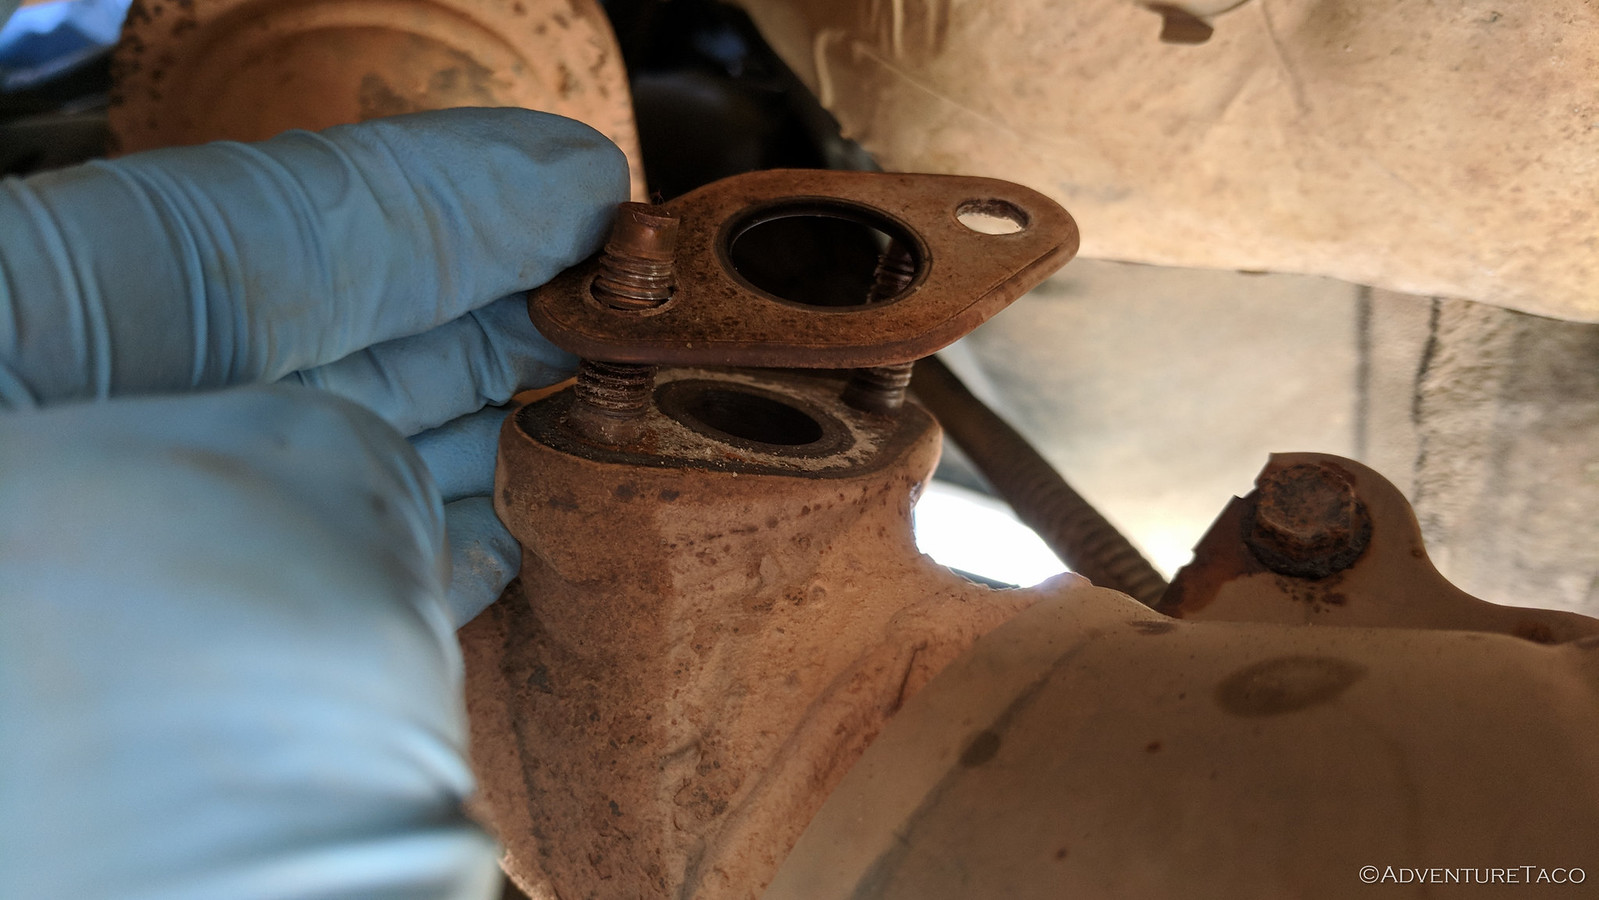
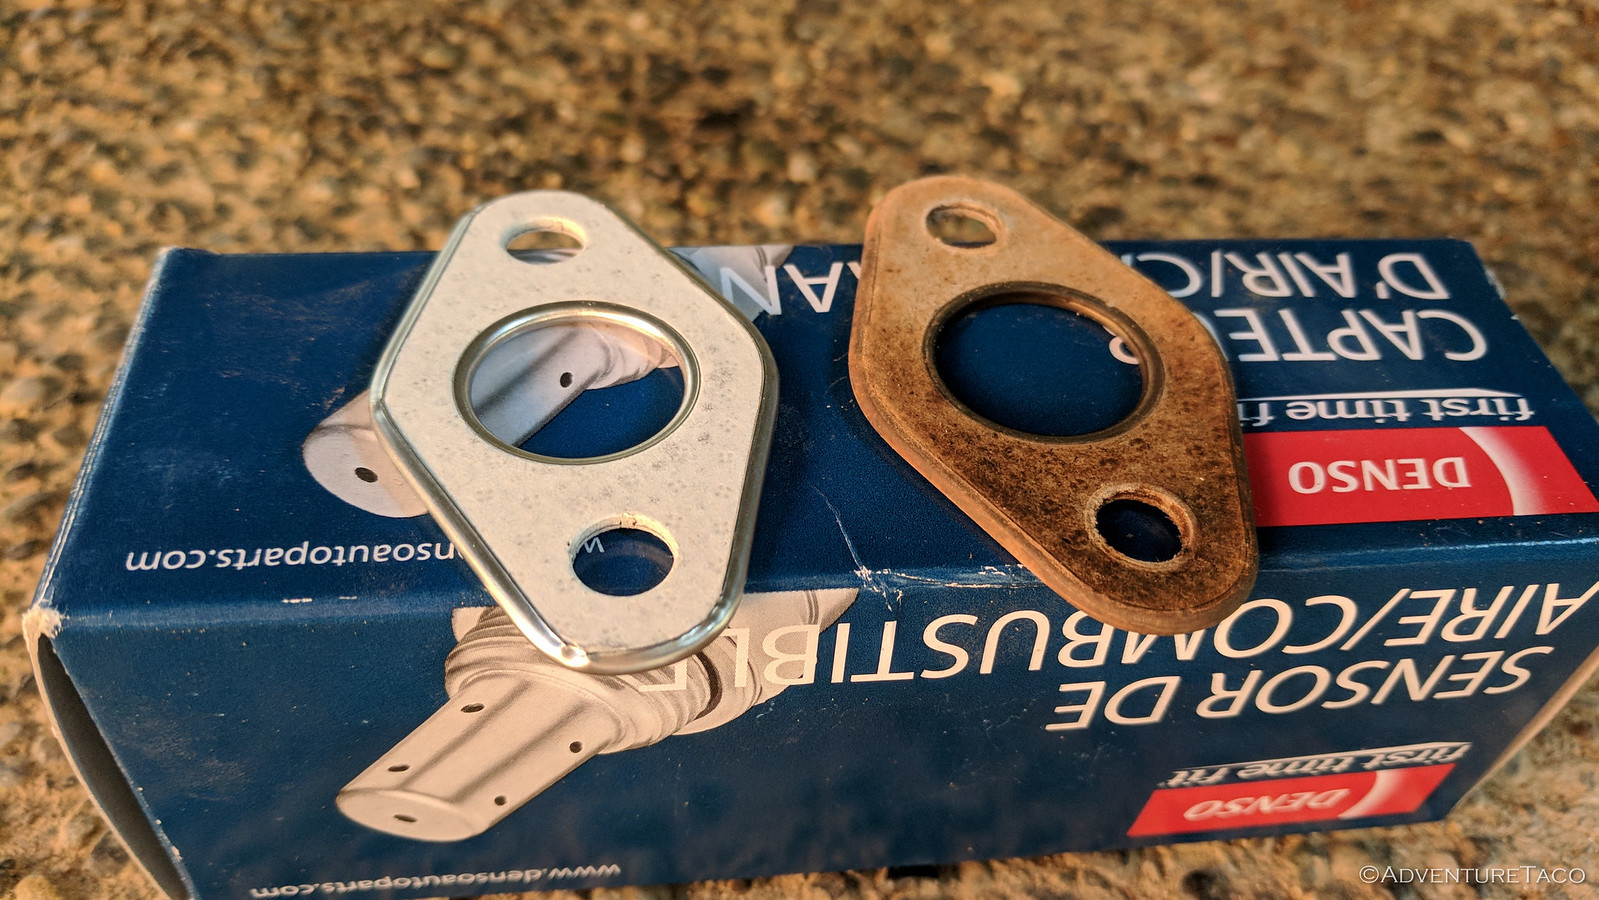
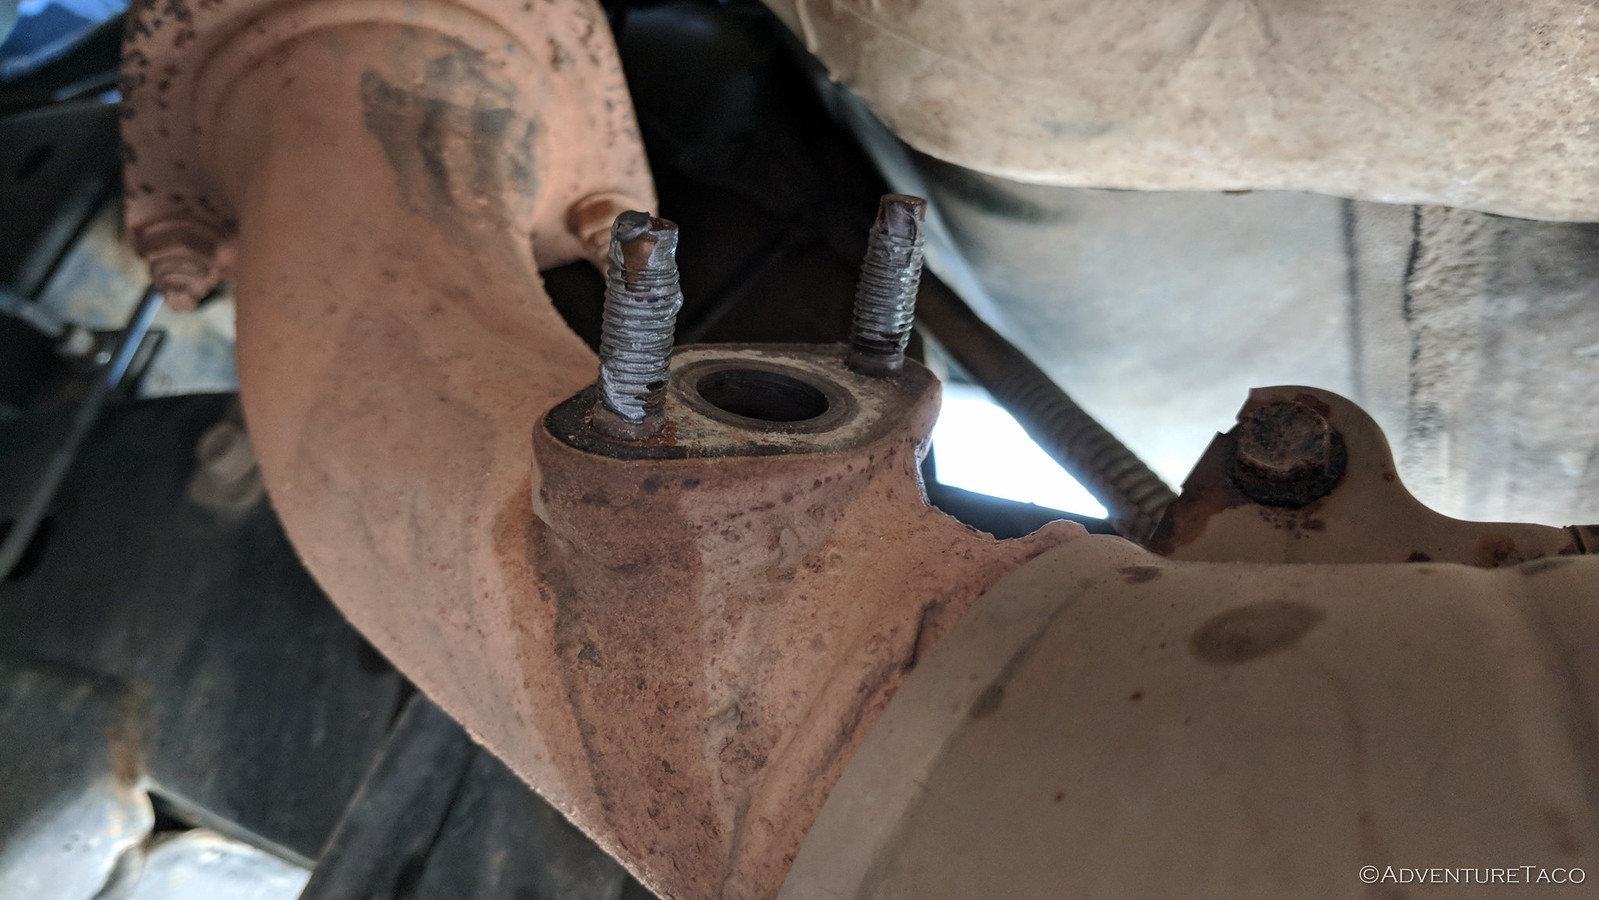
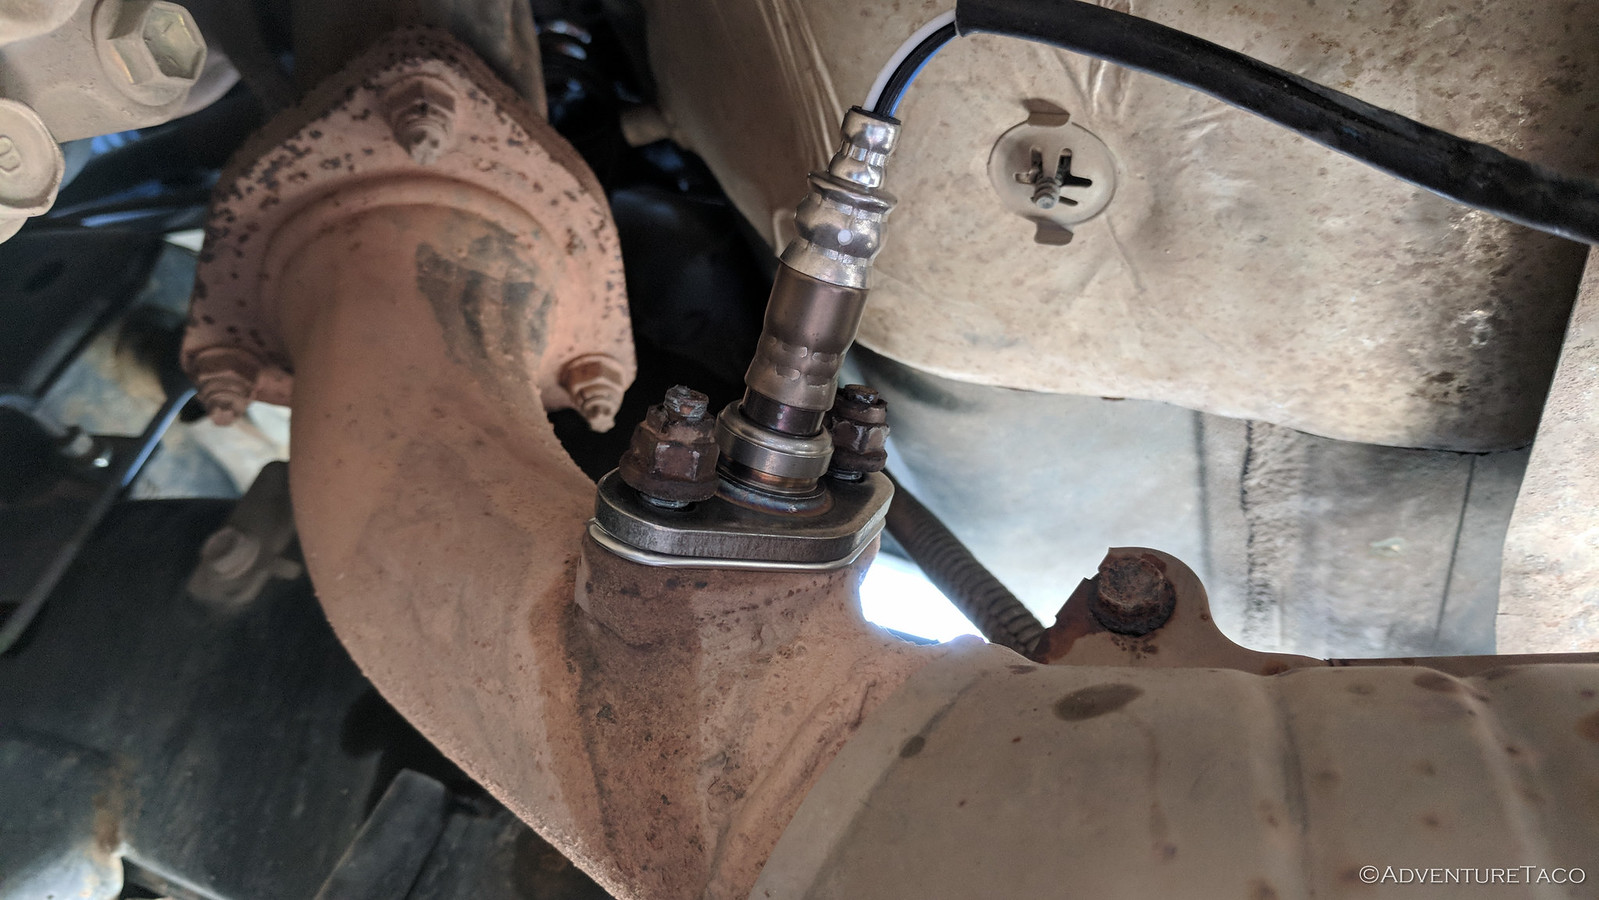
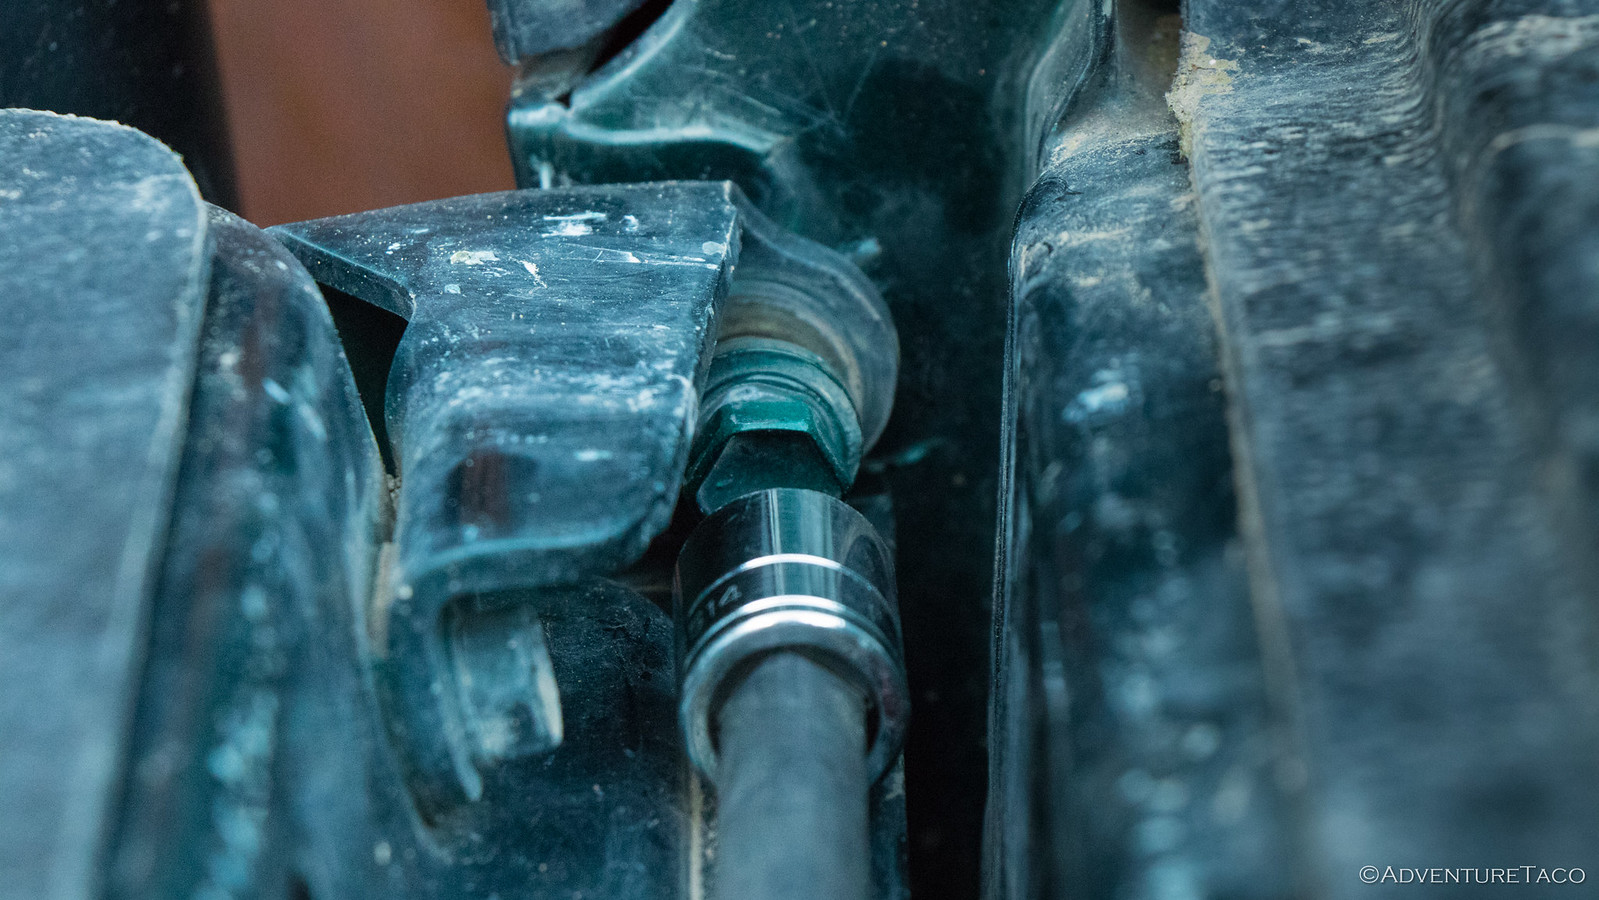
It's now time to remove the sensor itself. Back under the truck, I used a 12mm socket and a bit of dexterity (use whatever adapters you need) to remove the two nuts holding on the AF sensor. Once you do, carefully remove it and the gasket below it, noting the orientation of the gasket, which is important.


Next you can compare your old and new sensors to ensure that they are identical. My old one looked like it was in reasonably good shape, though I wouldn't know until the new one was installed and tested.


Connecting the new sensor is straight forward. I wrapped the sensor itself in the plastic bag it came in (so it wouldn't touch anything) and set about connecting the electrics first. This is just a matter of plugging the connectors together, and I opted to hold off on securing the connector to the top of the transmission until I was sure the new sensor was working.


Next, under the truck, I spread some anti-seize on the bolt studs for the AF sensor, and installed the gasket and sensor itself, first tightening the nuts by hand, and finishing them to 14 ft-lbs as speced ("tight" in my case, since it's pretty tough to get a torque wrench up in there).


Then it was into the cab so I could test everything. Everything was working as expected, so I re-clipped the connector to the transmission and buttoned up the shifter boots and knobs.


At that point, I took stock of my fuel trim situation. It was slightly better still, though Bank 2 was still showing higher trims than I'd expect.


So - here's the current situation. I believe that I'm below thresholds that will trigger a P0171 CEL at this point, but I still plan a couple follow-ups to determine whether I need to do work to the Bank 2 injectors:
  • Chat with Toyota Service to see what they think of the LTFT numbers I'm seeing, as well as the difference in trims between Bank 1 and Bank 2.
  • Convince some good folks who have first gen Tacoma's to take a look at their fuel trims, to see what ranges they are seeing, and to see if they have differences between the two banks.
- - -

Thanks for reading! And thanks to Monte (@Blackdawg), Zane (@Speedytech7), Mike (@Digiratus) and Dan (@drr) who answered a bunch of my questions as I went through the process, and helped me better understand a bunch of this.

- - -

Update: 2018-05-15
The LTFT numbers I was seeing for Bank 2 are bogus and should be ignored. Our (first gen) Tacoma's do not differentiate between Bank 1 and Bank 2 for LTFT, they send only one number to the ECU. The scanner is just picking up "random data" in the memory stream coming out of the OBDII port for Bank 2 fuel trims.
 

turbodb

Well-known member
Sway Bar Delete - Throwing Safety to the Wind
April 23, 2018.

A 2000 Toyota Tacoma only comes with so many safety features. Built two decades ago, there was no traction control; no forward, backward and side cameras; no blind spot radar; and definitely no Toyota Safety Sense™.

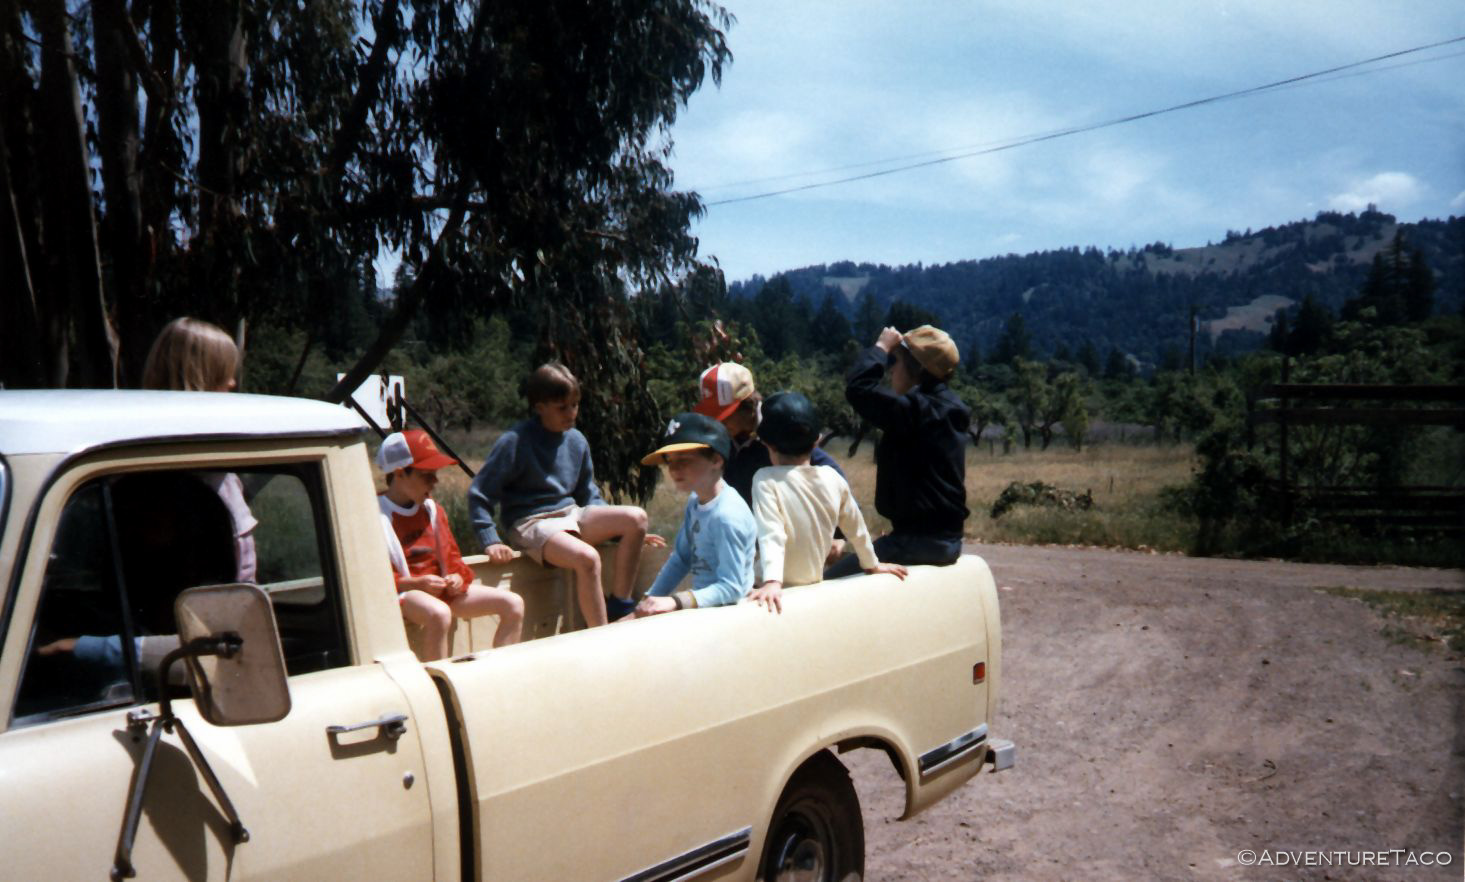
These were the days of kids riding in pickup beds for fun, seat belt warning chimes that buzzed twice and shut the hell up since they realized that if you were going to wear the belt, you'd have put it on already, and ABS-as-an-option.

These were the days before SMS; before we needed our cars to protect us from ourselves.


Of course, there are still some safety systems on a first gen Tacoma - seat belts, air bags, a 3rd brake light, and bumpers to name a few. And hey, on my truck they threw in ABS "for free," even though I'd explicitly asked not to have it.

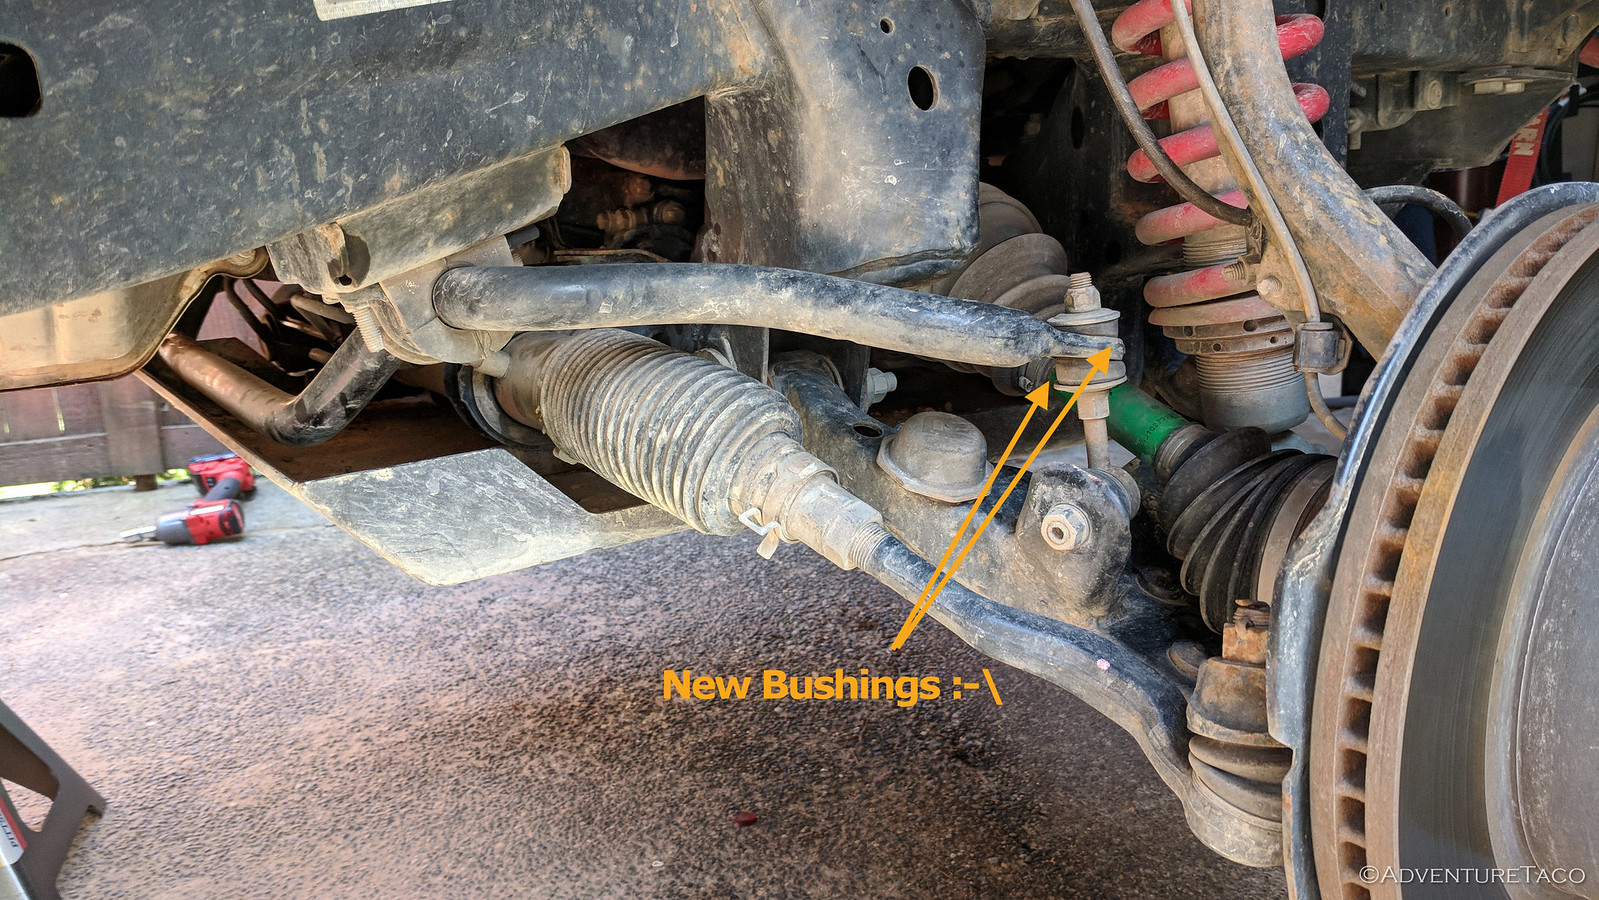
And for nearly 20 years, I didn't give these systems much thought - well, except for disabling the daytime running lights as the very first thing I did - since they mostly seemed to work, be relatively innocuous, and I didn't know much about them. So when I noticed a few rubber bushings wearing out, I replaced them - not really sure what I was doing.

28127322598_bd9ec160ff_h.jpg

On the last several trips, one of the things I've noticed is that roads feel "rougher" to me than most people. Some might argue that I'm getting old; others might say that it's the result of the new load-E tires - but unanimously everyone agrees that having the sway bar isn't making anything better.

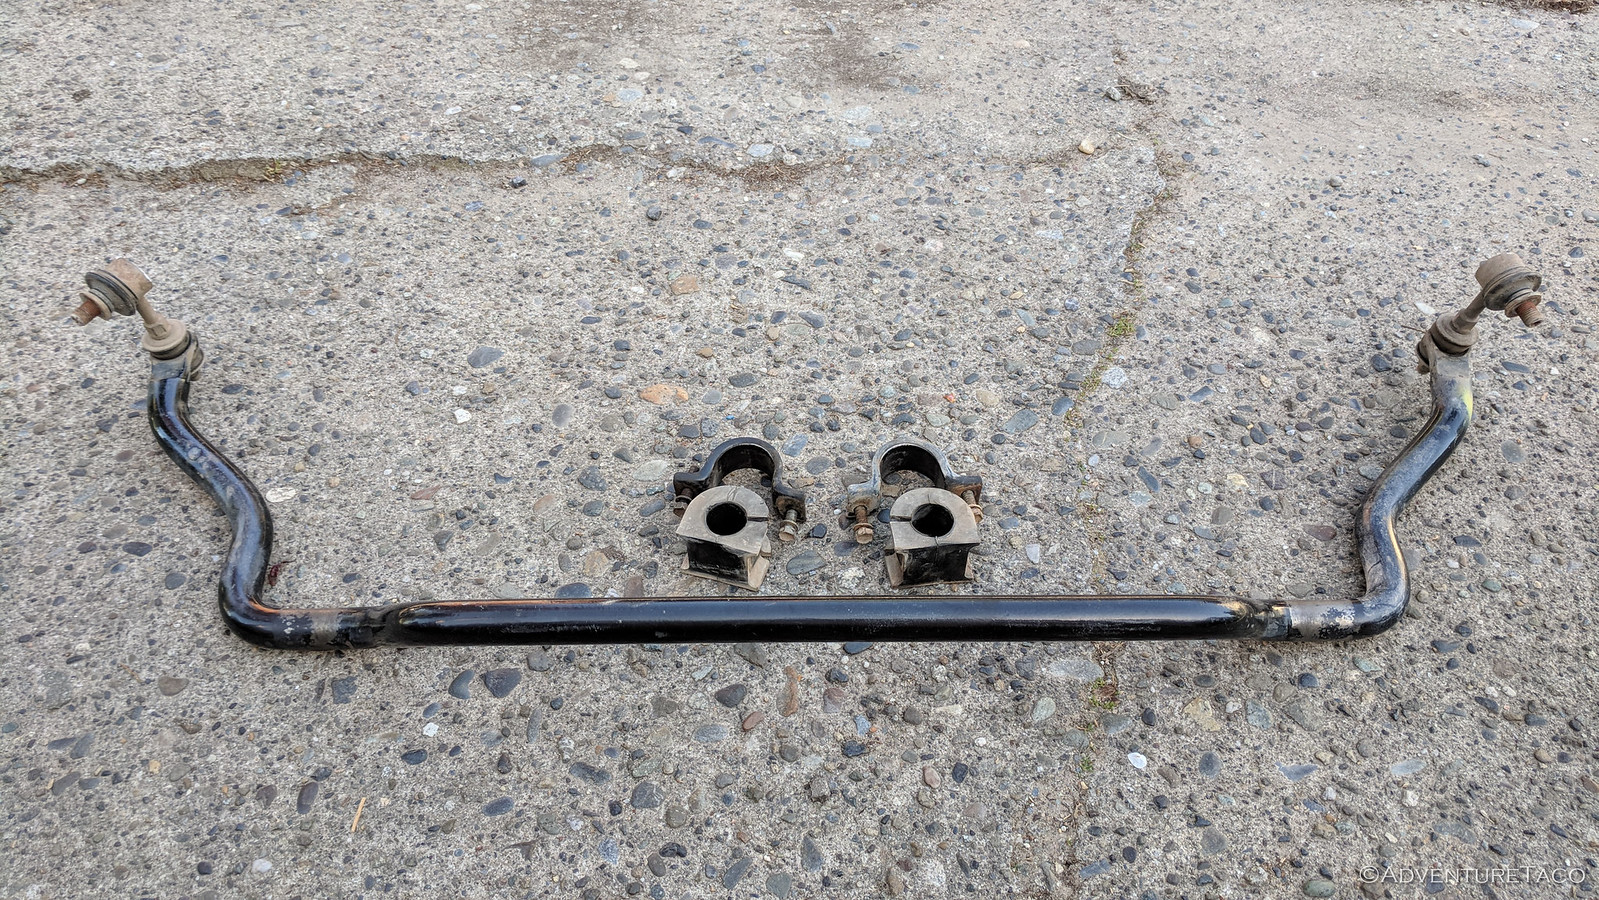
See, the sway bar removal is generally one of the first things that Tacoma owners do. By removing it, you remove the (literal) connection between the two front wheels, giving you more flexy-flexy on the rocks, and better bump absorption on those washboarded roads.

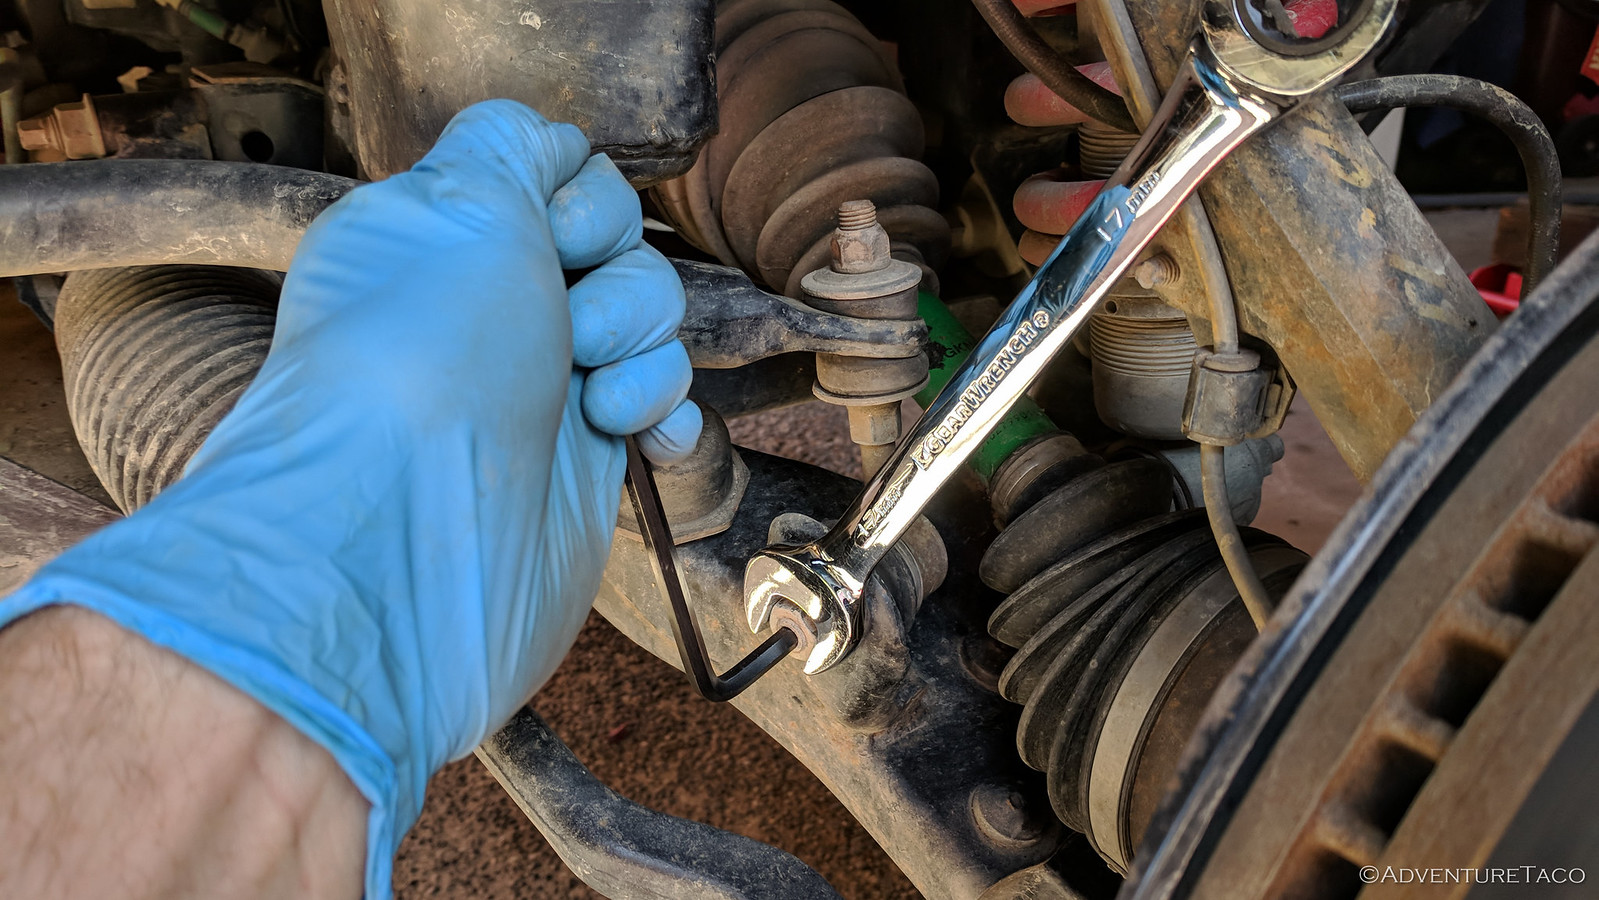
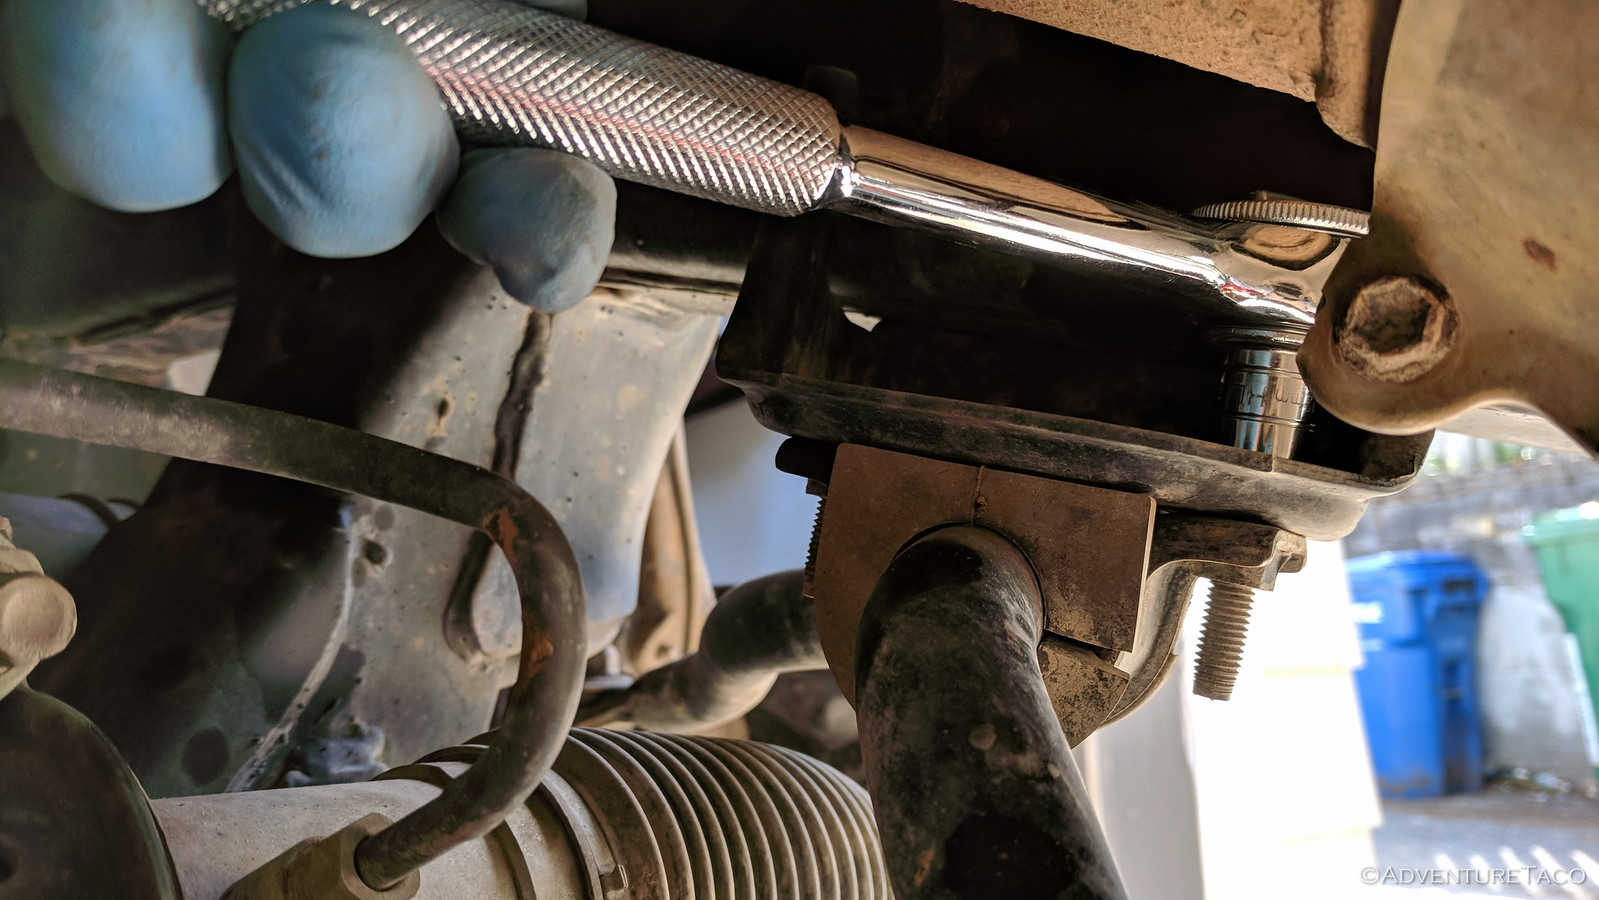
I could really use better bump absorption on washboarded roads. So, just a few weeks after buying new bushings, I finally decided to remove the sway bar. It's a straight forward process:
  1. Disconnect the links.
  2. Unbolt the sway bar bushings
  3. Finagle the sway bar out of the skid plate you were too lazy to remove at the beginning.

And with that I was done.

There are bound to be trade-offs with a mod like this. I'll need to learn to corner a bit differently, and be more aware of unevenness in the road. But that sounds like a great compromise for a smoother ride!

First Impressions (May 9, 2018)

Since removing the sway bar, I've put a couple hundred miles on the truck (but none off-road) and I can definitely tell the difference. The ride is smoother and cornering-at-speed is different (I have to pay a bit more attention), but in general the truck still drives like it's always driven - which is a good thing.

Lastly - I should note - the sway bar is a safety feature of our vehicles, so one should be careful in removing it. I've heard that having heavier-duty-than-stock front suspension can offset the lack of a sway bar to a great extent. That is, removing the sway bar introduces additional body roll when turning, but heavy-duty front coils resist that same body roll. This so far seems true in my experience as well - with 650lb coils in the front.

I'm looking forward to my next adventure, so I can exercise the new setup in a more taxing environment.
 

Kpack

Adventurer
I still have my sway bar on the truck, but it hasn't been connected for 2 years. I leave it there in the off-chance that I want to connect it for hazardous driving in the snow.

To be honest though, I haven't felt like the truck has suffered by not having it connected. It still feels totally planted and I feel very much in control. It does roll a bit more around corners, but I've gotten used to that. Quick movements aren't a great idea, but I always drive defensively and allow myself plenty of time.

I'm running 700lbs springs up front which helps keep it stable.
 

thezentree

pretend redneck
I ran without a front swaybar for a few months until I took a highway off ramp a little too fast, the weight shifted to the front outside tire suddenly, and I almost rolled it. No sway bars is predictable and easy to deal with until it's not, and then it's scary. I run both sway bars now. They're easy enough to remove when it's time to go play in the woods.

<--550lb springs up front in a 3rd gen 4Runner.
 

Kpack

Adventurer
I ran without a front swaybar for a few months until I took a highway off ramp a little too fast, the weight shifted to the front outside tire suddenly, and I almost rolled it. No sway bars is predictable and easy to deal with until it's not, and then it's scary. I run both sway bars now. They're easy enough to remove when it's time to go play in the woods.

<--550lb springs up front in a 3rd gen 4Runner.
I totally agree. Sway bar delete is fine until it's not. With my heavy springs it so far has not presented an issue.

Unfortunately the "quick disconnects" for the 1st gen Tundra are not quick. They still require you to crawl under the truck and use two 19mm wrenches to take off the top nut, then it's a struggle to get the lower joint off. I have them, but I just got tired of messing with them so they now reside in my center console in the off chance I feel the need to put them back on.
 

turbodb

Well-known member
Don't Skip Leg Day - Reinforcing the Rear Frame
May 12, 2018.

We all know how it goes - the list of things to do to the truck is so long that we have to prioritize. And often, that prioritization favors form over function. And from time to time, I've been as guilty of that as the next guy, for sure.

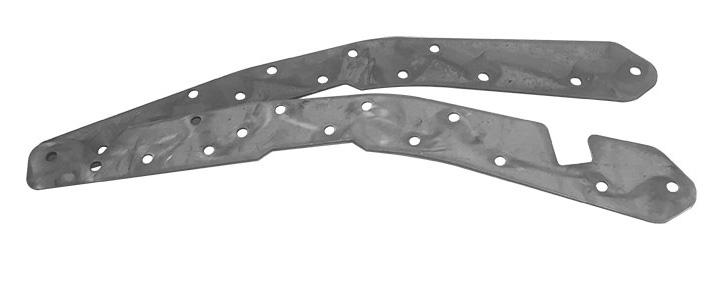
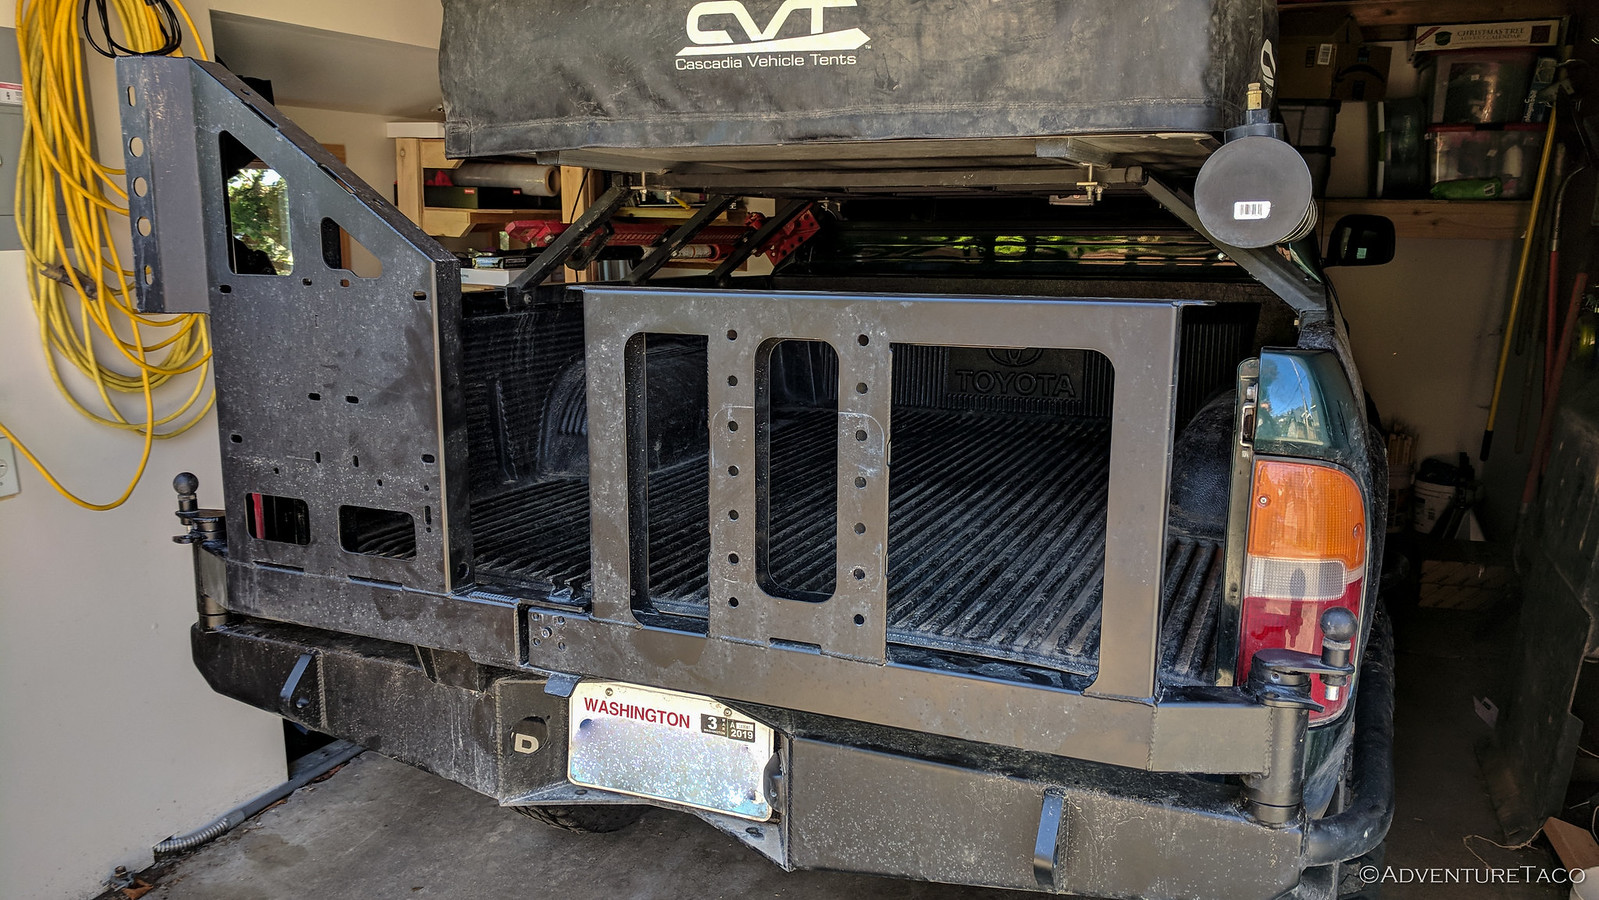
But not this time. This time, I knew that I needed the function with the form, lest I do irreparable damage to the Tacoma. So, when I installed the dual swingout CBI rear bumper in January, I purchased a set of frame reinforcement plates at the same time from @CBI OFFROAD FAB - knowing that with all that extra weight hanging off the back, that it was only a matter of time before my frame was going to get tweaked.


Now, I know what you're thinking - that I'm using with incorrectly here since I installed the bumper (form) in March, and it's now May that I'm finally getting around to the reinforcement plates (function).

I would suggest that you should stop all that thinking; it just bogs you down in details - I gave thinking up completely several months ago, and it's quite liberating. At any rate, let's get back to the story.

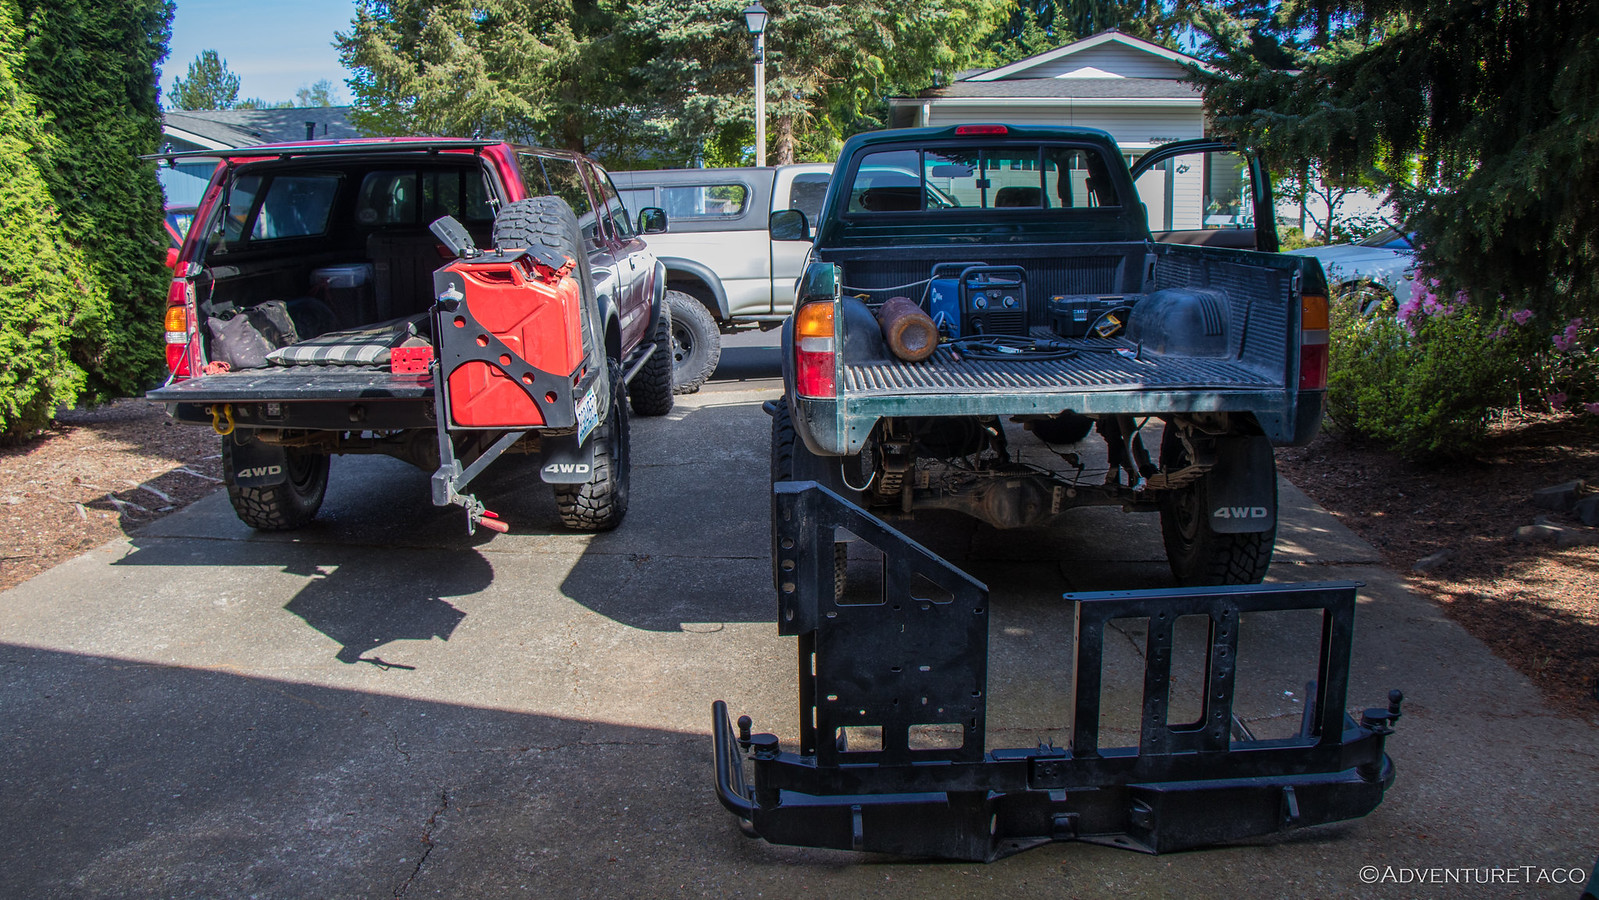
Knowing that summer (and more, longer adventures) was fast approaching, the shop day at Mike's was going to be the perfect time to remove the bed. I figured I'd make that whole process easier by getting the swingouts off the bumper before heading over - you know, so we didn't have to lift the bed up over them during removal.

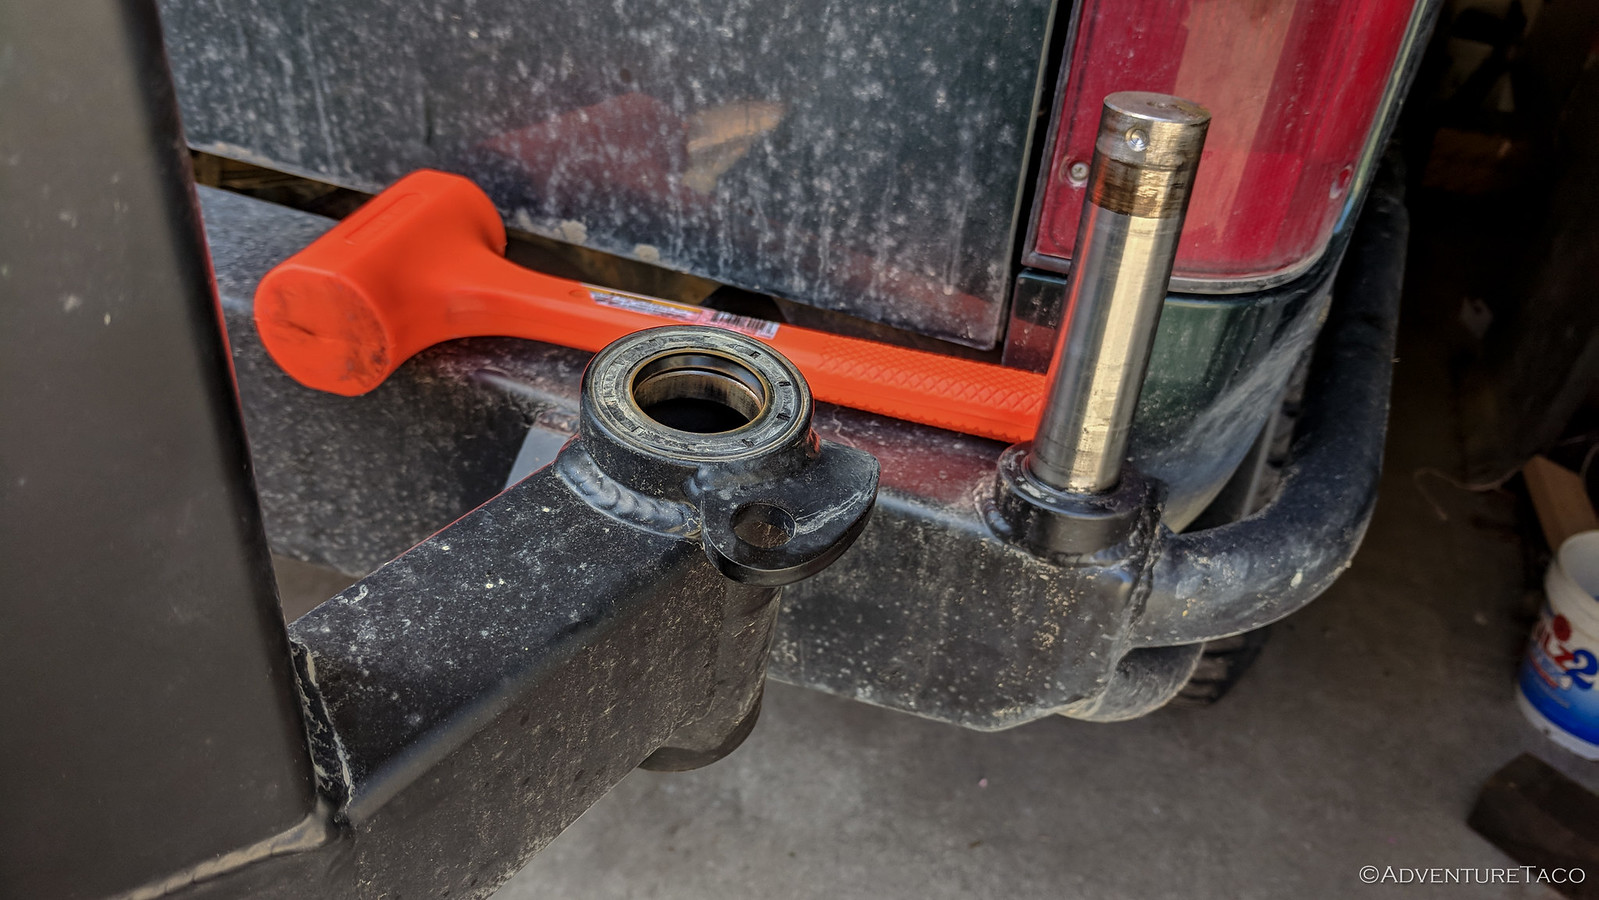
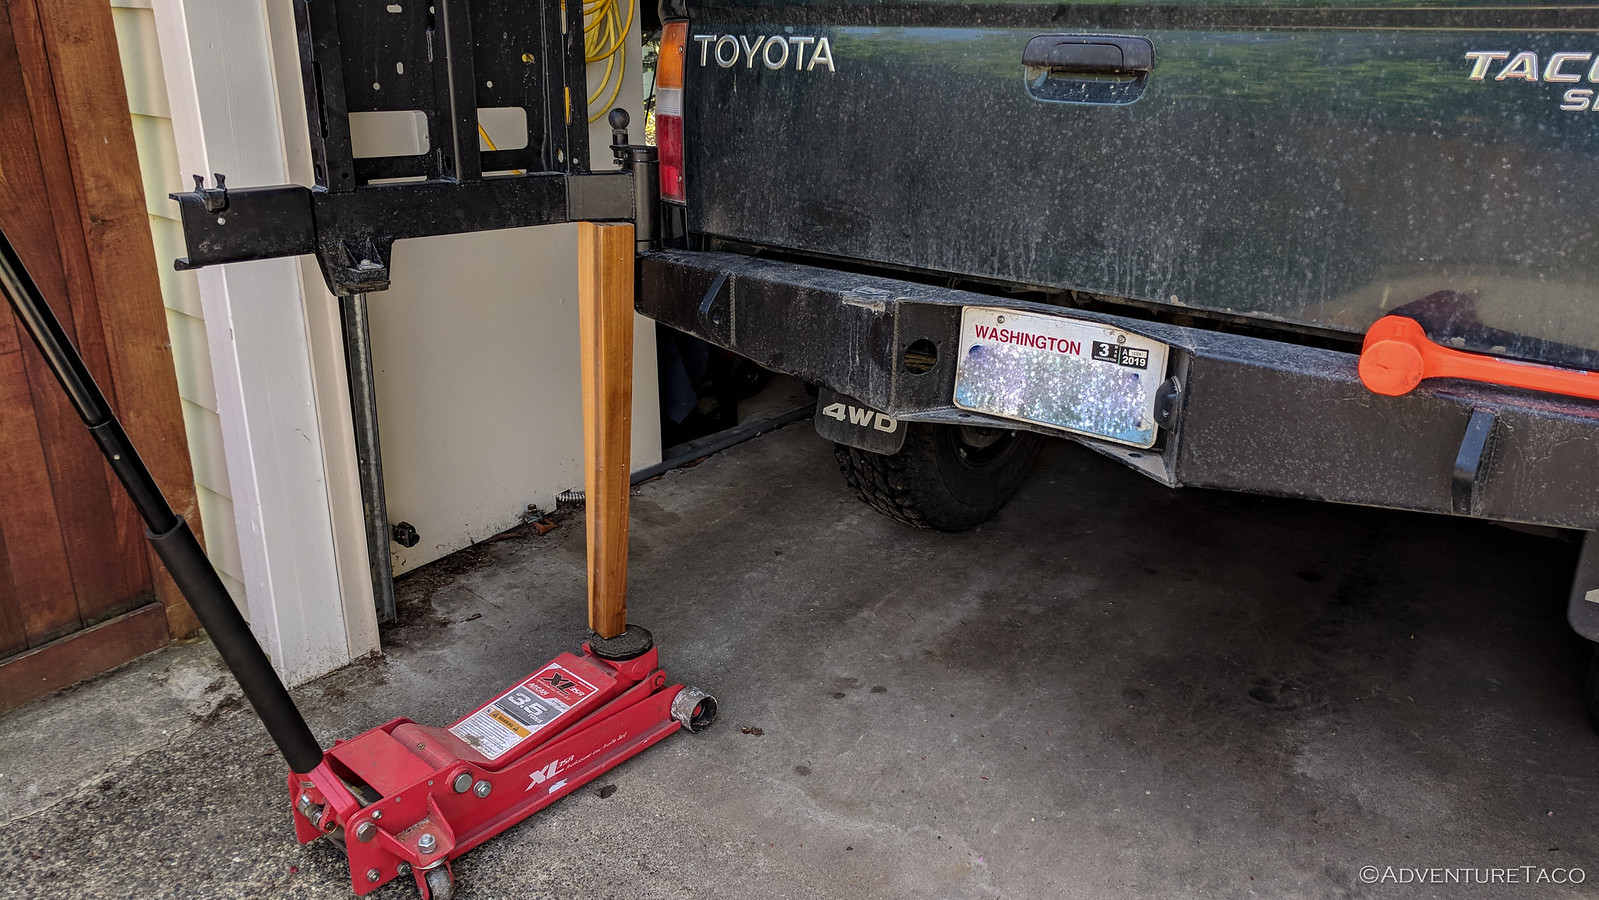
The passenger side swingout came off just fine - a little persuasion with the dead blow was all that was needed. The driver side on the other hand... well, it turns out I can jack the rear of the truck completely off the ground using that swing arm. It wasn't coming off!


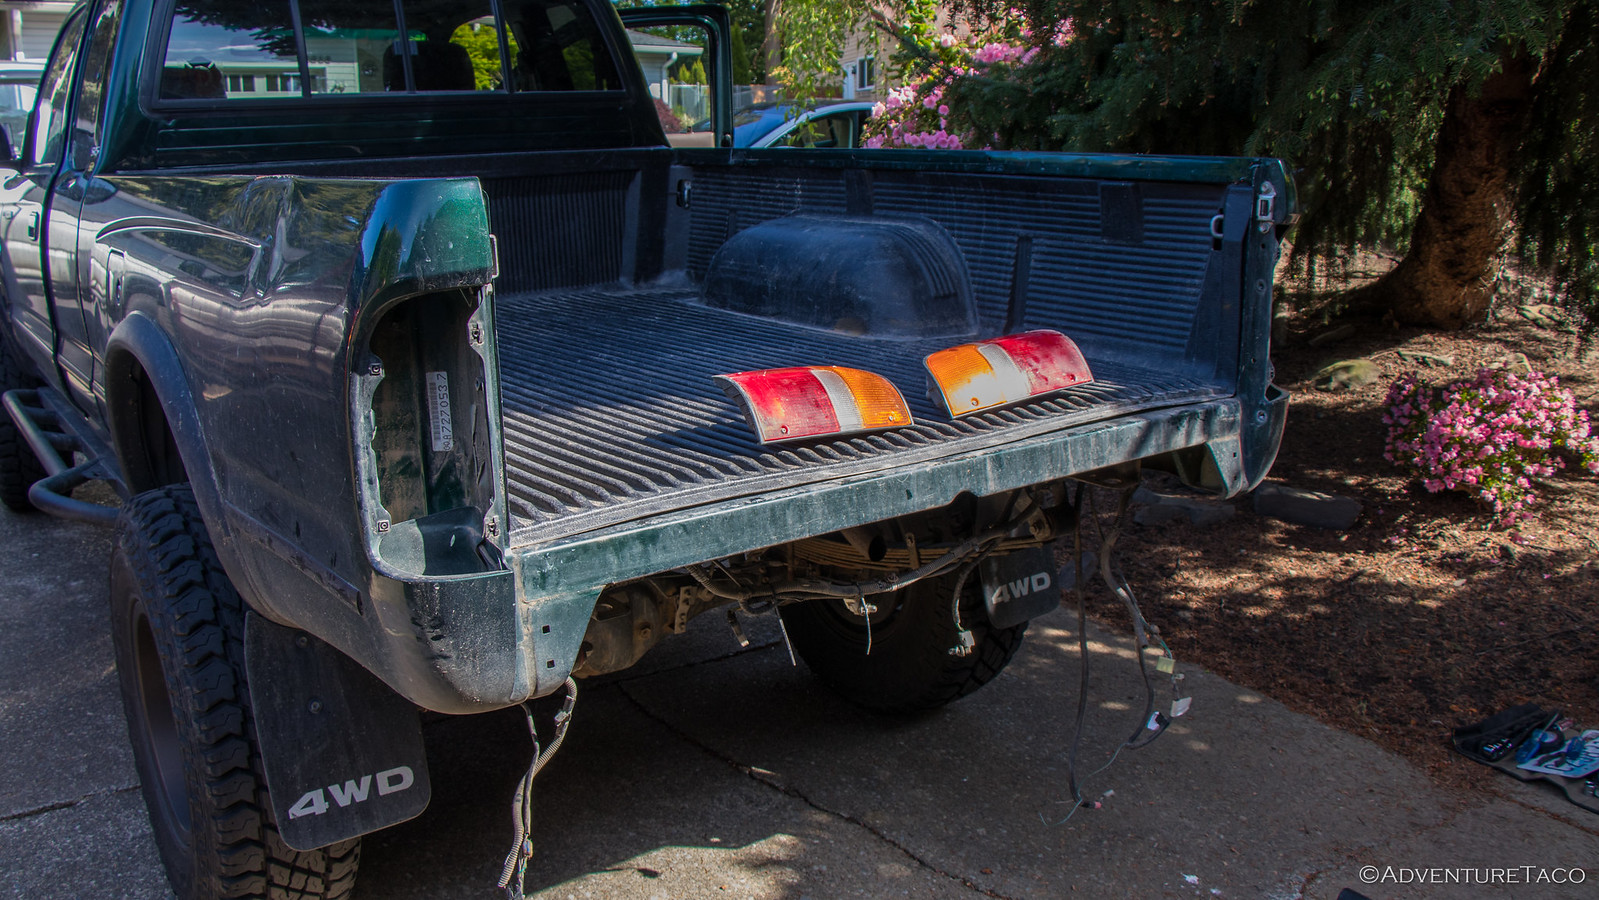
Unfortunately, that wasn't a huge surprise to me - getting that arm on was nearly a press fit, so I resigned myself to simply removing the tailgate, and then waiting to got to Mike's to take off both the bumper and bed. The tailgate came off easily enough - just two bolts on the bottom, and two screws holding the cables on the top - and I dare say that I like the look!

Of course, no tailgate leads to problems - just ask @mrs.turbodb :p - so the look is only temporary.


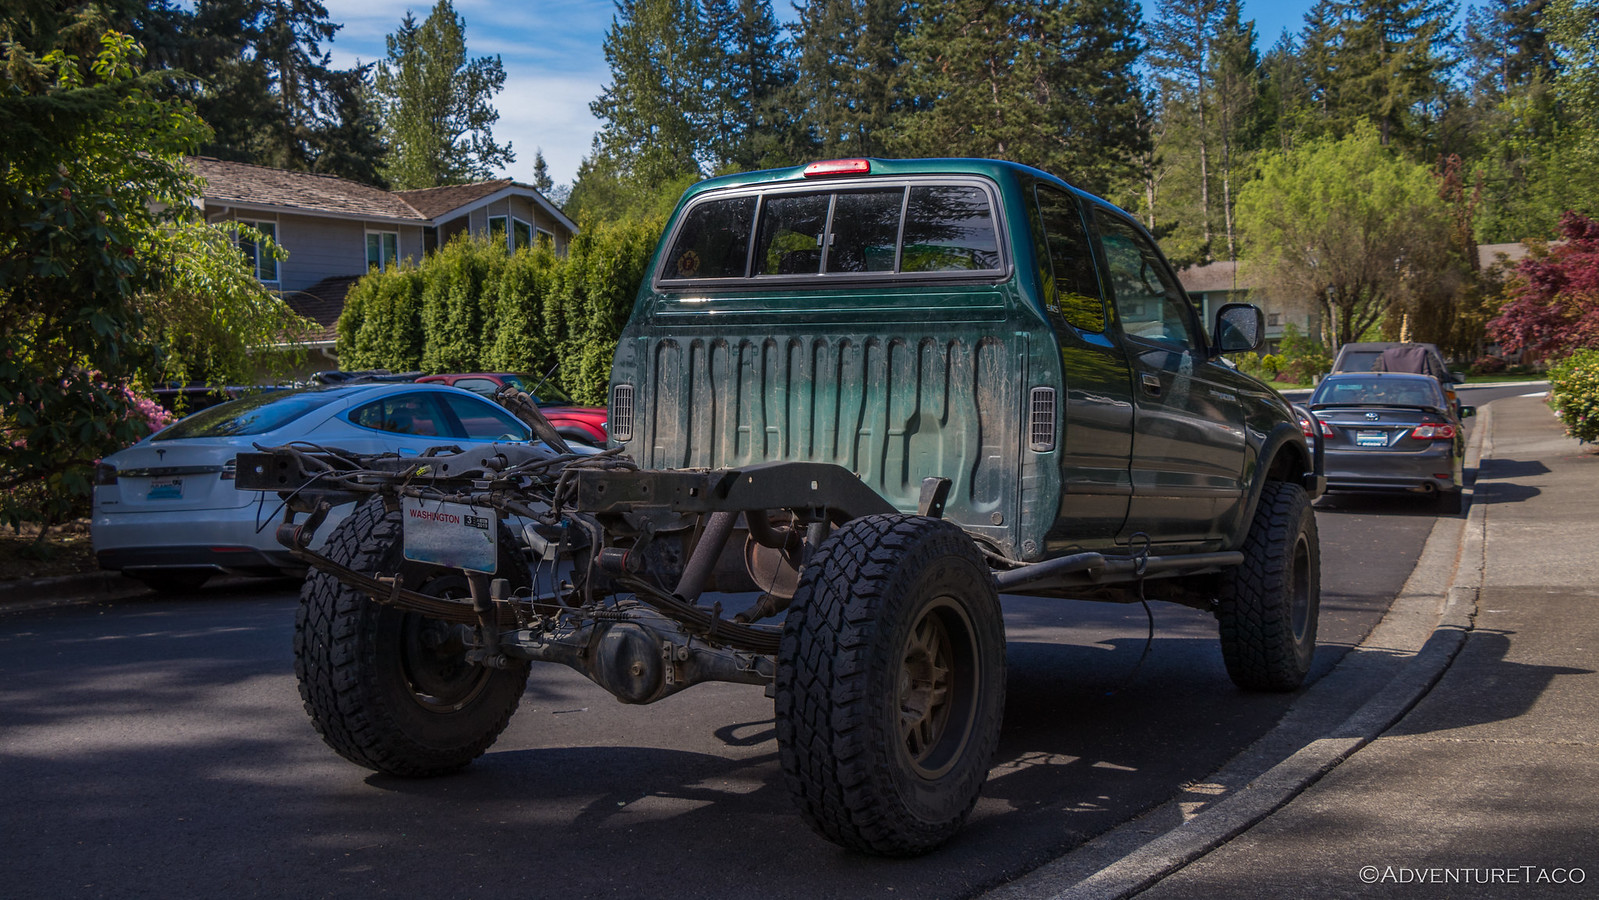
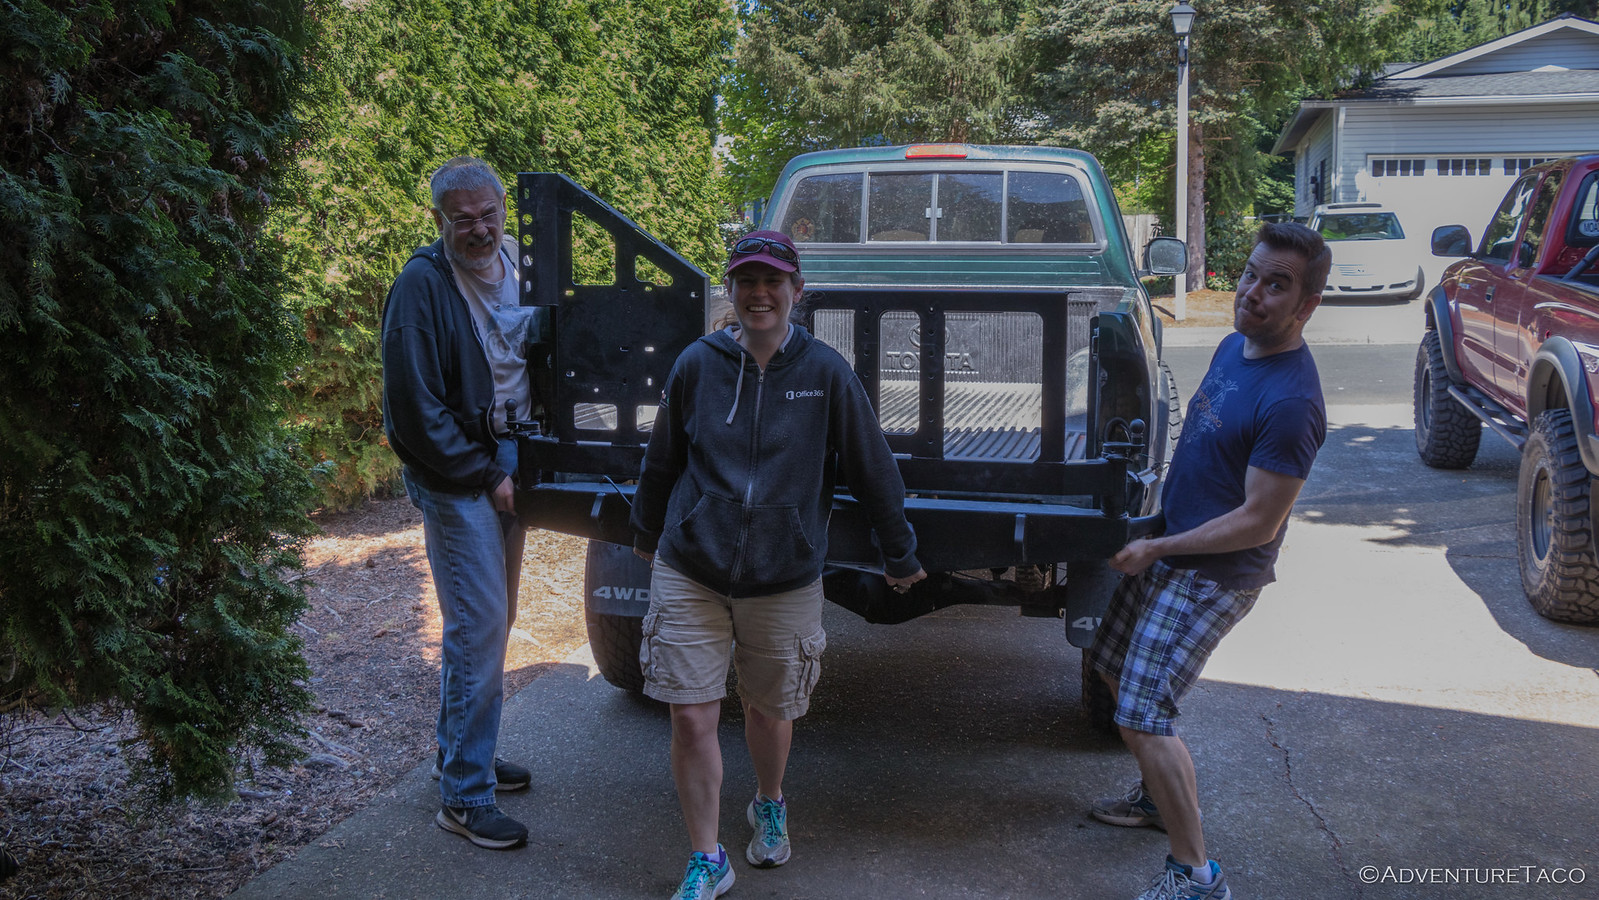
At Mikes, removal of the bumper and bed was a simple 15 minute affair, thanks to help from @Digiratus, @Speedytech7, and @drr. Additionally, the fact that we were all lifting bits off meant that photos were impossible - clearly, it's time for a drone, to capture such action shots at a couple hundred bucks a pop! ?


Without the weight of a bed or bumper on the back of the truck to cushion the ride, the drive home that evening made me realize just how smooth the truck was on the various washboard roads I've complained so much about in the past.

Not that I won't continue to complain about them in the future!

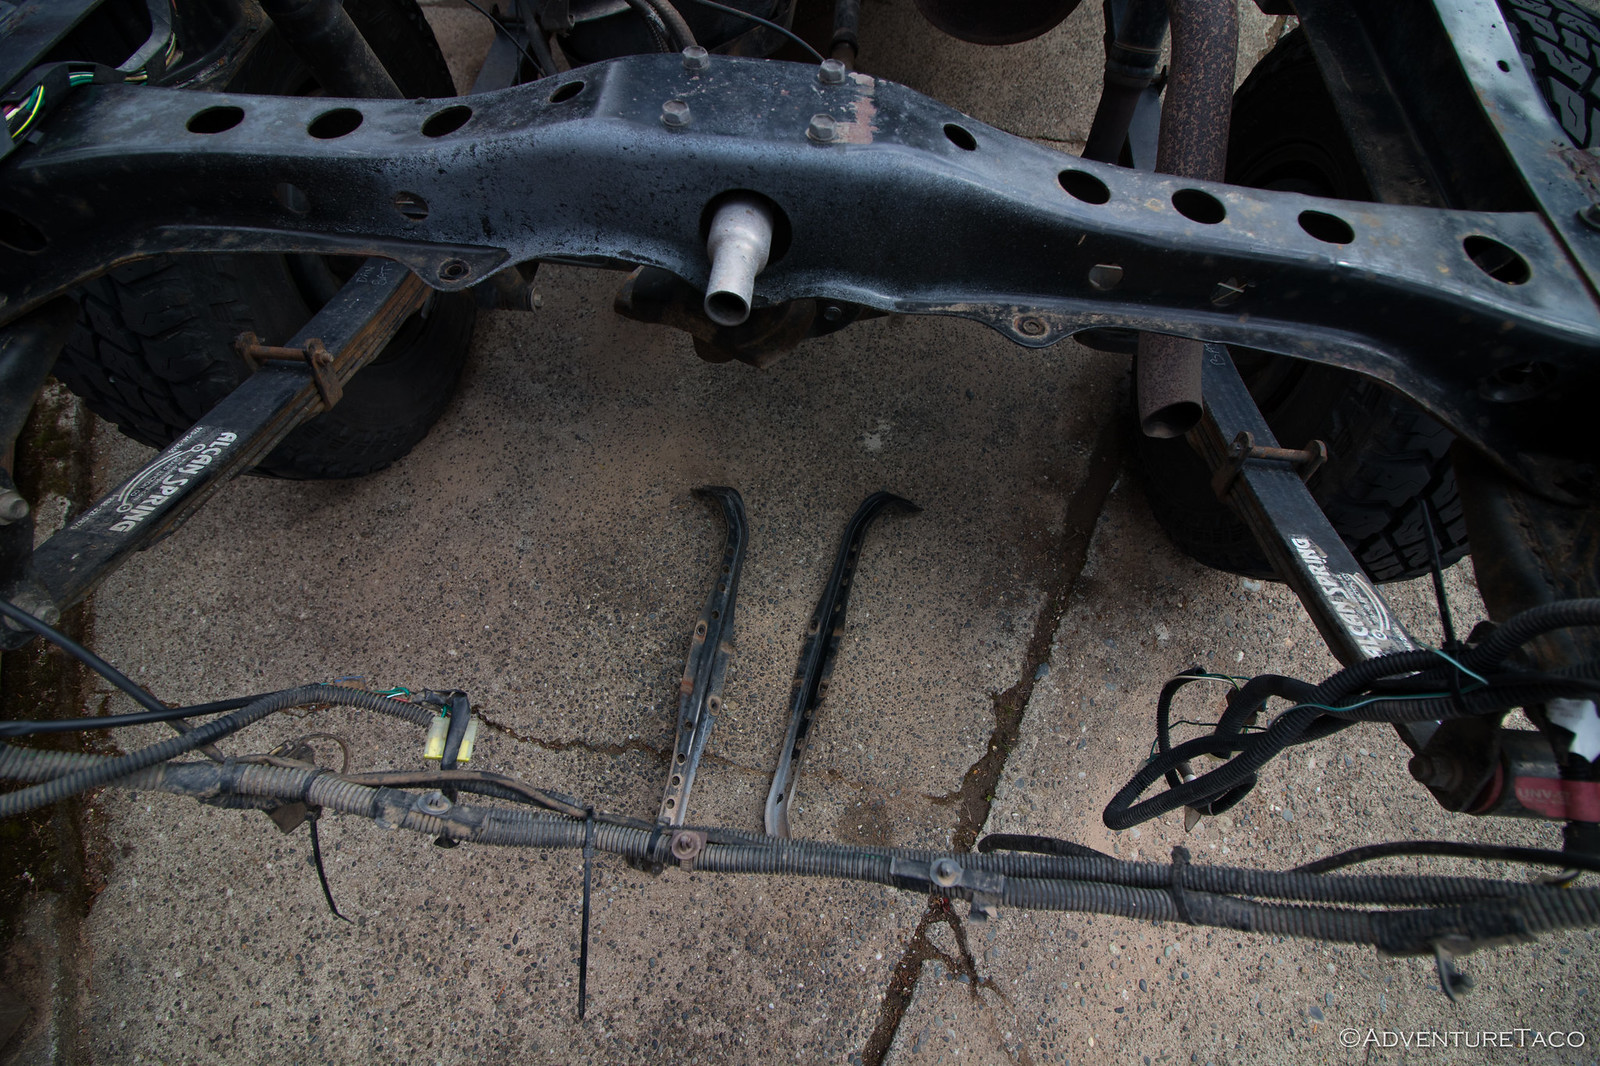
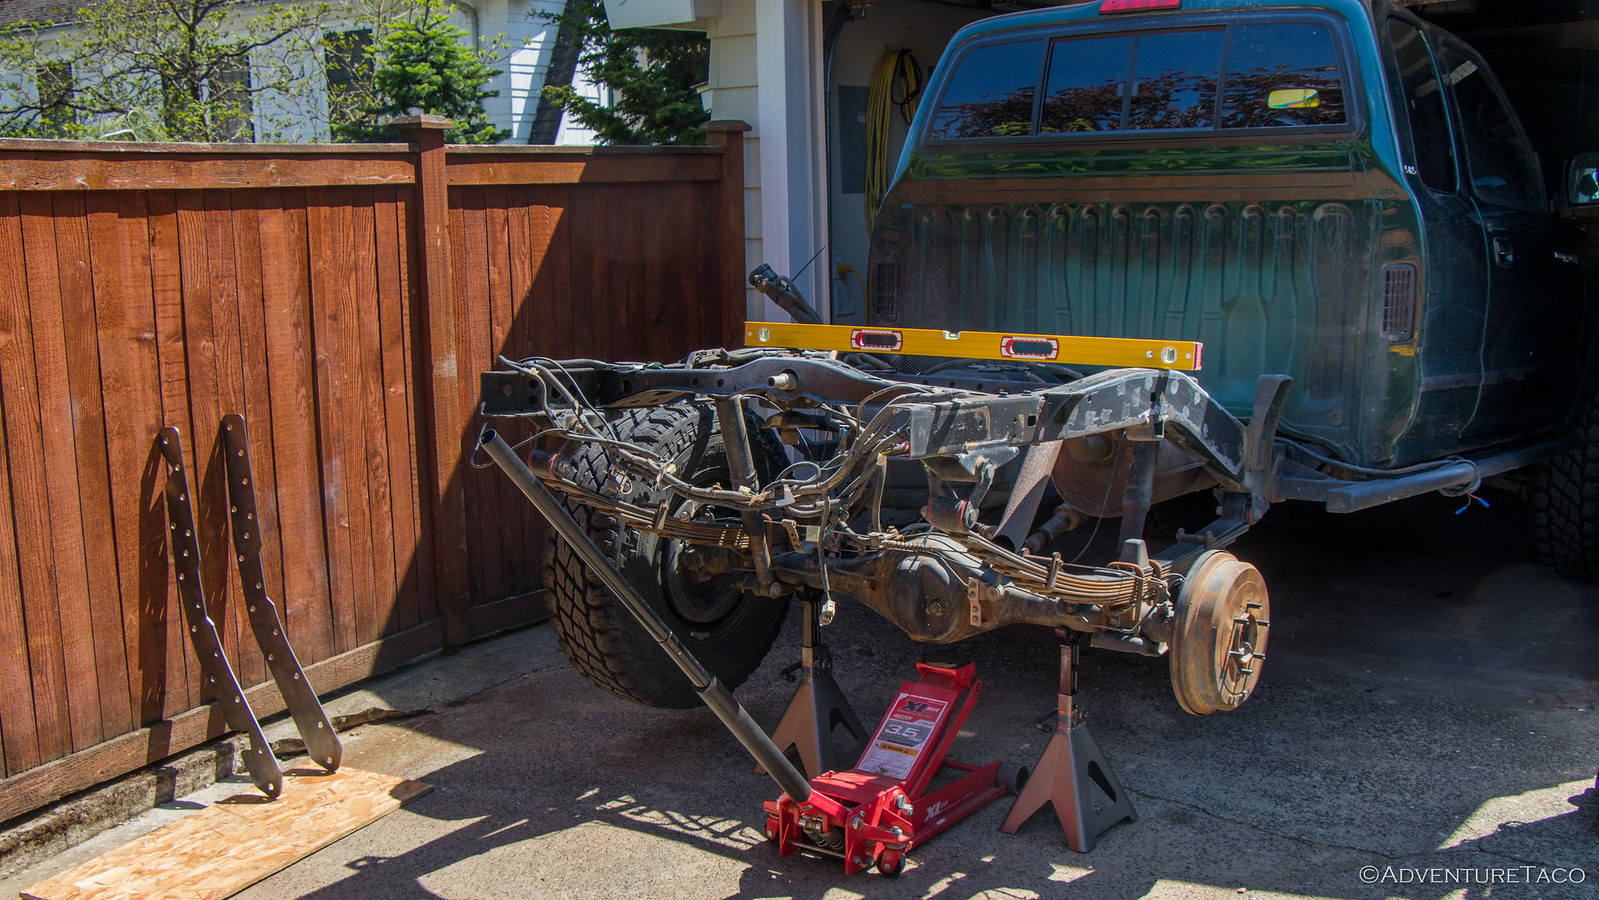
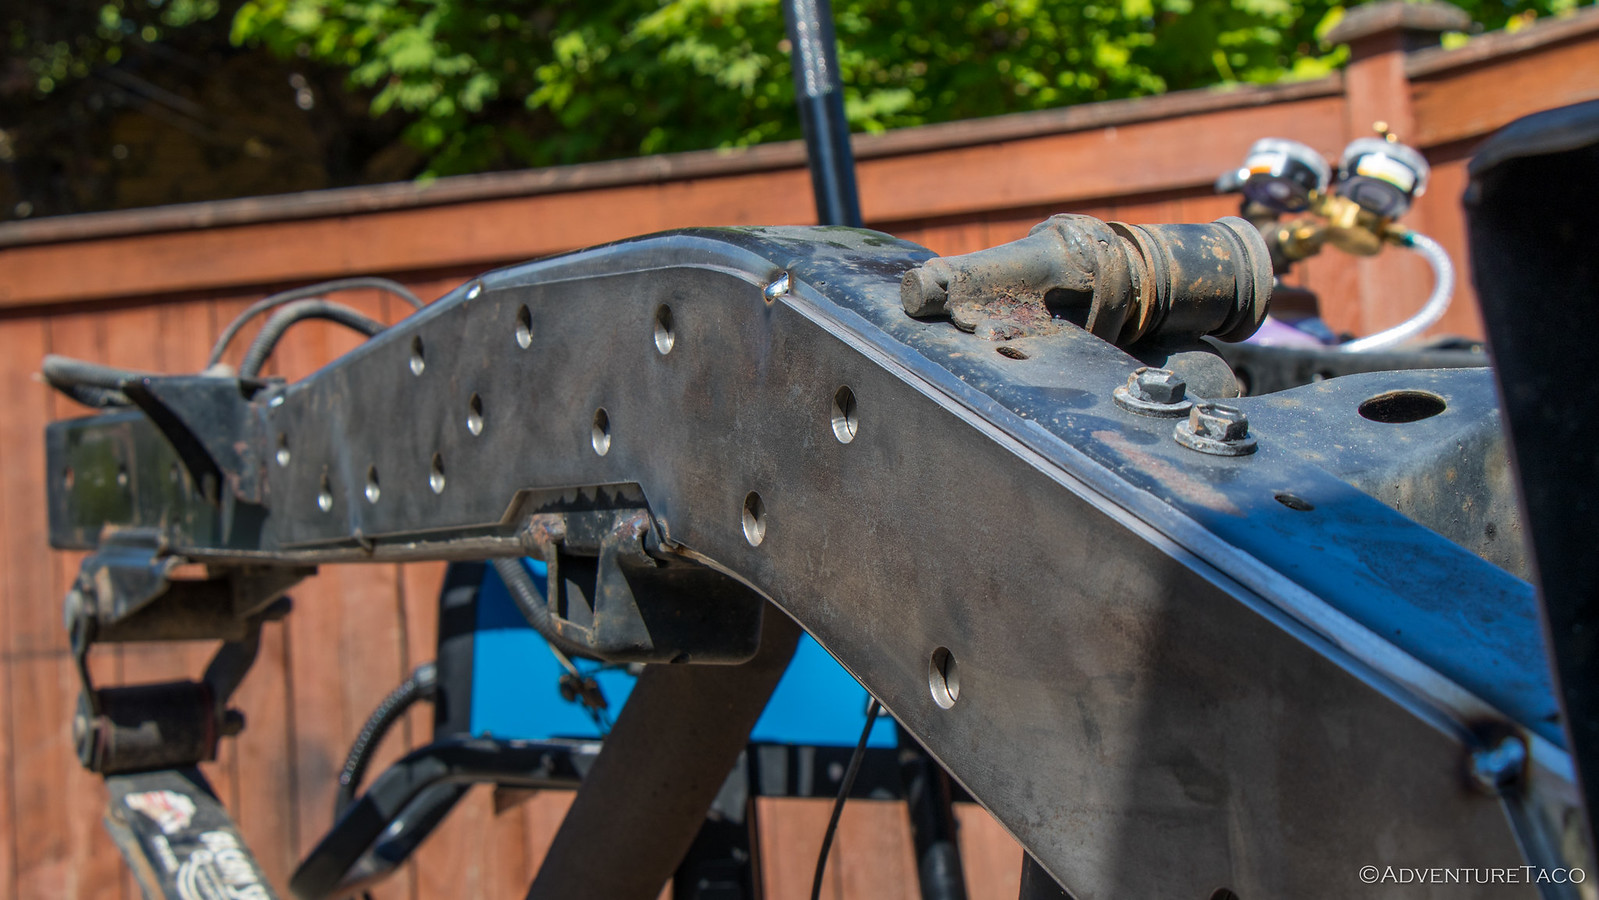
At any rate, the next step was removal of the spare tire carrier - something that's much more easily done with access to the bolts from the top, and mock-up of the reinforcement plates on the frame so I could make sure they were going to fit, and trace their outline with a sharpie.


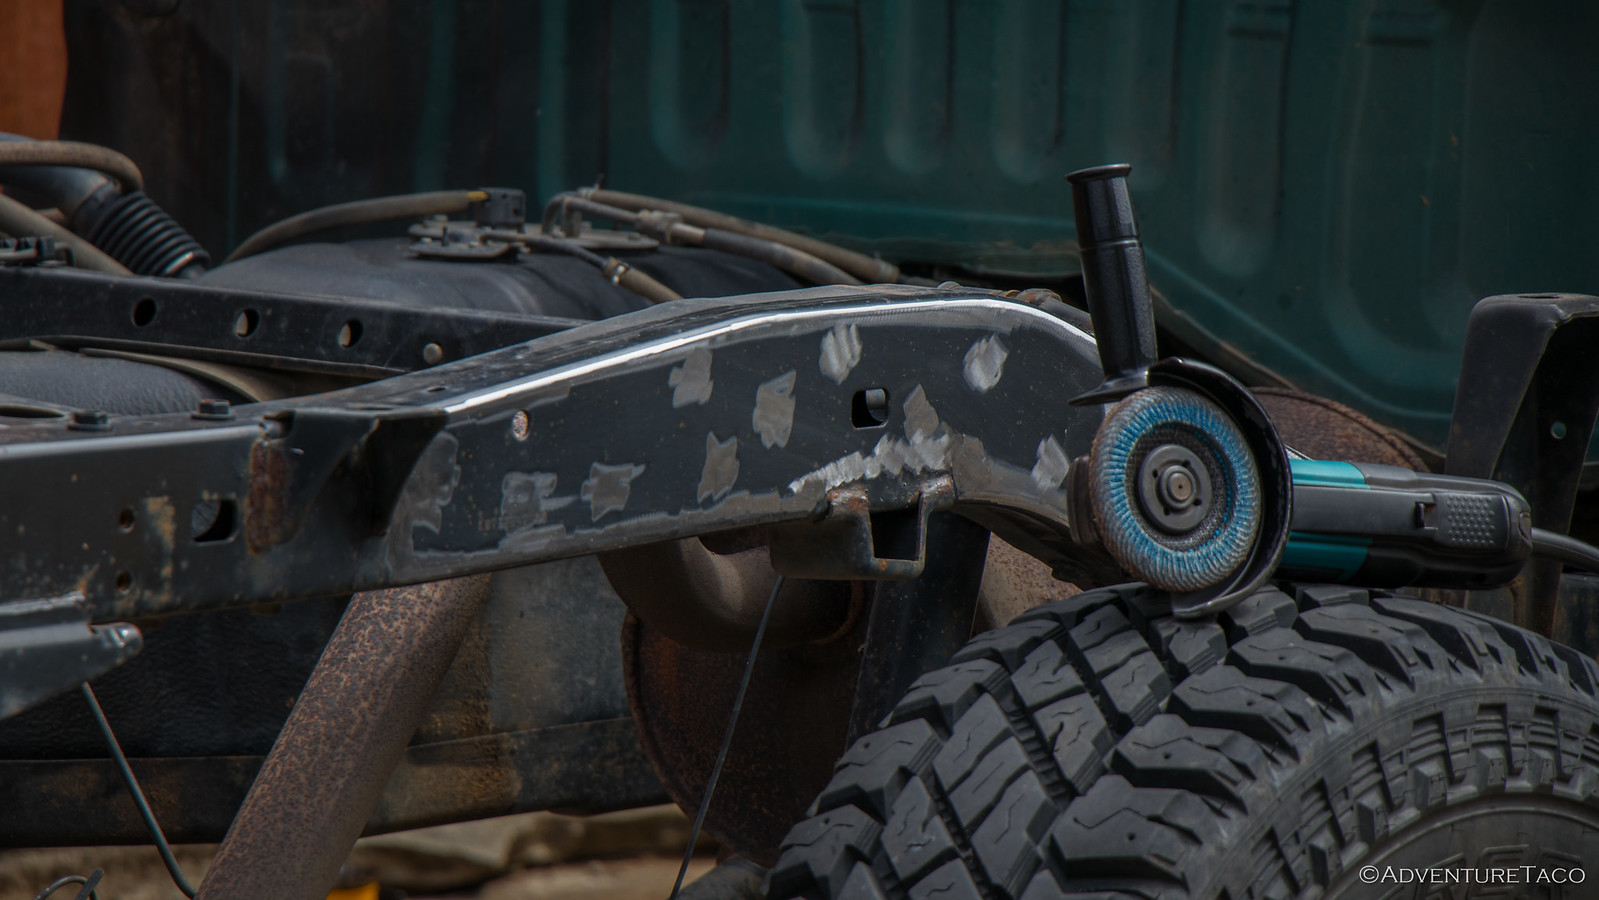
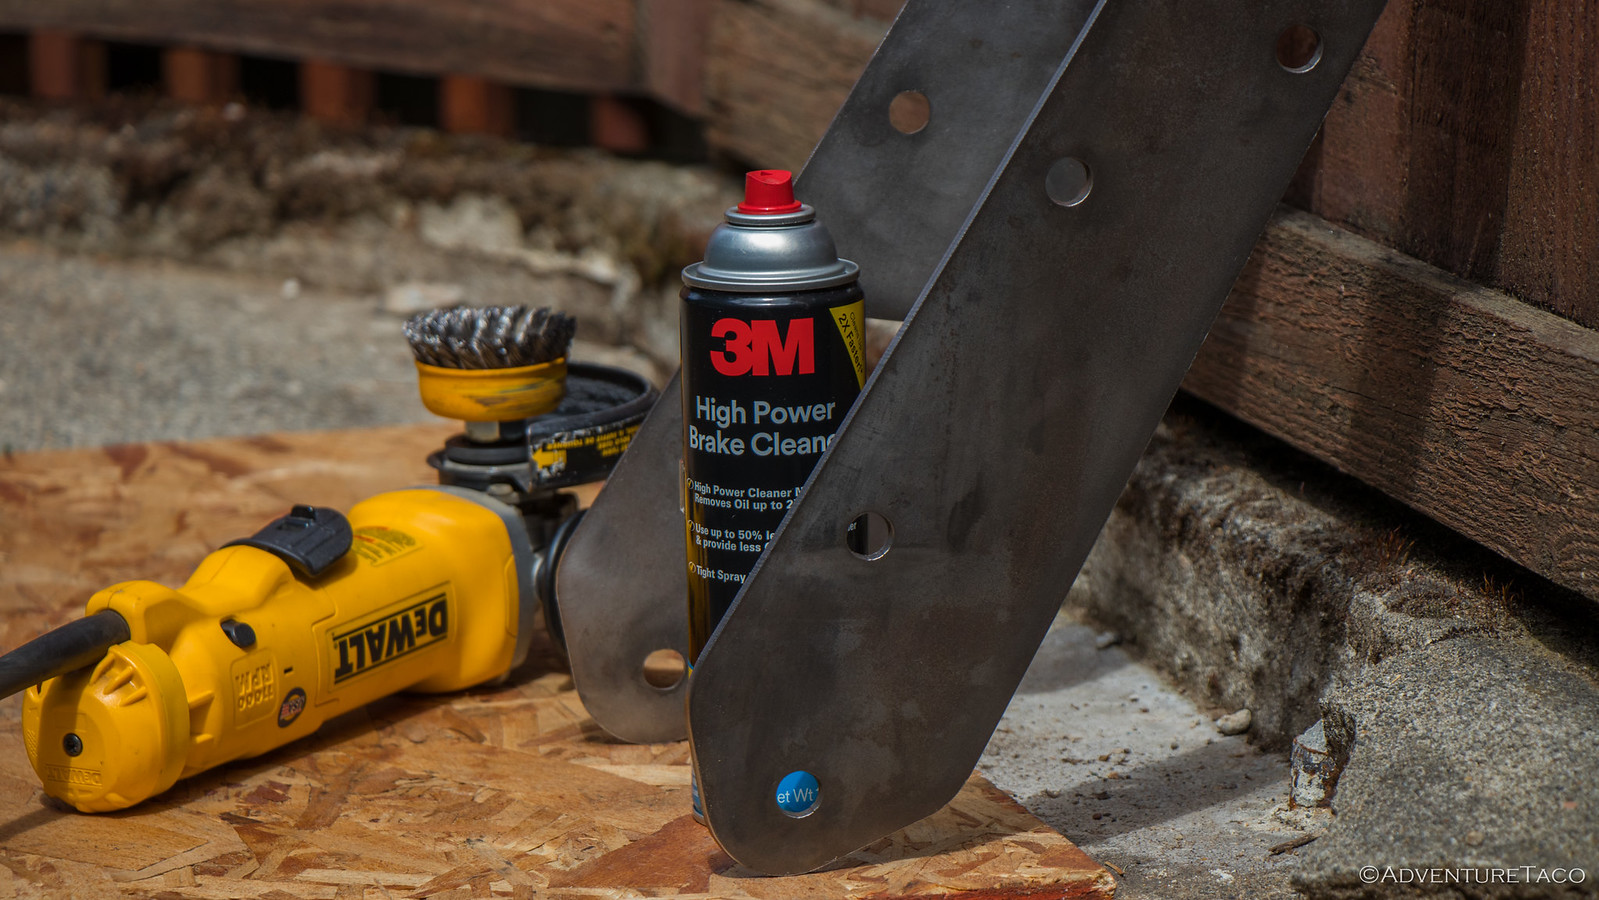
And then, it was time for metal prep. This isn't the most fun part of the project, but I dare say it's the most important. Shiny metal welds so much cleaner and stronger than dirty metal that it's insane. So, I spent some time - a good 45 minutes - with the flap disk on the frame, a wire brush on the reinforcement plates, and degreaser and mineral spirits everywhere to get all of the parts nice and clean in all the spots that would see a weld. Lastly, I decided to remove the tires and make sure the truck was level before getting going...

Because how much would it suck to weld your frame into a tweaked position because the truck wasn't level? (Hint: Suckage would be high.)


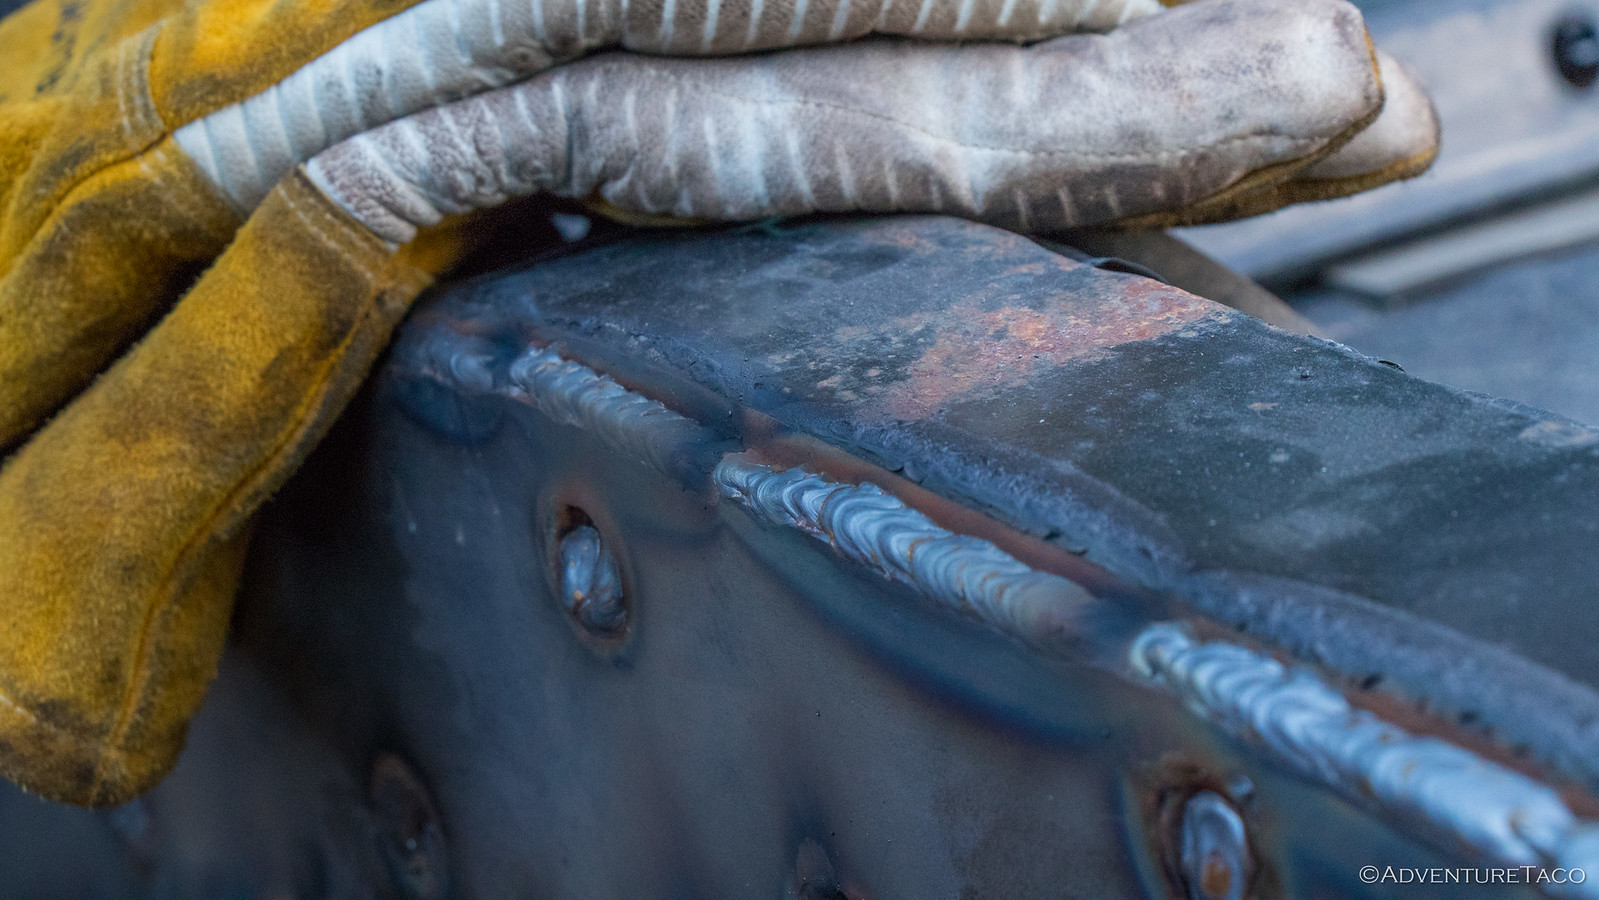
Finally, I was ready to get welding. I started by tacking the plates in several places around the perimeter on each side of the truck. And then, I started stitching. This is not a fast process - by design. The idea is to weld a couple inches of plate to the frame, move to another (cooler) area of the frame and weld another couple inches, and then let that side (passenger) of the frame cool down by moving to the other side (driver) and welding a couple places over there.
 

turbodb

Well-known member
You do that so that you don't heat up the frame too much, which can both cause it to twist, as well as weaken the metal in the frame itself - both things you want to avoid when you're ultimate goal is to reinforce the frame!


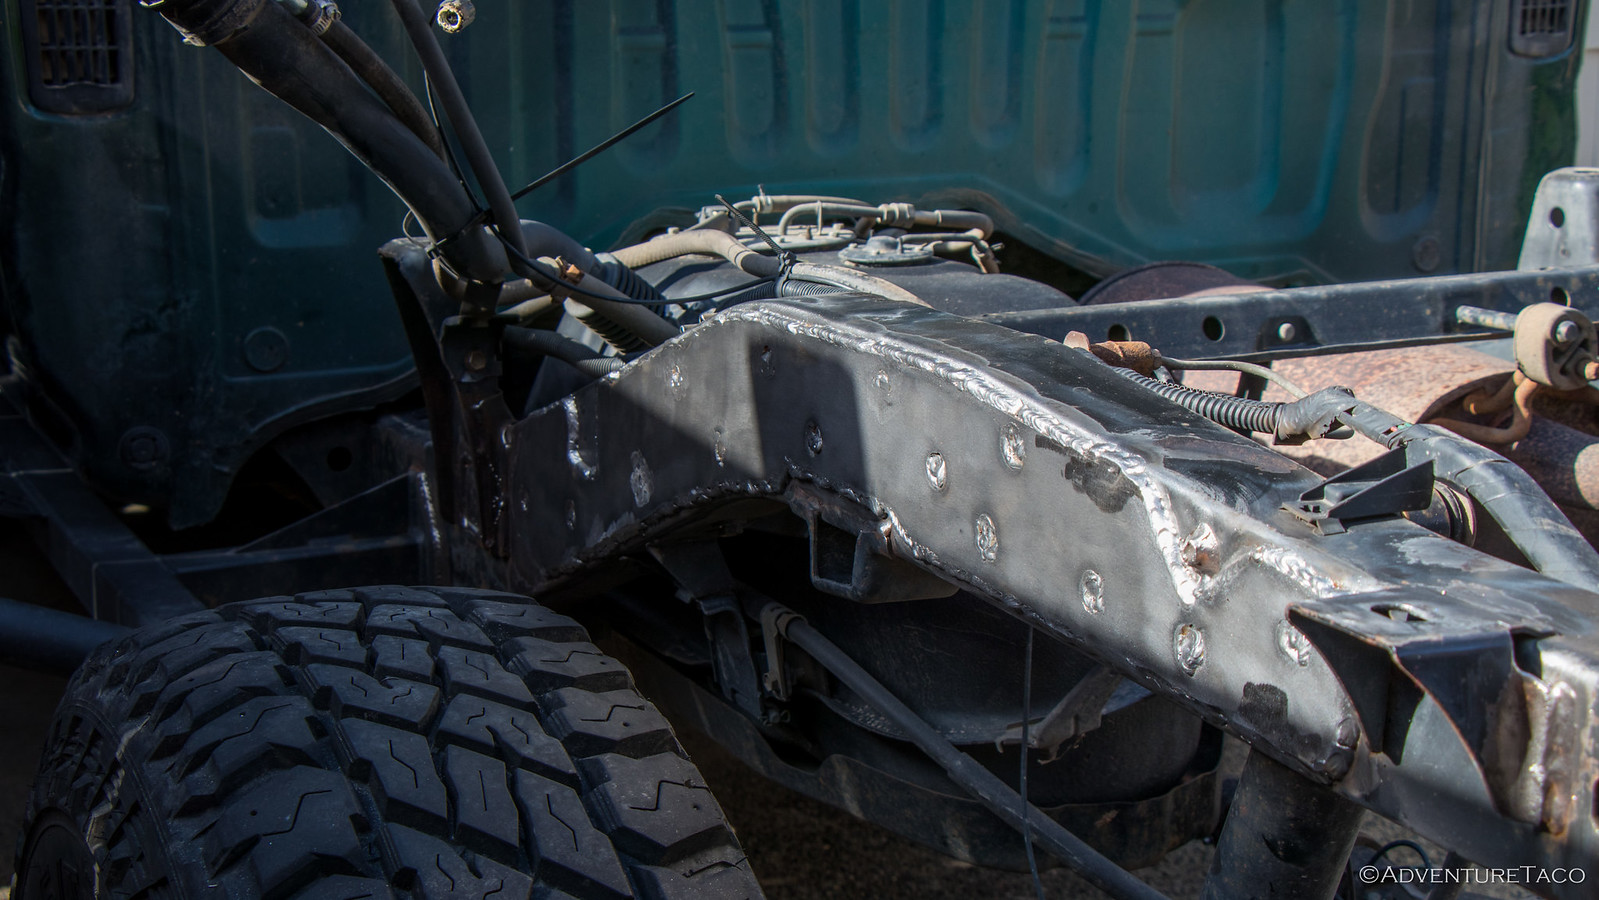
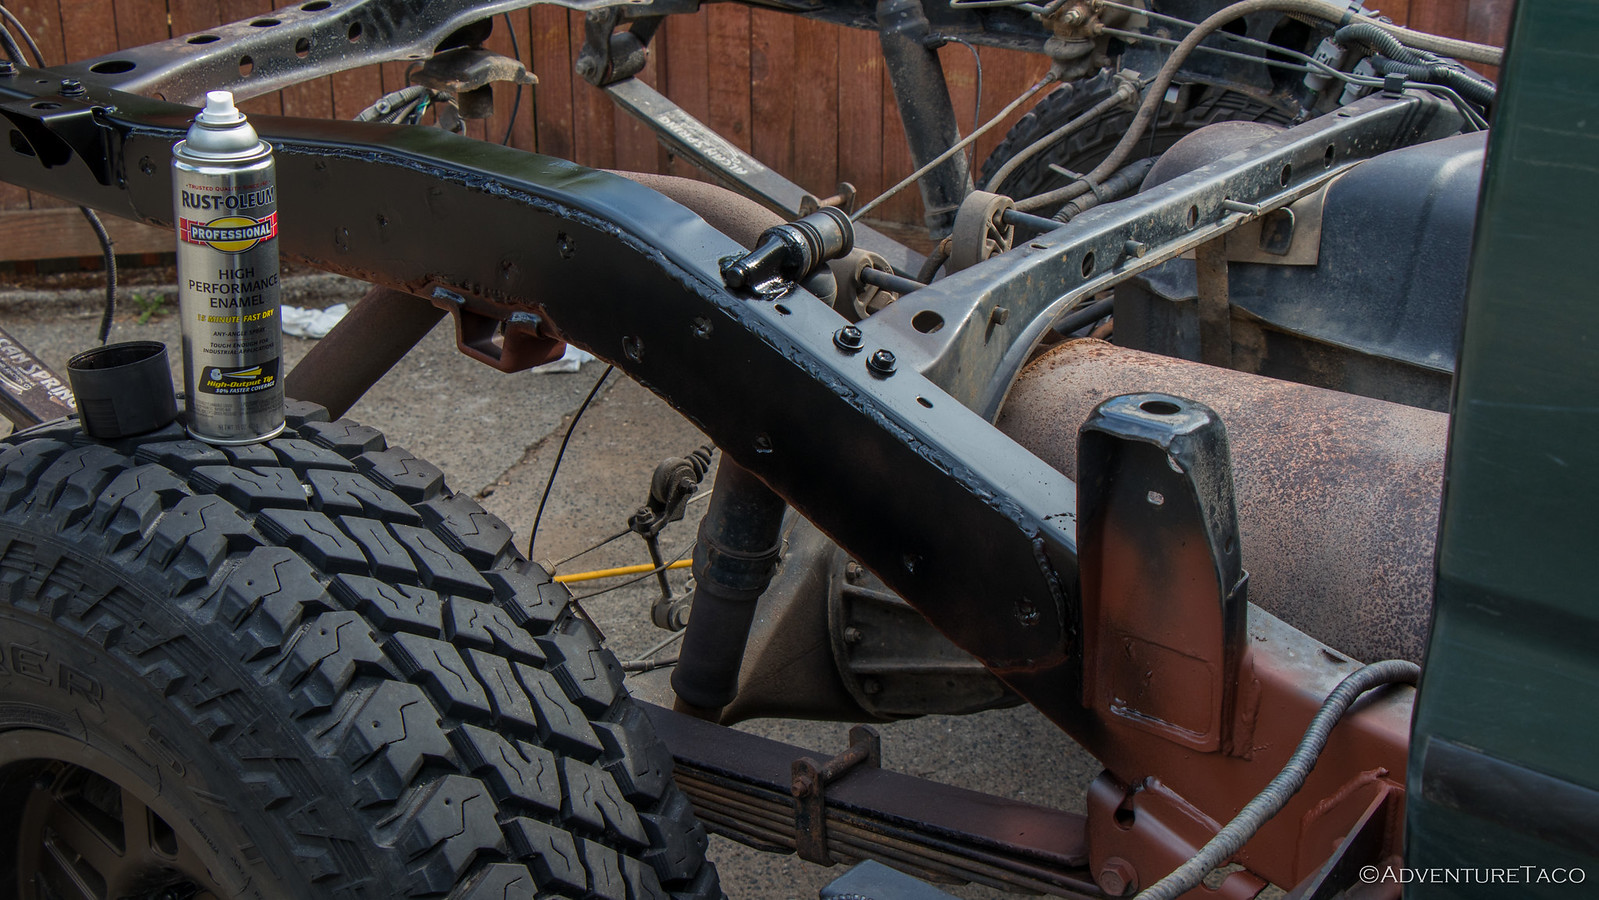
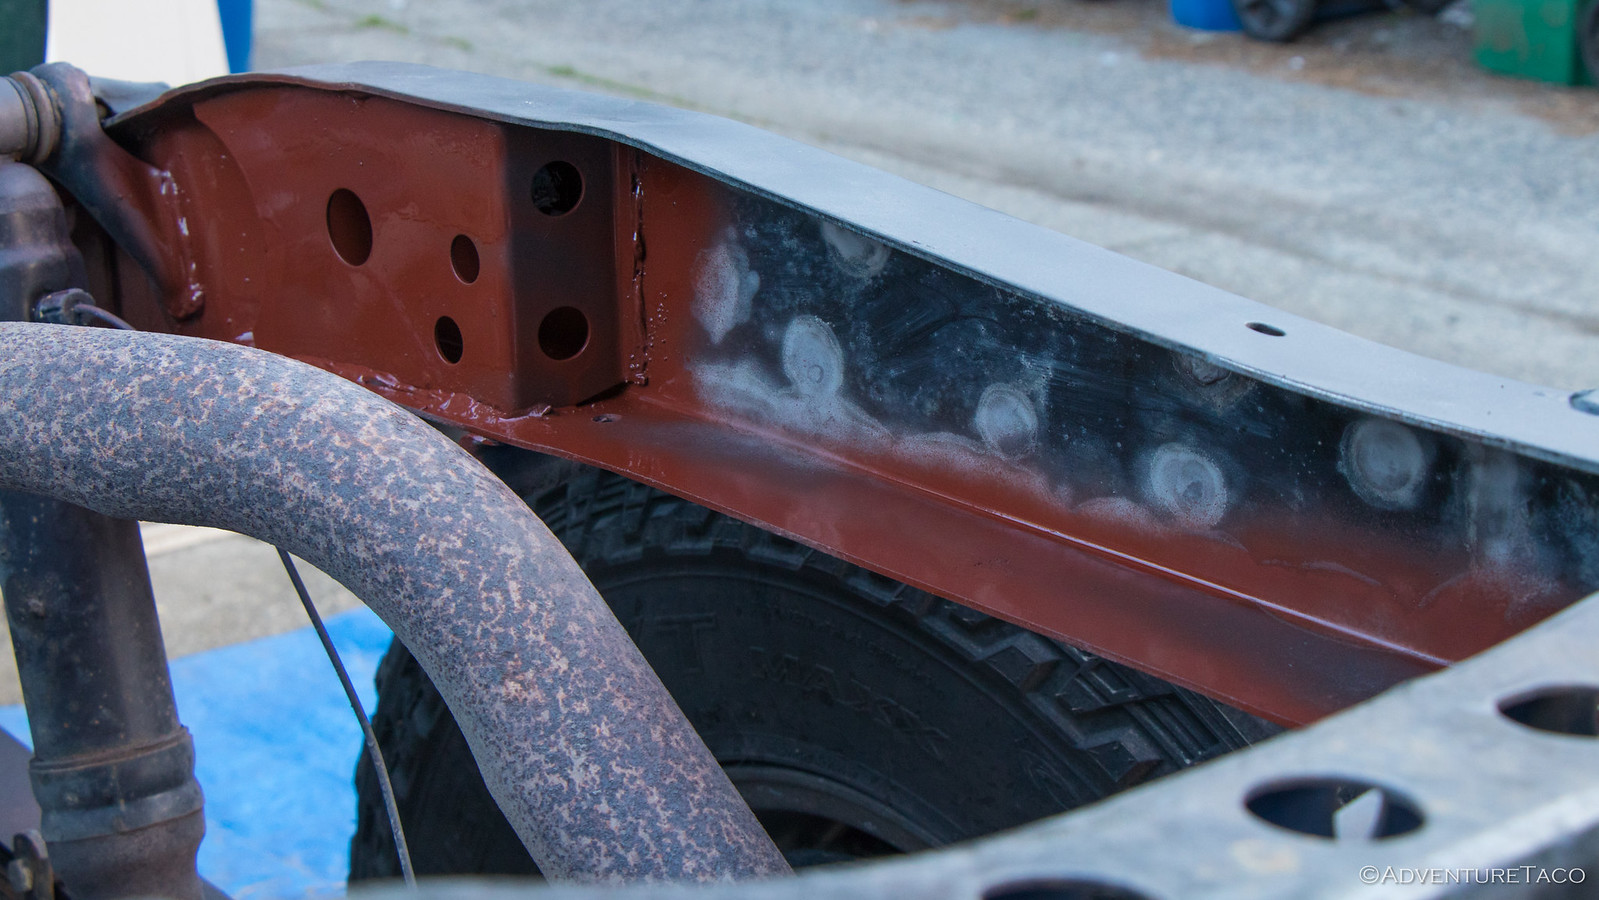
In the end, and after several hours, the plates were welded completely around their perimeter, as well as rosette welded in all of the holes for additional strength. I figured that this was the surest way to prevent water infiltration between the reinforcement plates and frame, since rust there would be near impossible to treat.

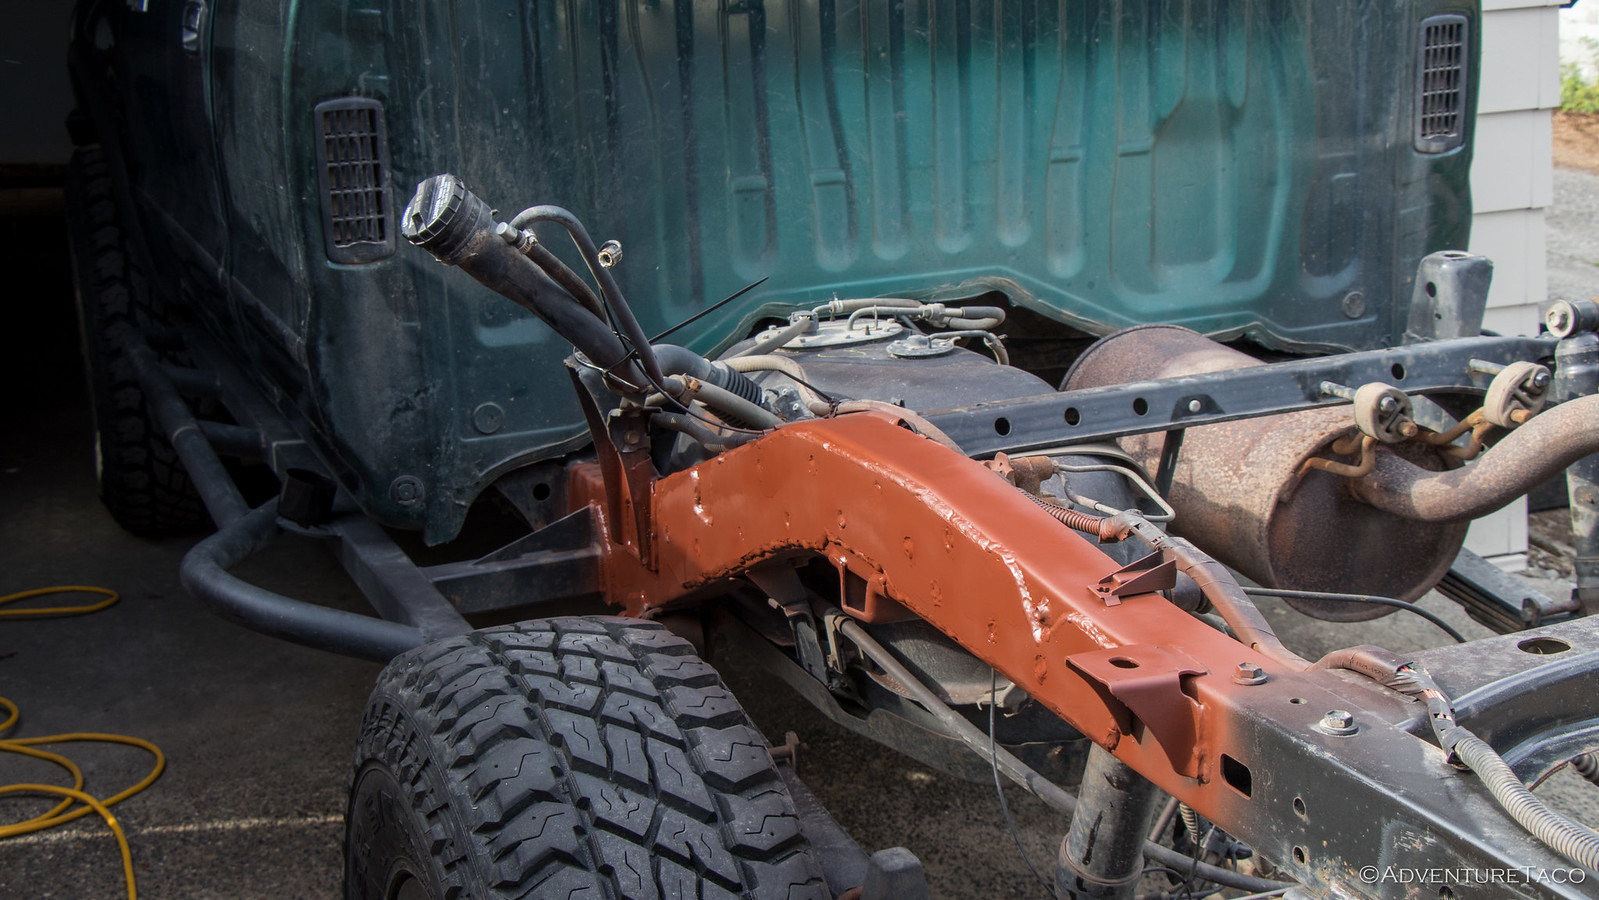
Welding done, I put the truck away for the evening and came back the next day to get the bare metal painted up. A bit of griding and a lot of wire brushing got everything looking good, and then two coats of primer and two coats of paint were applied in short order.


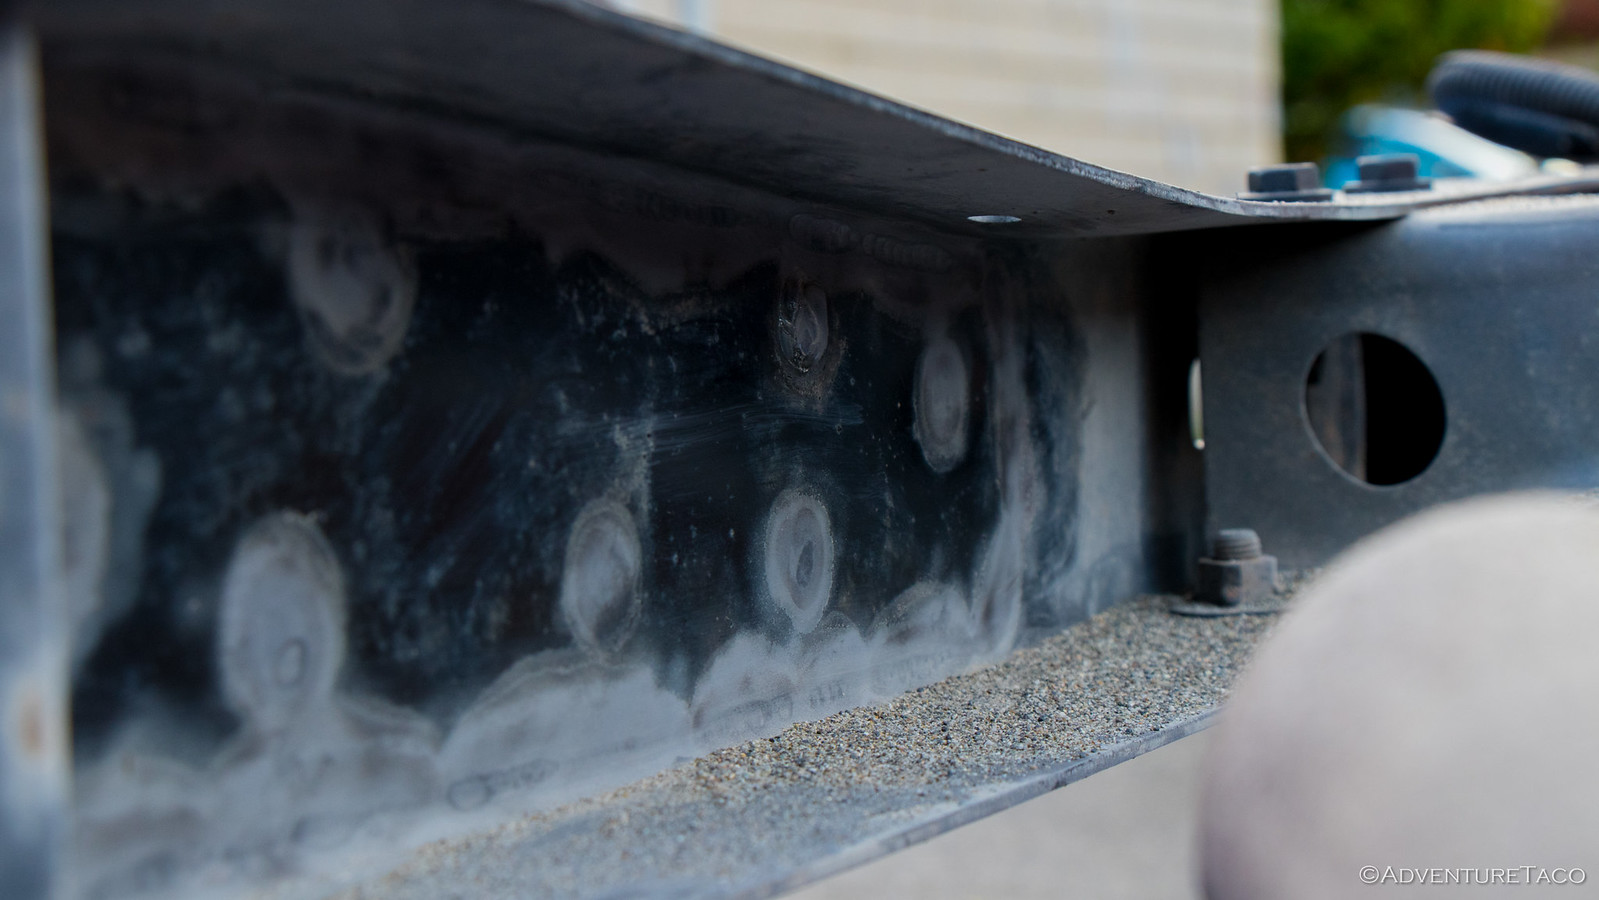
And with that, I was done with the plates. But I wasn't done with the frame - not by a long shot. You see, getting good welds between the plate and frame meant that I'd heated up the frame enough to burn the paint off the opposite side. That's good - because it helps you know you've got a strong weld - but it means I needed to do something to prevent rust from forming.

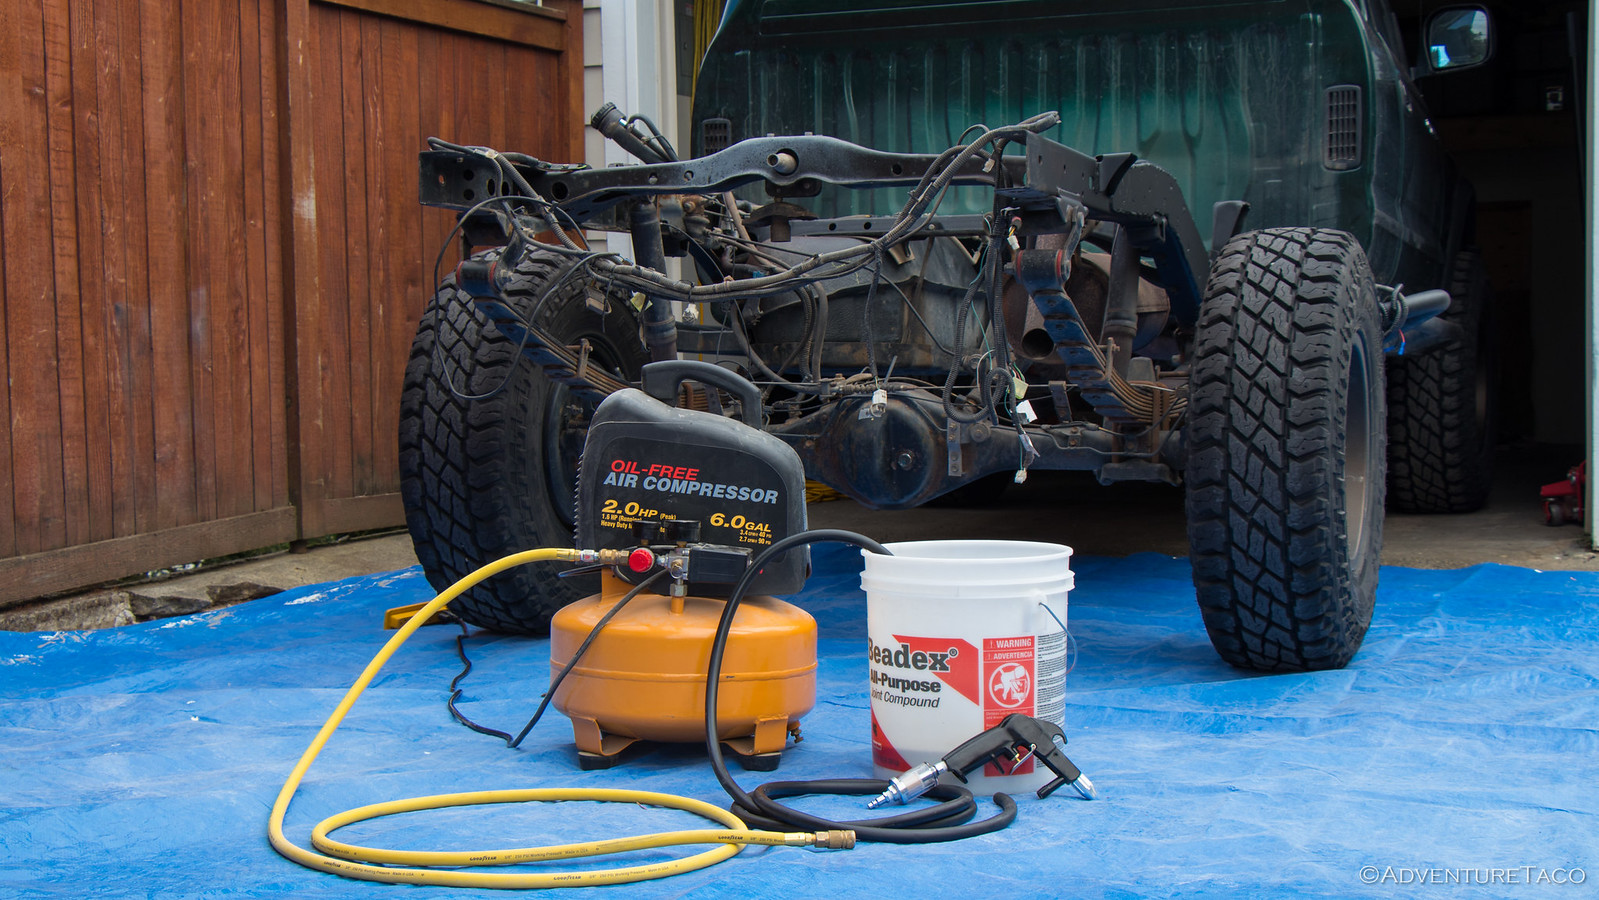
My solution: buy a new sand blaster (Campbell Hausfeld AT122601AV), so I could reach the interior parts of the frame that would be impossible to reach with a wire wheel. Plus, I'd get a new tool!


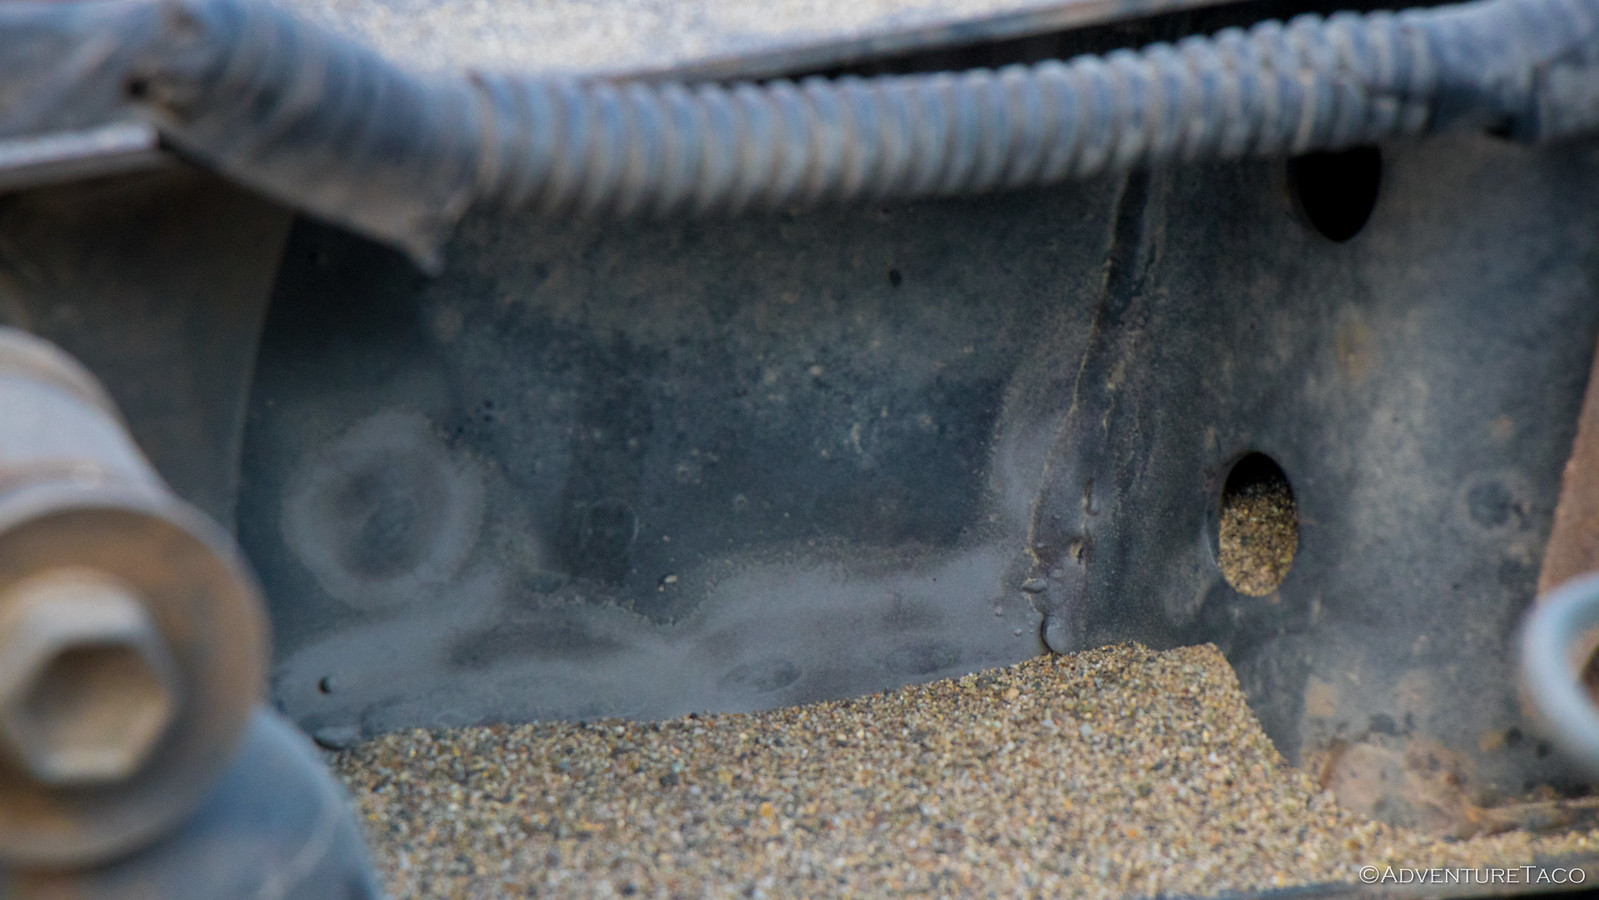
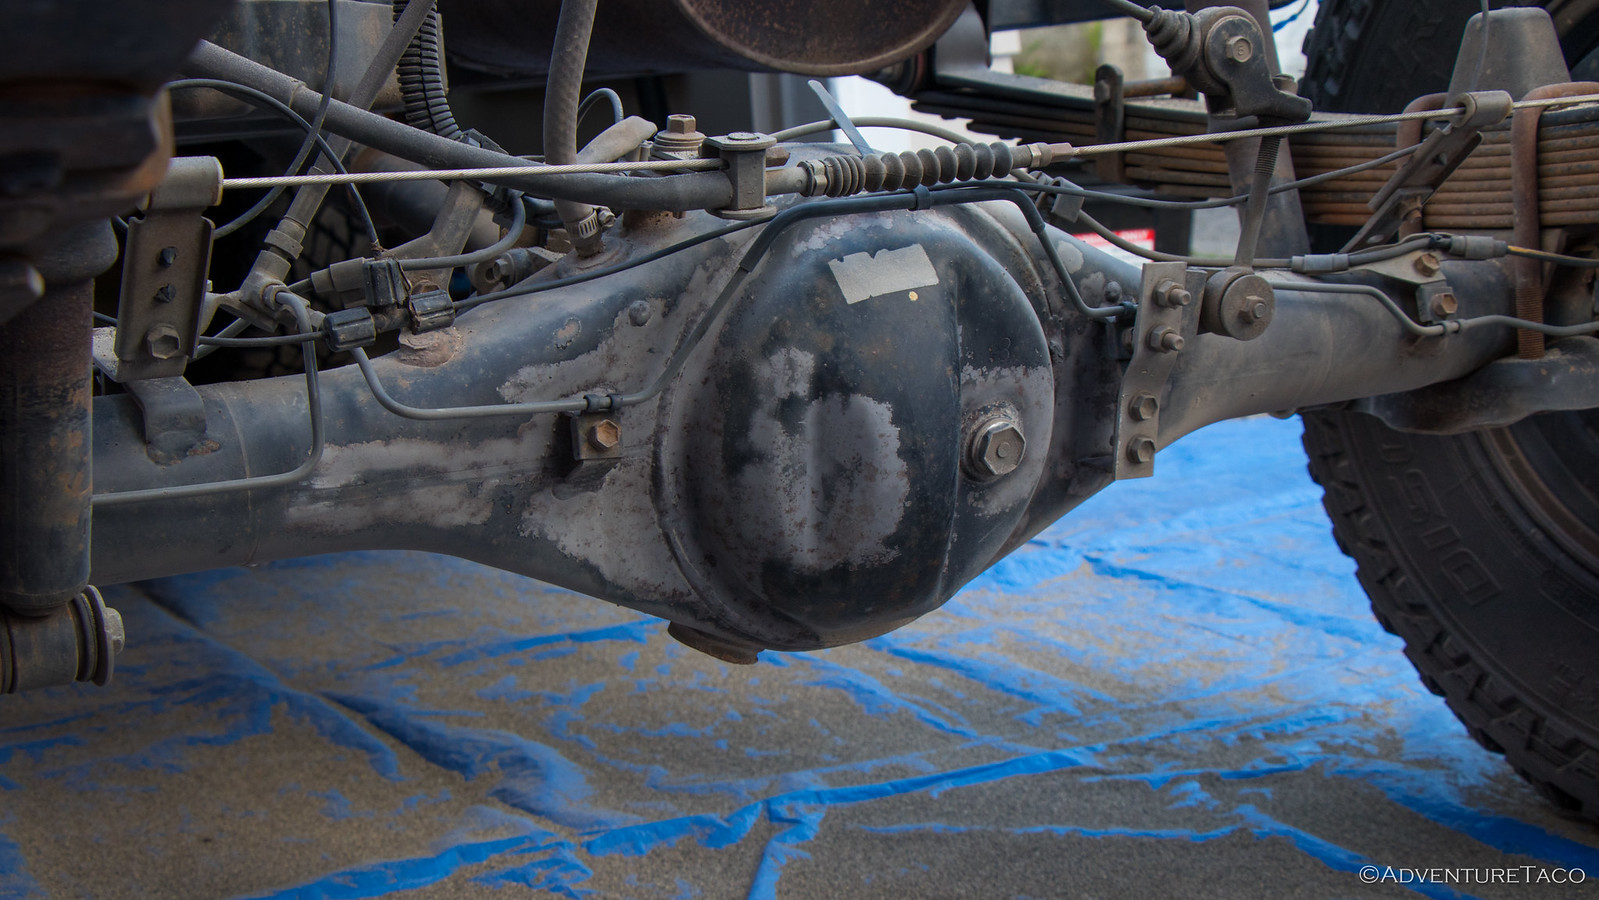
While a bit messy, I had a blast! (ba dum dum) I wasn't sure if my little compressor would be able to provide adequate air flow - and the reality is that it couldn't. I could blast for ~5-10 seconds and then wait for ~20-30 while it re-pressurized the tank, but when it was blasting, it worked great. Paint came off easily down to bare metal, and the surface was left with a bit of roughness - perfect for paint. I even spent some time cleaning up my rear diff, since I happened to have easy access.


Of course, the entire time, I was extremely happy to have my 3M respirator and earplugs, because it was super dusty and noisy. I'm sure the neighbors loved it! When I was done blasting, I spent a good 20 minutes blowing sand out of every little crevasse in the frame before wiping everything down again with degreaser and mineral spirits to prep for paint. And then, it was time to hit it with primer and paint, just like the outside - trying to get into every nook and cranny in the frame.


With that, the frame reinforcement was done, and the rear of the truck had never looked better. Well, it probably had when it was new, but I never really looked at it then.

A couple days later, I headed back to Mike's with @mrs.turbodb and a buddy from work, and they helped me lift the bed and bumper back into place. We tightened down all the bolts, and I reinstalled the tailgate, bed rack, and CVT.


It was nice to have the truck back to normal, and know that I could worry just a little less that I was putting form before function.
 

tomtaylz

Member
Really appreciate your detailed account of your rig, and all your adventures.
I've spent the last few days in my free time reading through your adventures here and on your website. Really inspiring and lots of trips that I want to do, I'm in SF so everything you are doing is very much in distance for me.

I like how you've built as needed in the last twenty years, running basically stock for a long time, yet now have a very capable rig - without breaking the bank.
I'm planning on getting a Tacoma later this year, I came from a few Jeeps which I spent a fair amount of time building up quickly before realizing they didn't quite do what I needed them to do, and space was always an issue. I have the knowledge on building a capable off road rig, although the Tacoma would be the first one I'm buying new so I want to slow down and take my time with it a bit more if my patience can win out.

I know you mentioned that you advise everyone who has kids to get a T4R, I could guess, but with no kids what's your advice?
Out of T4R and Tacoma I'm basically sold on the Tacoma, I think having the room for the gear in the bed is more valuable than seating for me.

Anyway, love reading your adventures, I subscribed to your news letter, and maybe I'll see you out on the trail one day.
 

turbodb

Well-known member
I keep waiting on your new adventures to read at work!! And one popped up on the email today, so I know it’s gonna be a good day tomorrow!! I’ll get my passport sorted and join you guys one of these trips, or finally talk you guys into coming north of the border and show you some glaciers and strong beer!


Sent from my iPhone using Tapatalk
Really appreciate your detailed account of your rig, and all your adventures.
I've spent the last few days in my free time reading through your adventures here and on your website. Really inspiring and lots of trips that I want to do, I'm in SF so everything you are doing is very much in distance for me.

I like how you've built as needed in the last twenty years, running basically stock for a long time, yet now have a very capable rig - without breaking the bank.
I'm planning on getting a Tacoma later this year, I came from a few Jeeps which I spent a fair amount of time building up quickly before realizing they didn't quite do what I needed them to do, and space was always an issue. I have the knowledge on building a capable off road rig, although the Tacoma would be the first one I'm buying new so I want to slow down and take my time with it a bit more if my patience can win out.

I know you mentioned that you advise everyone who has kids to get a T4R, I could guess, but with no kids what's your advice?
Out of T4R and Tacoma I'm basically sold on the Tacoma, I think having the room for the gear in the bed is more valuable than seating for me.

Anyway, love reading your adventures, I subscribed to your news letter, and maybe I'll see you out on the trail one day.
Glad you're enjoying - it's fun writing everything up (and of course doing it) so it's nice when others get a little bit too!

As far as T4R vs. Tacoma if you're kidless...

Personally, I think a Double Cab Tacoma would be about the perfect vehicle in that case. And, honestly, if I were to do it now, I'd probably go for a late model year 2nd gen (like '12-'15. For a few reasons...
  1. While I actually think the 1st gen is the most versatile truck - it's the narrowest, has the best approach/departure angles, etc. but it's getting old. Aftermarket support for it is dying, and so unless you want to fab everything yourself, it can be tough to build out a really nice rig (or at least a lot harder). Even a bunch of the stuff I have on my truck from the last couple of years isn't even available anymore. 2nd gen doesn't have this problem - there's still TONs of aftermarket support out there, and the trucks themselves are a lot newer (so less is going wrong in the first place).
  2. Personally, I like the look/size of the 2nd gen more than the 3rd gen. And, cost wise, you can get a used one for a lot cheaper than a new 3rd gen.
As far as cabs go - the double cab would be good, even with kids. Extended cab is just too small. Plus, if you're using for an adventure vehicle (vs. a work truck) you don't need a 6' bed - 5' is just fine, and in some ways better (I always have ~18" of "extra" depth in my bed and have to keep things from sliding around.

So yeah, there you go - my opinion. Love my first gen, but I know some day I'll wear it out to the point I can't fix it any longer. At that point...it'll be another Tacoma for me, I hope!
 

tomtaylz

Member
Glad you're enjoying - it's fun writing everything up (and of course doing it) so it's nice when others get a little bit too!

As far as T4R vs. Tacoma if you're kidless...

Personally, I think a Double Cab Tacoma would be about the perfect vehicle in that case. And, honestly, if I were to do it now, I'd probably go for a late model year 2nd gen (like '12-'15. For a few reasons...
  1. While I actually think the 1st gen is the most versatile truck - it's the narrowest, has the best approach/departure angles, etc. but it's getting old. Aftermarket support for it is dying, and so unless you want to fab everything yourself, it can be tough to build out a really nice rig (or at least a lot harder). Even a bunch of the stuff I have on my truck from the last couple of years isn't even available anymore. 2nd gen doesn't have this problem - there's still TONs of aftermarket support out there, and the trucks themselves are a lot newer (so less is going wrong in the first place).
  2. Personally, I like the look/size of the 2nd gen more than the 3rd gen. And, cost wise, you can get a used one for a lot cheaper than a new 3rd gen.
As far as cabs go - the double cab would be good, even with kids. Extended cab is just too small. Plus, if you're using for an adventure vehicle (vs. a work truck) you don't need a 6' bed - 5' is just fine, and in some ways better (I always have ~18" of "extra" depth in my bed and have to keep things from sliding around.

So yeah, there you go - my opinion. Love my first gen, but I know some day I'll wear it out to the point I can't fix it any longer. At that point...it'll be another Tacoma for me, I hope!

Great info! I’ve looked a bit at 2nd gens but after owning two 15+ year old Jeeps as my previous vehicles, I sort of want something drama less for a few years which is leaning me towards new (with a nice warranty).
Good to hear on the Tacoma, definitely my leading choice, I think for an adventure vehicle it is hard to beat the usefulness of a bed, especially with a closed tailgate.
 

turbodb

Well-known member
May 26, 2018.

... As I returned to the truck and put it in reverse, I looked at @mrs.turbodb and said, "Wish us luck!" I knew that having sat in the snow for 10 minutes or so, there was a good chance that the truck had sunk slightly, and that the already wet snow under the tires had likely melted even more. I hoped that the lockers were enough to get us the traction we needed to back out...
Read the full story and see all the photos at Snow, Sun, and Storms - Montana in May (part 2)

40710678100_18633be52f_h.jpg
 

Forum statistics

Threads
188,044
Messages
2,901,606
Members
229,352
Latest member
Baartmanusa
Top