Doc's 05 Tacoma Build Thread

Dave Bennett

Adventurist
Pics Courtesy of cbradley

From the wrenching thread:

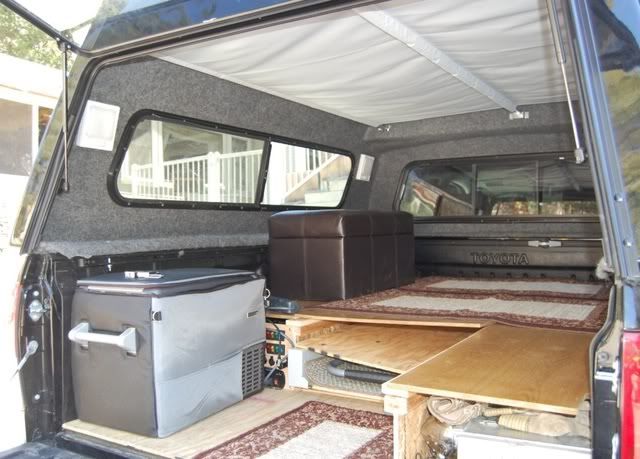
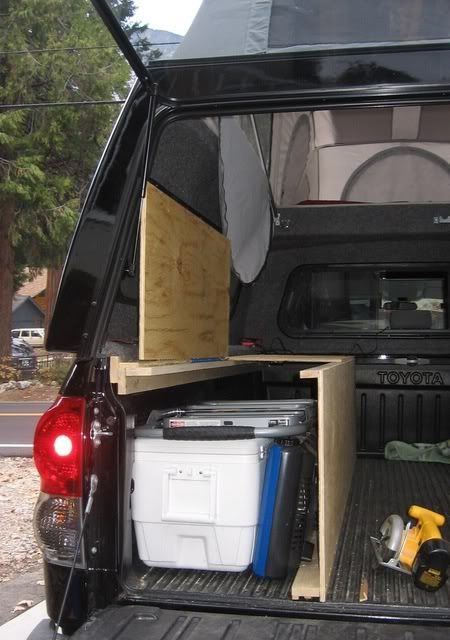
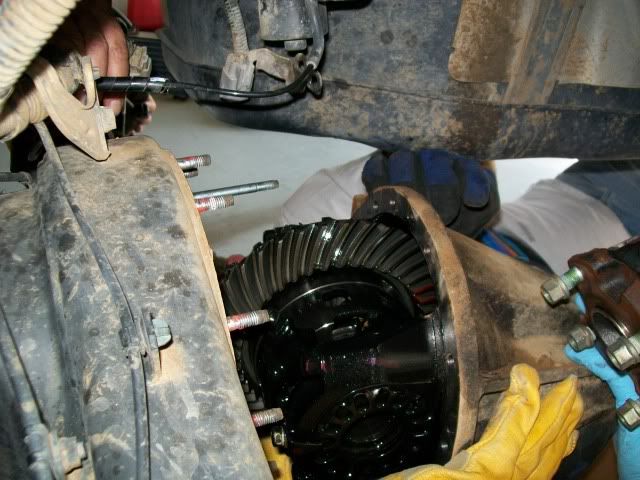
A couple pics from yesterday:

636351991_PHPSQ-L.jpg

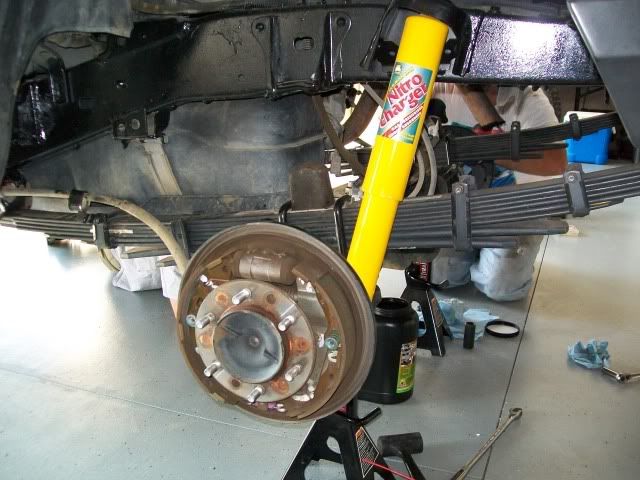
Disconnecting the e-locker from the rear differential.

636364475_NGH8B-L.jpg

Getting ready to pull the front half shafts.

636349243_xE8SA-L.jpg

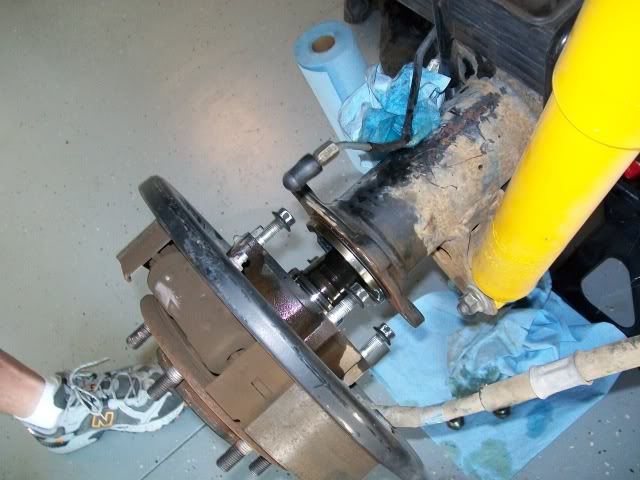
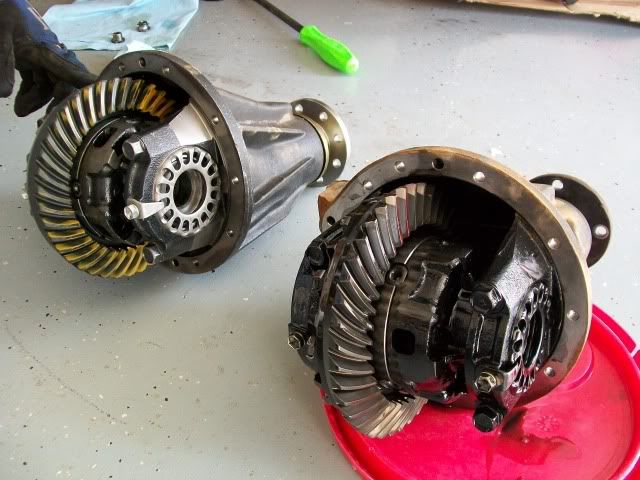
The front diffs were supposed to be identical. Sadly the new diff didn't have the passenger side gear installed. EDIT: This gear had to be swapped in from the old carrier.

636349881_2ZFbm-L.jpg

We spent an hour trying to swap the gear. This almost ended the day until Rick managed to coax it free.
 
Last edited:

Dave Bennett

Adventurist
More pics courtesy of cbradley

Here's what happened when the gear oild got away from Mark ;)
l5twpb


More wrenching pics:

636350237_jyEmK-L.jpg

Attaching the front differential to the rest of the assembly. In front is the ADD module.

636351035_wCriF-L.jpg

The completed assembly. EDIT: This is the side we had to swap the gear in from the old carrier

636364259_G3MqX-L.jpg

Putting it all back together.

636363446_2AuZx-L.jpg

Getting closer...

636351247_TeT9N-L.jpg

Dave putting the final touches on his baby. A little gear oil and she would be ready for a test drive.
 
Last edited:

Dave Bennett

Adventurist
More Pics from the Gear Install

Shiny new springs and shocks, and POR-15 on the frame! :D

OME_Dakar_small.jpg
oldmanemulogo.gif


These are the Old Man Emu Dakar HD w/ extra leaf and Nitro Charger shocks
101_1339.jpg


Axle shafts loose and pulled out of the way so the diff can be pulled
101_1344.jpg


Old gears coming out
101_1347.jpg


cbradley and XJ Mike working
101_1338.jpg


New Nitro Gear 4.88's and old OEM 3.73's side by side
101_1348.jpg


A big thanks to McTaco, XJ Mike, pray4surf, ScenicWonderRunner, and cbradley for all the wrenching...

...YOU GUYS ARE AWESOME!!!
:bigbossHL:
 
Last edited:

Dave Bennett

Adventurist
2005 Tacoma CBI Rear Bumper

I have had lots of compliments and questions about who made my rear bumper.

I highly recommend CBI's products, and I even put their swag on my rig to advertise CBI... of course, Tread Lightly, AT, and Sierra Expeditions get some free advertising back there as well ;)

http://www.cbioffroadfab.com/

100_1369.jpg


For me, the rear swingout was necessary since the tall 255/85R16's dont fit well in the stock spot unless you let some air out... not much point in a semi-flat spare IMO. I can carry a second spare in that spot if I wish, but my primary spare needs to be fully inflated and easy to access. Some people like to hang all the "ExPo Bling" on their back bumpers and swingouts but I advise against this temptation - try to limit your weight back there to absolute necessity items. Anything that can be carried closer to the center of the vehicle should be. I even jettisoned my old school Hi-Lift in favor of an X-Jack, a much lighter piece of gear and this saved a bunch of weight that was previously hanging on that back bumper. Right now all I carry on the bumper is a full size spare, Scepter can, and an ammo can for Wag Bag transport :)
 
Last edited:

Dave Bennett

Adventurist
4..88 Gears MPG/RPM Report

Here's how I did with the first tank of gas and the 4.88's:

With the 3.73's I was averaging a dismal 12-13 MPG with the 255's and armor etc.

With the new 4.88's I got 15 MPG on my first tank ;)

Not a big difference, but I did not LOSE any MPG and that is what I was hoping for :)

Before the regear I was averaging about 2,200 RPM's at 70 MPH in 5th gear (AT OD).

With the 4.88's, on the highway at 70 MPH I am averaging about 2,600 RPM's which is not bad and does not sound/feel "buzzy" at all.

I have much more power with these gears and I am VERY happy that I went with the deeper 4.88's vice the 4.56's. My 1st gear crawl speed is much slower too so I am looking forward to increased control on the trail, especially during technical downhill sections.
 

Willman

Active member
That's great news Dave!!

I'm ether going to the 4:88 or 5:29's with pulling my trailer and gear!

Keep us posted on how they do!

:)
 
Here's how I did with the first tank of gas and the 4.88's:

With the 3.73's I was averaging a dismal 12-13 MPG with the 255's and armor etc.

With the new 4.88's I got 15 MPG on my first tank ;)

Not a big difference, but I did not LOSE any MPG and that is what I was hoping for :)

Before the regear I was averaging about 2,200 RPM's at 70 MPH in 5th gear (AT OD).

With the 4.88's, on the highway at 70 MPH I am averaging about 2,600 RPM's which is not bad and does not sound/feel "buzzy" at all.

I have much more power with these gears and I am VERY happy that I went with the deeper 4.88's vice the 4.56's. My 1st gear crawl speed is much slower too so I am looking forward to increased control on the trail, especially during technical downhill sections.

That's what I like to hear. Thanks for the info, its very helpful as always.
 

Dave Bennett

Adventurist
AT FlipPac Delivery Date: 25SEP09

According to Mario, the FlipPac will be ready for install on September 25th 2009 :wings:

*Edit: Now they are saying 02OCT09...

I can hardly wait! :drool:

I've been asked quite a few times what makes the "AT FlipPac" different from a regular FlipPac. Here's what AT has to say about that:

"AT's model of the FlipPac stands apart with thicker fiberglass to ensure durability for off-road use and use of heavy duty hood mounting screws. Like any traditional truck shell, there is a split window for accessing the trucks cabin. Side windows are optional."

Adventure Trailers FlipPac:
http://www.adventuretrailers.com/flippac.html

FRP aka Fiberglass Reinforced Products - FlipPac:
http://www.flippac.com/index.html
 
Last edited:

tacollie

Glamper
Thats good to hear about the at flippacs being thicker. Mine did crack in an odd place. Flippac did fix it cost free and I used is a couple times with the crack. How much does the at weigh?
 

Dave Bennett

Adventurist
Thats good to hear about the at flippacs being thicker. Mine did crack in an odd place. Flippac did fix it cost free and I used is a couple times with the crack. How much does the AT weigh?

FRP is reputed to have great customer service once you make contact. I chose to go through AT vice FRP for a variety of reasons, #1 being superior customer service and #2 being the thicker fiberglass construction. Oh, and they are great guys and fellow enthusiasts which is always good :costumed-smiley-007

Here are the stats on the AT FlipPac Shell for Mini Trucks, 63", 74" and 76" long, taken from AT's site ~

AT FLIPPAC SPECIFICATIONS:

ALL MEASUREMENTS IN INCHES. LONG & SHORT BED MINI TRUCKS

Maximum length: 78"
Maximum Width: 64"
Height, Rail to the top of the roof: 32.5"
Gross Weight (approx. lbs): L/B 290 Lbs - S/B 290 Lbs
Interior Head Room: 7' 1" Center, 6' 1" Rear
Max. Width of Door Opening: 50"
Max. Height of Door Opening: 37.5"
Weight Capacity Lbs.: 1000 Lbs Double Bed, 180 Lbs Hammock
 
Last edited:

Dave Bennett

Adventurist
AT FlipPac Interior Fitment ~ The Beginning

As a foundation, I decided to source a couple of key components from AT and have them installed at the time of delivery so that I can focus on the interior build right away.

I chose to add the National Luna Power Pack to this build. All "house power" requirements will be drawn from this second battery system, the main battery will be left separate for starting/OEM use only: http://www.nationalluna.com/PPPack.htm

I will also be using the optional in-cab Dual Battery Monitor: http://www.nationalluna.com/dualmon.htm

Here's a sneak peak at the trick LED lighting that AT has sourced for this FlipPac build ~

DSC_0049.jpg


LED's = no bugs!
DSC_0047.jpg


These LED's have the mil-spec switchable white OR red light option. Good when you need to see inside the FlipPac and still maintain your night vision (or if you like to maintain a low profile in the backcountry).
DSC_0048.jpg
 

Dave Bennett

Adventurist
Interior Fitment ~ Ideas and Inspirations!

There are limitless ways that one can customize the interior of an AT FlipPac.

One of my earliest "Overlanding" examples that got me into this money pit was VikingVince's Tacoma FlipPac - Vince's interior setup is my main inspiration.

http://www.bajataco.com/vikingvince/Vince_FlipPac/index.htm

VikingVince's FlipPac:
DSCF7585_JPG.jpg


L_vince05_07.jpg


Suntinez has a great Tundra, and she has some great FlipPac ideas that I have been looking at:

flappinflipper.jpg


12vlights.jpg


DSC_0484.jpg


box.jpg


Bella PSD has done a great job with his interior:

Flip%20Pac%20inside%20015b.jpg


I don't have as much room as Linda and Louie (Tundra and F250), but I'll make the most of my 5 ft bed.

For a guy like me with a serious case of Shipfitter's Disease, I can barely get to sleep most nights as my mind races with ideas on all the different ways I can customize the interior. The best part of this is that building the interior the way I want it can be done by me, at home, at my pace.

This is going to be fun! :wings:

My short list of things I think we NEED inside the FlipPac:
1. Engel MT45
2. 2nd Battery
3. Toilet (PETT or Thetford)
4. Water
5. Seating/Storage
6. Kitchenette

I'd like to keep it modular so I can remove or rearrange things as needed and still have the utility of a truck. We'll see how that goes.
 
Last edited:

Forum statistics

Threads
188,436
Messages
2,904,815
Members
230,359
Latest member
TNielson-18
Top