EarthRoamer XV-JP "Northwest Edition"

AeroNautiCal

Explorer
How fortunate we are in having the benefit to share in the development of this build, from Mike's vision to Paul's artistry in design, construction and penmanship!

Thank you both for sharing, and I hope that you're not too put out by Nature's untimely intervention. raincloud.gif
 

PaulJensen

Custom Builder
Twenty-Two

Twenty Two…

P1110477.JPG

(above) Thursday morning…Clamps holding tight in the heated shop…

P1110478.JPG

(above) Outside the snow dump exceeded anything I’ve seen up here as long as I’ve lived here…Beyond a couple of decades…A good day to stay busy in the shop…


P1110481.JPG

(above) The bed panels are dry enough to cut to size on the tablesaw…


P1110482.JPG

(above) First I need to clear the work table…The clamps are now off the teak panel that will be the floor…


P1110484.JPG

(above) I have a piece of copper I’ve been wanting to use…Something with the teak might be nice…

P1110485.JPG

(above) With the teak possibilities not yet ready to execute, I cut the CF panels to size…


P1110486.JPG

(above) Head panel and foot panel…


P1110517.JPG

(above) Back outside the snow has stopped…Replacing the snow is freezing rain…Two words that hate…Freezing rain can be absolutely destructive…This episode turned out to exceed my greatest fear by a magnitude of ten…More on that later…

P1110522.JPG

(above) Back in the shop I cut the plywood components for the bed pull-out, the box jointed ‘em…


P1110523.JPG

(above) Some quick and fast gluing and pin nailing has them assembled…


P1110524.JPG

(above) Uh huhhh…Bed panel # 1…


P1110525.JPG

(above) And fitted between the drawer guides…


P1110526.JPG

(above) Keeping the progress going on a couple of fronts, I got the teak panel and set up the router to cut a dado centered on the glue joints…


P1110527.JPG

(above) 3/16” deep x ¾” wide…


P1110528.JPG

(above) Some teak off-cuts are ripped then epoxied into the dados…The theory is to spread out the load on the glue joint to a wider, backed-up joint…Not have a single, through glue joint…At least that’s the theory…

With that done I then focused on getting ready for the sure-to-follow power outage because the ice storm was growing with trees (and we have plenty) breaking with the sound of gunshots…Bad…

Sure enough the power went out a couple hours later, and stayed out all day Friday, Saturday and Sunday…72 hours total…The destruction to trees, plants and power lines was significant…Our home is fine, our yard is a disaster…During the days the power was out my wife and I cleared debris…yesterday a hauling guy filled his 18 cubic yards truck with twenty yards of our debris…


P1110553.JPG

(above) Life goes on…
 

PaulJensen

Custom Builder
Twenty-Three...

Twenty Three…

The power came back on last night…Word was it might not come back on until Wednesday…Am I ever glad that didn’t happen…

During the power outage we went to a coffee shop to check internet…Thanks for the concern and kind words…I appreciate it…

Now where did I leave off…???...

P1110589.JPG

(above) Teak floor panels…I belt sanded the inserts flush to start…


P1110591.JPG

(above) Then I figured a way to cut the copper in half…I lock-screwed the copper to a piece of left-over OSB…


P1110592.JPG

(above) Next another piece of OSB was screwed over the copper…


P1110593.JPG

(above) I ran it slowly through the tablesaw…Copper is soft for a metal and the carbide tipped blade went through it easier than some hardwoods...


P1110594.JPG

(above) Pulled the cover pierce off, then released the cut copper…The edge was sanded once, lightly…


P1110595.JPG

(above) Next the rail guided router came out…


P1110596.JPG

(above) …and a dado was cut across the teak…


P1110597.JPG

(above) The copper was slightly off parallel so I cut the teak edge with a utility knife…


P1110598.JPG

(above) Teak is nice to work with if you use sharp tools…


P1110599.JPG

(above) As you can see, somehow the router slipped and a stepped cut resulted…Ooops...


P1110600.JPG

(above) Design opportunity…Stiffen the assembly with some carbon fiber strips…


P1110601.JPG

(above) Thinking ahead of a way to finish the install, I went though my long lost copper-nail tin can…Maybe I’ll make these into copper rivets…???...Hmmm....???.


P1110602.JPG

(above) For now, I'll just epoxy them in place...Epoxy was mixed, the CF was laid, then saturated…Finally the copper strip was dropped in the dado and spring clamped in place…


P1110603.JPG

(above) With the snow melted from the Jeep, and no rain in today’s forecast, I silicone caulked the last leak source…The one at the front of the roof lift-up…Did it on both sides…


P1110604.JPG

(above) Next, inside the floor was insulated…


P1110605.JPG

(above) Back in the shop, the other copper inlay was routered out…


P1110606.JPG

(above) C.F. again used to reinforce…


P1110609.JPG

(above) By now the first inlay was set-up and the clamps were pulled…Still needs to get sanded…


P1110610.JPG

(above) After a trip to the store for hardware, the second set of clamps were off and the panel is further along in the process….Tomorrow the end teak caps will go on…

More tomorrow…
 

PaulJensen

Custom Builder
Twenty-Four...

Twenty-Four...

P1110613.JPG

(above) At least for a few days I won't take lights coming on for granted...

P1110612.JPG

(above) Some of the daily necessities...

P1110614.JPG

(above) The bed pull-out, as it is, was positioned over the cab and checked for fit and clearances...No surprises...

P1110620.JPG

(above) The other half of the bed platform is now ready for small part to fit inside of larger part with glue and pin-nails holding them together...

P1110624.JPG

(above) Then the piano hinge was rabbeted to the bed slabs...

P1110622.JPG

(above) The bed pull-out, pulled out...The CF panels are dry fitted...Later they will be epoxied in...

P1110623.JPG

(above) Well, lookey there, it works...

P1110627.JPG

(above) Another test fit, then a few filler plywood pieces are custom cut for the right side...

P1110615.JPG

(above) Next, the floor gets worked...First the inlaid areas are belt sanded flush...

P1110619.JPG

(above) The good cutters are readied for action...

P1110616.JPG

(above) The router cuts a rabbet on the rear door end of the floor panel...

P1110617.JPG

(above) A matching rabbeted piece of teak is epoxied, then taped on...Good masking tape has some stretch...Use it...

P1110618.JPG

(above) At the front end of the floor, a teak strip is inlaid...I'll cut the excess end of the panel off at the right side of the inlay later...

P1110626.JPG

(above) I pulled out the back-rest panels made in the mock-up stage...

Guess what you have if you use them as table legs with the removable floor panel on top...???...

Good guess..A 28.5" tall teak table...

Yet another serendipitous dual-purpose outcome...Never planned for, but....Voila...!!!...Outside dining elegance...

P1110629.JPG

(above) The tape on the floor end cap is pulled...Still needs sanding...

P1110628.JPG

(above) A couple weeks ago I put the teak curb up front...Well, I got to thinking that the resulting notch in the floor wasn't the best idea...So I cut the intruding teak out...

Now the floor will be straight, and either side can be up...All wood on this side, copper inlaid on the other...Bling or bland (hardly)...You choose...

My thinking on using the shower is this: Remove the wood floor when you want to shower...The panel weighs less than twenty pounds...Slides in easy and cutting grooves in the wood floor for drainage aren't needed... And lets be realistic, how often will you really be showering inside the Jeep...???...Sure you can, but, really...???...

Removable makes refreshing the teak oil finish a whole lot easier too...

The last thing I did for the day was to epoxy and pin nail a straight teak 'baseboard' on the curb side...

Tomorrow, I'll do the driver side...

More later...
 

X-plorenow

Adventurer
Floor looks great, fantastic work as always. I was without power or four days a few weeks ago. Fun, isn't it :). Glad all is well with you and your family.
 

mhiscox

Expedition Leader
Good heavens!

I'm leaving in about half an hour to go meet with Paul after postponing last week's trip. Looks like I'll have plenty to look at. All very cool and extremely trick.
 

WCO

It's Lil' Willi
Phenomenal, brilliant, beautiful, eclectic....my meager mind is in a wirlwind as twisted as during my first kiss.....this build is absolutely riveting. I'm a full size guy, who uses a work truck for play, but my tastes leave me yearning for an espresso on a cobble stoned alley in Italy, after riding a hand lugged stealie in my soft goat skin loafers; and that teak mixed with copper and carbon fiber satiates this yearning in an interesting way. I am fixated on this build, cannot wait for another post!
 

PaulJensen

Custom Builder
Progress has continued the past two days...Will posted it up Saturday morning...Not enough time to do it now...

I'm going snowboarding today...
 

PaulJensen

Custom Builder
Twenty-Five...

P1110630.JPG

(above) Today (Wednesday) Mike is coming up for a visit...In preparation, I get out all the components for final placement discussions...

P1110631.JPG

(above) I also organised the invoices for materials I've purchased ...All part of the job...

P1110632.JPG

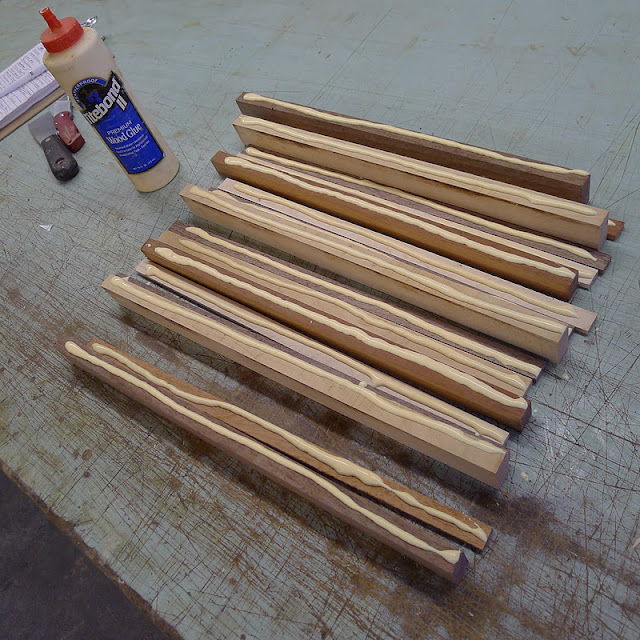
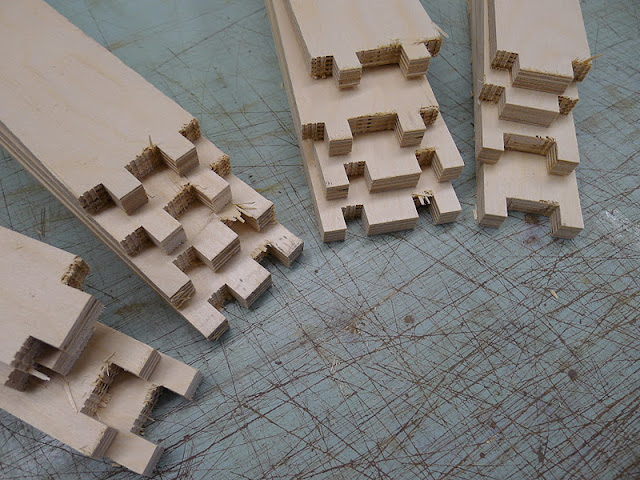
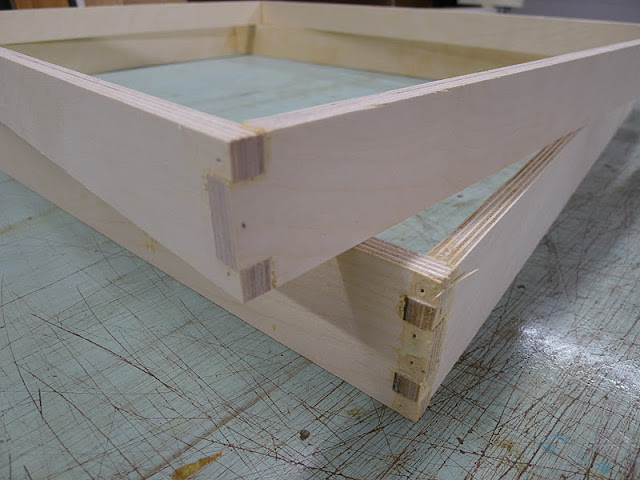
(above) Not wanting to get too deep into something complex before Mike gets here, I take the opportunity to glue-up a cutting board that will fit in the drawer directly under the stove...I 'm using maple, walnut and bubinga shorts that have been laying around...

P1110633.JPG

(above) Clamped and set close to the heater to help the glue dry on this winter day...

Mike showed up on time, with pizza and pop in hand and we basically just hung out inside the Jeep, had lunch and talked things over...

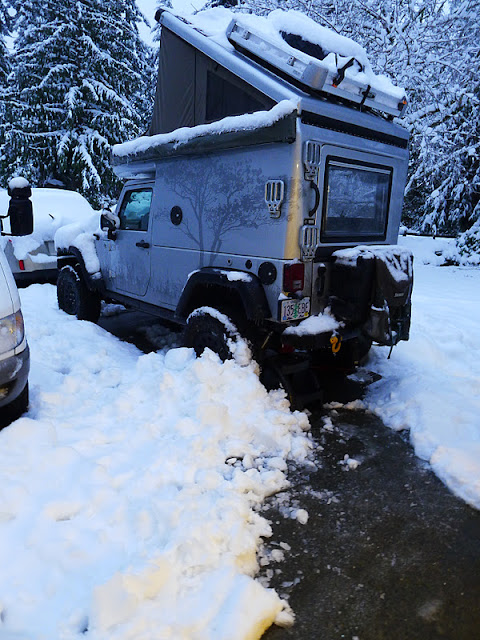
It is an easy vehicle for two people to occupy without it feeling crowded and it's not hard to see how simple two can travel in comfort and style...All in the twenty-five square feet that is the rear cabin...

We both were quick to say how our collaboration is resulting in something more than special...

P1110634.JPG

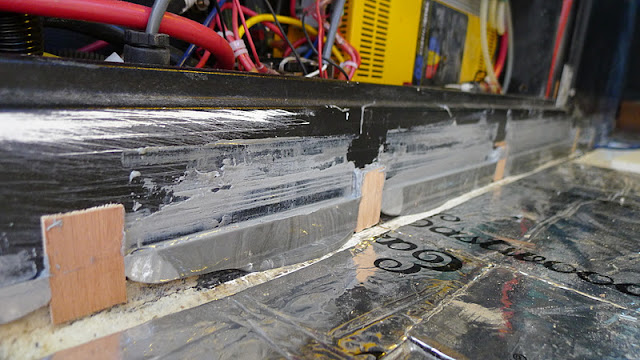
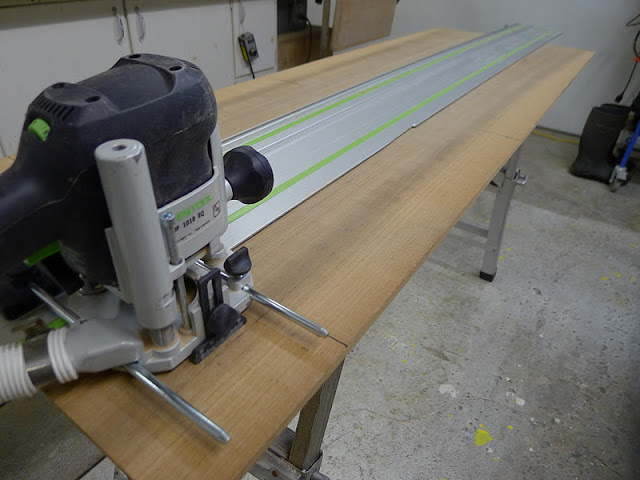
(above) After Mike's visit I got back to work...The teak baseboard on the driver's side was next on the list...The existing cabinet is far from straight at the baseboard level, and with the plan to have a removable floor that slides in and out, the baseboard needs to be a straight close fit...To get the base straight, I got the piece of teak that will go there, taped it all around with clear packing tape and positioned it...Next I put a piece of plywood the exact size of the floor, on the floor...Next, 1/8" plywood for spacers were put between the teak and ply floor...That will bet the finished gap size later...To correct the undulating wall, I shimmed the backside of the teak and mixed some grey construction duty epoxy and putty knifed it in place...It's kind of hard to see clearly all that, but that's what's going on above...After the epoxy set's up, I'll remove the ply and the teak which will not be stuck to the epoxy since epoxy won't stick to the clear plastic tape...Then' I'll pull the tape and use clear epoxy to bond the teak to the grey epoxy...Pretty simple really...

P1110635.JPG

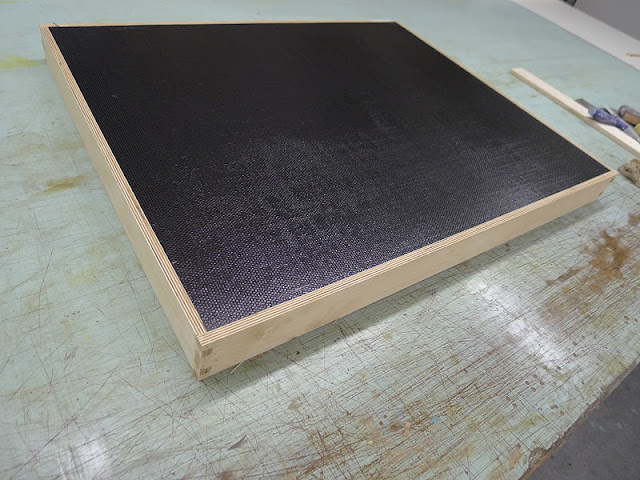
(above) At the end of the day, I put a piece of plywood on edge under the floor ply in the propane locker then spray foamed whatever gaps were there...

P1110645.JPG

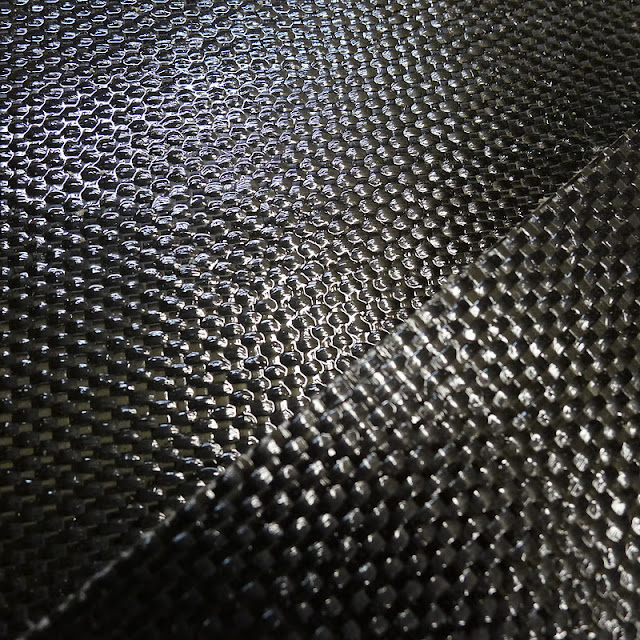
(above) Before turning out the shop lights, I found a place for the vinyl banner Mike brought me...

Day done...

P1110643.JPG

(above) Thursday morning after a quick trip out for parts...

P1110644.JPG

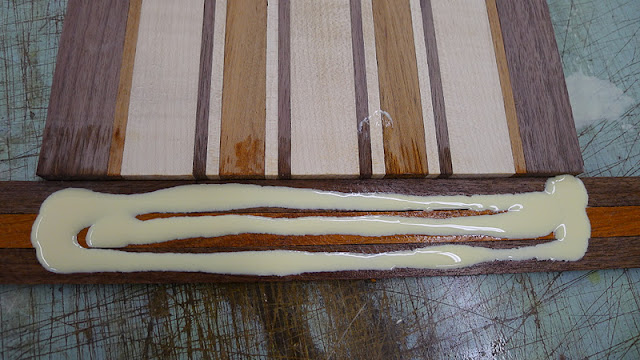
(above) Before getting in the Jeep, I ran the now dry cutting board through the planer...

P1110649.JPG

(above) Then after cutting it to length a few wood strips are glued on as end caps...

P1110650.JPG

(above) Again clamped and set to dry in a warm place...

P1110648.JPG

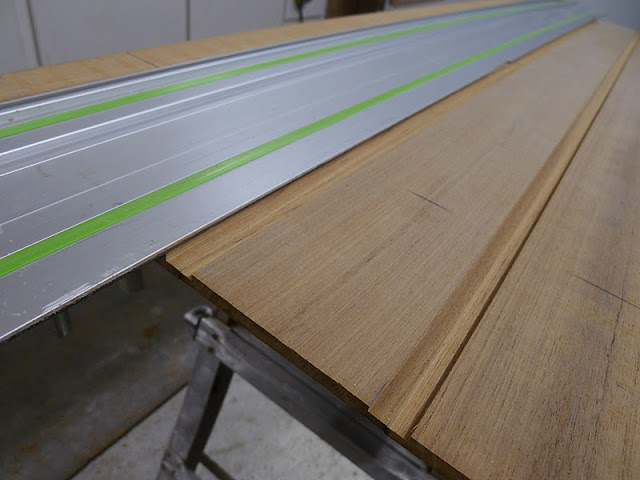
(above) Back in the Jeep...The ply floor shims and teak are pulled out as outlined above...Good enough for now...

P1110651.JPG

(above) The air lines that control the roof raising and lowering were leaking and the culprit was the quick-connect air line Tees...I changed them out for these brass compression fittings...A job that I thought should take about fifteen minutes, max...It took over an hour...The old air lines have expanded ever so slightly over time and that was enough to have the fittings and the tubing resist coming together without hard, heavy hand work...Frustrating when you expect it to be simple and easy...I ended up making a small wood block that slipped over the tubing and resting on the compression nut, the using big pliers I was able to get the nut to fit down over the insert ferrule, then I was able to get the nut to thread onto the tee......That make sense...???...

P1110652.JPG

(above) The compressor was turned on and the roof was lifted and it held...Yeaaah... The plywood is there in case it didn't...

P1110653.JPG

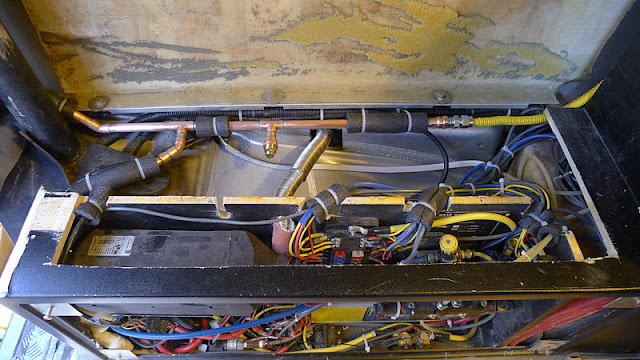
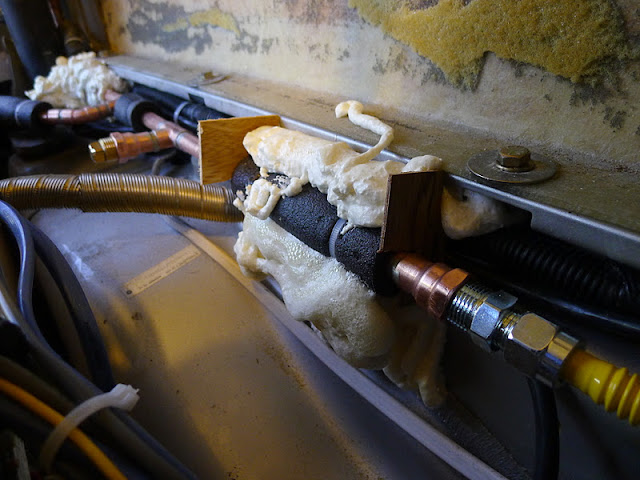
(above) Next on my list of "must get this done sometime" was to finish the gas lines for the stove and the wall heater...

P1110655.JPG

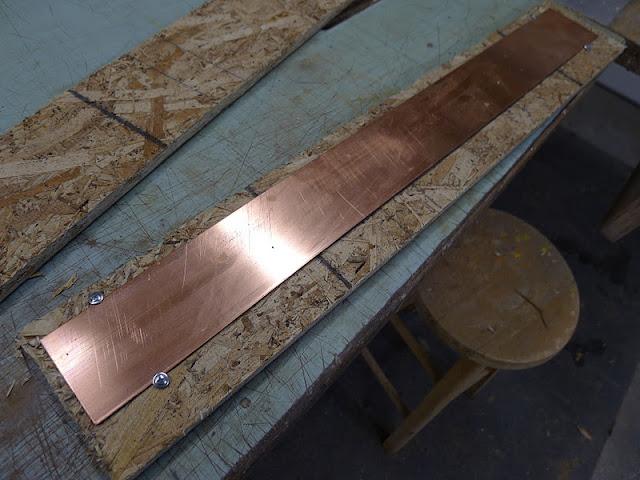
(above) The gas manifold is all 1/2" rigid copper...It ties into the 3/8" soft copper line that goes back to the propane locker...You can see the port for the heater line just to the left of the roll-bar and the stove line there on the right...Easy to get to the connections there...The tee in the middle is for a pressure test gauge...

P1110656.JPG

(above) Next I put foam pipe insulators over possible contact points...I also enlarged the cut-outs where the wires go through and wrapped them too...An ounce of prevention kind of thing...

P1110657.JPG

(above) Then it was back outside to cut away and sand the excess spray foam, then I fiberglassed the inside of the propane locker...Waterproof and airtight...

P1110658.JPG

(above) Finally I finished off the spray foam by using it to further resist movement...Once set it will stand up to some serious off road rambling...That after all is what this is all about...
 

Forum statistics

Threads
188,475
Messages
2,905,581
Members
230,428
Latest member
jacob_lashell
Top