EarthRoamer XV-JP "Northwest Edition"

kjp1969

Explorer
I 'm using maple, walnut and bubinga shorts that have been laying around...

My favorite line of the day. . . I couldn't pick bubinga out of a lineup, and Paul has a bunch just laying around, waiting to be a cutting board. :)
 

mhiscox

Expedition Leader
I 'm using maple, walnut and bubinga shorts that have been laying around . . .
I got a chuckle out of this, too. For serious overland travel, make sure that you've got your lockers, your aggressive tires and your bubinga-enhanced cutting board.
Paul's "WTH, why not?" projects certainly are making this Jeep something special to look at. If I get bored while camping in bad weather, I can just fondle all the eye candy. :sombrero:
 
Last edited:

Every Miles A Memory

Expedition Leader
I had to Google Babinga just to see what it was and what it looked like! Who the heck has it lying around in their shop...LOL

Always an entertaining thread
 

matthewp

Combat Truck Monkey
Now we've gone into serious glamping territory; Copper trimmed teak wood floor and a bubinga cutting board! I am seriously jealous!:bowdown: Be warned Paul, when I win the lottery, you're my next stop after the Jeep dealership!
 

PaulJensen

Custom Builder
Twenty-Six...

Twenty-Six ...

P1110663.JPG

(above) Another day at the playground...!!!...

P1110664.JPG

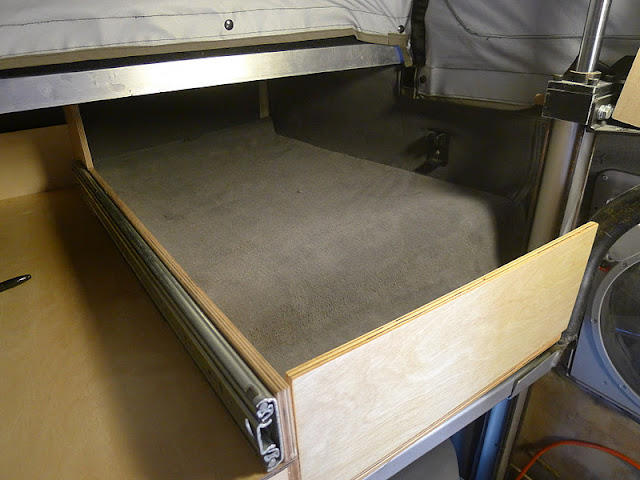
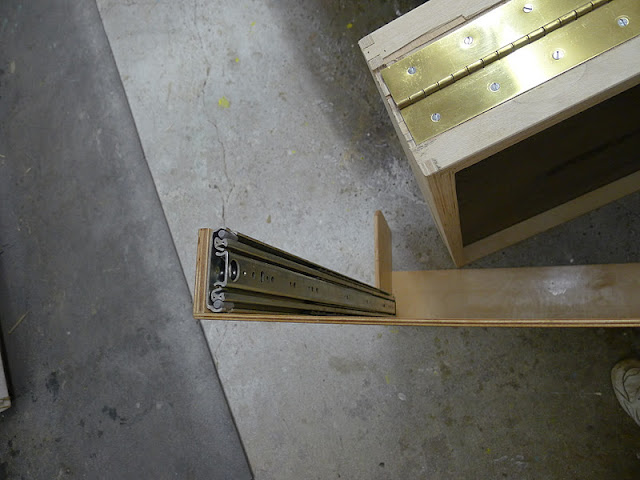
(above) Where I left off last week...The gauge and switch panel...There is just enough space here at the front end of the cabin, next to the sink, under the bed...This is just a pattern that I'll transfer to 1/2" ply later...For now, just defining the space is fine...

P1110665b.JPG

(above) Next to be resolved is the solution to the latch / pulls for the drawer pull-outs...I've been struggling with this one...I have a vision of how it should all look once it's done and despite searching stores, catalogs, the world-wide-web, and woodworking reference books, I just wasn't stoked...

I found these online and they seemed cool in the pictures...Once I got them, they weren't so cool...The finger notch just isn't right...Too small for a man's hands...That and too strong of a spring that controls the latch...Why is it so hard for designers to get things right...???...

This latch / pull decision has had me frustrated with the possibility of having to settle for something I wasn't 100% behind...

P1110666.JPG

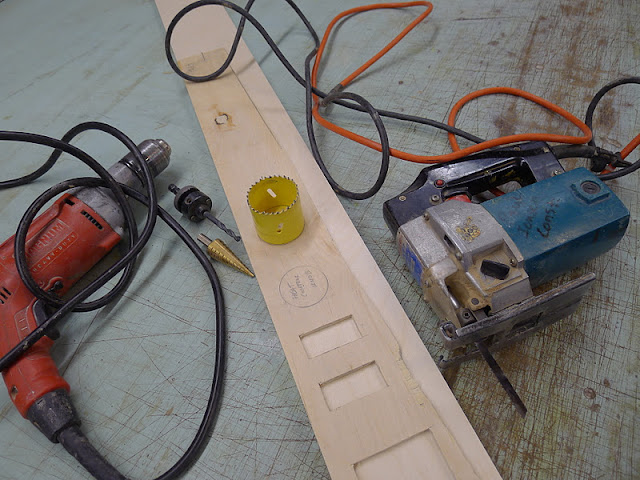
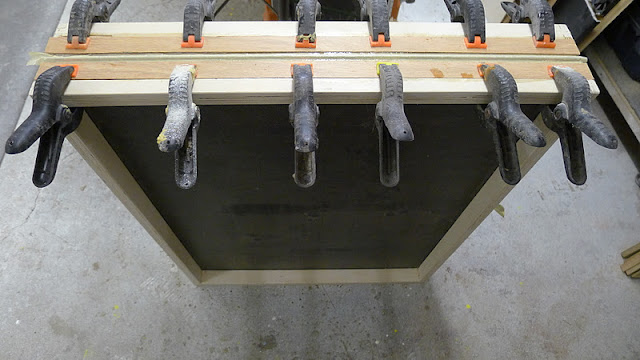
(above) So it was back to the drawing board...Today the drawing board has scraps of plywood...

The bigger piece on the right represents a drawer face...The small pieces are components of the latch / pull...

P1110667.JPG

(above) The side pieces started as 1/2" x 1/2" then a 1/4" rabbet was cut...The pieces in the center are 1/4" x 3/4"....

P1110668.JPG

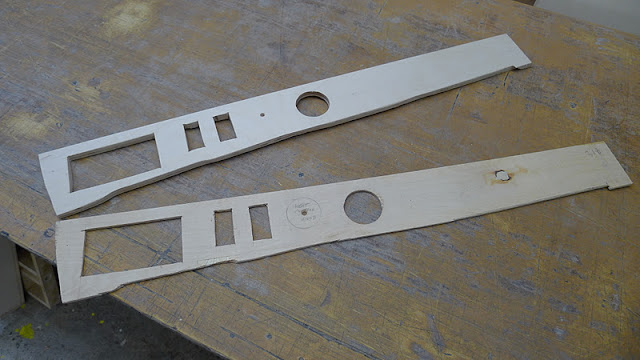
(above) When put together and inserted flush with the face create a wood slide bolt...

P1110669.JPG

(above) The vertical piece has a dado in it to capture the bolt...

I'm feeling good about this...Next to refine and finalize...

P1110672.JPG

(above) I thing that teak will be the best for the bolt...It is naturally oily and will self lubricate...A good thing for a moving part...

P1110674.JPG

(above) So I cut these...Teak 3/4" x 1.25" that are made into tees..The remainder dimensions are all 1/4"...

P1110675.JPG

(above) For the bolt part, another cut removed 3/4" of the finger pull part...Simple work on a tablesaw...

P1110677.JPG

(above) Test fit...

P1110678.JPG

(above) For the capture parts I had a choice...Blend-in and camouflage or go with stand-apart contrast...I'm going with contrast...Here it means walnut...

I ripped some to 1/2" x 1/2" and cut the 1/4" rabbet, then cut them to a rough length of 5"...

P1110679.JPG

(above) Test fit again...The finished drawers will have zebrawood veneer faces then I'll cutout the slide-bolt notch with a router in a jig...Under the slide-bolt is a 1/4" x 1" x 1" piece of walnut that is notched (again on the tablesaw) into the one of the walnut capture pieces...Why you ask...???...

P1110680.JPG

(above) When installed I'll drill a hole aligned and through both the slide pull handle and the walnut square...Then a wood peg can slip in to keep the bolt from moving and the drawer from opening...Another hole will be aligned and drilled when the drawer is open giving a place to slip the pin so it doesn't get lost...I might cord them...???...I'll also double up on the walnut squares so the pin alignment is more precise...

P1110681.JPG

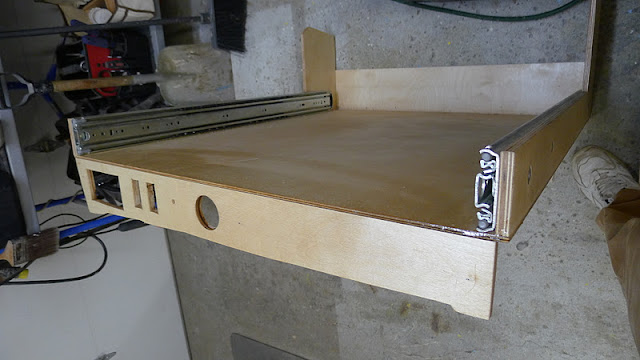
(above) Drawer pull / latch resolved and I'm stoked...!!!...

P1110682.JPG

(above) Oh yeah, the drawer case is the bolt capture on the back side...

P1110685.JPG

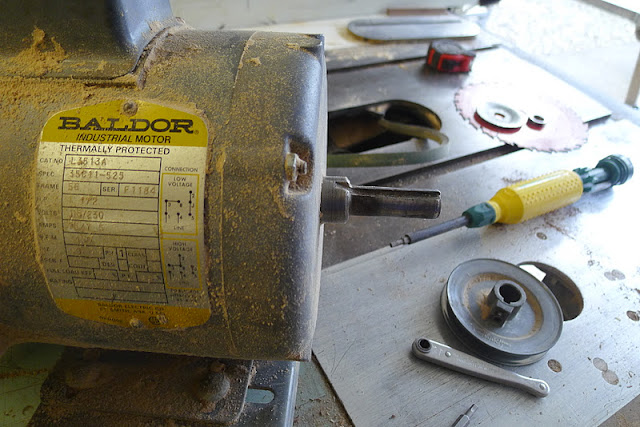
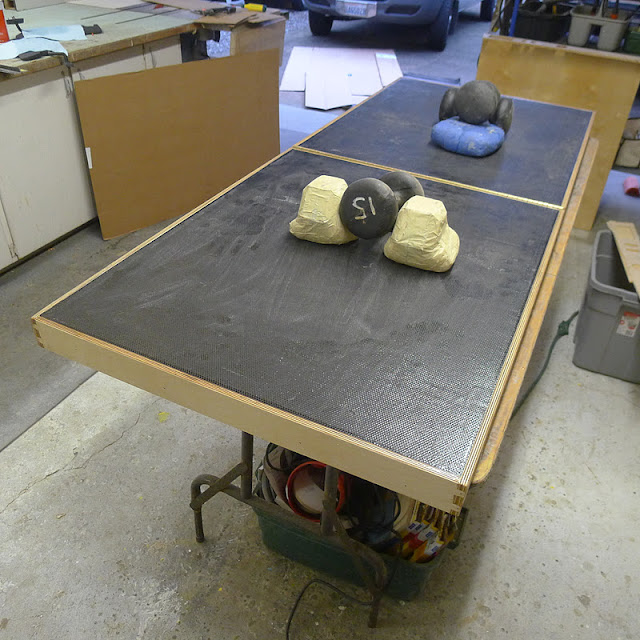
(above) Just as I finished my cuts, the belt pulley on the saw slipped and came off...Happens every five years or so...No big surprise given the use it gets...Getting to the motor is a pain and a half...The other hard part is finding the Woodruff Key in all the sawdust...I must be living right since I found the key and the motor came out without me swearing...

P1110686.JPG

(above) Old faithful...Close to 30 years in service...By the time the belt was slipped back in place and the saw plugged back in it was only about a half hour from the start...Not bad, not bad at all...

P1110687.JPG

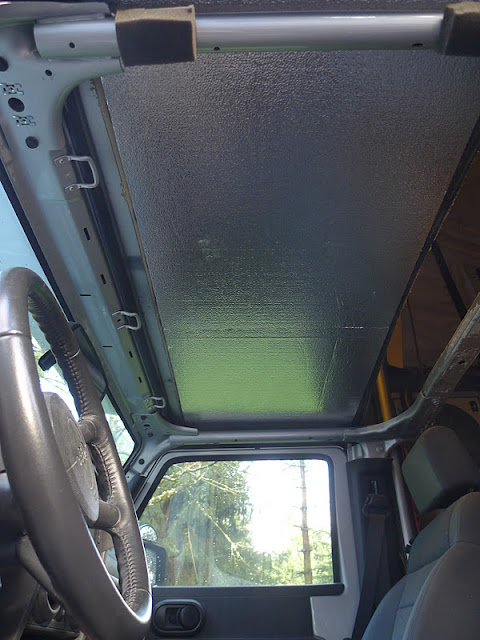
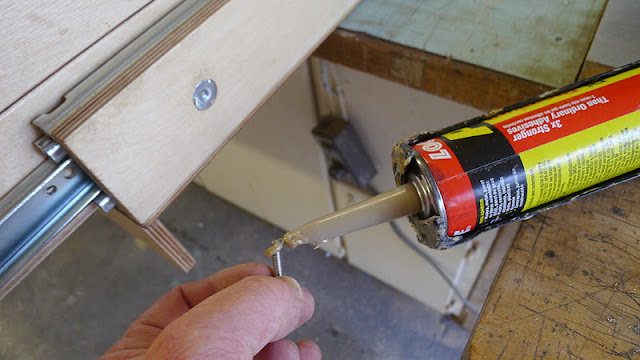
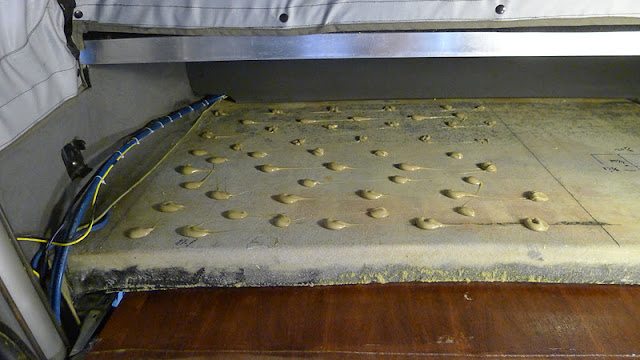
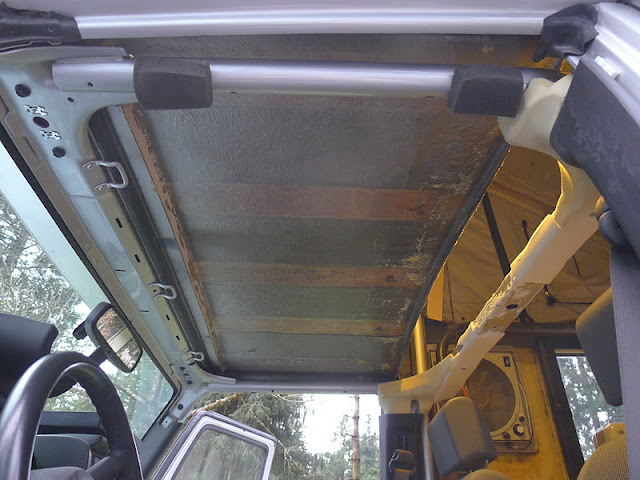
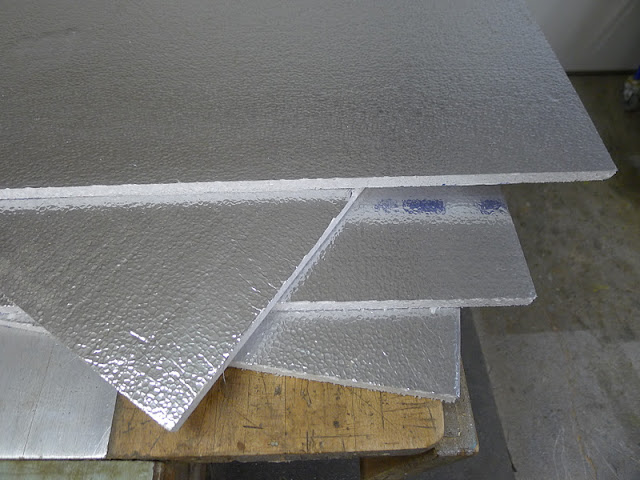
(above) Next on my list was to re-install the foam/fabric on the cab-over ceiling...I spread a layer on the fabric and one on the fiberglass ceiling...I cranked the heat inside the Jeep to high and went over the glue on the fabric with a heat gun for a few minutes to accelerate the process...

P1110690.JPG

(above) I needed to take some time mid-afternoon to do some state tax-form work and when I was done with that I installed the headliner inside the Jeep / sauna...

While in the office I made a call to an animal skin supplier I've used in the past to get some info on the choices for the bench seat and back rests...Bear (that's his name) said cow skin should cost about $6 a sq. ft....Not bad...???...More on that tomorrow...

One other thing that got done today was to vent the propane locker door...To do that it was as simple as cutting away part of the door gasket at the bottom of the door...Consider it vented...

Then it was off to get the State Tax payment posted before the post office closed...Whew, another full day...

More tomorrow...
 

1leglance

2007 Expedition Trophy Champion, Overland Certifie
the drawer bolts are very cool....I would be happy with the drawer body as the face and here you are adding a face & building a wood bolt. Thus the reason I am reading YOUR build thread and not the other way around :)

Very inspiring and know I am actually saving pics on my computer just in case some server crash robbed me of looking at this in the future :)
Great work & thanks
 

PaulJensen

Custom Builder
Swenty-Seven...

Twenty-Seven...

Today the focus is to get the cab-over components sealed with epoxy for final installation...

P1110692.JPG

(above) The bed was disassembled so the monitor and gauge panel could be installed on the under side of the platform...

P1110693.JPG

(above) Next the gauge pattern was pin-nailed to a piece of 1/2" ply...

P1110694.JPG

(above) Holes were drilled to give access to the jigsaw blade...

P1110695.JPG

(above) Pattern & panel...

P1110696.JPG

(above) Panel installed...

P1110697.JPG

(above) I want the hinges on the bed to be less prominent so I epoxied strips of 1/8" ply over the hinge wings...I taped over the hinge to keep life easier later...

P1110698.JPG

(above) Clamped...Later they will be sanded flush and veneered over...

P1110699.JPG

(above) The curb-side, cab-over face panel was glued and then given a sealer coat of epoxy...

P1110700.JPG

(above) The bed was unfolded and the plywood was given a sealer coat as well....

Next I went out and got the final parts to install the propane components, and went to see about getting some leather for the bench and back panels...What the supplier had was limited in color selection and if I wanted to order a skin, the cost was now $9.00 a square foot...No thanks...I'll go online later and see what I can find...

Back to the shop...

P1110701.JPG

(above) The headliner in the front end was sagging badly, so I removed it, as well as the other things up there that will be in the way when I install a new one...

P1110702.JPG

(above) With the headliner gone, I saw that I could insulate the ceiling...The insulation will be glued up there and give backing for the new headliner...

P1110703.JPG

(above) In the back of my scrap plywood pile I found this piece of 1/8" Afromosia ply that was the perfect size for the headliner...

P1110704.JPG

(above) After making and test fitting patterns, I cut the Afromisia to size, sanded it lightly then gave it a coat of teak oil...

P1110708.JPG

(above) It will dry overnight then get installed first thing tomorrow...

See you then...
 
Last edited:

mhiscox

Expedition Leader
In the back of my scrap plywood pile I found this piece of 1/8" Afromosia ply that was the perfect size for the headliner . . .
You gotta be impressed with Paul's pile of "scraps." Let's see . . . we've got Afromosia, Birch, Bubinga, Maple, Teak, Walnut, and Zebrawood. So far. ;)

Just think, before I met up with Paul, I'd been wondering whether or not to paint the birch plywood. Seriously. :sombrero:
 

mhiscox

Expedition Leader
Went to see about getting some leather for the bench and back panels...What the supplier had was limited . . . I'll go online later and see what I can find.

Brettuns Village Leather has Caiman skins in pink, green, white and black:

caiman4.jpg

Oops; too small. Thankfully. :)
 

alexfm

Explorer
You gotta be impressed with Paul's pile of "scraps." Let's see . . . we've got Afromosia, Birch, Bubinga, Maple, Teak, Walnut, and Zebrawood. So far. ;)

Just think, before I met up with Paul, I'd been wondering whether or not to paint the birch plywood. Seriously. :sombrero:

Right? :drool: My scrap pile consists of dry plywood, wet plywood, and partially rotten plywood. Oh, and an old door. :D

On another note, was there a specific reason to using the teak oil on the Headliner panel Paul? I'm pretty new at the wood work thing, and I'm not sure if the teak oil was an aesthetic thing, or if it served a specific purpose.

Rig looks great, I'm anxiously awaiting tomorrow's update.
 

PaulJensen

Custom Builder
Teak Oil was on the shelf...Often that dictates what's part of the project...

I'm fond of the Watco family of oils and waxes, but any penetrating oil would have been OK for the lid...
 

PaulJensen

Custom Builder
Twenty-Eight...

Twenty-Eight...

P1110709.JPG

(above) With yesterday's epoxy dry on the other side, the bed was flipped over then a coat of epoxy was brushed onto any bare plywood...

P1110710.JPG

(above) The foundation for the bed was turned over and an access panel for the gauge wires was cut in...You just gotta have access to those things...

P1110711.JPG

(above) Some plywood strips, epoxy and a few pin-nails create a bottom rim for the lid to sit on...

P1110712.JPG

(above) Turned back over...The way you get in is with the bed fully pulled out, so that access panel will be hidden almost always, but if you need to get in, you can...

P1110713.JPG

(above) I had the heat on in the Jeep so it was time to insulate the headroom area in the front cabin...

P1110715.JPG

(above) 3/4 of the way insulated...

P1110716.JPG

(above) 100%...

P1110717.JPG

(above) The 1/8" Afromosia ply headliner panel got patterned with polyurethane adhesive...

P1110718.JPG

(above) Then it was slid in (from the rear cabin, over the roll-bar) then aligned and pushed hard and held with low tech methods...Nothing fancy here...

P1110719.JPG

(above) Next it was finally time to install all the cab-over stuff...The vertical panel that hides the lights and air tank was taped so I could see my scribe lies, then cut to fit...Took two tracings and cutting to get it right...

P1110720.JPG

(above) The bed foundation was put in place to check the fit with the gauge panel now attached...

P1110721.JPG

(above) The side panel was positioned so I could accurately cut a piece of carpet for the bottom...

[
P1110723.JPG

(above) Something like that...Then everything was removed one last time...

P1110724.JPG

(above) One last look before the final install...Note the poly-U adhesive on the side fabric...There to keep it up after it's folded and pressed...

P1110725.JPG

(above) The vertical panel had a plywood back and it was as far forward as it could be...That meant it was up against the lights and air tank...That meant it would rattle annoyingly when rolling along and bumping against the hard components, so I glued a scrap piece of carpet over the ply...Rattle-be-gone...

P1110726.JPG

(above) Before the final install, I want to fiberglass the front headliner ply to the steel frame to prevent the headliner from moving at all later...I trust the adhesives I used, but if I see a way to build it better, I will...Here it means three layers of fiberglass tape and 30 ml of epoxy resin...

P1110727.JPG

(above) Three minutes later...The backside of that ply sure looks nice now...

P1110728.JPG

(above) Then it was back to the shop to permanently install the bed pull-out to the foundation part...Since the Poly-U tube was right there oozing at the tip, I dabbed the end of the screw in it before screwing it in...Locked-tight...

P1110729.JPG

(above) The bed assembly is on it's side...I put a scrap of carpet on the back of the drawer foundation to help it blend into the other grey shades in the cab-over...

P1110730.JPG

(above) On the back side I put some Poly-U under the fabric, then taped it flat...

P1110731.JPG

(above) Been waiting to do this for a while now...Polyurethane adhesive on the fiberglass cab-over...Ready for the bed assembly...It was wrestled in place, aligned and clamped...

P1110732.JPG

(above) Then the side piece was glued in position and clamped...Then the cut carpet was dropped-in folded and left to set...Before I put it in, I washed the carpet and it was still more than damp when I put it in...I'm thinking because it was wet, it will take a better 'set' once it dries...

P1110733.JPG

(above) Installed...

P1110734.JPG

(above) Over on the far driver's side, I put a narrow filler strip of carpet in...To protect and conceal the wiring and air tubes, I put a piece of grey pipe insulation over it...I like that...

P1110735.JPG

(above) One last look at the front cabin ceiling...

Today was satisfying to finally install the cab-over area...It will get worked a bit more in the days to come with fiberglass, veneers and finished lumber...

At the end of the day, I stepped back and appreciated how big a day today was...

More tomorrow...
 
Last edited:

Every Miles A Memory

Expedition Leader
Paul your work is beyond impressive. I've got to ask because you've never mentioned it in any of your posts....Do you work alone or do you have an assistant?

Only asking because I know how hard builds can be when trying to do them by yourself compared to having an extra set of hands around. If you say "No I work alone!" Damn, I'm even more impressed!!
 

Forum statistics

Threads
188,475
Messages
2,905,599
Members
230,428
Latest member
jacob_lashell
Top