Kitchen Kit/Chuck Box

alia176

Explorer
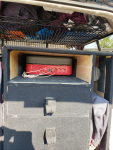
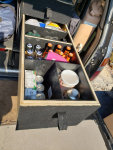
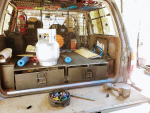
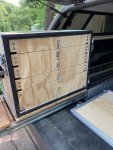
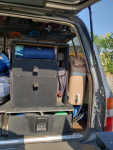
There are some brilliant solutions in this thread, wow!!! Mine is a simple wooden made kitchen box that have been lined with corrugated plastic things using hair pins to connect the walls together. Each drawer has a 4mm sticky back foam on the bottom. I had two reasons to go this route: eliminate ALL digging and make ZERO rattles. I've achieved this and quite happy at the result. I still would like to build two hinged doors for the open compartments.

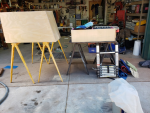
Material: two 4x8x 1/2" Birch plywood and most of it is used. Tip: when you go to the big box stores for this expensive plywood, pick couple of blemished units and then ask lumbar dept employee a discount. This resulted in a 75% discount on one sheet and a 25% on the second sheet due to all kinds of handling damages on the smooth surfaces. (y)

Since this is my third or fourth build of similar storage solutions, I opted to go with NO slides of any kind. There's no bees wax, no UHMW runners or anything. It's simple wood on top of Birch and I was able to maximize the drawer sizes. The drawers are heavy since they're really deep and hold a lot of $hit! It takes a fair amount of effort to pull them out and push them back in, just the way I like it. There are zero rattles, squeaks and everything fits nice and snug.

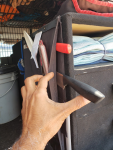
The ladder compartment has more foam toward the rear where the top of the ladder is narrow so it's wedged back there. Another benefits of this ladder storage solution is that a dirty/wet/muddy ladder has its own compartment. The ladder compartment also holds a Cgear sand mat for a ladder or a shower footprint.

I approximate the weight of the carcass minus the drawers to be around 60#. There is a Miford cargo barrier that's back there and the carcass is angled to match the cargo barrier's angle. Every square inch of space is maximized.

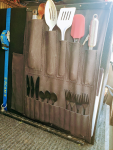
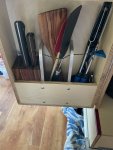
My teenage daughter sewed up an utensil holder for the left side of the kitchen unit and it's nothing sort of wonderful. I can access utensils quickly for a trail side lunch w/o digging through stuff.

On the right side of the box lives a potable water can and a 10# alum propane bottle. The jerry can is now a royal PITA to remove because I have to slide the kitchen over to the left. I've created another thread for a DIY jerry can sight glass level indicator.

The bulk of non perishable food that needs to be cooked live in this kitchen box while an open top plastic container lives in the middle row for snacks. This box is easy to access while driving. I always have dogs with me so the left side of the cargo has to stay open.

Let me know if you have any question.
1653584241058.png1653584261723.png1653584286247.png1653584296028.png

1653584355985.png1653584378144.png1653584385334.png1653584401376.png

1653584728998.png
 
Last edited:
JMacs

Observer
Well, it is finally done! Mostly. Well, it fully useable. Only a couple of things I want to redo.

(OK, sorry for the wonky pictures. Some want to post as full images, some as file names, some as thumbnails. I tried to be consistent in the way I uploaded them. Don't know what happened.)

I thought I should add my version of the chuck box to the mix. I have been inspired by many, used many of their ideas, had a couple of my own. We have been using a knock off version of the Alu-Box stackable cases for years. Stacking silverware trays inside. And it has worked pretty well. But, I was getting tired of finding what I needed next was always on the bottom tray. And my wife and I always kind of battle back and forth. I put together / build things to make it easier for our travels. When things get easier, she takes it as an invitation to expand what she can do while traveling. Then I build something to make my life easier again. Then she gets more ideas. Kind of a chicken and the egg thing.

So, I built this, an upright case with drawers. It had to fit on my slide out in the back of my truck. Had to be as dust proof as I could make it. And removable.

I wanted to make it lightweight. (Didn’t accomplish that.) Had to make it look cool for the wife (I think I accomplished that). And it had to be easy to use (It accomplished that).

I thought using 8020 for the structure and 3/8” plywood for the sides would help keep the weight down. Well, it’s sturdy. I don’t have to worry about glue joints coming lose, screws vibrating lose between pieces of plywood, or my woodworking skills compromising the integrity.

Stats:
  • 16” deep x 26” wide x 20” high
  • 8020 structure only – 16.4 pounds (Started out heavier than I thought. Should have known it would go downhill from there.)
  • With wood sides, handles, slides – 42.5 pounds
  • Final weight with drawers (empty) – 70 pounds
  • Final weight with all our stuff – I don’t want to know.
I always wanted to build something out of 8020.

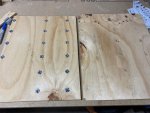
The top, bottom, back and door are a single sheet of 3/8” plywood. The sides are built with 2 pieces of 3/8” plywood. There are t-nuts in the inner piece to screw the drawer slides into. This way they have a solid mounting and there isn’t any penetrations of the outer skin. Had to drill little pockets in the outer sheet for the t-nut head. Then the pieces were glued together.

The handles are motorcycle handlebar tie down strap extensions. Those will get replaced eventually. They put your knuckles at the top edge of the box while you are carrying it.

The slides are 14” full extension slides.

The drawers are bent sheet metal sides, 1/8” Masonite bottoms, 3/8” plywood front and back, a piece of 8-32 all-thread going from the front to the back for a little additional support.

The door has lift off hinges so it can double as a tray / table top.

All the plywood has been sealed with a couple of coats of urethane. Silicone between the wood and the 8020. Door seal by 8020.

Things that I want to update / change:
  • Drawer fronts. The notch at the bottom corners was an oops on my part.
  • Drawer pulls. Used what I could find at the Home Depot. Found what I wanted at Lowes 2 days later after I had installed the Home Depot pulls
  • Carry handles to something a little shorter and more comfortable to use.
View attachment IMG_2809.jpg
IMG_2826.jpg
View attachment IMG_2827.jpg
View attachment IMG_2829.jpg
View attachment IMG_2831.jpg
IMG_3374.jpg
IMG_3376.jpg
IMG_3372.jpg
View attachment 2022 YNP Jim iP 18.JPGIMG_2826.jpgIMG_3376.jpgIMG_3372.jpgIMG_3374.jpgIMG_3372.jpg
 

alaskantinbender

Adventurer
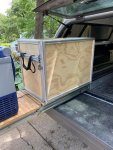
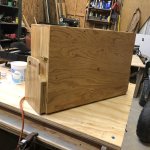
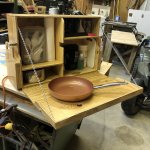
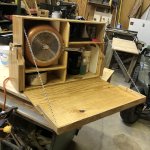
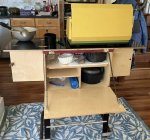
My birch camp box... complements of my FIL. I provided pictures and rough drawings from many of the boxes in this thread and he worked it up.
View attachment 254055

View attachment 254056

and one during the process...
View attachment 254057

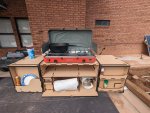
My requirements were that it fit a Coleman 425 series stove, and also fit under the Access bed cover on my truck. If I recall, it comes out to 19 1/2" tall over all. I holds a surprising amount of "stuff". I'd like to find some little bins to slide in and out of the cubbies.
Great design. I have built several over the years and much like yourself I like the stove on the top and easy to use in place. I have made the top cover so it hinges back to make a table space to spread things out a bit.
 

AZCamping

New member
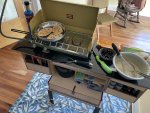
Here is my camp kitchen setup that i use for overlanding/family camp trips. Fully loaded it weighs 48 lbs, which includes the cook partner stove at 15.5lbs. I have lighter stoves and even my old coleman stove weighs less than 10 lbs, but i like the durability/burner control of the cook partner and that it's made in the USA. 4 sets of plates/bowls/spoons/pot/pan/cutting boards/tinfoil/spices all fit comfortably. Light enough to set up on a picnic table or cook directly on my tailgate.
 

Attachments

  • chuck box 1 .jpg
    chuck box 1 .jpg
    82.6 KB · Views: 158
  • chuck box 2.jpg
    chuck box 2.jpg
    65.8 KB · Views: 157

HitchFire

Supporting Sponsor / Approved Vendor
Seeing all of these DIY Kitchen set ups look amazing! We wanted to share something that we've been working on for a while and will be releasing soon... our new Hitch Kitchen. The Hitch Kitchen utilizes our proprietary swing arm technology so that when you're driving, it stays stowed behind your vehicle, and easily swings out while parked to allow for full access to the back of your vehicle. The standard set up will include a sink and stove top as well as two side tables to add extra work surfaces. Add on our side table cutting board and you've got even more working area to prepare your meals. We'd love for you to check it and some of our other products out over on our website at Hitchfire.com.
 

Attachments

  • IMG_9742.jpg
    1.1 MB · Views: 108
  • IMG_9728.jpg
    994 KB · Views: 91
  • IMG_9628.jpg
    1.2 MB · Views: 81

alia176

Explorer
Seeing all of these DIY Kitchen set ups look amazing! We wanted to share something that we've been working on for a while and will be releasing soon... our new Hitch Kitchen. The Hitch Kitchen utilizes our proprietary swing arm technology so that when you're driving, it stays stowed behind your vehicle, and easily swings out while parked to allow for full access to the back of your vehicle. The standard set up will include a sink and stove top as well as two side tables to add extra work surfaces. Add on our side table cutting board and you've got even more working area to prepare your meals. We'd love for you to check it and some of our other products out over on our website at Hitchfire.com.

that's really cool!!!!
 

Bentworker

New member
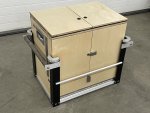
Some pics of a “Tom Builds Stuff” based Chuck box. I ended up using 1/2” Baltic Birch. Top is skinned in high temp fiberglass sheet. I made a lot of the hardware. Stand is aluminum angle, some round aluminum rod, 80/20, some tube and random bits I machined (like the feet). When nested in the stand the round tubes make good carry handles.

I didn’t deviate much from the TBS design other than abandoning the use of pocket screws. Figured there was nothing wrong with fasteners being exposed.

The piano hinges (12075A83) & (12075A87) are from McMaster-Carr along with the flush mount carry handles (1655A21). The vertical dividers for the tall utensils are 3/8” square aluminum stock. All the accent pieces are actually accidents where I screwed up and had to add material back. Once I get a foldable sink it will be complete. Might also toss in a very flat cast iron “breakfast” pan I have, along with a container of rock salt to clean it.


12CAAD79-F28A-42C5-9746-B8D5E9037EA0.jpeg650122FB-1F21-4AFC-B0C2-F7ED1935724E.jpeg3BECFEA3-494F-4748-9530-78FC15E321BA.jpeg
D752BA11-C0E2-4698-B981-407D0E4ED728.jpeg

285DD5D5-4AF2-4FD2-8EB8-02E2F7403529.jpeg
 
Last edited:
Hotspur

New member
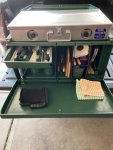
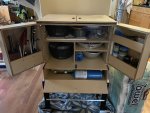
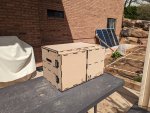
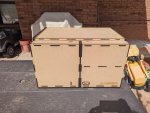
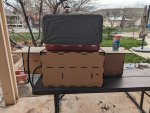
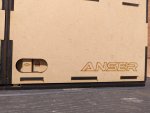
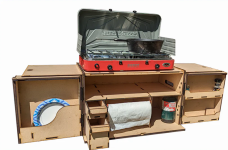
My Chuck Box is made with Rosenberg 6mm Waterproof MDF. I started working with baltic birch but found that mdf machines better. Armorite MDF won’t swell or soak up water like traditional MDF. The box is designed to work with the Camp Chef Everest stove. It features an interior space that can hold a 1-gallon propane bottle with a opening for a propane line. The green 16oz bottles will still work as well. It has two drawers for storing all of your camp utensils. I used T-nut hardware and torx M4 machine screws to ensure that the hinges won't break down or tear out from vibrations during transport. The joints are built with mortise and fingers using Titebond 3 waterproof glue. I designed it using CAD and cut on a laser cutter. The front doors are held in place with a sliding lock to prevent the doors from opening while traveling. Underneath the top panel are two sliding surfaces that open and are supported by each door that expands the cooking countertop surface, making it easier to prepare meals. The box weighs in at just 35 pounds empty.

I had to special bulk order the MDF and have some extra sheets if anyone is interested in purchasing one i am going to be planning on selling some. I call it the Shackleton.
 

Attachments

  • PXL_20230324_212708057.jpg
    PXL_20230324_212708057.jpg
    3.2 MB · Views: 116
  • PXL_20230324_212716504.jpg
    PXL_20230324_212716504.jpg
    3.3 MB · Views: 110
  • PXL_20230324_213202846.jpg
    PXL_20230324_213202846.jpg
    3.5 MB · Views: 105
  • PXL_20230324_213338037.PORTRAIT.jpg
    PXL_20230324_213338037.PORTRAIT.jpg
    3.6 MB · Views: 97
  • PXL_20230324_213421181.jpg
    PXL_20230324_213421181.jpg
    2.5 MB · Views: 95
  • PXL_20230324_213428583.jpg
    PXL_20230324_213428583.jpg
    3 MB · Views: 90
  • PXL_20230324_213826835.jpg
    PXL_20230324_213826835.jpg
    3 MB · Views: 87

Jake's_dad

New member
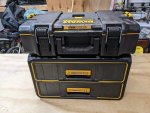
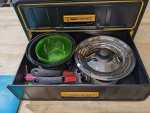
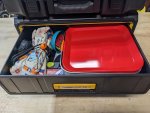
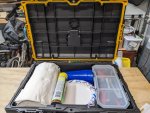
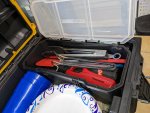
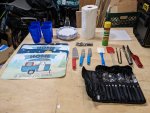
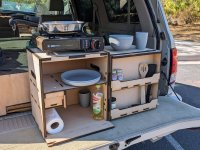
I have been looking for a simple solution for a chuckbox for quite a while now and stumbled across the Dewalt drawer boxes while browsing the black friday deals. Paid around $150 for both pieces. It fits nicely in the vacant generator compartment of my truck camper and fits just about everything we need. It is also somewhat waterproof, so not a huge deal if it gets left outside and we get a bit of rain.
 

Attachments

  • PXL_20230425_232905140.jpg
    PXL_20230425_232905140.jpg
    2.8 MB · Views: 104
  • PXL_20230425_232914690.jpg
    PXL_20230425_232914690.jpg
    3.2 MB · Views: 99
  • PXL_20230425_232936925.jpg
    PXL_20230425_232936925.jpg
    2.7 MB · Views: 99
  • PXL_20230425_233005361.jpg
    PXL_20230425_233005361.jpg
    2.6 MB · Views: 96
  • PXL_20230425_233013265.jpg
    PXL_20230425_233013265.jpg
    2.6 MB · Views: 100
  • PXL_20230425_233247747.jpg
    PXL_20230425_233247747.jpg
    2.6 MB · Views: 97
  • PXL_20230425_233613855.jpg
    PXL_20230425_233613855.jpg
    2.6 MB · Views: 95
  • PXL_20230425_233903467.jpg
    PXL_20230425_233903467.jpg
    3 MB · Views: 99

Hotspur

New member
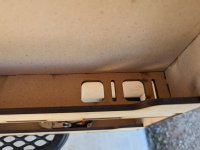
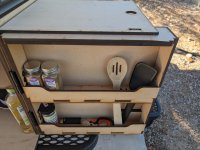
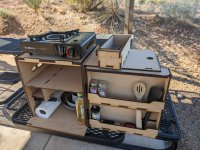
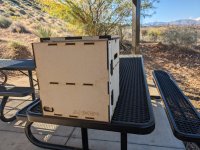
Ever wanted a smaller chuck box? That thought crossed my mind after building the larger chuck box and filling it with every conceivable item. After using my larger chuckbox with the double burner everest stove got me thinking I should make a smaller one for single burner stoves. What do you think? Its really easy to pack and I think it will probably get used more than my bigger one. Front Open.jpg
 

Attachments

  • PXL_20231117_200348465.jpg
    PXL_20231117_200348465.jpg
    1.6 MB · Views: 34
  • PXL_20231117_200338847.jpg
    PXL_20231117_200338847.jpg
    2.7 MB · Views: 34
  • PXL_20231117_200256260.jpg
    PXL_20231117_200256260.jpg
    3.3 MB · Views: 34
  • PXL_20231117_200125971.jpg
    PXL_20231117_200125971.jpg
    2.8 MB · Views: 32

hoser

Explorer
Nice! I was actually thinking more like a 2/3 version. Double burners, I need...

I don't know how accurate these dimensions are but:
16 x 7.25 x 2.5 inches
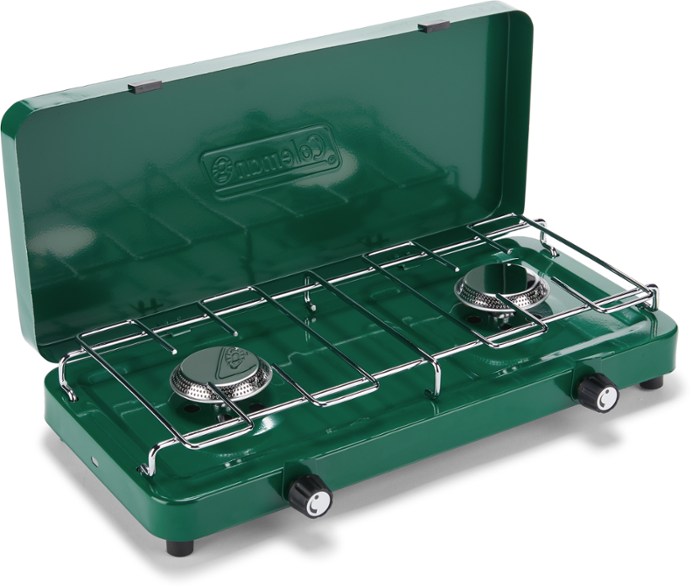
Coleman compact stove:

f7e8eb30-a64e-4a2f-9def-bb7510424c49.jpg
 

Forum statistics

Threads
188,041
Messages
2,901,505
Members
229,411
Latest member
IvaBru
Top