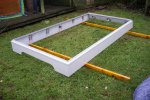
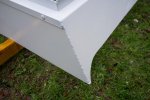
Managed to get a bit done before Christmas was upon us, and did it inside as the weather is sliding into proper winter.
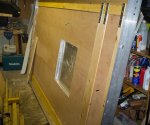
Got the ply lining and pine bracing installed. The strip of pine nearest this end is there for three reasons:
1) there's a joint in the ply sheet (the roof is 9' long, and sheets are only 8'),
2) and as this is where we'll climb up to get onto the sleeping platform it will provide a firm fixing point for a couple of handles or a bar that can be used to pull up on,
3) and which will also be useful for physically pushing the lifting roof up, and pulling it down again.
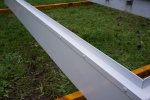
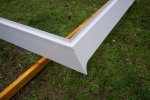
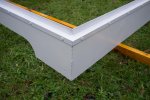
Also the roof width is just over 8" wider than a 4' sheet of ply so putting the pine strips either side mean I only need one sheet of ply. The rebate (groove) in the sides of the pine allow the ply to be held at the correct thickness to give an even finish throughout the roof length. They also provide a smooth, clean, strong fixing point for the top of the fabric sides and allow the top of the gas strut to be firmly fastened to them, and will spread the not-inconsiderable load on the strut (which would have been a point-load on one small spot on the roof) along the full length of the side. They keep the roof from flexing too much as well. So well worth fitting.
Because of the length/angle of the gas struts and the fact they have to lie horizontal when closed they will only operate when they reach 12 degrees so that first push up is important and a good firm fixing point is essential. The metal strengthening plates will be countersunk and can be filled or veneered over with some thin slices of pine.
As I've still got the lower section of the roof sitting on the top of the 110 I thought it might be prudent to take it off as snow was forecast. It needed cleaning out anyway as it had filled up with dead leaves, crisp packets and any other rubbish the recent gales could toss about. Its now in a generous neighbour's garage where I'll rub it down and etch prime it sometime soon.
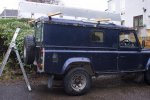
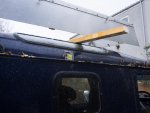

As the 110 was 'topless' I thought I'd use it to go over to the west coast a few days ago to see my mum. We have a small VW but the 110 is safer in the winter and the road was very very wet with giant lakes on it hiding deep potholes (yes this is the main road west!). On the way back I took a detour which is on a small rural single track road which is quieter and would avoid me having to negotiate the swerving cars trying to avoid the big puddles on the main road in the dark, and it had started to sleet which looked like it might turn to snow (although not forecast to do so until the following morning). However this is a hill road and has a high pass but I thought we'd get over before the snow started in earnest.
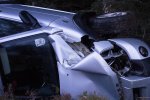
As we hit the first bit of hill we found a Land Rover Freelander demolished in a ditch. It had done a 360 spin and gone into a tree backwards/sideways but because of its rearwards trajectory had saved the occupants, an elderly couple on holiday to visit relatives for Christmas, from serious injury. You can see the tree imprint in the side of their vehicle.

They were shaken but ok, so I offered to take them to their destination about another 25 miles, and on my route. So we emptied all their stuff into the 110 and waited for the Police to arrive. By the time they got there it was dark and snowing in earnest. We then had the main mountain pass to negotiate in a raging blizzard (sorry no pictures as it was rather full-on). Got to the top of the pass and could see another vehicle coming up the other side so stopped, pulled in and flashed for them to come on. But they stopped. On the hill. In a 2wd hire car. And were stuck. It was a family on holiday from England and caught unawares. My tow line was buried under the elderly folks gear mountain so I thought I'd use my shovel and cleared as much snow as I could down to the tarmac and they were able to inch up, but we had a long long way to go and the snow was getting worse in the 30 mph wind. But then a new Land Rover Disco with the local garage owner in it came up, pulled out a strop, would it round something underneath the small car and I got to see terrain response working in earnest. He pulled the Ford to the top of the hill with no drama, no slipping and with an ease that was quite remarkable. We all got home safely. Thank you Land Rover.


