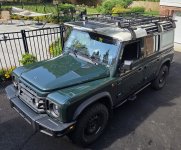
Outfitting my Grenadier Trialmaster

jscherb

Expedition Leader
Great idea Jeff. Your new garage looks more cramped than the old one!
Thanks. I used that technique for years in my Elmira house; when I moved I took the strut channels with me and installed them in the new garage.

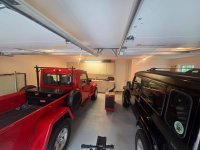
That bay is the third of three in the new garage; it's a single bay with an 8' high door so taller things (like vehicles with racks can fit):

GarageBay3.jpg

The front two bays are a little more roomy although they only have 7' doors.

GarageBay12.jpg

And cabinets I removed during renovations inside the house became storage in the garage.

GarageBay12a.jpg

Overall the garage is very efficient. And not to mention my wife's beautiful yoga studio over the front two bays. :)
 

jscherb

Expedition Leader
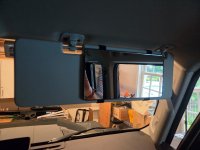
My better half can't believe that a vehicle this expensive doesn't come with a mirror on the visor. It does seem very cheap not to include one, so to end that discussion, I added this one. It was $13.99 on Amazon and it's very large - you can see how much of the visor it takes up. Attaches with elastic straps. Apologies for the photo inside the messy garage, it was raining when I slipped it onto the visor. FWIW: https://tinyurl.com/27bw4nma.

VisorMirror1.jpg
bbbbb
VisorMirror2.jpg
 

dman93

Adventurer
I don’t have a Grenadier or a Wrangler but I found this very interesting and gave me lots of ideas for my Toyota. Thanks for taking the time to document it.
 

jscherb

Expedition Leader
Thanks, I'm glad you find it useful.

More ideas... being a long-time subscriber to a number of UK Land Rover magazines, a few years ago I started a thread called "Land Rover Ideas for Jeeps", and in it I posted ideas from the Land Rover magazines that I thought might be useful for Jeeps. Probably some of the ideas would also be useful for Toyotas so you might find that thread useful as well: https://forum.expeditionportal.com/threads/land-rover-ideas-for-jeeps.218029/.
 

jscherb

Expedition Leader
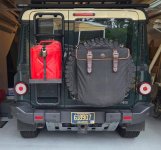
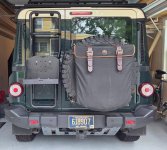
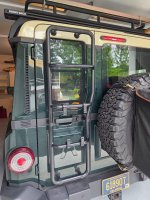
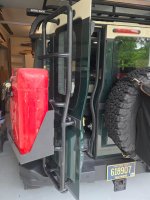
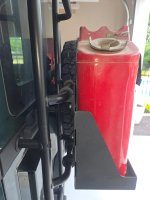
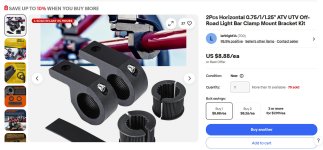
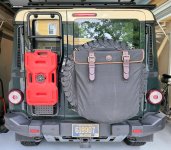
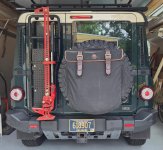
DIY Jerry Can Carrier... I mounted a jerry can tray to the ladder using a two pairs of clamp mount brackets I found on eBay (<$20). Quick project, all that was really necessary was drilling a few new holes in the back of the jerry can tray to line up with the brackets. Many jerry can trays are not tall enough to reach between two rungs of the ladder, so if you have one of those trays you'll probably need a few extra bits of hardware. This tray is from MORryde, it's part of a side-mount design for the Wrangler that I did for them a few years ago. Also I could have mounted the tray one rung lower, but since the bottom rung of the ladder doesn't stick out as far as the middle two rungs, spacers would be required between the brackets and the tray on the bottom rung, it wouldn't be a big deal to make spacers for that.

I'm working on a few other ladder mount ideas, stay tuned, will probably have photos to post tomorrow.

JerryCarrier1.jpg

JerryCarrier2.jpg

JerryCarrier3.jpg

JerryCarrier4.jpg

JerryCarrier5.jpg

LadderBrackets.jpg
 

jscherb

Expedition Leader
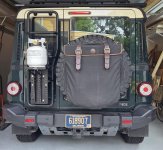
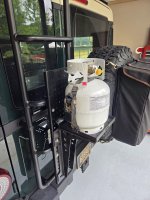
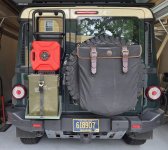
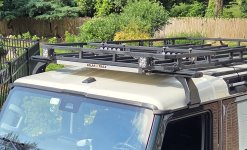
Yesterday I posted a DIY Ladder Mount Jerry carrier. Next I mounted a grid panel recycled from one of my Jeep projects on the ladder using the same mounting clamps I used for the jerry can tray yesterday. I tried mounting a bunch of different things on the grid - a "rotopax" (actually a Chinese version), a smaller "rotopax" plus a large ammo can in an ammo can tray, a propane tank (that mount is designed to bolt to Wrangler tailgate hinges so isn't optimal for this grid but does work) and a HiLift jack. A photo of the panel with nothing attached is also included. If I were to design a grid specifically for mounting on the ladder it would be a little bit different size and shape, but as a proof of concept this recycled grid seems like it could be very useful.
LadderGrid.jpg

LadderGridRoto.jpg

LadderGridPropane1.jpg

LadderGridPropane2.jpg

LadderGridRotoAmmo.jpg

LadderGridHiLift.jpg
 

jscherb

Expedition Leader
With the ladders "real estate" taken up. How do you plan to access the roof basket?
Being 6'6", I can easily stand on the Grenadier's very high door sills, rear tires or rear barn door sill and reach everything I need do.
 

Zeep

Adventurer
Being 6'6", I can easily stand on the Grenadier's very high door sills, rear tires or rear barn door sill and reach everything I need do.
Kinda figured that. Just curious if you were adding some hinge mounted steps, or similar.
Will you be using any paint protection on the sills? 3M offers a clear vinyl film, that applies easily.
 

jscherb

Expedition Leader
Kinda figured that. Just curious if you were adding some hinge mounted steps, or similar.
Will you be using any paint protection on the sills? 3M offers a clear vinyl film, that applies easily.
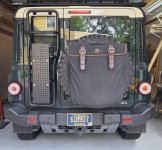
When I first bought the Grenadier, I had the dealer remove the ladder because a ladder on the rear didn't seem as useful to me as the hinge steps I had on the JKU. Later I reinstalled the ladder to use it for various cargo purposes as I've posted recently.

I may design a version of my hinge steps for the Grenadier after I have some experience carry more things on the roof rack, but because the door sills are higher than the JKU sills I may not need the steps. If I decide I do need a little more height for accessing things on the rack, I'll make some steps like the ones I made for the JKU - I like the single hinge folding step design much better than the commercial two-hinge design...

HingeStep1.jpg

You can see from this photo how much access I have to things on the rack with a step on just the lower hinge on the JKU...

HingeStep2.jpg
 

jscherb

Expedition Leader
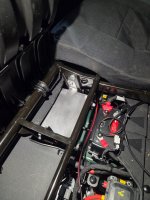
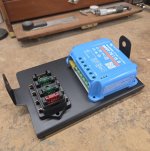
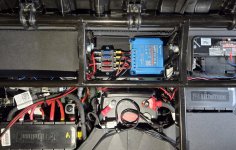
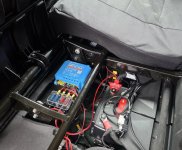
Continuing work on my solar project, I needed a place to mount a solar charge controller so I designed and built a simple bracket that mounts to factory bolts under the rear seat. I will be using a Victron MPPT 75/15 controller. The controller and a fuse panel will be mounted on the bracket - Victron recommends fuses between it and the solar panel and between it and the battery; I'll also fuse circuits requiring unswitched power from the load outputs of the Victron, such as the refrigerator.
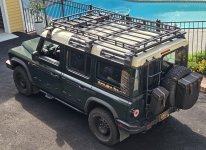
The bracket would also fit a CTEK D250SE which is what I planned to use until I found out from CTEK tech support that it would be damaged by my solar panel, which can output 24 volts in full sun - the CTEK only supports up to 23 volt panels. So I chose the Victron instead.
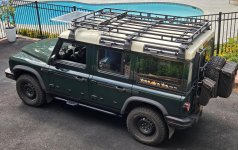
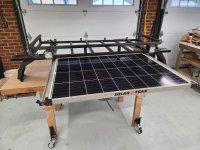
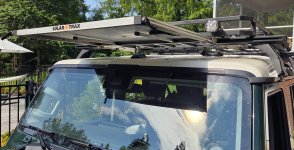
I've already built the rack mount for the solar panel, it slides out from under and extension to the front of the roof rack. Next I'll fish wires from the roof to under the seat and when that's done I'll install the Victron and the fuse panel and connect everything. I hope to get the wiring done tomorrow.

SolarBracket1.jpg

SolarBracket2.jpg

SolarBracket5.jpg

Extension2.jpg
 

jscherb

Expedition Leader
This morning I installed and wired the solar controller. I started by removing the panel above the driver's side back seat door and adding an additional electrical connection for the solar panel. Adding the connection allowed me to keep the factory power connection in that location as well.

RoofPanelRemoved.jpg

SolarRoofConnection.jpg

I ran the wires down inside the c-pillar.

WireRouting1.jpg

Under the back seat I installed a Victron MPPT 75/15 Solar Charge Controller with Bluetooth. I showed the mounting bracket I made for it in the previous post.

VictronInstalled1.jpg

VictronInstalled4.jpg

I wired the Victron to charge the main battery. The load output of the controller is connected to an outlet I installed in the load area to power my fridge/kitchen, it's the outlet just above the factory 12v outlet. It's an ARB socket with a screw-in collar to secure the plug to it can't work loose on a rough trail.b

SolarOutlet1.jpg

The solar panel mounts on a slide under my rack basket but the rack basket isn't installed at the moment so for initial testing I just set the panel on the roof.

SolarTestInitial.jpg

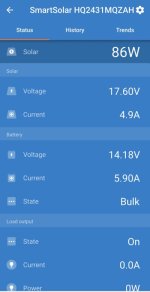
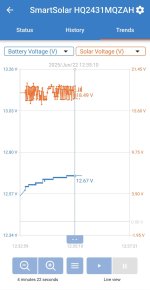
It's a very overcast day here today but the system is working - the panel is charging the battery. This screen of the Victron app shows that the panel is outputting about 18 1/2 volts and the battery has been charging for a little over 4 minutes and has added 0.10 volts. Since the battery voltage is fairly high already, the Victron is slowly charging it at this point.

VictronApp1.jpg

This screen shows the voltage and current the charge controller is drawing from the solar panel and the batter voltage and current current going into the battery.

VictronApp2.jpg

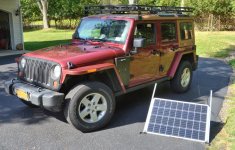
I've used this same solar panel for years with two of my Jeeps and it's got 100w/6a/24v output in full sun and easily keeps up with the power requirements of my fridge/kitchen in most sunny and cloudy situations.
 

Forum statistics

Threads
189,608
Messages
2,918,797
Members
232,571
Latest member
Psyph
Top