Project "Autonomous" F-350

pappawheely

Autonomous4X4
My favorite shot from the Best in the Desert race. Sam Berri shredding a corner. Will be shooting SNORE race this weekend.


rayra

Expedition Leader
Oh you or anyone else is welcome to it. Why I put it out there. I've got a line on a used sewing machine this weekend, and shopping for tarp material now, so shoul dhave somethign to show in a build thread later this winter.


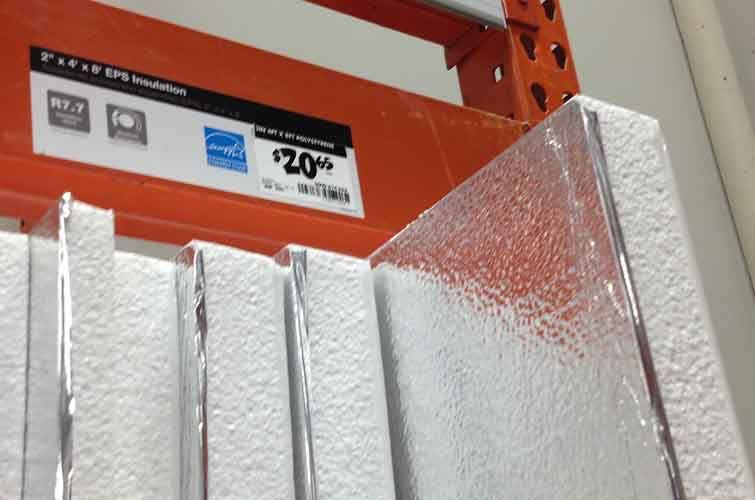
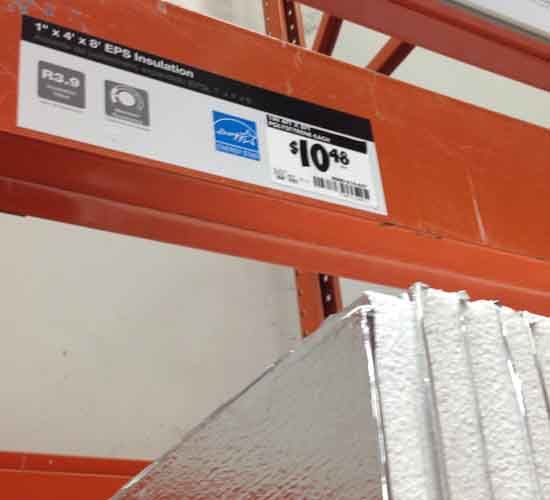
eta took some pics at Home Depot yesterday with your build in mind. The 2" foam is about $.65/sq'. The 1" is .35/sq'. I used the 1" on my garage door because it was a wedge fit in the C-channel framing of the door. No fastener install. You're supposed to put the mylar towards the sun / heat source for max effect. But the backside of the sheets are covered in garish royal blue text and logos on the white foam. And I wanted the light reflectivity of the mylar to brighten my garage. Which you might want in that box, too. Even installed backwards it made a huge difference in the radiant heat coming thru the east-facing door this summer.

foam1_zpsfde251d2.jpg
foam2_zpsabe4d5bc.jpg
 
Last edited:

underdrive

jackwagon
Rayra, do you have any experience with that foam where you used glue to hold it onto whatever you were insulating? Any suggestions on what glue will stick well but not dissolve the foam?
 

pappawheely

Autonomous4X4
Rayra, do you have any experience with that foam where you used glue to hold it onto whatever you were insulating? Any suggestions on what glue will stick well but not dissolve the foam?

I guess I have to spill the beans. Before I left on my current trip I built my bed frame inside the box. I used that same insulation from HD under the bed platform. It has a plastic film on one side and foil on the other. I used wood glue to attach it to the painted aluminum floor of the uhaul box. As soon as I get back I will let you know how well it bonds. The insulation is cheap and easy to work with. Yes, it makes a mess when you cut it with a jigsaw like rayra says, LOL.

1. The aluminum bed frame sits on spacers and wooden pads. It is also tied into the rails that are glued and screwed into the walls.


2. I used spray foam between the aluminum angle and the outside walls where it was tight.


3. The insulation panel will sit on the box floor with an air gap between it and the plywood used as the bed platform. I like these panels on a flat surface but the roof is domed. I am looking into spray foam for the ceiling.


java

Expedition Leader
The diy spray foam kits work well. We have used the dow one IIRC, its messy, and expensive, but seals well. its was about $750 with the gun for a 600 board ft kit.
 

pappawheely

Autonomous4X4
The diy spray foam kits work well. We have used the dow one IIRC, its messy, and expensive, but seals well. its was about $750 with the gun for a 600 board ft kit.

I think that's expensive for DIY. It might serve me better to hire a pro to do it. I could even bring the job to them. Just doing the limited amount around my bed frame made a big mess.
 

406expo

Adventurer
I was going to do the whole roof. If I pay someone, they can do the entire box. If I spray it, I will need a hazmat suit or it will get in my beard.

Sir you absolutely cannot disrespect your beard by getting all sorts of nonsense caught up in it. Seriously though very cool truck build.
 

rayra

Expedition Leader
Rayra, do you have any experience with that foam where you used glue to hold it onto whatever you were insulating? Any suggestions on what glue will stick well but not dissolve the foam?

100% silicone caulking works great and if you ever wish to remove the foam it comes undone pretty readily.
 

rayra

Expedition Leader
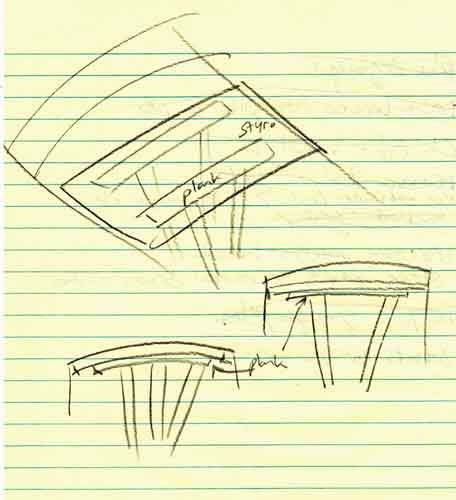
use a couple layers of the 1" foam on the ceiling, it will readily conform to the curve. Get a couple fencing planks and 4 cheap 2x4s and use them to shim / press the foam sheet against the roof while your adhesive sets.

sketch to follow shortly


curvedceilingplacement_zps133807b4.jpg


There's enough spring in a 1" foam sheet and 1x6 cedar fence plank that you can likely just shove up in just the middle. Cut the 2x4 just short enough to push upward towards the ceiling and set the end on a jack. Then jack it up. Or pre-measure the center height floor to ceiling and subtract 1-1/2" and jam the stud in place against the floor. The fence plank i smore like 5/8" so it'll be a nice snug fit while it's braced.

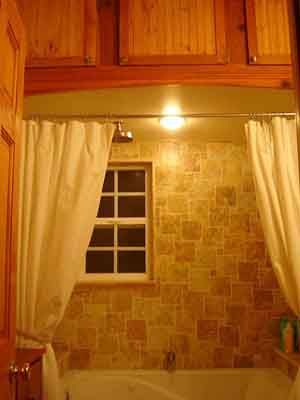
I did a curved ceiling on a shower enclosure in a house bathroom remodel one time in a similar fashion using 1/4" drywall, two layers.

bathroom13_zpsce52153a.jpg
 
Last edited:

Seabass

Idiot
I was scrolling through and saw the pic of the shower. At first I was all like "WOW, Pappa has put the coolest shower in his camper!!! He must really like bathing!!" Then I read the caption and I was disappointed.
 

Forum statistics

Threads
188,160
Messages
2,902,865
Members
229,582
Latest member
JSKepler
Top