gearbox
Adventurer
What a great community :clapsmileWillman said:i can stop by Grainger and mail ya some for a Christmas gift!
")
/grumbles about "other" forums
What a great community :clapsmileWillman said:i can stop by Grainger and mail ya some for a Christmas gift!
Davids90toy said:i have a 1990 toyota pickup and i went with AJ's bumper from www.bentup.com.... they do awsome work and pretty fast... not to expensive... im going back soon for my sliders and soon a roll cage if he dose those... but other then that im extreamly happy with the work hes done...
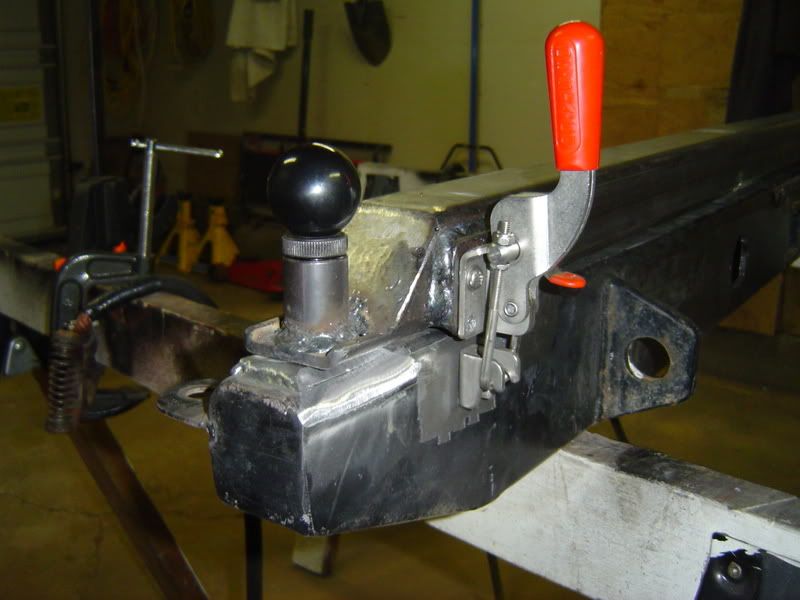
Willman said:This is a 5/16 threaded one.....couldn't find the 1/4" one that i used on their site. This one is the next size up. Let me know if you have any problems.... i can stop by Grainger and mail ya some for a Christmas gift!
http://www.grainger.com/Grainger/items/3CC17
p1michaud said:What a great place!
Sen you a PM.
Cheers,
P
Willman said:It's in the mail P!!!!
Due to the Christmas traffic.....might be a little slow.....
3trdmarine said:Great write-up so far! Any progress pics? On one of the other posts sch 40 was mentioned. It is plenty strong! I have a solid axle tacoma with the front bumper and rock sliders all made of sch40. They've held up very well and supported the entire weight of the truck many times while out playing on the rocks. Great build and can't wait to see the final product:wings:


Willman said:Then i added a 1/2" solid round stop so the tire on the gate does not takeout my tail light...