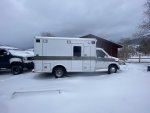
YAAC - Yet Another Ambulance Conversion

dtruzinski

4 Season Traveller
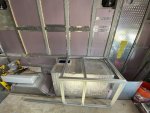
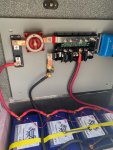
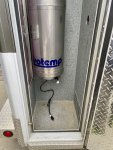
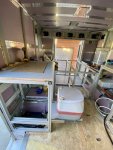
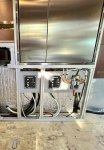
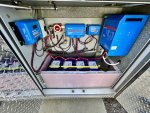
Well I have officially started installing the parts. I am using the lower left side outer compartment for my batteries and major electrical components (inverter, mppt solar charge controller, DC2DC controller, and my distribution bus). Note the 2" insulation for everything below the frame. Above the frame is in the interior and that is all insulated as well
Battery Compartment.jpeg

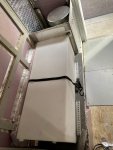
Next up was the left side buildout on the interior which starts with a frame over the battery box you see above (I am leaving that access hole to move airflow to the batteries (especially in the winter).
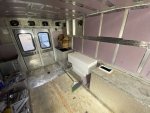
Getting Ready to Build Left Side.jpeg
Refrigerator Base.jpeg

Notice in the pic below an air gap at the bottom of the refrigerator. There is a gap all around to keep it from overheating.
Readt for Refrigerator.jpeg

Ah the Isotherm Cruise 200 fits nicely in its new home
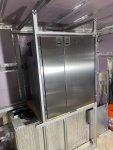
test fit cruise 200.jpeg

A nice piece of stainless trim attaches to the bottom of the refrigerator hiding the plywood base. Next up will be the framing of the kitchen counter and then the bed.
 

dtruzinski

4 Season Traveller
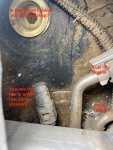
Took a detour and decided to cut a hole in the floor to reach the fuel tank so I can easily connect my Espar heater fuel source. I have the tank that sits aft of the rear axle ( I think it is 55 gallons). I assume that the forward connector and associated 2 lines are connected to the in-tank fuel pump (fuel in and return). There is a third fitting on this connector which could either be under fuel pump pressure or just a fuel pickup (see first pic below) Next to this likely pressurized line, there is another plastic access cap with no lines in it. Could this be the proper place to add a pickup tube.

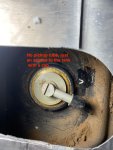
Also there is a separate connector on the back of the tank that has a rubber cap over it (see second pic). I think this is some type of pressure relief system.

Has anyone connected a diesel appliance to one of these tanks? If so where is the best place to connect?
IMG_5591.jpg
IMG_5590.jpg
 

cobro92

Active member
Great build! I always feel like the hardest part of any Ambo build is the removal of the extra wiring and cabinetry. Once you get it down to the bare box it’s pretty easy because it’s just straight up and down walls.


Sent from my iPhone using Tapatalk
 

iggi

Ian
Take a look at my build. I cut a hole in the floor and connected my diesel heater to the aux fuel port. (it's not under pressure). Good to know that the pickup for that line only goes down to about quarter tank.

Took a detour and decided to cut a hole in the floor to reach the fuel tank so I can easily connect my Espar heater fuel source. I have the tank that sits aft of the rear axle ( I think it is 55 gallons). I assume that the forward connector and associated 2 lines are connected to the in-tank fuel pump (fuel in and return). There is a third fitting on this connector which could either be under fuel pump pressure or just a fuel pickup (see first pic below) Next to this likely pressurized line, there is another plastic access cap with no lines in it. Could this be the
 

dtruzinski

4 Season Traveller
Take a look at my build. I cut a hole in the floor and connected my diesel heater to the aux fuel port. (it's not under pressure). Good to know that the pickup for that line only goes down to about quarter tank.
@iggi Thanks for the help on this. I will connect to the aux fuel port, now that I know that it is not under fuel pump pressure. I appreciate the info.
 
Last edited:

UjointoffroadCO

Approved Vendor
Looking good, Dave! Just toss in my 2 cents on fuel pick up for the Esbar. Not sure if this applies to diesel or not, but on the gas esbar's I've done on transit's, if you use the factory 6mm pick up in the tank into the 2mm line of the ebsar, it creates major suction problems and easily loosing it's prime. I have just been cutting a hole in the sending units to mount the pick up that comes with the heater. Everything has to be just right on the install of these heaters or they will always have issues right when you need it most.
 

dtruzinski

4 Season Traveller
@UjointoffroadCO Justin thanks for the feedback. I know these Espars are finicky. I have had 2 hydronic Espar heaters in past rigs. I will try it with the factory tube and if I have issues, I will get a new pickup (one did not come with my kit). Fortunately, the distance from the fuel tank to the heater is only about 4 feet. In past rigs I was over 10' between the fuel source and heater.
 

dtruzinski

4 Season Traveller
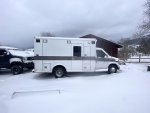
Progress has been slow due to the weather. My garage is not tall enough for my ambo, so I have to do all of this work while it sits snow-covered in near-zero weather.
Outdoor workshop.jpg

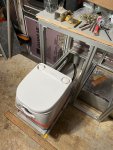
I have built the counter to hold the induction cooktop and hide a cassette toilet on 500 lb drawer slides. These slides lock in the open position which should minimize embarrassing situations where the toilet retracts without you.
Sliding Toilet.jpegCooktop Counter.jpeg

And opposing that counter is the sink (adjacent to the refrigerator). Note that everything but the kitchen sink is here!
Sink Counter.jpg

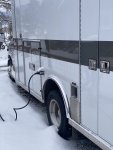
Lastly, I installed my batteries, the battery heaters connections, and the inverter!
30 Amp Connector.jpgIMG_5624.jpeg
 

dtruzinski

4 Season Traveller
Hmmm..been a while since updating this thread so I will break this into multiple posts and catch you all up...current state preview: just dropped off with Justin at U-Joint CO!

Now back in time...Winter in MT is brutal...building an expo vehicle in said winter is even more brutal.

Feb Temp.jpeg

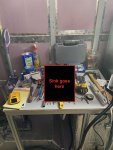
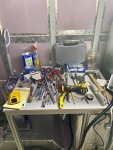
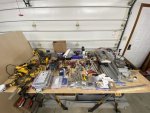
A note on tools. Buy some, then buy some more, then even more...specialty tools are the key to success (well that's what I convinced myself and my wife!)
Tools.jpegMore tools.jpeg

Lesson learned: dust control and 80/20 alum shaving control are critical. Need to get a bigger shop vac!
 

Attachments

  • Building in Winter.jpeg
    Building in Winter.jpeg
    35.3 KB · Views: 10

dtruzinski

4 Season Traveller
Design principles:
  • use the best components available
  • insulate, insulate, insulate
  • everything gets bolted down in multiple places
  • reuse the 3/4 laminated plywood for furring strips
  • while there is copious amount of good copper wire from the demo, buy new anchor wire and have a plan for routing
  • place as much solar on the roof as possible (leave a little space for a future fan)
  • test the config before installing ceiling and walls (this is the current state...more on this later)
  • have a plan for shower and ultimately a mini-split a/c but those will come later
  • do it right the first time and if not, then do it over (there was a lot of the latter)
  • frame it entirely with 80/20 extruded aluminum
  • water fill to be behind a locked door
  • fresh water and gray water drains to be operational at sub-zero temps; therefore, the valves must be in an insulated compartment
Once the batteries and inverter were installed, it was time to get heat. I installed the Espar M4D2L commercial heater.


The hot water heater was the Webasto 5.2 gallon and mounted vertically.
Hot Water base install.jpeg

Test fitting the 20g fresh water tank. Notice r-20 to exterior wall. The round item at the top is the water heater. Both of these are under the bed platform
IMG_5917.jpeg
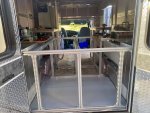
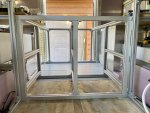
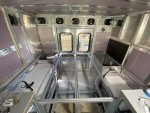
Next, I connected the fridge/sink side to the induction cooktop side with the bed and garage framingBed platform and garage taking shape.jpeg
framing detail from inside.jpeg

Start to take shape. Toilet slide locks in and out...would not want that sliding back in at the wrong time
Taking shape.jpegFraming 2 with Water tanks (1).jpeg
 

dtruzinski

4 Season Traveller
The weather was warming up so it was 'solar time'

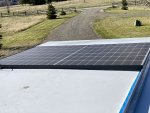
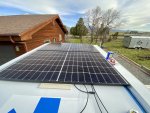
1095w Solar Panels and 1 MPPT Controllers
365w Rec Solar Panel
1 x Victron Energy SmartSolar MPPT 100/50 Solar Charge Controller 12/24VDC at 50 Amps

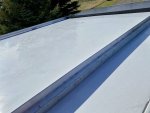
The rails were build from 1x3 alum square stock and I added aluminum angle stock to create a mounting surface. These rails were vhb taped onto the roof.

Solar rails.jpeg

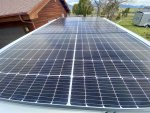
One panel view
solar 1 panel.jpeg

Two panels installed
solar 2 panels.jpeg

Alas all three are mounted.
solar 3 panels.jpeg
 

dtruzinski

4 Season Traveller
@CaptainBuilt The electronics are broken into three categories: DC, Inverted A/C, and Shore Power A/C.

On the DC side the big draw will be the Isotherm Cruise 2000 refrigerator/freezer. I also have a water pump, exterior lights, interior lights, and USB charging ports. I am going to wire for a ceiling vent/fan, but not install it until I am sure that it is needed.

The inverted circuit has 3 breakers. One for the induction cooktop and then two for duplex A/C outlet loads for charging laptops and camera batteries.

I have a separate set of breakers for shore power. There is a duplex receptacle in the compartment with the water heater and one on the opposite side of the bed. Both of those are accessible from the rear exterior doors and both are on dedicated circuits. I could install a mini-split A/C in the driver's side rear exterior compartment

A/C breakers and DC fuse panels

Breaker and fuse panels.jpeg

The electrical brains and Victron components. Thanks to Battleborn for the Victron supplies and of course the lithium batteries

Mission control.jpeg
 

dtruzinski

4 Season Traveller
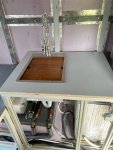
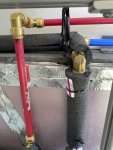
On the fresh and wastewater systems, the goal was to super insulate the tanks and all of the lines. Further, nothing is outside and exposed to the cold except the last few inches of drain lines. The waste lines will be wrapped in the final process. Pic of sink, faucet and wrapped hot/cold lines

.Sink and faucet.jpeg

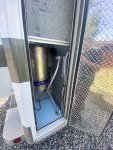
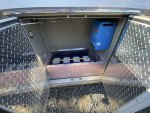
Fresh water inlet is behind a locked exterior door. You will see that I put a valve on the vent line. This allows me to pressurize the water system to blow it out. I put a water level sight in that compartment which makes it easy to monitor the water level without those less than accurate gauges.

Fresh water sight - filling - vent.jpeg
 

Attachments

  • wrapping all interior water lines.jpeg
    wrapping all interior water lines.jpeg
    61.5 KB · Views: 25

Forum statistics

Threads
188,395
Messages
2,904,132
Members
230,274
Latest member
mbauerus1
Top