EarthRoamer XV-JP "Northwest Edition"

mhiscox

Expedition Leader
Colin Chapman's creed - add lightness.
Unfortunately, the lightness ship sailed long ago and the XV-JP wasn't on it. It weighed better than 7K when I got it. It's worth noting, however, that any JK with those big bumpers and carriers, big tires, winch, full skid plates, and all the other full-on off-roader stuff is going to be in the 5K range anyway.

I wonder what the before and after weight of the vehicle will be. Just curious if all the wood and fiberglass resin will make for a big handling / performance difference.
The "demolition" lightened it by 500 pounds. The pneumatic struts put about 100 back in, so Paul started about 400 pounds lighter than the original. As he pointed out, the teak, copper and other "exotic" materials don't weigh much; it's the construction materials (plywood, drawer slides, etc.) that add the weight.

In an apples-to-apples comparison, I'm pretty sure the new version would be a little lighter. But I have equipment (propane tanks, big inverter, etc.) that wasn't on the original, so it's probably real close. In any event, though, a change in the modest acceleration and fuel economy of the unit would likely be undetectable. Indeed, the biggest factor in the truck's performance has been and will remain the wind vector.

One other thing . . . I do pick up weight by having and filling the JK's auxiliary fuel tank James Lombardo installed for me. But since it doubles my range, it's about the best couple-hundred-pound addition possible,
 

PaulJensen

Custom Builder
Thirty-Nine...

Thirty-Nine...

I took fewer pictures the past couple of days...The focus has been about fine tuning the details...At times progress crawls...Finishing things can be like that, but forward progress does continue...

P1110973.JPG

(above) The lighting for the rear cabin will be divided...Concealed LED rope lighting under the roll-bar covers and exposed LED rope lights across the roof at the ends...To help the reflectivity under the roll-bar, I put aluminum tape on the underside of the shelf and on the wall facing portion of the roll bar...The aluminum tape I have, is used primarily for taping seams in HVAC installations...The better form of duct tape...All aluminum, no fabric...

P1110975.JPG

(above) After quite a bit of testing for the prime position of the rope lights, on this side I went with it being set as close to the wall as possible...On the curb side the lights were positioned near the lower edge of the vertical panel due to the window flange that would have blocked a lot of the light...

P1110977.JPG

(above) Both of the roll-bar lights will be on a single switch, so to connect them I soldered them together like this...After the solder connection I did two things...First, the bare wires were covered with hot glue, then covered with shrink wrap tubing...The connector wire now fits, concealed, atop of the roll bar at the rear...

P1120020.JPG

(above) The edge of the curb-side bench will need a rim to keep the cushion from moving around...So I ripped some zebrawood to a bit over 2" then cut a dado in it and cut box joints on the portable tablesaw set up just to do box joints...I then cut that narrow slot with a handsaw to accept the narrow remainder of the other part of the joint...I could have just removed the sliver, but once it gets finished, it'll look cool if you appreciate the details...

P1120021.JPG

(above) With the box joint saw still out, I cut a simple ones for the sink edge...That's teak...

P1120022.JPG

(above) The rear door is a close fit to the cabinet, so I hand planed away enough to get minimal clearance...The scrap piece of zebrawood edging there shows the special cut to fit there...I only left about an 1/8" on the thin side...Backed-up solid, so I'm not concerned with it breaking off...

P1120025.JPG

(above) The edging for the bench was then put together with polyurethane constuction adhesive and pin-nailed to the plywood edge...After the glue sets up tomorrow, I'll put screws from the underside of the ply into the zebrawood....

The inverter panel was trimmed a bit for even clearance, then the brass latches were fine tuned to fit, then installed...The wood edging on the sides of the panel were installed, then everything got a coat of Tung oil...

P1120023.JPG

(above) The sink and edge is fiberglass and even though a purely adhesive bonded edge would probably be alright, here I think it's better tho have screws anchored into the fiberglass...The brass screws were installed into pre-drilled holes into the fiberglass...The teak edging received matching holes to capture the screws...

P1120024.JPG

(above) Next a strong bead of Poly-U adhesive was put on the wood and into the holes, then it was tightly fitted over the screws and clamped to the edge...

P1120026.JPG

(above) After the adhesive had set, the top edges were hand planed...Still needs more sanding, but you get a sense of what it'll look like...

On top of the bench is the thin plywood pattern that will be handed over to the bench cushion maker tomorrow...

Up front, by the fan, is a cover for the pneumatic rams that lift the roof...I can see now how the rear cabin will really have a fit and finished completeness that I never really planned for...It's just happening...

P1120027.JPG

(above) The pull-out desk tops got their copper tops...

With all the copper and rich toned woods, the quality to the light has a feel similar to sitting around a campfire..You feel like slowing down and really relaxing back here...Unplanned goal achieved...

P1120028.JPG

(above) Up here, the holes for the gauges were cut out and the components were loosely relocated...

The top of the bed pull-out cover had another piece of trim installed to create an even line of wood from roll-bar cover to roll-bar cover...The even line works to create a nice visual consistency around the rear cabin...

Mike had the pad for the bed sent to me...It's that red thing over the front-panel wood...When deployed it fits perfect on the bed and is a deliciously thick 3.5"...

Getting closer...More tomorrow...
 

westyss

Explorer
Paul, that is really looking good, texture and colours are matching great and I can see it coming together, beautiful!
 

AFSOC

Explorer
Mike/Paul, I am just awe struck every time I open this thread. Thanks so much for the regular and relevant updates. Your work certainly inspires.
 

Ford Prefect

Expedition Leader
May I ask...

Will there be a step of some form to help you get into the bed?

Also why did you use rope lights? Why not go with EL wire? I know little about the latter, but from what I know it seems like it might have been a good choice.

Thanks in advance!
 

PaulJensen

Custom Builder
Forty...

Forty...

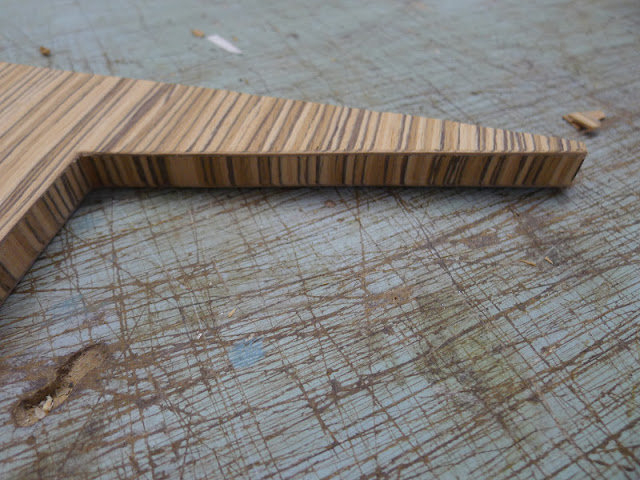
I can almost see the finish line...

P1120028.JPG

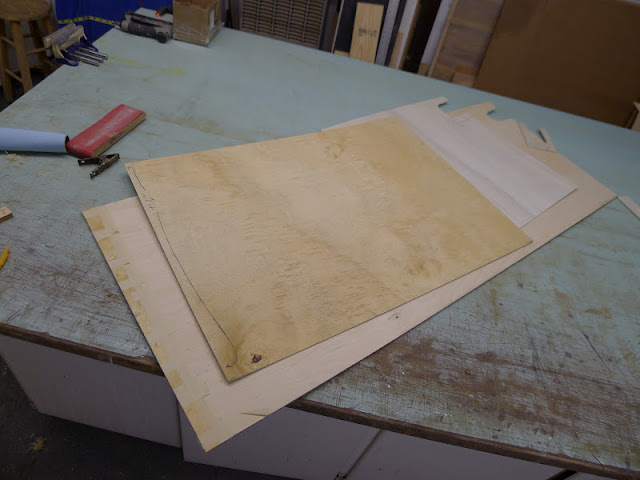
(above) I met with the guy who will upholster the bench seat and back rests yesterday...We kicked ideas back and forth and agreed on the approach for this project...The bench cushion will be made with a dense foam set on a 1/4" plywood base...The overall length of the cushion is just over 5' and the plywood I want to use is 5'x5'...The plies are flatter and the quality is better than what I can get as a 4'x8'...So to get the extra length I used a rail guided router to make a 1/8" x 3/4" half-lap joint...To that I added enough 1/8" plywood to make the panel 61" long...

You can see the pattern on top of the cushion base...The added plywood is taped on the left edge...

P1120029.JPG

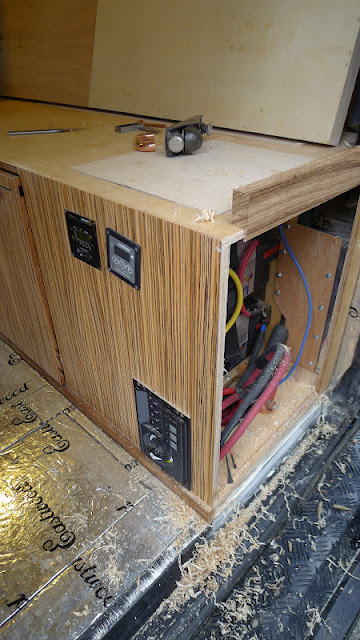
(above) Back to the Jeep...I'm going to work my way forward and finish the details, and there are a lot of them...The driver side gets worked first...

P1120029b.JPG

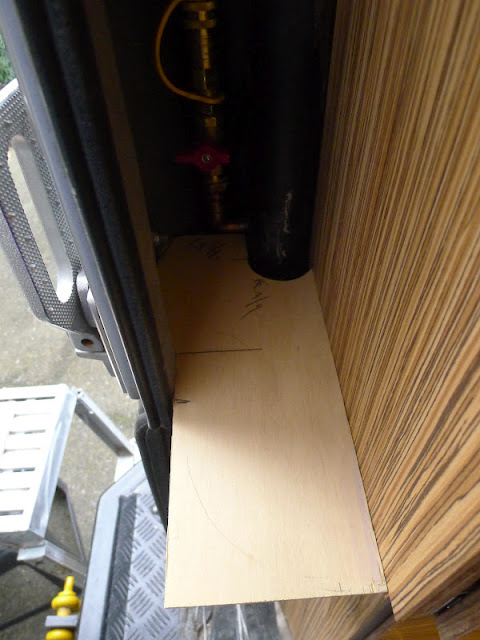
(above) Back in the far rear corner is the roll bar and the connection to the gas manifold...The original plan of having a heater on top of the countertop is history...So instead of having a stainless steel flex line come out of the copper, there will be a valve and quick connect fitting...This affords the option of connecting a heater or another gas appliance...A BBQ or a multiple burner stove, an oven, or ???...The connection is there if you need it...

The problem (for me) was the flex line was wrenched on before the cabinet was in and that flex line need to be removed...Removing it was exceedingly difficult...No room to turn a wrench...It took me close to an hour using several combinations of gripping tools to get it loose and the new stuff put on...I am a man of great patience and this was one of those tests...Confirmed...

P1120030a.JPG

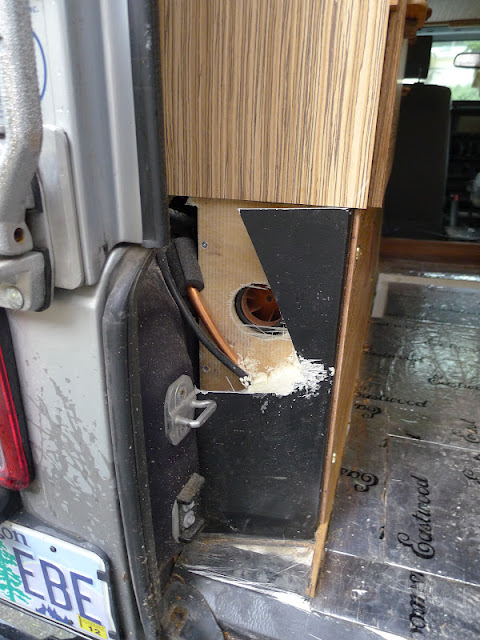
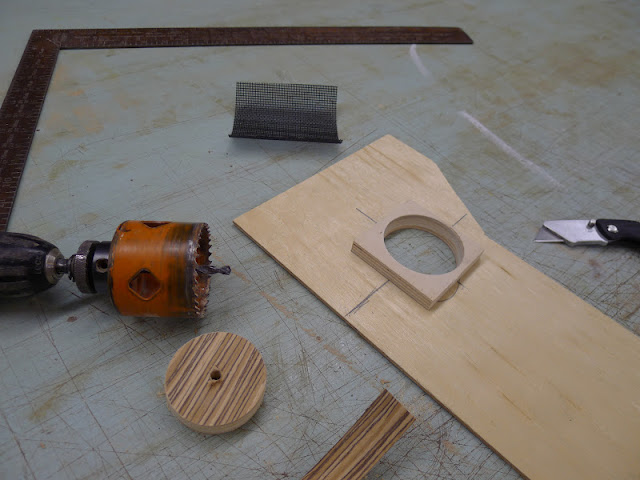
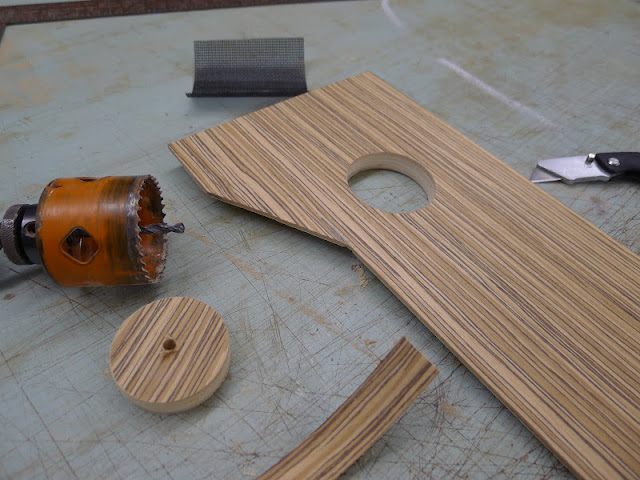
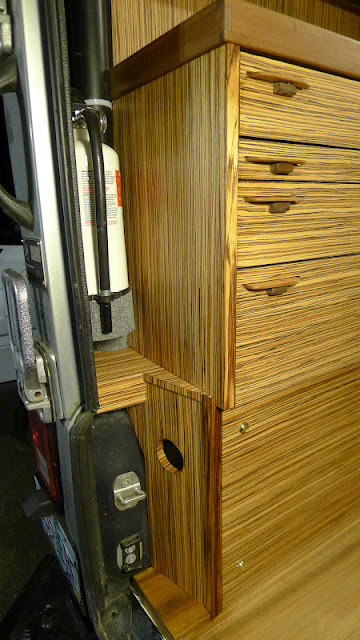
(above) The lower end panel was next...The intake for the gasoline fueled space heater is back there and there was no vent for that...So i put one in the panel...Simple hole and backing block...

P1120030b.JPG

(above) The finish side looks like this...

P1120031.JPG

(above) Screen on the inside...

P1120039.JPG

(above) Glued with polyurethane adhesive and clamped...

P1120044.JPG

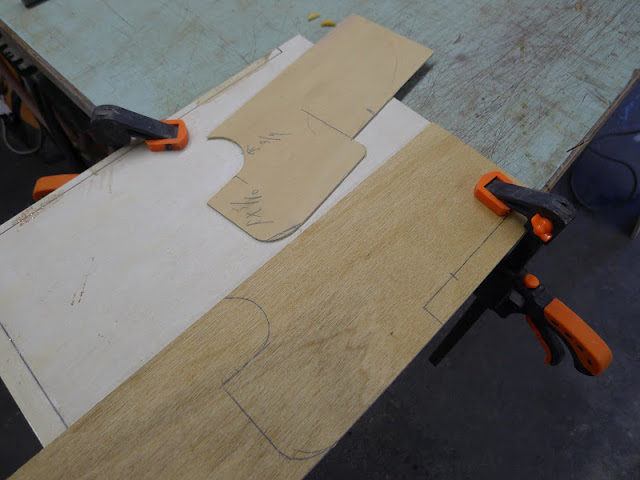
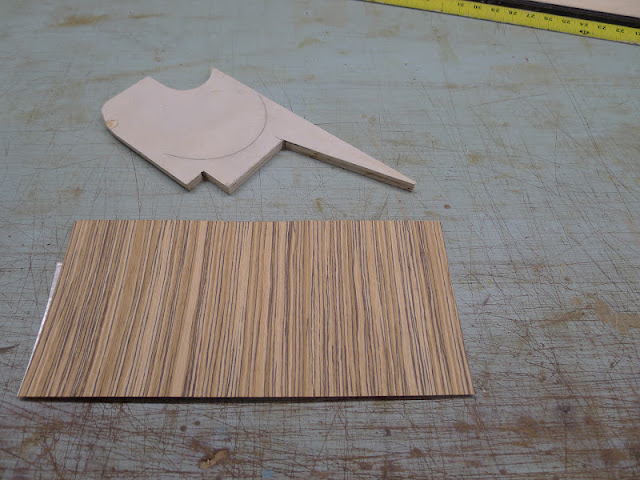
(above) To cover that space, I first made a pattern...

P1120045.JPG

(above) Adjust it, then traced it to to a scrap of 1/2" ply and cut it out...

P1120046.JPG

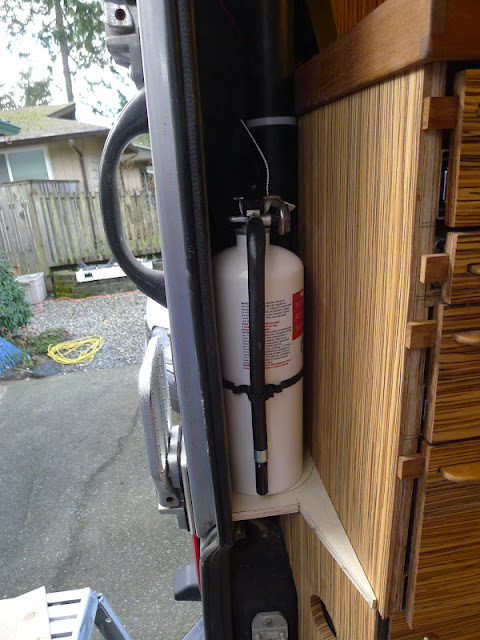
(above) Test fit...You also see the fire extinguisher that will go in there...

P1120049.JPG

(above) Peel and stick veneer...

P1120050.JPG

(above) Ready to get installed...First I glued in more support for the shelf to the side of the cabinet...

P1120050b.JPG

(above) The fire extinguisher will hang from a hook that is bolted to one of the bolt ends that mount the exterior grab bar...Perfect...To keep the extinguisher from rattling around, I PSA taped a piece of carpet to the lower edge of the extinguisher....The roll bar also received a matching piece of carpet...No one likes rattles and this one won't...Custom is about thinking through the details...

P1120051.JPG

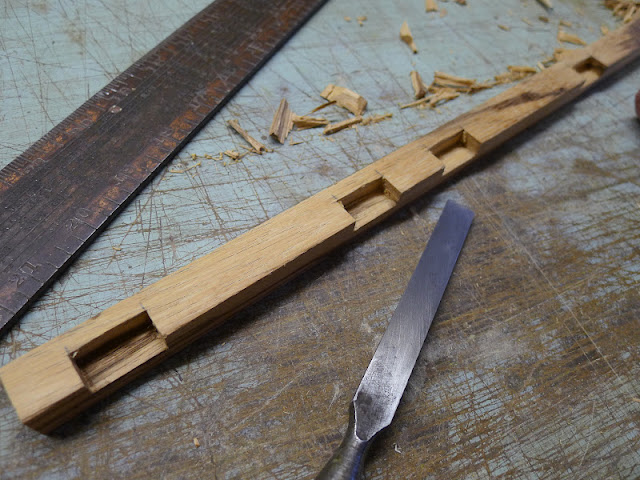
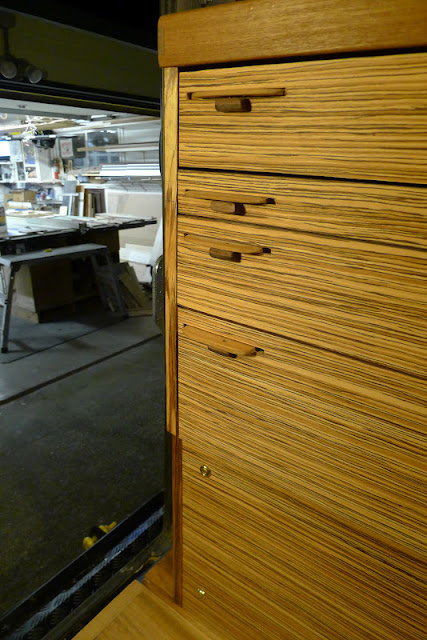
(above) A few other details were finished back there, then it was time to finish the drawer stops / cabinet vertical edges...Hammer and chisel time...These were attached with polyurethane adhesive and pin-nails...

P1120052.JPG

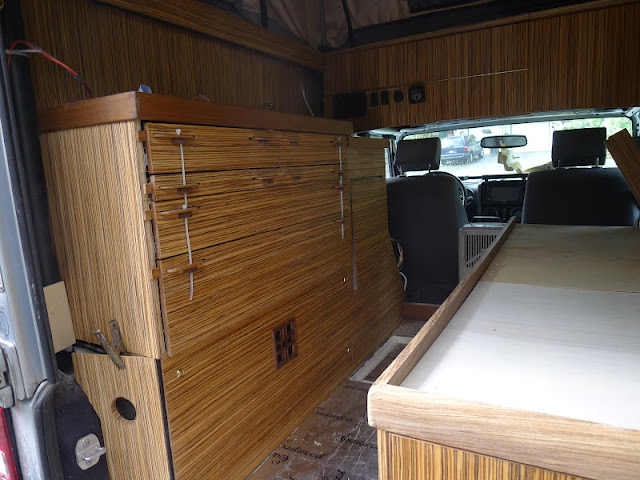
(above) And when it was done, it looked like this...You can also see the teak filler piece at the floor...Also the shelf edge got an apron under it and a piece of veneer covered that...You see the fire extinguisher placement as well...I'm pleased how this all turned out given the existing conditions I had to work with...

P1120053.JPG

(above) View from the bench seat...Clean...

P1120056.JPG

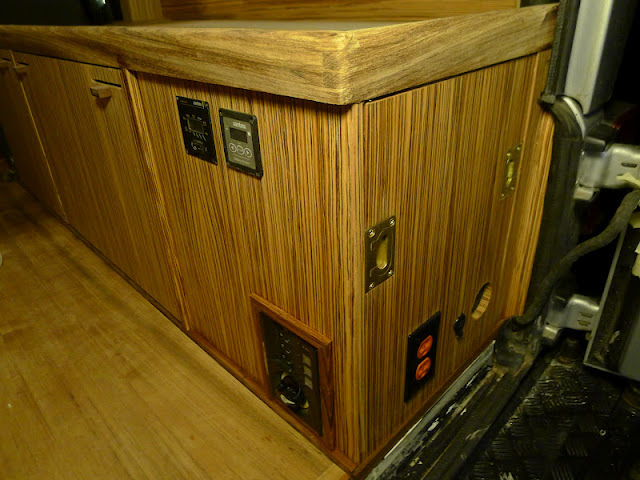
(above) Over on the curb side, the drawers got their edge treatment...Also a piece of teak was put on the bottom back edge of the inverter panel and the battery switch/beaker panel were trimmed in zebrawood... Looking good...

P1120057.JPG

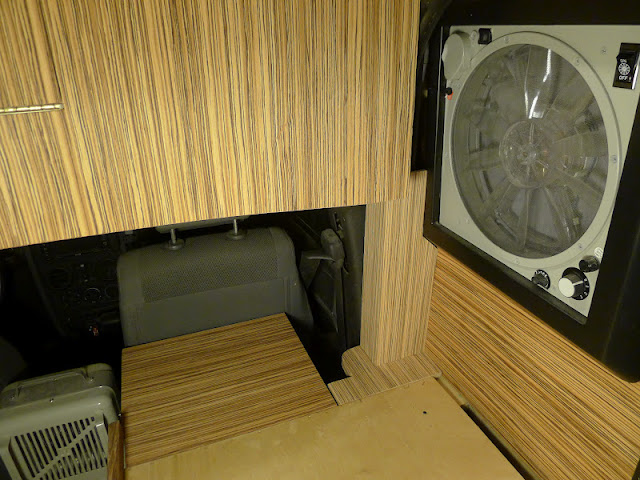
(above) Up front the cover for the pneumatic ram was veneered and installed...

P1120058.JPG

(above) It's all about functionality and that means paying attention to the details...The cushion will go to the vertical edge of the cover panel...

P1120058b.JPG

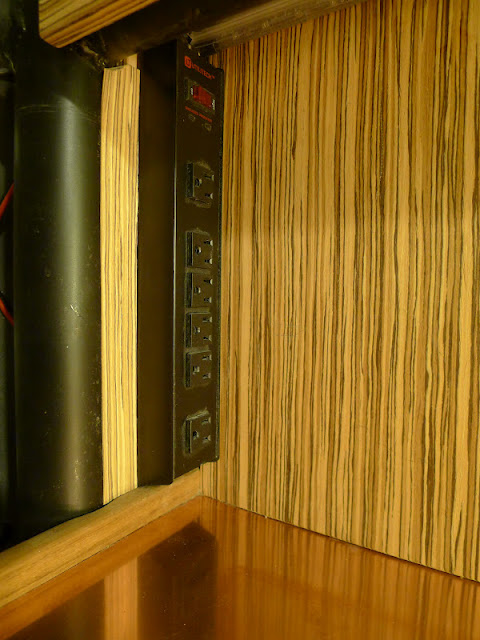
(above) Over on the driver side countertop wall, a multiple outlet power strip was installed on a piece of 1/2" plywood that was poly-u glued and pin-nailed to the teak edge...Over the plywood, extending to the roll bar a piece of zebrawood veneer...I like how this worked out...

P1120059.JPG

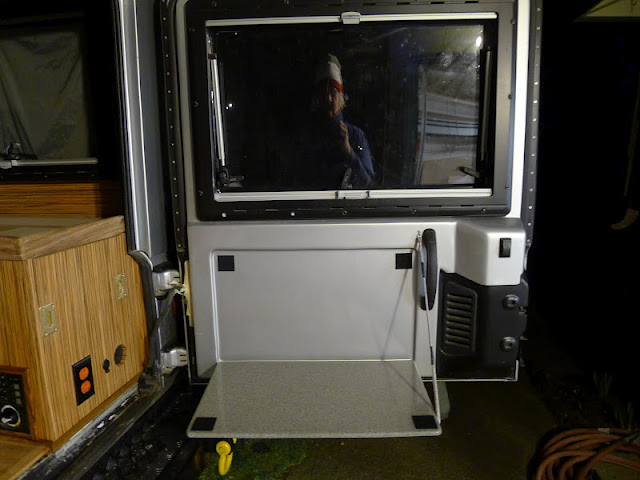
(above) The black panel is a drop down table...There was a piece of duct tape keeping it closed...Classic...That's gone now...

P1120060.JPG

(above) Replacing tape as a fastener are a couple pieces of industrial strength Velcro ...More better...

The Jeep really is turning out awesome...In the forefront of my mind while working on this vehicle is that it can (and hopefully will) be driven from Alaska to the tip of Chile, or from India to Norway...And if you are on such an expedition, the time you spend in the vehicle should be a quality experience, not a grueling endurance challenge...Those considerations guided me throughout this process...Quality in design and build...Something that can't be rushed if you want it done to meet the anticipated conditions...I appreciate very much Mike giving me the creative liberties I've taken...

Not done yet...More later...
 

AFSOC

Explorer
As badly as I want to see (in exhausting detail) photographs of the finished product, I am very sad that you're nearing the end of this build. Paul your work and updates have been wonderful. Mike thanks for commissioning and sharing this piece of art.
 

Forum statistics

Threads
188,625
Messages
2,908,037
Members
230,800
Latest member
Mcoleman
Top