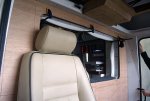
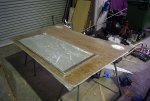
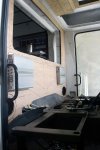
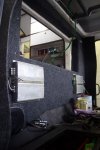
Still working on the cab now, fitting the panel on the rear of the cab. There are loads of wires, and the air con lines as well. The board is sealed with marine varnish after a lot of wiring, the speakers and the amplifiers are all fitted.
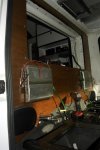
Then I took it all apart again and covered it with marine carpet. We have decided to go with a grey/black marine carpet, the same as what we have had in the back of the Defender for the past 3 years, it is very hard wearing and works well with the grey floor, and the beige seats have a similar grey piping. The green wires going through the crawl-through are only to test out the sound system using the rear radio, once I have finished the console, the amplifiers will be powered from the front radio.
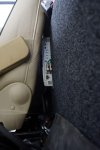
The amplifiers fit behind the seat, and can't be seen from outside. There is also a fair air gap, which is good as they get pretty warm when cranked up high. I was "testing" them the other day, using just the passenger side amp to power the bottom 6x9s and the 4" ones in the console. It got hot enough so that I could just hold my hand on it, but it was very warm. The sound is really good and very loud, just what we need to drown out the engine noise.
With the back board complete, I turned my attention to the overhead console. I started this about almost three years ago, and after a whole series of cardboard mock-ups finally found something I like. There are two 7" touchscreen monitors, one on each side. I also wanted to have the sun visors flush inside the console.
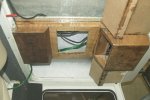
I made it out of 1.8mm ply, using super clue to temporary hold each piece of ply in place, using small temporary braces and gaffer tape. Once It had each piece in place, I would reinforce the inside with woven fibreglass matting.
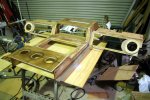
Each corner is reinforced with epoxy resin mixed with microspheres, the reinforcing is for when I round off the corners. The internal corners are filled in a glass reinforced filler, and then hours of sanding and shaping. This is what it looks like with all the ducting for the air conditioners in place. I was going to run a third duct, but decided not to, and have a light in place of the third outlet.
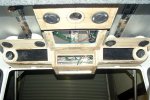
Hours of sanding and shaping later, and it was time for the final fit-up.
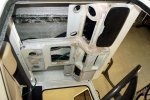
Then it got a layer of high build primer/filler.
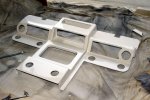
This is the last layer and after a bit more sanding and hopefully no more filling, it will be ready to go off to get covered in vinyl. We have decided to go with a a beige leather look vinyl. It may require some stitched joints so we are going to leave it to the professionals.
The inserts around the radios, monitors and the controls for the a/c will be laser cut from 3mm aluminium, then I will glue a thin Jarrah veneer. similar to the what was done in the rear of the camper.
I will make all the inserts and send them off with the console to the upholstery place, so they can get everything smooth.
The other thing being worked on is the door panels, after many iterations we have decided to go pretty simple, with just a plain door card and two net storage pouches. I also fitted OEM door pockets, they hold 1.5lt bottles and various other things. Being built by MB for the new Unimogs and Zetros trucks, they are pretty tough, they are held on by seven 6mm nutserts, so they are not meant to come off.
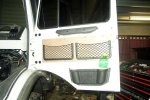
I am also sorting out the interior lighting. We have found in our travels that having good interior lights in the cab is very important. There are various requirements, from bright shadow free lights when your are looking for something inside the cab, to red night lights for when I am driving and Trish wants to look at maps or things. The plan is to have three different modes, the normal interior lights that come on with the door switches, including lights for the steps and on the doors. Then a large very bright main light to really light up the interior. Then there is two deep red night lights, one each side for use when driving or when we don't want to attract too much attention. There will also be a flexible map light for on the passenger side.
Over the next week or so, I'll continue with wiring, to get all the various switches and things in place. The monitors are connected to four cameras, one on each side, on on the rear and one on top of the cab. The top and side cameras are mainly for looking for branches and things, but the Polaris four way splitter will automatically activate the side camera when the indicators are used, or the rear camera when in reverse. The monitors will also be used for the in-car computer, and have things like portal and gearbox temperature monitors. The computer will also be connected into the radio and be connected in to the sound system. All these things will take time, and will happen once the truck is on the road.

