ramblinChet
Well-known member
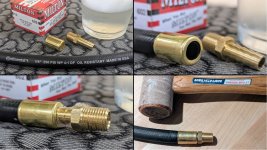
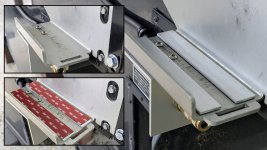
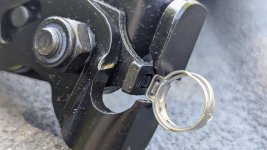
My primary goal in designing my on-board air system was to create a fast and reliable solution for inflating tires to appropriate pressures when transitioning from off-road to on-road. The difference between a 10-15 minute inflation time and the more common 20-30 minutes is significant, especially when trails demand multiple transitions in a single day. To optimize this process, I mounted Milton HIGHFLOWPRO V-style brass couplers on both sides of my vehicle, between the cab and camper, allowing me to connect to the driver’s side, inflate both tires, then repeat on the passenger side. I sourced 3.5x3.5x3.5-inch aluminum brackets and secured them to the base of my aluminum RotopaX carriers.

To centralize the air system accessories, I mounted a Milton Safety Blow Gun with a 10-inch extension on the rear wall of my camper, adjacent to the air system. I used three spring clip holders for mounting, and it remains to be seen whether these clips will securely retain the blow gun on rough trails.

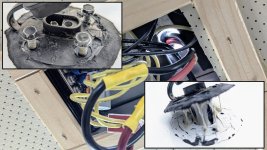
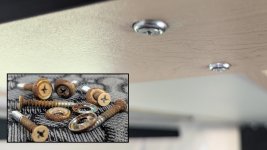
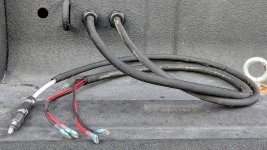
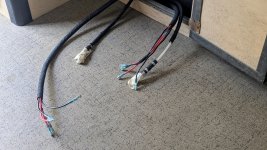
The next phase involved transferring pressurized air from inside the camper to the external brass couplers. I applied masking tape to mark measurements, transferring precise data to ensure accuracy. My objective was to drill a 24mm hole through the aluminum base of the air compressor mount and a horizontal camper surface while avoiding a 3/4-inch-thick blind vertical wall. The hole needed to be close to the wall without contacting it. Through meticulous, repeated measurements, I achieved satisfactory results. A high-temperature silicone rubber grommet was installed in the hole to protect the air line, as shown in the accompanying image.

While inspecting the engine compartment, I noted significant dirt accumulation, prompting a thorough cleaning before my next trip. I installed a Victron Energy MEGA Fuse Holder to power a Victron Energy Orion XS 50-amp DC-DC charger, which charges my house batteries while driving. Based on my calculations, Ancor 4 AWG wire was suitable for this application. The RAM's High Amperage Power Point (HAPP), an M8 stud on the battery rated for 300 amps, facilitates this connection, located on the driver’s side within the power bus.

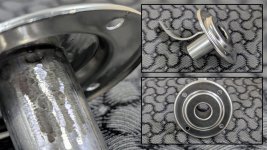
Recently, I noticed a soft grinding noise from the front of my truck at 15-25 mph, louder during left turns and quieter during right turns. Despite my hearing challenges from past exposure to helicopters and machine guns, and my habit of driving with windows down and radio on, I suspected the passenger-side hub assembly (wheel bearing) was failing. After driving briefly and stopping in a parking lot, I confirmed the passenger-side hub was significantly hotter than the driver’s side. On a 95°F day, the driver’s side was hot (approximately 110°F, touchable for 5-10 seconds), while the passenger side was very hot (approximately 120°F, touchable for 1-3 seconds). Using a Fluke 87V-MAX multimeter and Type-K thermocouple, I measured the temperatures, confirming the passenger-side hub assembly failure.

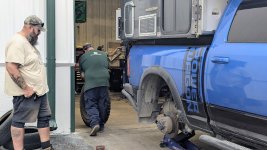
With my time in Virginia nearing an end and a strong desire to return west, I enlisted my son’s expertise to replace the faulty hub assembly. After jacking up the truck, we confirmed significant play in the passenger-side wheel by shaking it at the 3 and 9 o’clock and 6 and 12 o’clock positions, compared to the driver’s side. Within an hour, the repair was complete, and I drove away satisfied, grateful for my son’s skillful assistance.

Approaching 100,000 miles on my AEV Prospector, I am planning long-term preventative maintenance, including replacing transmission and transfer case fluid, flushing engine coolant, and checking brake fluid. Using test strips from Phoenix Systems, I measured copper contamination in the brake fluid at 30-100 ppm, indicating no immediate need for a flush. Additionally, I plan to test the brake fluid’s moisture content, as brake fluid is hygroscopic, and increased moisture lowers the boiling point, reducing braking performance and causing corrosion. In my superbike racing days, I flushed brake systems between races to ensure optimal performance.

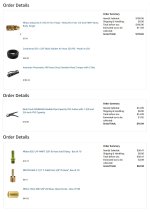
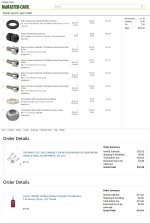
For historical purposes, I have documented the expenses associated with this work.

The AEV Prospector’s steering knuckle, drag link, and track bar, part of AEV’s High Steer Kit, are custom-engineered components that address longstanding aftermarket suspension challenges. Few companies possess the engineering expertise, OEM connections, and resources to develop such solutions.

If you are interested in a technical discussion related to What It Really Takes to Build a Factory Overlander with Dave Harriton from AEV - here is a great podcast:

To centralize the air system accessories, I mounted a Milton Safety Blow Gun with a 10-inch extension on the rear wall of my camper, adjacent to the air system. I used three spring clip holders for mounting, and it remains to be seen whether these clips will securely retain the blow gun on rough trails.

The next phase involved transferring pressurized air from inside the camper to the external brass couplers. I applied masking tape to mark measurements, transferring precise data to ensure accuracy. My objective was to drill a 24mm hole through the aluminum base of the air compressor mount and a horizontal camper surface while avoiding a 3/4-inch-thick blind vertical wall. The hole needed to be close to the wall without contacting it. Through meticulous, repeated measurements, I achieved satisfactory results. A high-temperature silicone rubber grommet was installed in the hole to protect the air line, as shown in the accompanying image.

While inspecting the engine compartment, I noted significant dirt accumulation, prompting a thorough cleaning before my next trip. I installed a Victron Energy MEGA Fuse Holder to power a Victron Energy Orion XS 50-amp DC-DC charger, which charges my house batteries while driving. Based on my calculations, Ancor 4 AWG wire was suitable for this application. The RAM's High Amperage Power Point (HAPP), an M8 stud on the battery rated for 300 amps, facilitates this connection, located on the driver’s side within the power bus.

Recently, I noticed a soft grinding noise from the front of my truck at 15-25 mph, louder during left turns and quieter during right turns. Despite my hearing challenges from past exposure to helicopters and machine guns, and my habit of driving with windows down and radio on, I suspected the passenger-side hub assembly (wheel bearing) was failing. After driving briefly and stopping in a parking lot, I confirmed the passenger-side hub was significantly hotter than the driver’s side. On a 95°F day, the driver’s side was hot (approximately 110°F, touchable for 5-10 seconds), while the passenger side was very hot (approximately 120°F, touchable for 1-3 seconds). Using a Fluke 87V-MAX multimeter and Type-K thermocouple, I measured the temperatures, confirming the passenger-side hub assembly failure.

With my time in Virginia nearing an end and a strong desire to return west, I enlisted my son’s expertise to replace the faulty hub assembly. After jacking up the truck, we confirmed significant play in the passenger-side wheel by shaking it at the 3 and 9 o’clock and 6 and 12 o’clock positions, compared to the driver’s side. Within an hour, the repair was complete, and I drove away satisfied, grateful for my son’s skillful assistance.

Approaching 100,000 miles on my AEV Prospector, I am planning long-term preventative maintenance, including replacing transmission and transfer case fluid, flushing engine coolant, and checking brake fluid. Using test strips from Phoenix Systems, I measured copper contamination in the brake fluid at 30-100 ppm, indicating no immediate need for a flush. Additionally, I plan to test the brake fluid’s moisture content, as brake fluid is hygroscopic, and increased moisture lowers the boiling point, reducing braking performance and causing corrosion. In my superbike racing days, I flushed brake systems between races to ensure optimal performance.

For historical purposes, I have documented the expenses associated with this work.

The AEV Prospector’s steering knuckle, drag link, and track bar, part of AEV’s High Steer Kit, are custom-engineered components that address longstanding aftermarket suspension challenges. Few companies possess the engineering expertise, OEM connections, and resources to develop such solutions.

If you are interested in a technical discussion related to What It Really Takes to Build a Factory Overlander with Dave Harriton from AEV - here is a great podcast:
Last edited:


