Outfitting my Grenadier Trialmaster

jscherb

Expedition Leader
I think the Grenadier designers could have placed the rear 12v outlet better - a plug in the socket sticks out into the cargo area and something loose in the cargo area could smash into the plug and damage it and perhaps the socket as well. I added an unswitched outlet right above the factory one to power my kitchen a while back, so I decided to add a little protection for both outlets. Since the Grenadier has guards over many of its switches, I decided to do the same for these outlets. I found the guards at Home Depot: https://tinyurl.com/mrxt7y9p

OutletGuards1.jpg

OutletGuards2.jpg
 
Last edited:

jscherb

Expedition Leader
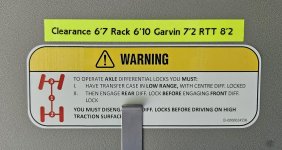
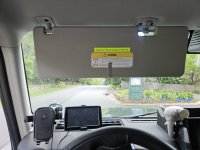
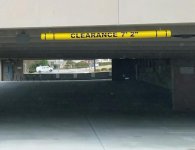
The Grenadier is a fairly tall vehicle, especially when you add a rack on top and a roof top tent. To keep from going somewhere I shouldn't, like a too-low parking deck, since I reconfigure what's on top of my vehicles for each expedition something I've done in my Jeeps is add a reminder of the height of the vehicle with various options on top. Using my Dymo LetraTag, I did that for my Grenadier too, listing the basic height, height with the factory Rhino rack crossbars, height with my Garvin rack basket on top and with the roof top tent on the Garvin. And a tip: before I travel, if I plan to park in a deck somewhere I use Google maps street view to check out where I plan to park - you can often get a view of the clearance bar so you know what the clearance is before you go.
ClearanceWarning1.jpg
ClearanceWarning2.jpg
ClearanceBar.jpg
 

jscherb

Expedition Leader
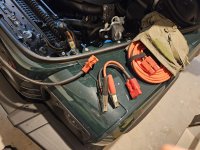
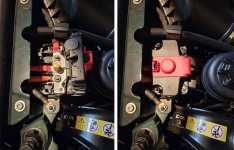
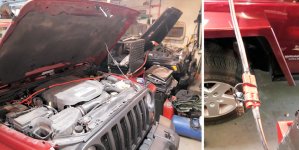
Some years ago I implemented a jumper cable/winch power system for all three of my Jeeps which consisted of cables permanently connected to the battery with an Anderson connector on the end, jumper cable ends with clamps and an Anderson connector and an extension cable. I kept a jumper cable end in each Jeep (a fairly small thing to store) so if I ever needed a jumpstart or needed to jump someone else, I always had what I needed. And if I ever needed to jump one of my Jeeps with one of my other Jeeps, I could just plug the two Anderson connectors on the ends of the battery leads together - I've attached of photo of one time I had to do that in my home garage. I also used the battery leads to power my winch, which goes in a receiver mount on the front bumpers of the Jeeps, and the extension could be used either to jump a vehicle some distance away, or to power the winch in the rear receiver of one of the Jeeps. It's worked out to be a very convenient and effective system, so I decided to implement the same thing in the Grenadier. I've attached a few photos of the cable in the Grenadier. Now the Grenadier can jump/be jumped either by plugging the Anderson connector into one of the Jeeps or by using the jumper clamp ends and I can run a front winch off the same connection, although I do have the optional 500a winch circuit in my Grenadier.

This photo shows the cable stowed in the engine compartment. It's along the very front. Note the two aluminum guards to prevent contact with the hood springs (which could wear the cable insulation if contact is made), and just outboard of the guards there are plastic clips holding the cable in place when stowed. The Anderson plug is at the right, secured to the radiator support with a loop of Velcro (Velcro not visible in the photo).

JumperCableStowed.jpg

The cable unstowed with accessories - jumper cable end and extension cable.

JumperComponents.jpg

Where the cable is connected to power showing the connection cover open and closed.

JumperConnections.jpg

Jumping one Jeep from another using just the cables in the engine compartments and plugging them together:

Jumpstart.jpg
 
Last edited:

jscherb

Expedition Leader
When I was shopping for my Grenadier I considered adding the factory front receiver - I use a receiver-mount winch on my three Jeeps and planned to use it with the Grenadier as well. Unfortunately the factory front receiver is only rated for moving trailers around, it's not rated for as much force as a winch can provide when getting the Grenadier unstuck.

So I ditched the idea of adding the factory receiver to the front, and decided I would need to build my own receiver as I've done for my Jeeps. I've designed and built "quick install" receivers for the front of the Jeeps which bolt in place/remove in minutes - since I only need a winch (and therefore the front receiver) when I'm on an expedition, I can install the receiver and winch just for that expedition and remove it for daily driving when I return home.
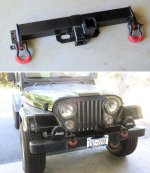
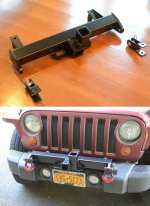
TJQuickInstallRCVR.jpg

JKQuickInstallRCVR.jpg

I've designed a quick install front receiver for the Grenadier and I am getting ready to build it. These are the main materials that will be used... a Reese Class IV (10,000 lb.) hitch for some pickup and a piece of 3/8"-thick steel angle:
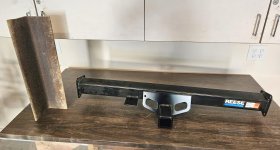
RcvrComponents.jpg

It'll go together approximately like this - the steel angle will be cut into brackets that attach using the bumper bolts that are behind the plastic trim on either side of the center of the bumper. The Reese hitch will be cut to fit between the brackets and welded to the brackets; there will also be tabs in the back which have holes for bolts that go into factory holes on the top of the bumper into the frame. I'll have it powder coated once it's built.
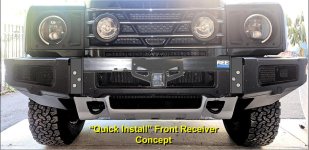
RcvrConcept.Ajpg.jpg

Installation will be simple - remove the two plastic trim pieces (4 T-30 screws on each side), remove the 4 bumper bolts into the frame on each side, position the hitch to replace those bolts and tighten them down. Should only take a few minutes and removal will take about the same time.

I'll install it just for expeditions where I might need the winch and remove it when I get home, same as I do with the quick install receivers on the Jeeps.
 
Last edited:

jscherb

Expedition Leader
I'm wondering why, if the Grenadier engineers intended the side-mounted L-tracks to be truly useful, they didn't put one on the top of the side panel? This photo shows a short fragment of L-track left over from my dash mount project posed in place... mounting things on the sides would be much easier this way than having to go up to the bars in the roof or to the drip rail with awkward bracketry. I may add L-track here so I can do custom side mounts without messing with the roof bars or drip rail

TopSideLTrack.jpg

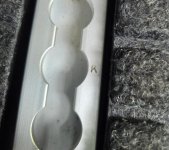
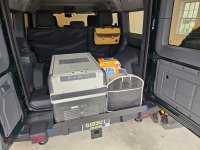
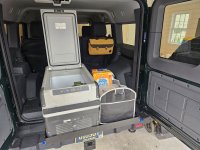
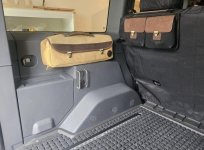
Another L-Track idea... I only have my Trail Kitchen installed when I'm on a trip or expedition when I'll use it - for example I installed it two weeks ago for my trip cross-country to Overland Expo West, and removed it the day after I got home. It bolts to the L-Track on on the cargo floor, so installation is easy, but I can never remember exactly which position it installs in, so after I removed it the other day, I stamped a "K" in the stud locations for proper positioning in the cargo space.

KitchenLocation.jpg
 

jscherb

Expedition Leader
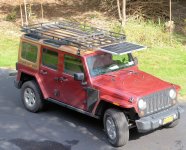
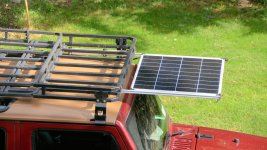
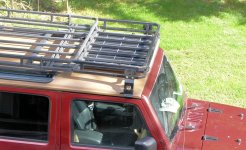
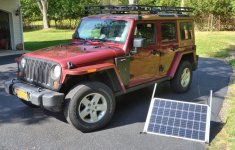
Some years ago I built an extension for the front of the Garvin rack basket I'd been using on my Jeeps; the extension expanded cargo capacity when the roof top tent was taking up most of the original rack but more importantly it provided a place for a solar panel. The panel stows under the rack extension (freeing the extension for cargo), and slides out for use. A few photos of the extension and solar on one of the Jeeps:

SolarDeployed1.jpg

SolarDeployed3.jpg

SolarStowed3.jpg

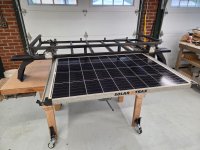
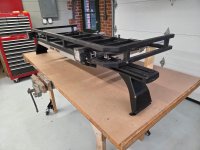
This morning I modified the extension to work on the Grenadier, these are some shots of it in my workshop. It's raining out today so I'll install it another day. The solar panel is 100w and over the years has proven to keep up with the demand of my campsite accessories - fridge, water pump for sink, etc. The panel slides all the way out and has legs and can be placed on the ground and connected with an extension in the event the vehicle isn't parked to optimally catch the sun.


Extension1.jpgb

Extension2.jpg

Extension3.jpg

SolarOnGround.jpg

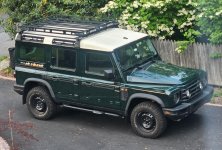
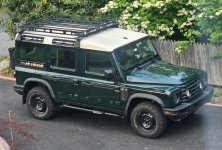
I modified a factory Rhino rack crossbar, removing a section in the center for the solar panel. Only one crossbar is needed because the back of the extension bolts to the front of the Garvin. A photo of the Garvin rack basket installed on factory Rhino crossbars on my Grenadier (without the front extension).

GarvinInstalled2.jpg

Next I need to either modify the left front roof wiring connection to be an input for solar or add a dedicated connection to that location and add a solar controller under the back seat. I'll probably use the CTEK solar controller because that will easily interface to the factory CTEK dual battery controller.
 

jscherb

Expedition Leader
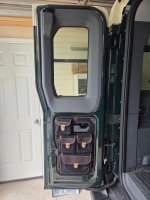
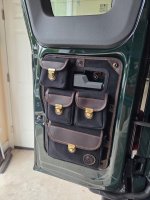
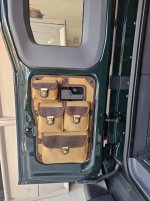
Overland Outfitters sent me a black pocket panel for the small rear door to try out. I've had one in tan installed for a while and I'm finding it very handy. They used my Grenadier in their booth at Overland West and all of their new Grenadier products were installed in it - the products got a lot of interest. Most of what I have installed is tan and some people asked if they were also available in black; the black version of this wasn't produced until after that event so here's what it looks like in black (and tan).

Their Grenadier product page: https://tinyurl.com/2jv2jk7d

SmallDoorPocketPanelInstalledB1.jpg

SmallDoorPocketPanelInstalledB2.jpg

SmallDoorPocketPanelInstalled.jpg
 

jscherb

Expedition Leader
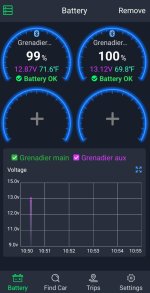
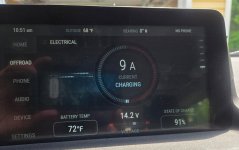
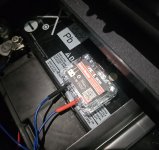
A few weeks ago I installed a battery monitor on my factory second battery because the dash display only reports on the primary battery. The monitor works very well and since I'm not 100% comfortable with the status display on the dash for the primary battery I installed a monitor on the primary battery. The phone screen image shows what the app reported right after I installed the monitor with the engine not running. Immediately after the screen shot I started the engine and took the photo of the dash showing the battery status. They don't agree, but the 12.87v that the app monitor reports for the primary battery is more like 99% charge than the 91% that the Grenadier reports. Whatever the truth is, I'm more comfortable with the batteries now that I have monitors on both of them. I've included a photo of the monitor on the auxiliary battery; the one on the primary battery is hidden under the plastic shroud, the main purpose of which seems to be to make it difficult to access the primary battery. The monitors are only $23.99 on Amazon, I consider them inexpensive peace of mind.
BatteryMonitorStatus.jpg

GrenadierBatteryStatus.jpg

BatteryMonitor2.jpg
 

jscherb

Expedition Leader
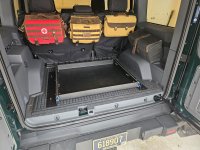
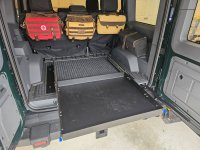
I've been working with MORryde on a slide tray for Wranglers, Broncos and also the Grenadier, I've posted about it here before. The project is done and the cargo slide is ready for production, so my part in it is done. As often happens during the product development process, MORryde sent me two preproduction samples of these trays. The main differences between the first sample and the final sample is that the first sample doesn't have holes in the tray for tie-downs, it has factory holes for installing in a Grenadier and the it doesn't have a MORryde sticker on it. The mounting base has holes to fit directly on the L-tracks in the Grenadier's cargo area floor, so it's an easy bolt-in installation.

I don't need both of these and MORryde doesn't need them back, so I'll offer the first sample to forum members for free.

You'll need to provide your own L-track studs to secure it in place. Holes for cargo tie downs are easy to drill if needed.

It can either be picked up here (Wilmington, DE), or you can pay the shipping but in either case the slide tray is free.


PreproductionSlideTray6.jpg

PreproductionSlideTray7.jpg

PreproductionSlideTray8.jpg

PreproductionSlideTray9.jpg
 

jscherb

Expedition Leader
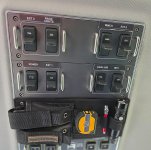
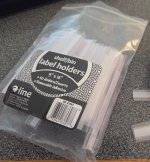
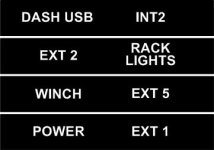
It would have been nice if Ineos included a provision for labeling the High Load Aux Switch Panel switches. I've added a number of accessories to those circuits, and it would be helpful to have labels for each circuit so there's no confusion about which switch does what. I've only added things on a few circuits so far but I have more planned and I wanted a non-permanent, non-destructive way to label the circuits so I used self-stick 1/2" x 3" label holders with removable adhesive. The labels, printed on cardstock from my computer, slip in place in the holders and can be changed at any time, and if I decide I don't want the labels any more the removable adhesive on the back of the holder makes it easy and non-destructive to remove them. I put the labels over the factory text so they don't duplicate what's already there for circuits not in use.

LabelsInPlace.jpg

I used these labels, available through Staples, although I found them a lot less expensive on eBay: https://www.staples.com/c-line-best...-5-x-3-clear-50-pack-cli87607/product_2661435. I just put them on today, I'll have to see how well the "removable adhesive" stays in place; if they fall off it wouldn't be hard to add a stronger double-sided tape on the back though.

LabelHolders.jpg

DashLabels.jpg
 

jscherb

Expedition Leader
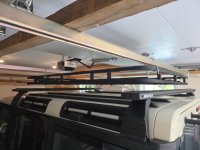
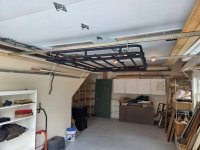
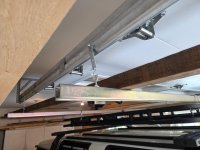
I have a Garvin rack basket that I've been using on two of my Jeeps for years and now I also use it on my Grenadier. I don't have it installed on any of them full time, I just put it on when I need it. To make it easy to swap and install, I hang it from the garage door rails. I put mounted two pieces of strut channel across the garage bay, hanging from the garage door rails; the strut channel is just a few inches above the rack basket when installed on the Grenadier. To uninstall the rack basket, I unbolt it, lift it each corner a few inches and secure it to the strut channel with u-bolts. To install it on any of the vehicles, I mount whatever feet are required for that vehicle to the rack and remove the u-bolts so I can drop it onto the roof of the vehicle. I've been doing this for years and it's very convenient. And if you wonder why I don't leave the rack basket on a vehicle all the time, besides the reason that I use it on the Jeeps and the Grenadier, another reason is that without it I can park any of the vehicles in most parking garages. With the rack basket in place the parking garage options are very limited.

Just sharing this in case someone else is looking for an easy way to install/remove a higher rack when necessary. The photos should make everything clear but feel free to ask any questions you might have.

RackHanging.jpg

RackHanging2.jpg

StrutChannel.jpg


GarvinInstalled2.jpg
 

406to417

Explorer
By and chance were you in the Bannack area of Montana a few weeks ago? Passed by a similar looking Grenadier on a back road in the middle of no where.
 

jscherb

Expedition Leader
By and chance were you in the Bannack area of Montana a few weeks ago? Passed by a similar looking Grenadier on a back road in the middle of no where.
Haven't had my Grenadier to Montana yet, wasn't me. I've done about 13 states in it so far, including from home in Delaware to Overland West in Arizona, but haven't been to the northern states yet. and will be heading for Colorado in July to do some exploring (ghost towns and mine sites) and testing the Grenadier's off-road capabilities.
 

Forum statistics

Threads
189,533
Messages
2,917,958
Members
232,442
Latest member
rumpityz28
Top