Outfitting my Grenadier Trialmaster

Quartermaster

New member
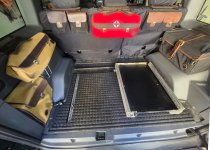
Just did similar, but I pulled out the L-track and used the existing threaded holes to bolt down for a homemade wood plate. Then picked up a fridge slide off Amazon for my Dometic CF50.
 

jscherb

Expedition Leader
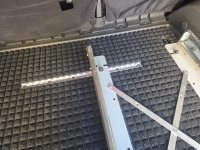
I'm making use of the L-tracks in the cargo area for many things, including a MORryde Trail Kitchen (https://forum.expeditionportal.com/threads/outfitting-my-grenadier-trialmaster.247640/post-3213227), a cargo slide (https://forum.expeditionportal.com/threads/outfitting-my-grenadier-trialmaster.247640/post-3214583) and a smaller fridge slide. I'm finding that additional tie-down points in the floor would be useful for some things. I made a cross-bracket to install the narrower things, it can be seen in this photo of the small fridge slide:

FridgeSlide.jpg

That bracket is only 16-gauge steel and it works but isn't rigid enough.

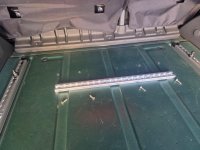
For stronger mounting, I added another section of L-track oriented crosswise. It provides additional tie-down points for things like the small fridge slide and the Trail Kitchen.

The track is secured to the floor with four 1/4-20 rivnuts. The rivnuts have to be located properly so they don't interfere with crossmembers under the floor. There are lines of spot welds where these crossmembers are welded under the floor; I put the rivnuts about 3/8" behind a row of spot welds - in that location they grip on both the floor and the flat section of the crossmember.

CrossTrackRivnuts.jpg

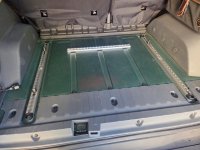
Track secured to the rivnuts:

CrossTrackInstalled.jpg

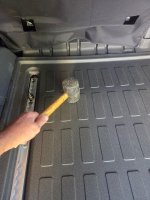
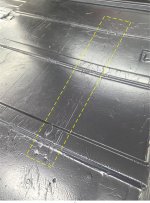
Because the track is mounted on the floor, it sticks up a bit, but that's not a problem. First I cut a slot in the factory floor pad. To located the slot, I installed the pad and used a mallet to make impressions on the bottom of the pad as a guide for cutting.

FactoryMatLocating.jpg

FactoryMatLocated.jpg

Slot cut and pad installed:

FactoryMatInstalled.jpg

Then I cut a slot in my non-slip cargo area mat (from Lowes, details here: https://forum.expeditionportal.com/threads/outfitting-my-grenadier-trialmaster.247640/post-3212907). I used the same mallet method, but that wasn't making impressions in the tough rubber mat so I put some duct tape on the bottom of the mat and then impressions we made.

LowesMatInstalled.jpg

With the factory pad and the Lowes mat installed, the new track is slightly below the surface of the mat.

LowesMatFlush.jpg

The fridge slide installed securely to the factory track and the cross track:

SmallSlideInstalled1.jpg

SmallSlideInstalled2.jpg

Looks like it could be factory, works very well and makes it easy to secure things narrower than the factory tracks.
 

grimmbusiness

New member
When I was shopping for my Grenadier I considered adding the factory front receiver - I use a receiver-mount winch on my three Jeeps and planned to use it with the Grenadier as well. Unfortunately the factory front receiver is only rated for moving trailers around, it's not rated for as much force as a winch can provide when getting the Grenadier unstuck.

So I ditched the idea of adding the factory receiver to the front, and decided I would need to build my own receiver as I've done for my Jeeps. I've designed and built "quick install" receivers for the front of the Jeeps which bolt in place/remove in minutes - since I only need a winch (and therefore the front receiver) when I'm on an expedition, I can install the receiver and winch just for that expedition and remove it for daily driving when I return home.

View attachment 879824

View attachment 879825

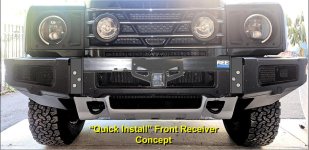
I've designed a quick install front receiver for the Grenadier and I am getting ready to build it. These are the main materials that will be used... a Reese Class IV (10,000 lb.) hitch for some pickup and a piece of 3/8"-thick steel angle:

View attachment 879826

It'll go together approximately like this - the steel angle will be cut into brackets that attach using the bumper bolts that are behind the plastic trim on either side of the center of the bumper. The Reese hitch will be cut to fit between the brackets and welded to the brackets; there will also be tabs in the back which have holes for bolts that go into factory holes on the top of the bumper into the frame. I'll have it powder coated once it's built.

View attachment 879828

Installation will be simple - remove the two plastic trim pieces (4 T-30 screws on each side), remove the 4 bumper bolts into the frame on each side, position the hitch to replace those bolts and tighten them down. Should only take a few minutes and removal will take about the same time.

I'll install it just for expeditions where I might need the winch and remove it when I get home, same as I do with the quick install receivers on the Jeeps.
Super helpful (as always). Do you recall the exact model Reese you used? Looks like they have a ton listed on their website that are probably mostly the same (although some seem to be straight and others slightly curved) - guessing the main difference has to do with the attachments on the side (which don't matter here anyway).
 

jscherb

Expedition Leader
Super helpful (as always). Do you recall the exact model Reese you used? Looks like they have a ton listed on their website that are probably mostly the same (although some seem to be straight and others slightly curved) - guessing the main difference has to do with the attachments on the side (which don't matter here anyway).
I'll be using a Reese 37016 for this project.

ReeseHitch2.jpg

I chose it because I wanted a heavy-duty class 3 or 4 hitch (this one is a class 4) with a straight crossbar and a receiver below the crossbar. I found this one on FB Marketplace for $100 in new never-installed condition.

ReeseHitch.jpg

I should be starting the fabrication in the next month or so; I've been too busy with other priorities to have time for this project yet. Finished receiver will look like this when installed:

RcvrConcept.Ajpg.jpg
 

jscherb

Expedition Leader
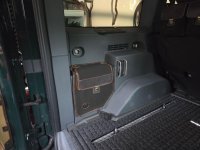
I wrote before that I'm not a fan of the storage compartment in front of the jack. It's hard to store anything in there because whatever is in there will be in the way when you need the jack, also things in there will rattle around because there's no provision for securing anything. And the 120v receptacle for the factory inverter is inconvenient inside that compartment.

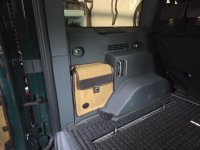
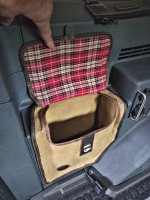
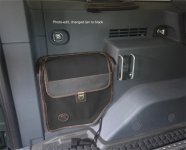
There are a few bags on the market for that space but none of them optimal to me so I designed something that I like better. It's a bag that clips in place using existing holes in the inner fender panel and removes in seconds, doesn't require Velcro or any additional hardware, replaces the factory plastic cover and hides all the unsightly clip holes in the inner fender panel. I sewed a prototype a few weeks ago and it worked out well so I turned the patterns over to Overland Outfitters. They sewed some preproduction samples; I received one the other day and photos are attached. I also did a photo-edit to show what one would look like in black. I've got a few very small tweaks to recommend to them before this goes into production, which will probably be released at Overland Expo West the first weekend of October.

JackSpacePP1a.jpg

JackSpacePP1c.jpg

JackSpacePP1f.jpg

JackSpacePP1e.jpg

JackSpacePP1aBlk.jpg
 

jscherb

Expedition Leader
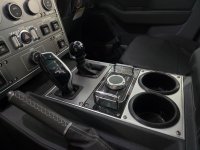
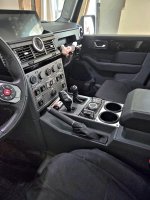
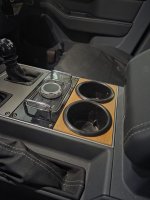
A few months ago I decided I needed larger cup holders so I made a replacement for the factory unit with larger cup holders. As a prototype, I made the replacement panel out of wood, and it has worked out very well. I had intended to replace the wood panel with aluminum and finally had time to make that this morning.

CupHolder4.jpg

CupHolder5.jpg

The wooden prototype panel:

Cupholder1.jpg
 

jscherb

Expedition Leader
jackspacepp1e-jpg.896012


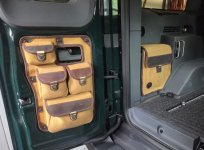
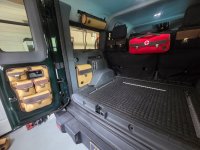
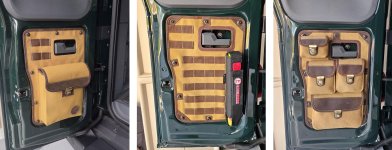
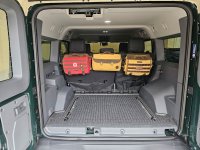
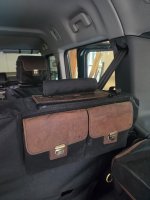
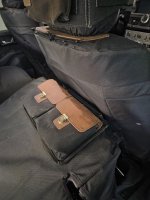
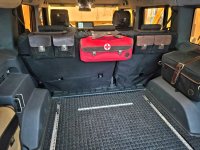
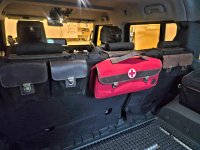
After posting about the preproduction bag that fits in the compartment in front of the jack the other day, I got a number of questions about other storage accessories that were in the photos, so here's more info on two of them. There were questions about the pocket panel on the inside of the narrow rear door. There are several options for that, I've got the four-pocket option installed in my Grenadier. There's also a version with a single large pocket, and a MOLLE panel version. www.overland-outfitters.com/store/p86/Narrow-Rear-Door-Storage.html#/ and https://www.overland-outfitters.com/store/p90/Narrow-Rear-Door-Storage.html#/. All of these are available in either tan or black and install using the factory hardware on the door.

SmallDoorOptions.jpg

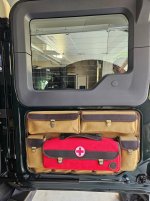
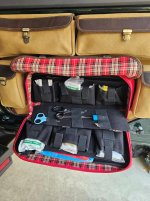
Also got some questions about the First Aid Bag hanging on the back of the seat. That one can hang there or on the wide rear door panel; it's got pockets inside to organize all of the medical supplies for fast and easy access. https://tinyurl.com/3m78w3hk https://www.overland-outfitters.com/store/p88/Grenadier_First_Aid_Bag.html#/

RearDoorPrepro2F.jpg

FirstAidBagOpenOnDoor.jpg
 

jscherb

Expedition Leader
I received a second preproduction sample bag for the jack space today. There's one more tiny tweak I'll ask them to make as it goes into production. I won't need to see another sample, the change I want them to make is very small, so they can begin the first production run asap.

JackSpacePrepro2.jpg
 

jscherb

Expedition Leader
This is a quick and imperfect photo-edit showing what the bag will look like in black.

Notice the extension sticking out from the bottom, that's for the factory inverter outlet, which can be used with an extension like this when the bag is in place.

Also can't decide if I'll recommend to OO that they call this the Jack Compartment Bag or the Jack Space bag... opinions welcome.

JackSpacePrepro2Black.jpg
 

jscherb

Expedition Leader
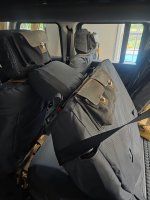
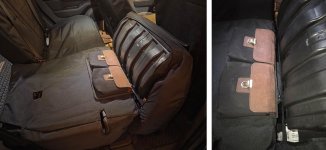
I find it very inconvenient that the back seat won't fold down with the headrests in place. In my 2013 Wrangler, when the back seat folds down, the headrest automatically hinges so the seat won't be prevented from folding down by the headrest hitting the front seat, but the Grenadier's headrests are much more primitive. Since I almost never have back seat passengers, I could just remove the rear seat headrests, but I actually use the headrest posts to hang things, so to fold the seat down, not only do I have to remove the headrests, but the bags/pouches hanging on them have to come off too.

SeatBackBags1.jpg

The problem:

HeadrestInterference.jpg

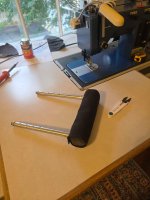
So here's what's on my sewing table right now - smaller "headrests" that don't interfere with the front seats when the back seat folds down.

HeadrestSewing.jpg

I'm making three. They're a direct replacement for the factory headrests, but are small enough to allow the back seat to fold down.

MiniHeadrestInstalled.jpg

MiniHeadrestFolded.jpg
In the rare event I need to transport people in the back seat, I'll swap one or more factory headrests back in, but for maybe 360 days per year, these mini ones will be perfect.

For anyone interested in the details... the Grenadier headrests have 14mm posts, which are not very common. They're more common in European-designed vehicles, so I went to the U-Pull junkyard with my micrometer in hand and discovered that VW Jetta's have 14mm posts. The spacing between them is not the same as the Grenadier's spacing, so I modified that and then build a small roll of padding (pipe insulation like you might use to insulate the copper pipes coming out of your home water heater) and sewed a tight-fitting cover.
 

jscherb

Expedition Leader
I finished the remaining two "mini headrests" this afternoon...

HeadrestsDone1.jpg

HeadrestsDone2.jpg

HeadrestsDone3.jpg

These enable the back seat to be folded down with the headrests (and the attached bags/pouches) attached.

SeatBottomRaised.jpg

Obviously these don't provide much support in the event of being rear-ended, so as I said in the last post for the very fews times each year that I carry passengers in the rear seat, I'll swap the factory headrests back in, but for the rest of the days, these work exactly as I planned - the hold the bags/pouches in place while allowing the seat to be folded down.

Project done.
 

Forum statistics

Threads
190,374
Messages
2,926,980
Members
233,851
Latest member
sunnyaz
Top